by Joanne James30. December 2015 21:31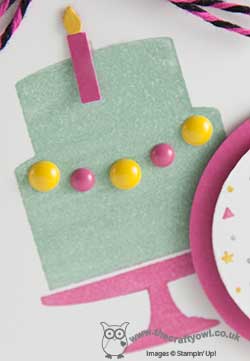
Good evening lovely readers! I hope you've all had a pleasant day. I went for my second visit of the week to the pantomime, this time the turn of The Snow Queen, which was excellent. I love pantomime - for me it is one of those traditions that make my Christmas. As for crafting - I'm back today with another 'sneak peek' for you, this time using the current sketch over at Mojo Monday as the basis for my birthday card:

Today's card features not one, but FIVE new products from the forthcoming Stampin' Up! Spring-Summer catalogue. Here's my card - can you spot them all?
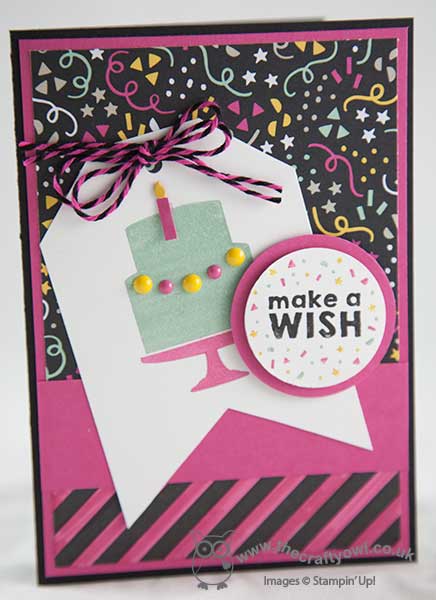
So how did you do? Check out the fun party-themed designer series paper from the 'It's My Party' Designer Series Paper Stack, along with the stamps, both from a new set called 'Party Wishes' (I coloured them with my Stampin' Write markers to get the detail). Then there's the fabby two-tone baker's twine that I also shared on yesterday's card and check out the trio of enamel dots on my birthday cake - these come in a pack with Mint Macaron coloured dots too! Finally, did you spot the fifth item? This is a slightly sneaky one - the candle on the cake was punched with one of a trio of punches in the 'Party Punch Pack' (it also includes a balloon and a mini cupcake!) If you are wondering where the striped paper across the bottom panel came from - this is actually a piece of black and white striped paper from the Neutrals paper stack where I coloured in the white stripes with my Melon Mambo Stampin' Write marker to create my custom paper to co-ordinate in with the rest of my colour scheme.
So much party fun in one card! I just love the bold colour combinations of the 'It's My Party' Suite - they offer so many different creative possibilities!
Back tomorrow with a new challenge over at Create With Connie and Mary where it's out with the old and in with the new! Until then, happy stampin'!
Stampin' Up! Supplies Used:
The following items will be available on 5th January:
140552 It's My Party Designer Series Paper Stack
140961 Party Wishes Stamp Set
140608 Party Punch Pack
140555 Baker's Twine Combo Pack
140554 It's My Party Enamel Dots
by Joanne James6. December 2015 10:00
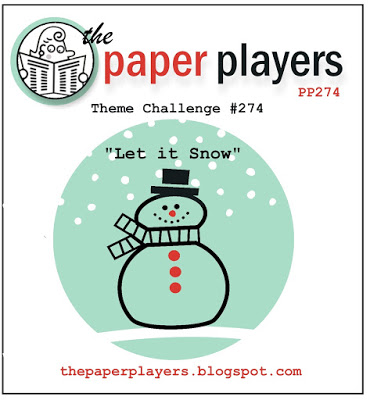
It's Sunday and time for a new challenge over at The Paper Players! This week it is the turn of my good friend Claire to host and she has a fun theme to get our creative juices flowing this week:
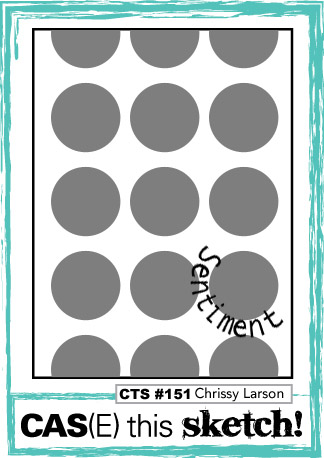
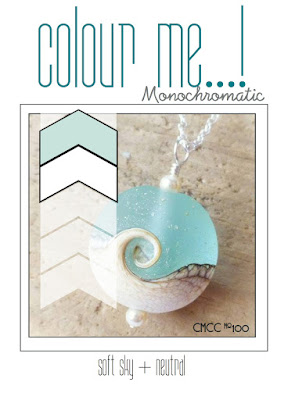

I had an idea brewing in my mind all week for this challenge, but I had rather less time to craft this week than I would have liked so ended up in the end going with something altogether more clean and simple! I was intrigued by this week's sketch over at CAS(E) This Sketch and was sad to see that Hayley and Tara are winding up the Colour Me...! blog after this week's challenge. I had such a lovely time when I did my DT stint over there I just had to play along for this their final challenge (although I did take a little liberty by adding in silver to my monochromatic colour scheme - well ladies, it is Christmas!) I'm also linking with CAS-UAL Fridays, since my card today features snowflakes - take a look:
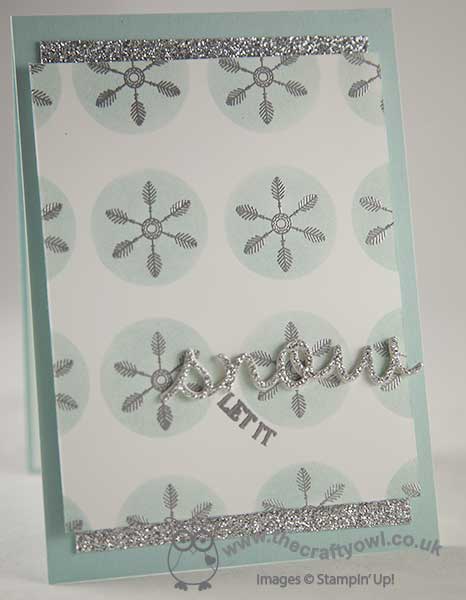
I used a base of Soft Sky then added some strips of silver glimmer paper, before adding my Whisper White panel. On this panel, I stamped the small snowflake from the Project Life Hello December set in Versamark and heat embossed it in silber. I then cut a stencil with my 1 1/4" circle punch and sponged around the snowflakes in Soft Sky ink. I then took my 'let it snow' sentiment from the Sparkly Season stamp set and having curved it on my block, I stamped just the first two words in Versamark and heat embossed that in silver too. For my 'snow' to finish the sentiment, I used the coordinating die cut from the same set and cut three in extra-thick Whisper White and one in silver glimmer paper and layered them together to create my stacked sentiment. In retrospect I would change the placement of the 'let it' (it should be above the 'snow' rather than below it) but I was against the clock and didn't have time to make a second panel. That aside, I like the card -there is something soothing about the soft blue colour and the pattern is an interesting one. Oh and it's got silver glimmer paper, which I seem to be using everywhere lately!
Before you reach for your ink and papers, check out what our amazing team has created to inspire you this week:
The Paper Players Design Team
Here's a quick recap of our challenge rules:
1. Create a new paper project
2. Upload your creation to your blog with a link back to us and provide a direct link to the post featuring your challenge submission.
3. Please link your card to no more than three challenges, TOTAL.
4. Have FUN!
I look forward to seeing your snowy creations this week. I'm off for a morning of basketball and then I've some final preparations for the last of my Christmas card classes tomorrow, hopefully time for a spot of crafting, then Ben is attending a birthday party in the afternoon. Oh and we are going to attempt to put the Christmas tree up - not much to be going on with then!
Back tomorrow with another project; until then, happy stampin'!
Stampin' Up! Supplies Used:
ff2dbafd-aed3-402b-9816-5444187b4067|0|.0|96d5b379-7e1d-4dac-a6ba-1e50db561b04
Tags: Stampin' Up, Stampin' Up Card, Stampin' Up Card ideas, Stampin' Up Supplies, The Paper Players, Shop online, Shop Stampin' Up online, Christmas, Project Life, Hello December 2015, circle punch, Seasonal Frame Thinlits Dies, Sparkly Season
Cards | Shop Online | Stamping
by Joanne James31. October 2015 22:29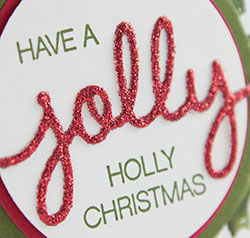
A late post from me today - too much trick-or-treat fun earlier on this evening! Anyway without further ado, today I made a couple of cards using the sketch from Mojo Monday this week, the second of which is also for this week's challenge over at Merry Monday:
Both my cards feature papers from the Season of Cheer designer series paper, along with the Christmas Greetings Thinlits with the Holly Jolly Greetings stamp set - one of the great bundle offers in the current seasonal catalogue. Here's the first card I made in traditional festive colours with the holly paper:
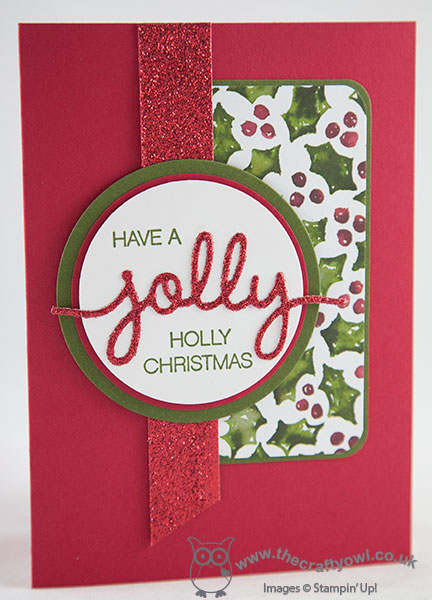
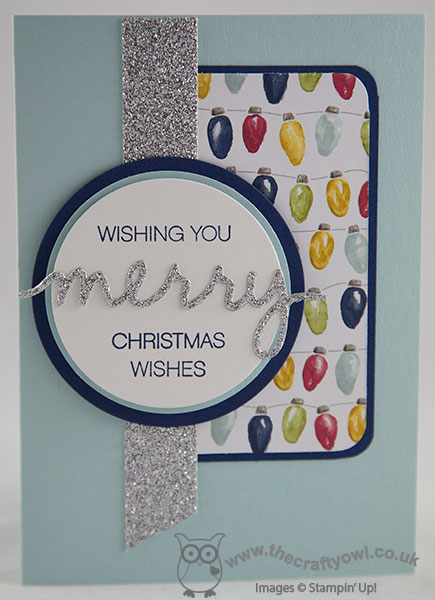
I went with a simple base layer of Real Red, then for the panel layered the holly paper with some Mossy Meadow and added a banner of red glimmer paper before adding my layered circles featuring my sentiment, a combination of stamped elements from the 'Holly Jolly Greetings' stamp set and a glimmer die cut using the Christmas Greetings Thinlits. I really liked this card, so decided to make a second one with a slightly different sentiment combination from the same sets, this time featuring the Christmas lights paper from the same DSP pack and a slightly less traditional colour scheme. Here it is:
I just love the glimmer paper on both of these cards; I'm not a fan of loose glitter, but glimmer paper is the best! So which one do you prefer - traditional or contemporary colour scheme? They are both great, although I think I'm veering towards the holly - I'm a sucker for red and green at Christmas time! I'd love to hear your thoughts - do leave me a comment below.
Back tomorrow with this week's new challenge over at The Paper Players; until then, happy stampin'!
Stampin' Up! Supplies Used:
1aa2e683-a079-4780-b72d-885d34e72039|0|.0|96d5b379-7e1d-4dac-a6ba-1e50db561b04
Tags: Big Shot, Greetings Thinlits, Holly Jolly Greetings, Season Of Cheer, circle punch, Circles Framelits, Christmas, Shop online, Shop Stampin' Up online, Stampin' Up, Stampin' Up Card, Stampin' Up Card ideas, Stampin' Up Supplies
Cards | Shop Online | Stamping
by Joanne James22. October 2015 08:05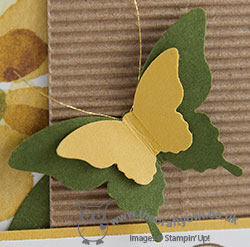
Today it's time for a new challenge over at Create With Connie and Mary and this week we have a great colour challenge for you:

When I sat down to work on my card this week I realised that all of the challenge colours could be found in the lovely English Garden Designer Series Paper, so it seemed like the perfect opportunity to showcase it. I also used this week's sketch over at Retrosketches as the basis for my layout. Here's my card:
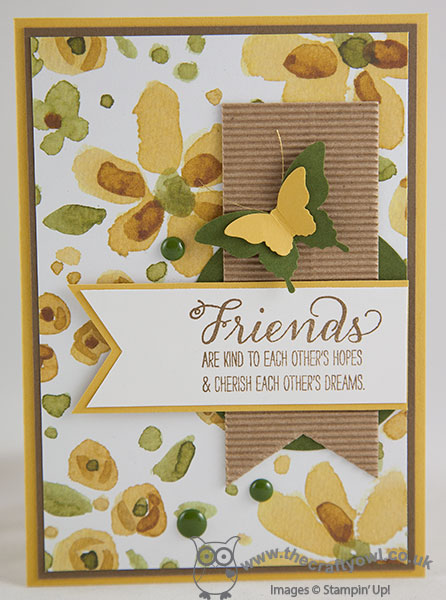
I used a base of Hello Honey with a mat of Soft Suede, then covered my cardfront with a piece of floral patterned paper featuring all of the colours. I added a 2" circle of Mossy Meadow and cut my banner from a piece of neutral kraft corrugated paper, to add texture and detail without detracting from the pattern. I stamped my sentiment from the 'Garden In Bloom' set in Soft Suede on Whisper White and matted this on a banner of Hello Honey, both of which I punched with my Triple Banner Punch. I considered using the butterfly from this set too as my embellishment, however it was a little too small to really stand out. I decided to go with a simple layered butterfly instead, punched using my Bitty Butterfly and Elegant Butterfly punches, with a couple of strands of gold metallic thread for antennae. To finish, I added a trio of Mossy Meadow enamel dots. This is one of those cards that really is 'all about the paper' - the English Garden papers are so very pretty though, they deserve to take centre stage.
Do visit the other Design Team members to see how they used this week's challenge colours; there's lots of inspiration over on their blogs too!
Enjoy your day and I'll be back tomorrow with another project; until then, happy stampin'!
Stampin' Up! Supplies Used:
- Garden In Bloom Photopolymer Stamp Set
- English Garden Designer Series Paper
- Soft Suede Classic Stampin' Pad
- Soft Suede A4 Cardstock
- Hello Honey A4 Cardstock
- Mossy Meadow A4 Cardstock
- Gold Metallic Thread
- 2" Circle Punch
- Banner Triple Punch
- Bitty Butterfly Punch
- Elegant Butterfly Punch
- Kraft And White Corrugated Paper
96b780a5-fc4c-4b52-aef9-56c4d0faa2c7|0|.0|96d5b379-7e1d-4dac-a6ba-1e50db561b04
Tags: Create With Connie And Mary, Stampin' Up, Stampin' Up Card, Stampin' Up Card ideas, Stampin' Up Supplies, English Garden, Garden In Bloom, Triple Banner Punch, Elegant Butterfly punch, circle punch, Bitty Butterfly Punch
Cards | Shop Online | Stamping
by Joanne James29. September 2015 21:48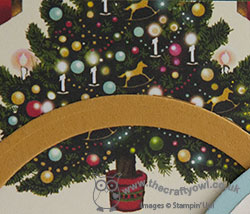
I've a super-quick post today to share another of my stamp-a-stack cards featuring the lovely Home for Christmas designer series paper and stamp from the 'Cup of Cheer' stamp set - take a look:
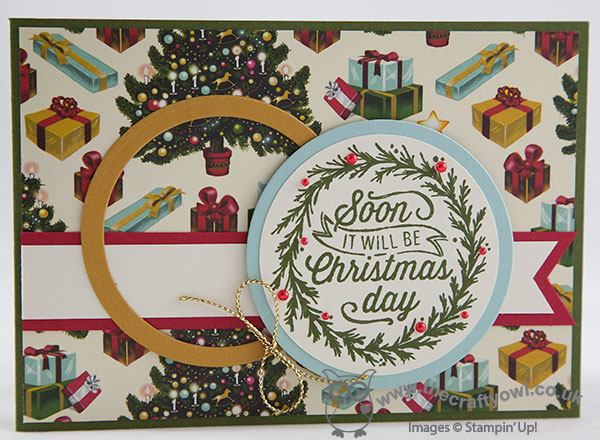
This is a layout I've used before, with a very similar card here that explains in more detail the items used - I just changed up the paper and colours so that I can use some of the lovely Christmas tree paper - this paper makes me think of Christmas day and opening all of the lovely present beneath the Christmas tree.
If you are as in love with this season's new designer series papers as I am, you may want to consider joining my paper share; I am currently doing my second round of paper and accessory shares from the seasonal catalogue - you can find all the details along with links to order in the original blog post here.
I also have another stamp-a-stack Christmas card class planned for 10th November; if you would like to come along and make your Christmas cards ready for posting then you would be more than welcome - email or call me to book your place!
Back tomorrow with another project and this week's Weekly Deals. Until then, happy stampin!
Stampin' Up! Supplies Used:
f8b8524e-9f44-4a8e-ba7a-fda6270ec759|0|.0|96d5b379-7e1d-4dac-a6ba-1e50db561b04
Tags: Big Shot, circle punch, Circles Framelits, Christmas, Cup Of Cheer, Home For Christmas, Shop online, Shop Stampin' Up online, Stampin' Up, Stampin' Up Card, Stampin' Up Card ideas, Stampin' Up Supplies
Cards | Shop Online | Stamping
by Joanne James28. September 2015 22:14
Happy Monday everyone! Today I have another of the cards that I designed for my recent Christmas stamp-a-stack featuring an adorable reindeer from the Home For Christmas designer paper. This clean and layered card is just perfect for the challenge over at The Card Concept this week, which is to feature a forest friend on your card:
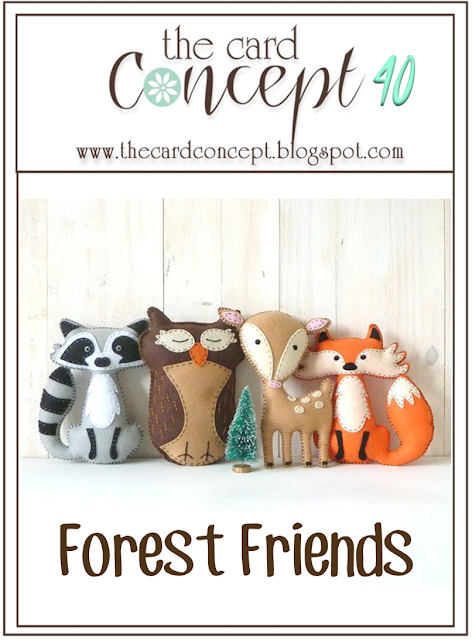
Isn't that inspiration photo just the cutest? Here's the reindeer forest friend that features on my card:

I used a Soft Suede base and a couple of patterned pieces of Home for Christmas DSP, then punched a 2" circle of Very Vanilla and adhered my fussy cut reindeer on the top. I stamped the 'Have a' and 'Christmas' parts of my sentiment from the Holly Jolly Greetings set in Memento Black onto Very Vanilla, then cut a 'jolly' out of red glimmer paper using my Big Shot and Christmas Greetings Thinlits Dies and adhered all of my sentiments with dimensionals for a little extra height. I just love the Home For Christmas Designer Series Paper - the retro designs are fantastic and the reindeers and santas are all decorated differently and in slightly different poses that are great for fussy cutting, although I'm not sure my ladies agreed after cutting out six of these little fellas!
That's all from me today; back tomorrow with another project. Until then, happy stampin'!
Stampin' Up! Supplies Used:
7d13f4cb-0caf-49da-9fdc-04962fe7f8a3|0|.0|96d5b379-7e1d-4dac-a6ba-1e50db561b04
Tags: Big Shot, Christmas, Holly Jolly Greetings, Home For Christmas, Christmas Greetings thinlits, circle punch, Shop online, Shop Stampin' Up online, Stamp-A-Stack, Stampin' Up, Stampin' Up Card, Stampin' Up Card ideas, Stampin' Up Supplies, Classes
Cards | Shop Online | Stamping
by Joanne James21. September 2015 21:40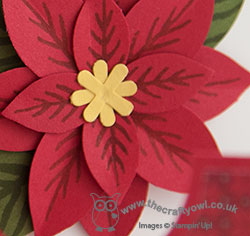
I've been busy today with the final preparations for the first of my all day Christmas Stamp-a-Stacks later this week but today's card that I'm going to share is the final one from last month's technique class using the 'Reason For The Season' stamp set:
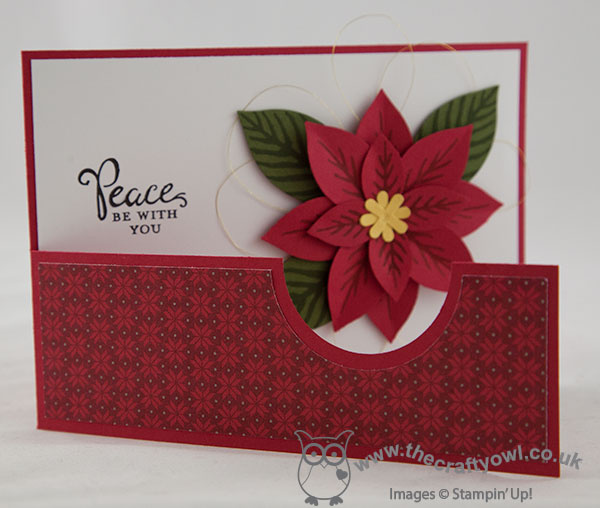
For this card we used a base of Real Red and decorated the front with a piece of Merry Moments DSP, then cut away a section using a 2" circle punch, so that it would fit around a 3D poinsettia flower made from Real Red card stock and adhered to the inside to the card. We used two layers of petals and a trio of leaves for our flower and wrapped a few loops of fine gold metallic thread behind it. This was a great card to get everyone used to building the 3D flower using the punch, having stamped the patterns onto the petals and leaves beforehand. These flowers also look great on festive packaging and really make the most of this versatile stamp set. This is one of the many great value bundles in the seasonal catalogue - with 15% off when you purchase the bundle, it represents a great saving. If you would like to see this stamp and punch combo in action (and a refresher for the ladies that attended my class!), here's a great video from Stampin' Up! that gives you the lowdown:
I hope you enjoyed that video. Don't forget, if you live in or around Northampton and would like more information on attending any of my classes, you can find full details here or just get in touch to confirm availability. Back tomorrow with another project; until then, happy stampin'!
Stampin' Up! Supplies Used:
d7e58306-7582-4497-8b07-1f2ec3d69de4|0|.0|96d5b379-7e1d-4dac-a6ba-1e50db561b04
Tags: Classes, Festive Flower Builder Punch, circle punch, Merry Moments, Christmas, Reason For the Season, Shop online, Shop Stampin' Up online, Stampin' Up Supplies, Stampin' Up, Stampin' Up Card, Stampin' Up Card ideas
Cards | Classes | Shop Online | Stamping
by Joanne James15. September 2015 21:02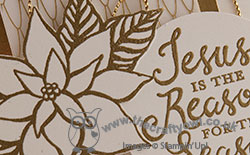
Good evening blog readers! I had a lovely time with the ladies - and gent! - that attend my card class at a local residential care home this morning. As always, the lovely Sheila and Brenda were wonderful hostesses and today we were joined a new resident, Peggy, for the first time. We enjoyed a pleasant few hours making Christmas cards and this afternoon I caught up with one of my team over a quick coffee and got some jobs done before collecting the children and embarking on the usual Tuesday round of homework, piano lessons and dinner. Anyway, enough about my day! No time to make a card today, so I thought I'd share with you another of the cards we made at my Technique class this month. Another using the 'Reason For The Season' stamp set, but this time in white and gold:
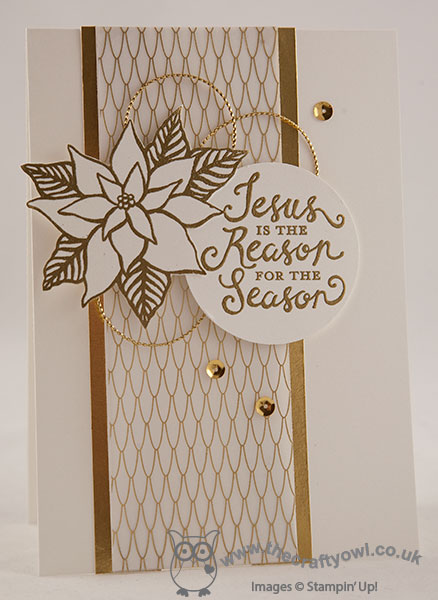
I used extra thick Whisper White cardstock for my base, then created a layered central panel using a piece of gold foil cardstock and a piece of Whisper White covered with a piece of the gorgeous gold foil Winter Wonderland Designer Vellum Stack. I stamped the sentiment and flower onto a piece of Whisper White in Versamark and heat embossed in gold, then fussy cut the flower and punched the sentiment out using a 2" circle punch. To put together, I created a few loops of gold corded trim and adhered these to my card, followed by the sentiment then lastly the flower, overlapping each slightly. A sprinkling of gold sequins from the Metallics Sequin Assortment completes my card.
This is my favourite of all the cards we made in this month's technique class - I love the modern, crisp gold and white finish. That's all from me today; back tomorrow with a new collection of weekly deals. until then, happy stampin'!
Stampin' Up! Supplies Used:
by Joanne James7. September 2015 21:09
Happy Monday everyone! Today is an especially happy one for me as it's my birthday - yay! There has been lots going on today: the James Juniors are back at school today, I had the first of this month's technique stamp classes and there were lots of presents, flowers and birthday cake! Anyway, onto today's card! We are using 'Reason For the Season' stamp set in my technique classes this month and whilst I was making up some samples last week, I decided to use the set to make a card using last week's Mojo Monday sketch, although I didn't get a chance to link up. Here's my card:
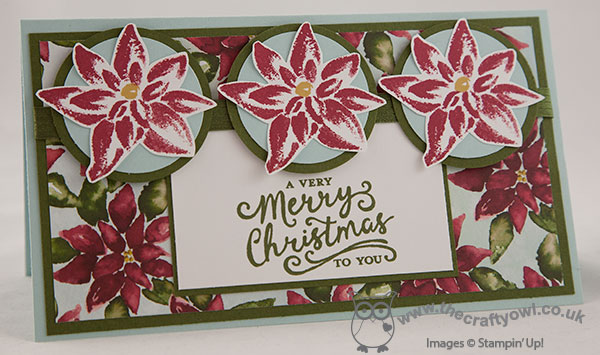
I used a piece of the 'Season of Cheer' poinsettia patterned paper for my background, picking out the Mossy Meadow for my mat and Soft Sky for my card base. I stamped three flowers in Cherry Cobbler and Hello Honey on Whisper White and fussy cut them out, mounting each on a double-mounted circle and linking them together with a piece of retired Mossy Meadow satin ribbon. I stamped the sentiment in Mossy Meadow and mounted this on a panel in the centre of my card.
I wasn't sure about the busy background paper, but this is one of those cards that has really grown on me the more I look at it and I actually quite like. The 'tall and skinny' 6"x4" layout also means that it is a little different from the norm.
That's all from me today; back tomorrow with another festive project. Until then, happy stampin'!
Stampin' Up! Supplies Used:
by Joanne James29. August 2015 09:00Good morning everyone - yay, it's the weekend! Today I'm sharing one of the cards from my last technique class using the Sprinkles of Life stamp set:
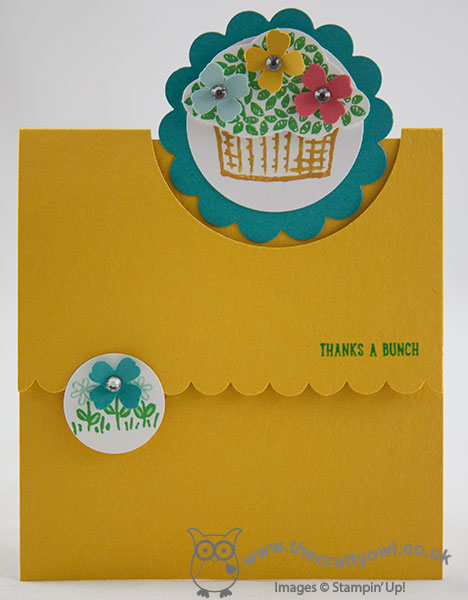
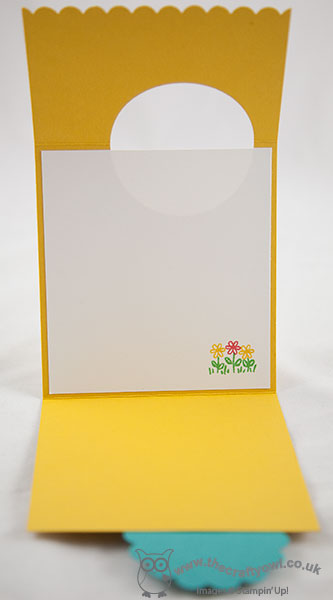
This is an example of a Flap Fold Card - Julie Davidson has a great tutorial which you can find on Splitcoast Stampers here. The 'how to' on this card is fairly straightforward to see from the pictures, but if you have any questions then leave me a comment below and I will happily provide more detail. This was our easy 'warm up' card for a class that also featured a couple of other fun folds, along with the great 'Sprinkles Of Life' set - this year's Stampin' Up! stamp set that fundraises for the Ronald McDonald House Charities charity. Here's a photo of the inside so that you can see how the fold works:
My next technique classes are on the 7th and 8th of September and will feature the new 'Reason For The Season' stamp set and co-ordinating Festive Flower Builder Punch. The class will cost £26 per person and this will include your own stamp set to take home. Alternatively, you can also purchase the co-ordinating punch at the time of class booking and pay £30 - this will mean your class will cost a mere 25 pence. if that's not great value, I don't know what is! All class reservations need to be made by tomorrow Sunday 31st August, so if you haven't already reserved a place and would like to join me, contact me by email at joanne@thecraftyowl.co.uk to reserve your place.
I'm off on a boat trip today into the Wash along the north Norfolk coast in the hope we can spot some native seals; wish me luck!
Back tomorrow with another project; until then, happy stampin'!