Today it's Sunday and time for this week's new challenge over at The Paper Players! It's the turn of the fabulous Ann to host this week and she has a fun clean and simple challenge for us to work with:


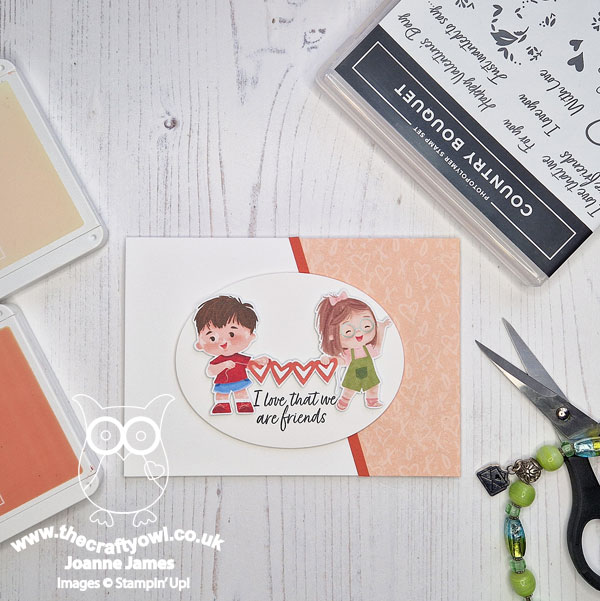
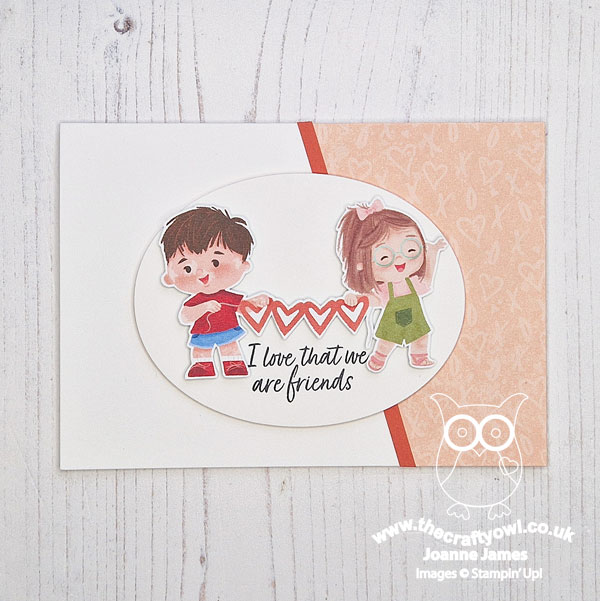
I love a good clean and simple challenge and we all have 'forever friends' that we can send this kind of card to, right? I used Linda's layout over at Freshly Made Sketches this week (rotated through 90 degrees) and grabbed my Just Kiddin' designer series paper and my scissors and set to work. This is what I came up with:
Here's the low-down on today's card:
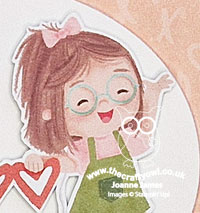
Just Kiddin' - Just Kiddin' is one of my most favourite designer papers - ever! Perfect for cards, children's home decor and scrapbooking, it contains children being children, doing all kinds of things: playing, reading, baking, dressing up, painting and lots more besides. What's more, it is a showcase of diversity: there are children of every colour, wheelchair users, amputees, members of the deaf community and lots more besides - it's so inclusive. I fussy-cut my sweet pair of friends making their heart paper chain directly from one of the pages. This paper appears in the mini catalogue and during February is also available as a free Sale-A-Bration item with a £45 purchase - time to stock up before the end of the month, race you to the shop!!
Country Bouquet - I mounted my fussy cut pair onto an oval that I stamped with a sentiment from the 'Country Bouquet' stamp set that I thought suited these friends perfectly:
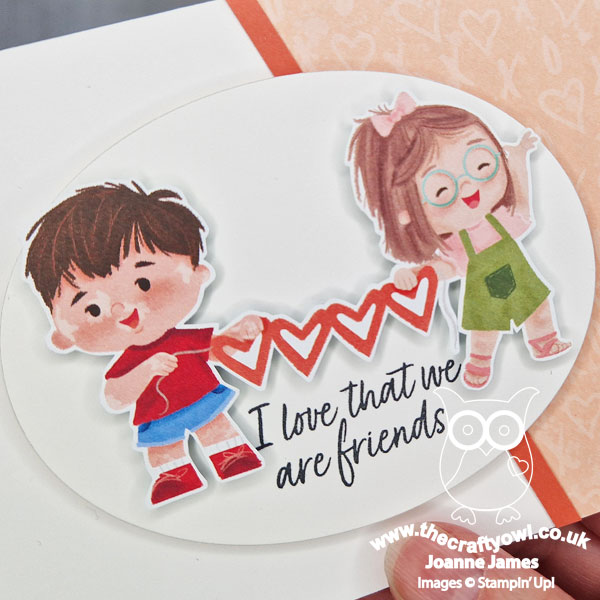
Are they not just sooo cute?! A diagonal panel of the retired Country Floral Lane designer paper with a heart design to pick up on the detail of the image completed my card. I'm also linking today's card up over at Inkspirational for another play along with their 'hearts' theme. If you like this card, check out yesterday's post too that features another sweet pair from the Just Kiddin' paper.
What Is Clean And Simple (CAS) - I love a good CAS card; as a reminder, when we talk about 'clean and simple' over at The Paper Players we mean:
- Have minimal layers and embellishments
- Have plenty of open space
- Are simple and uncluttered
My card definitely fits the brief this week - designer paper, a little fussy cutting and a well-chosen sentiment - and done!
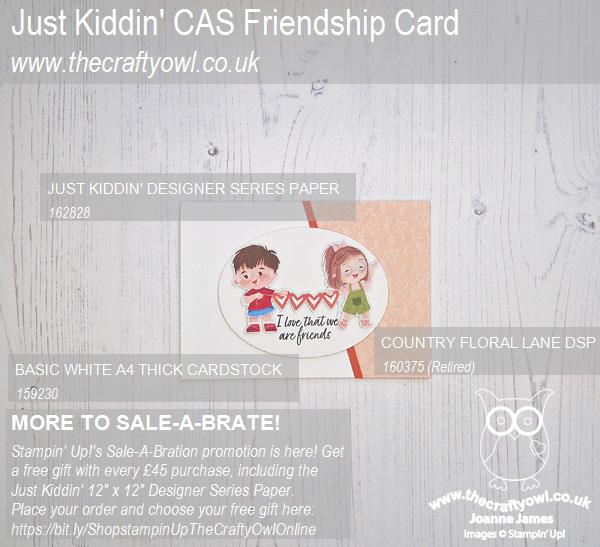
Here is the visual summary of the key products used on today's project for you to pin for easy reference:
You can see all of my Product and 'How To' summaries on my 'How To - Tips and Techniques' Pinterest board in case you've missed any.
Before you reach for your ink and papers, check out what our amazing team has created to inspire you this week:
The Paper Players Design Team
Here's a quick recap of our challenge rules:
1. Create a new paper project
2. Upload your creation to your blog with a link back to us and provide a direct link to the post featuring your challenge submission.
3. Please link your card to no more than four challenges, TOTAL.
4. Have FUN!
Enjoy your day; I am looking forward to a Sunday roast and a relaxing day today. I'll be back tomorrow with another project. Until then, happy stampin'!
Stampin' Up! Supplies Used: