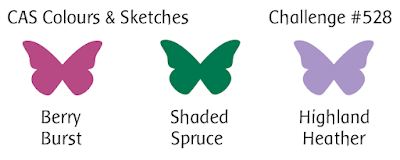
It's Tuesday and time for our first challenge of the year over at CAS Colours & Sketches. We have some new designers so do check out the refreshed team. The lovely Jeanne is hosting this month and our first challenge is a colour challenge:

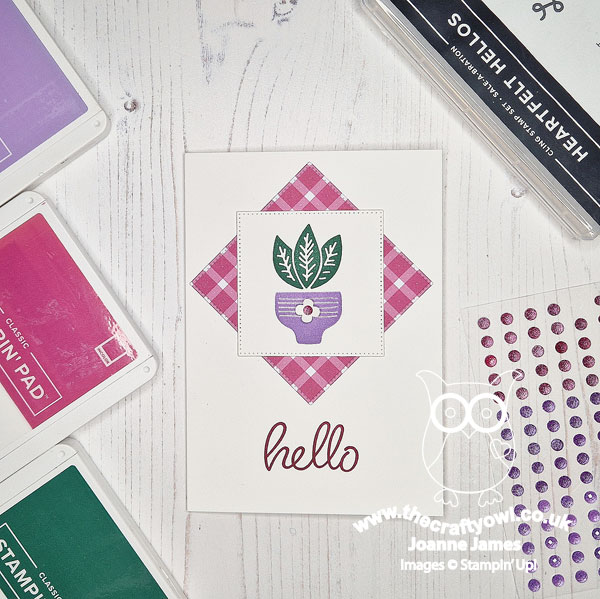
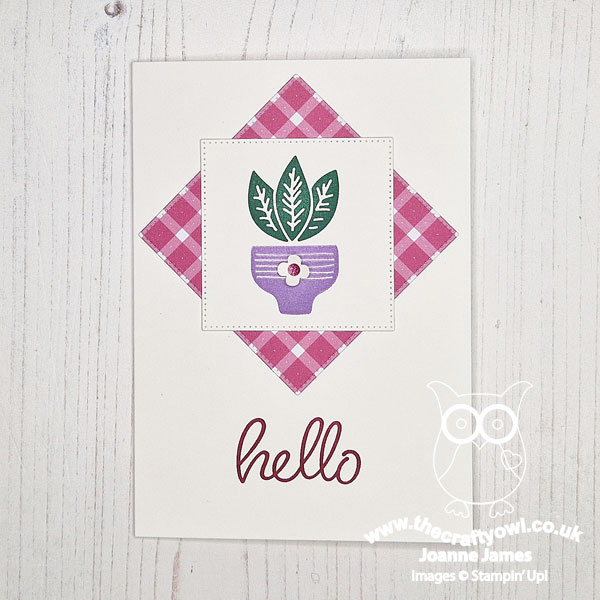
For my card today I was so tempted to go with Perennial Lavender again for today's card with this colour palette, but decided instead to change tack and break out a new stamp set that I received at our Online launch event for the mini catalogue, called 'Planted Paradise' - take a look:
Here's the low-down on today's card:
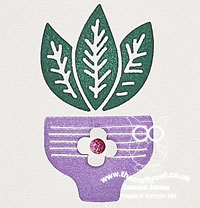
Planted Paradise - The 'Planted Paradise' stamp set is a reversible stamp set that contains lots of different pots and leaves that you can use to build your own plants, pots and hanging baskets - so fun! I actually intended to use an alternative pot in my design, until I remembered that the stamps are actually shown at 60% of size, so they are larger than I anticipated and I had to scale down my choices. I had originally intended to use the rounded flower-patterned pot - so I added a single punched flower to the one I eventually used in homage to that! These stamps are so easy to use and offer lots of creative options - if you like the ability to just stamp and see what you can create - this stamp set is for you.
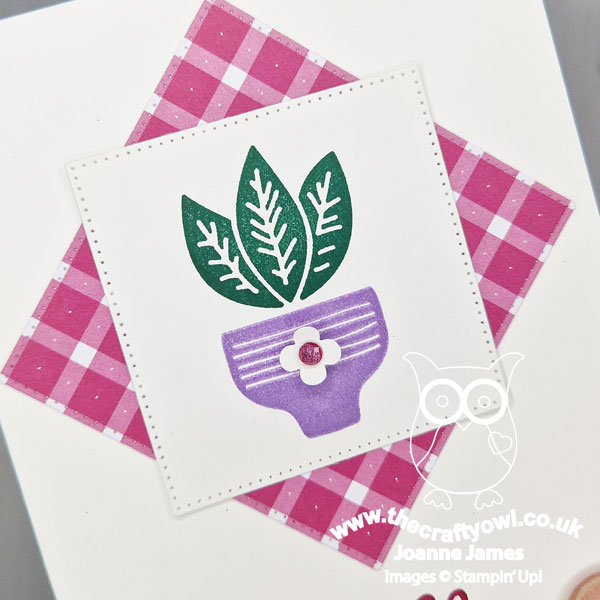
Glorious Gingham - Everything's better with gingham, right?! I used a square of Berry Burst gingham to back my pot, as a way to incorporate a pop of berry goodness and following the Try A Sketch on Tuesday that I included above (previously Try Stamping on Tuesday). The team are doubling up with Double Trouble where they want you to choose a background that reflects your introvert or extrovert personality. Well, since today is clean and simple day it's no surprise that I chose a clean white base, which I guess could fit either - which works for me, as I can be both introvert and extrovert!
Heartfelt Hellos - The 'Planted Paradise' stamp set is sentiment-free, so I needed to find one from elsewhere to complete my card. I wanted a 'Just For You' type set so that I could play along over at CAS on Friday this week as that is their theme, so I decided to ink up 'hello' from a new, FREE, set called 'Heartfelt Hellos' that can be yours too with a purchase of £45 or more. This is such a useful set with a mix of sentiments for a variety of occasions - I particularly love the font of the greeting I used on today's card.
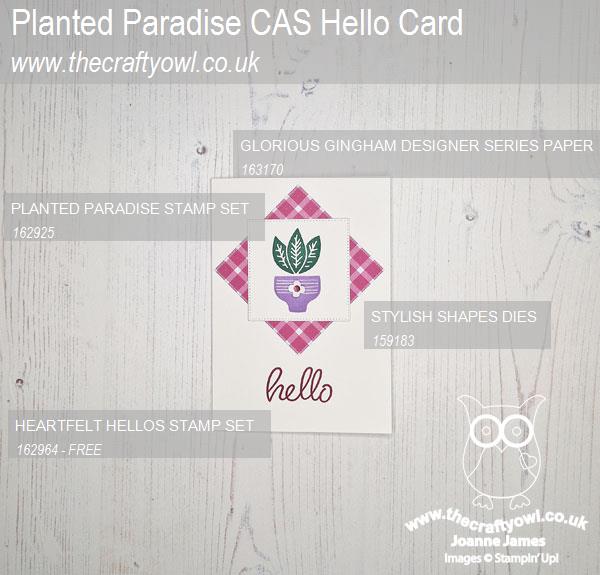
Here is the visual summary of the key products used on today's project for you to pin for easy reference:
You can see all of my 'How To' summaries on my 'How To - Tips and Techniques' Pinterest board in case you've missed any.
As a reminder, for our colour challenges, you must use all of the stated challenge colours. You may also use neutral colours; however, the challenge colours should be the most noticeable ones featured on your card. We use Stampin' Up! color names for reference, but you are welcome to use any other companies' products as long as you match the challenge colours as closely as possible.
Enjoy your day and I'll be back later this week with another project. Until then, happy stampin'!
Stampin' Up! Supplies Used: