Signs of Santa and Seasonal Sale Starts Today

by Joanne James13. November 2024 09:00

Today I have another Christmas card to share with you but firstly I need to remind you that the seasonal sale that I told you about yesterday is now LIVE:

  • 20% OFF ALL STAMP BUNDLES AND DESIGNER SERIES PAPERS
  • 10% OFF SELECT INKS AND CARDSTOCK (including Blends and ink refills)

I'll do a post tomorrow with some cards I've shared previously that highlight some of the great bargains to be had. Meanwhile, today I'm sharing a card that I made for a few challenges that caught my eye:


Color Hues are featuring red and black as their current colour combo, so I grabbed the sketch over at TGIF Challenges (which is a keeper - super versatile!) and added in some twine so that I could play along over at Festive Friday too and got nostalgic with an old favourite - take a look:


Here's the low-down on today's card:

I decided that a red and black colour combo was made for Santa Claus - so I went into my retired box to find this cutie from the 'Signs of Santa' stamp set, coloured him with my Stampin' Blends and added a piece of  textured striped Santa's Workshop paper for him to sit on. I tied this with some white baker's twine and added a trio of white loose snowflakes from the current mini - love these!


Whilst I had the set out on my desk, I also made a second card, this time featuring Mrs Claus:


This card was more faithful to the sketch as I omitted the twine and added two separate DSP strips, along with a little extra colour for the holly in her hair. Here's both cards together - Santa is still my favourite of the pair -how about you?

It was fun to delve into the retired box for this pair of fun cards and pair them with something new to give a fresh look. Do you have a favourite retired Christmas set that you can't resist pulling out year after year? Do let me know in the comments below. 

Here is the visual summary of the key products used on today's project for you to pin for easy reference:


You can see all of my 'How To' summaries on my 'How To - Tips and Techniques' Pinterest board in case you've missed any. 

Enjoy your day and I'll be back tomorrow with another project. Until then, happy stampin'!


Stampin' Up! Supplies Used:

Table built using Product Table Builder by The Crafty Owl - Independent Stampin' Up! Demonstrator.

Santa's Workshop Card and Envelope Punch Board Gift Voucher Holder

by Joanne James29. October 2018 07:00

I so enjoyed making my cards for this week's challenge over at The Paper Players that I shared with you yesterday, that I just had to make more with those fabulous little elves. As such today I'm sharing another card that I made using products from the Santa's Workshop Suite, along with a gift voucher holder made using the Envelope Punch Board. Both of these use the current sketch over at Freshly Made Sketches as the basis for my layout:


First up is my card - full of busy elves! Take a look:


Here's the low-down on today's card:

More Santa's Workshop - I'm loving this elf patterned paper and whilst it's busy, it seemed the perfect background to accompany my sweet elf and his accompanying pile of Christmas presents. I love how the sentiment is in two halves and carries over neatly to the inside of my card:


Stitched Shapes and Layered Ovals - With all those elves, I wanted to keep the rest of my card fairly simple, so used a large stitched oval to create some additional white space around my sentiment, layered on a scallop-edged oval in Poppy Parade for definition. Whilst I don't often use ovals, preferring circles or squares generally, sometimes an oval is the shape that works best for balance. One thing I do use lots though are my Stitched Shapes Framelits - these are on my Top 5 Framelits Of All Time list (I must publish that list one of these days!) - a must have for adding subtle detail to your frames.

Envelope Punch Board Gift Card Holder - having made my card, I still had a couple of elves with flocked hats left that I had diecut from the Santa's Workshop DSP and decided that I would use the same basic layout but in a landscape orientation to get a headstart on my Christmas Gift Voucher holders. I created a simple wallet using my trusty Envelope Punch Board to create the closure; this is similar to ones I've created previously, only I decided to 'go large' this time and create a wallet large enough to hold £10 notes - I have growing nieces and nephews and these days, only cash will do so I am finding I need to come up with ever more creative ways to gift it! This wallet measures 6" x 6" square and again uses the sketch for the front layout (the stamp I used is from last year's retired Merry Little Labels set):


The wallet opens to reveal a sliding pocket insert, where the money sits in the pocket flap which opens to reveal Christmas wishes and with enough space above to include a personalised message: 


I love this style of wallet and make them often. If you would like the dimensions, then just leave a comment below - I'm thinking this might be worth another blog post in itself! 

This wallet would also be great to fill with Stampin' Up! gift vouchers for a crafty friend or even to treat yourself - if you would like to order Stampin' Up! gift vouchers for Christmas and receive them beautifully packaged in a wallet like this, then do get in touch and place your order.

Here is the visual summary of the key products used on today's project for you to pin for easy reference:


You can see all of my 'How To' summaries on my 'How To - Tips and Techniques' Pinterest board in case you've missed any. 

Enjoy your day and I'll be back tomorrow with another project. Until then, happy stampin'!


Stampin' Up! Supplies Used:

Table built using Product Table Builder by The Crafty Owl - Independent Stampin' Up! Demonstrator.

Santa's Workshop For The Paper Players PP416

by Joanne James28. October 2018 09:00

Today it's Sunday and time for this week's new challenge over at The Paper Players! It's the turn of the lovely Anne Marie to host this week and she has my favourite, a sketch challenge, for you to work with:
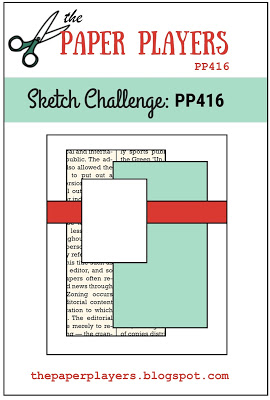
 

I decided that the sketch layers were perfect to showcase some designer series paper and since I am back creating for Christmas I knew exactly where to start - with a personal favourite this season. I ended up making not one, but two cards. Here's the first one: 
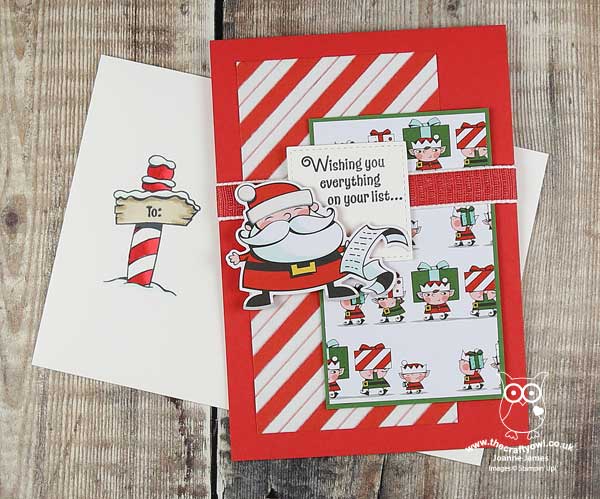
 

Here's the low-down on today's card:

Santa's Workshop - The Santa's Workshop Suite is my favourite in this year's seasonal  Stampin' Up! catalogue: with Santa, elves and Mrs Claus - what's not to love? The Santa's Workshop Specialty Designer Series Paper is the star of the suite - not only choc-full of cute designs, but four of the twelve sheets have a fabulous white flocking detail which adds great texture - it reminds me of the Fuzzy Felt of my childhood! I used three different sheets on my card: two for the panels (one with the diagonal flocked stripes, the other with Santa's elves diligently delivering everything on Santa's list) and a third for my Santa himself, complete with list.

Fun With Framelits - With the exception of the sentiment, there is no other stamping on the front of my card. Even the jolly Santa is cut from the designer paper; yes, this pack is another that has designs that can be cut with the Santa's Signpost Framelits that co-ordinate with the Signs of Santa stamp set. I could have stamped the Santa and coloured him, but then I wouldn't have had the flocking adorning his bobble hat and I just couldn't pass that up! 

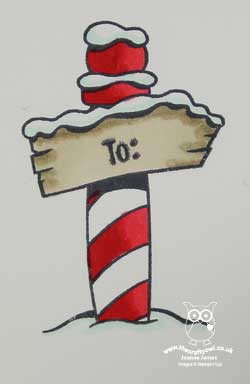
A Little Colouring Too - I did a little stamping and colouring both inside my card and on the front of my envelope to complete my project; you can see the envelope on the main photos above and below; here's a peek at the inside:
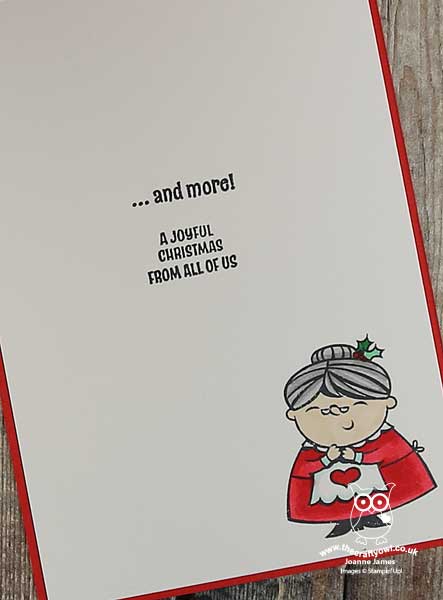
 

How sweet is Mrs. Claus?! I actually liked this card I decided to create another one with the same design - this time, making more of the diagonal striped paper to really show off the flocking:
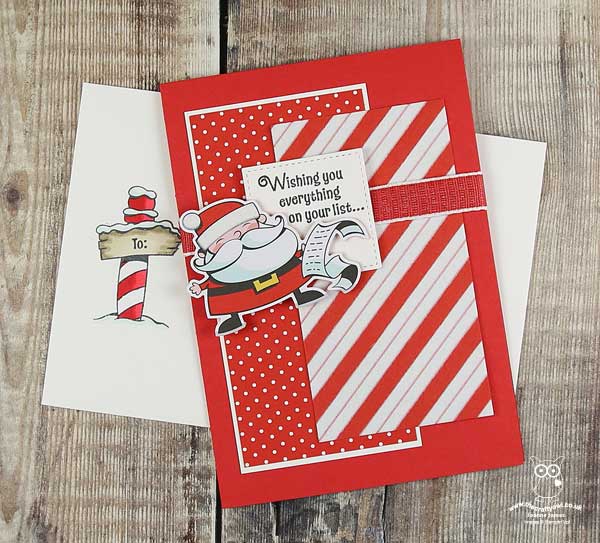
 

So which of these do you prefer? I think I actually like the second one better, but I suspect that is because it's a little less busy in terms of pattern and I just love the red and white with the felt flocked detail. Do leave me a comment and let me know what you think.

Here is the visual summary of the key products used on today's project for you to pin for easy reference:
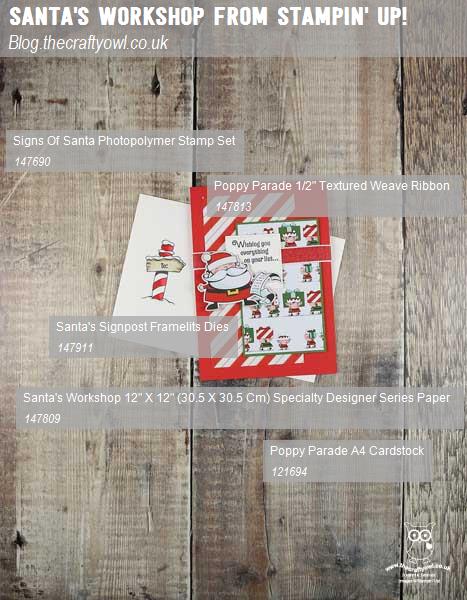
 

You can see all of my Product and 'How To' summaries on my 'How To - Tips and Techniques' Pinterest board in case you've missed any. 

Before you reach for your ink and papers, check out what our amazing team has created to inspire you this week:

Here's a quick recap of our challenge rules:
 
1.  Create a new paper project
2.  Upload your creation to your blog with a link back to us and provide a direct link to the post featuring your challenge submission.
3.  Please link your card to no more than four challenges, TOTAL.
4.  Have FUN!

You can see all of my 'How To' summaries on my 'How To - Tips and Techniques' Pinterest board in case you've missed any. 

Enjoy your day and I'll be back tomorrow with another project. Until then, happy stampin'! 


Stampin' Up! Supplies Used: 

Table built using Product Table Builder by The Crafty Owl - Independent Stampin' Up! Demonstrator.

New Online Exclusives

There are new products available exclusively in the online store from 5 November - check them out here.

Latest Kits!

Stampin Cut and Emboss

The Perpetual Beauty Calendar Kit and Cherry Blossoms Treat Boxes Kit are the latest kits in the online store - get yours here!

Shop Online

Access my online shop 24 x 7, 365 days of the year:

Current December hostess code:

9NKXDTTR

Shop Online

Mini Catalogue

BROWSE THE CATALOGUE

'Tis The Season - the new Stampin' Up! Mini Catalogue is here! For more details and to download your copy click here

Scrapbooking

Stampin' Up! has introduced a new range of 12x12" scrapbooking product and kit - the full range is now available to purchase online. To download a copy of the new digital Scrapbooking Catalogue click here.

2024-25 Annual Catalogue

BROWSE THE CATALOGUE

Click on the image to download your copy of the 2024-25 annual catalogue. For a full list of current SU! supplies, go to my online store. If you would like any help or advice, please drop me a line at joanne@thecraftyowl.co.uk or give me a call on 07773 421446 - I'd be happy to help.

Join My Team

It's always a great time to join Stampin’ Up! New team members can get £130 worth of products for only £99 + free business supplies + free shipping + all the fun being a part of Stampin’ Up! Stampin' Up! has something for everyone: join my growing team and benefit from my support to enjoy Stampin' Up! however you choose.

If you're interested, call me for a chat to understand how I can help you realise your goals. Alternatively, if you have already decided to sign up and you just can't wait, please click here for the link to the online form where you can sign up and order your starter kit right away! 

About Me

Hi I'm Joanne and live in Northampton and when I'm not looking after my husband and two beautiful children, am an avid crafter with a passion for all things Stampin' Up!

I must confess that I have never been a big rubber stamper - until I discovered Stampin' Up! that is. I love the fact that I can get such great results with co-ordinating stamps, inks, papers and punches - the possibilities are endless! Join me on my stamping journey as I share the things I love and be inspired to create amazing things yourself!

Follow Me

Monthly Newsletter

Box Builder

Click the button above to use Box Buster to create your custom box design using the Envelope Punch Board!

Kits Collection Now Available!

Stampin Cut and Emboss

The new Kits Collection from Stampin' Up! is now available!

Click here to see the current kits available and order yours online today.

I Design For


Stampin' Up Stuff

This is my personal blog and is not endorsed by Stampin’ Up! I hope you find it a plentiful source of ideas and personal inspiration but please don't copy my designs for contest submission or use for classes, publication or sale without express permission.

DSP Special Release

Check out 3 popular designer series paper designs in fresh new colourways! Available exclusively in the online store from 3 December - check them out here

Last Chance Products

Last Chance Products will now be updated every other month - check them out here.