Happy Friday everyone - the weekend is in sight! Today I'm sharing my design team card for our new challenge over at As you See It where it's time for a recipe challenge:
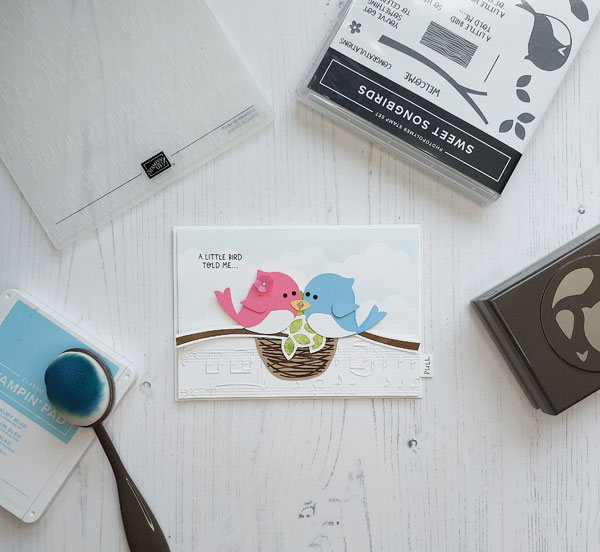
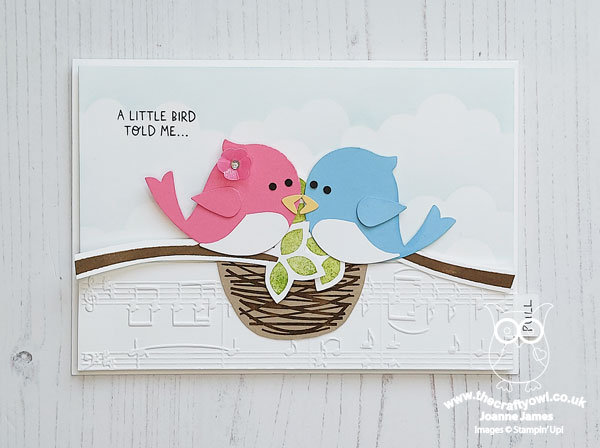
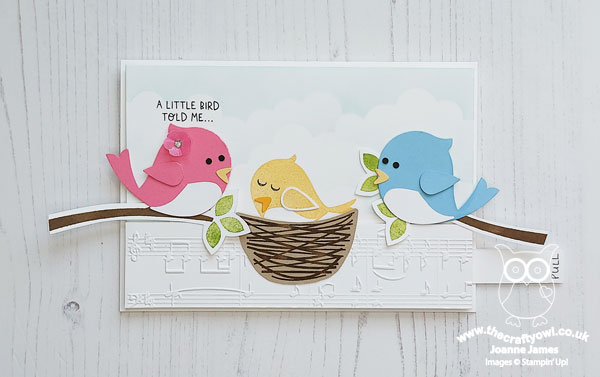
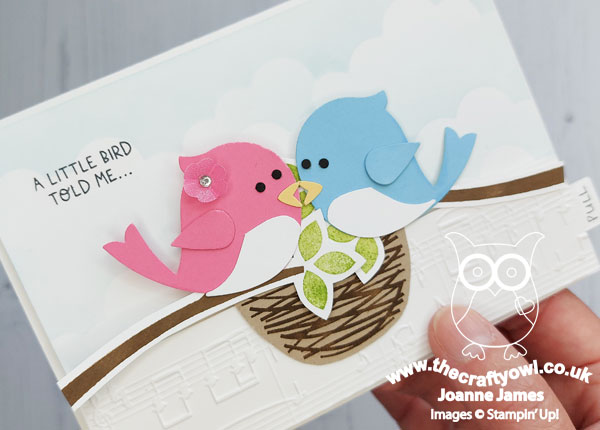
I made a very special card to share with you today! You know when you get an idea and you just can't rest until you make it a reality? Yes, that was today's card! My card to welcome a new baby features the new Sweet Songbirds bundle - take a look:
Here's the low-down on today's card:
Sweet Songbirds - Everyone loves a good punch bundle and the Sweet Songbirds bundle, comprising the stamp set of the same name and the Songbird Builder Punch, is definitrly a great addition to your crafting collection. Perfect to welcome someone to a new home or to welcome a new baby, for thank yous, news notes or any kind of celebration (even Christmas - these birds would make great robins!), the Sweet Songbirds bundle has it all. The punch will either punch the stamped image of the large bird in the set, or allow you to simply punch a bird from cardstock. This is particularly useful to easily create mirrored birds, as I've done on my card today.
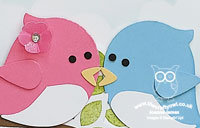
Double Slider Reveal - What might not be immediately obvious at first glance, is that today's card is a double slider card. When you pull the tab at the side of the card, the mama and papa birds slide out to reveal their baby bird in the nest:
I might be biased, but I think this is such a cute idea!
Here's a short video clip showing you how that works:
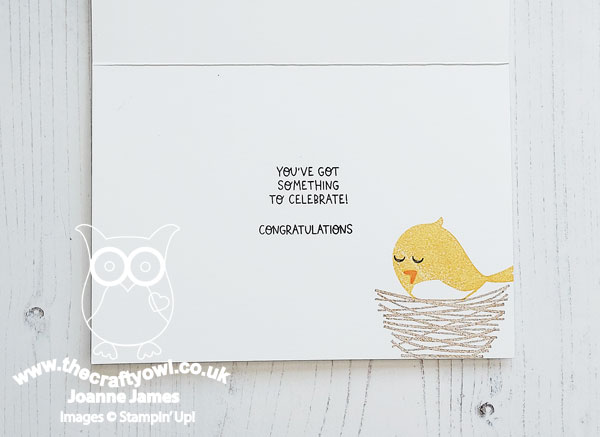
I'm mindful that today's post doesn't show the detail of the 'how' I created my double slider; I watched a number of actually very frustrating YouTube videos, and ultimately ended up re-engineering the mechanism until it is so super easy! It really needs a video to explain it though and I didn't then have time to film one this week, but I will pick this up and share in another post with you next week since I feel like I owe it to the crafting community to demystify this type of card!! I finished my sentiment and re-stamped my baby songbird on the inside of my card to finish.
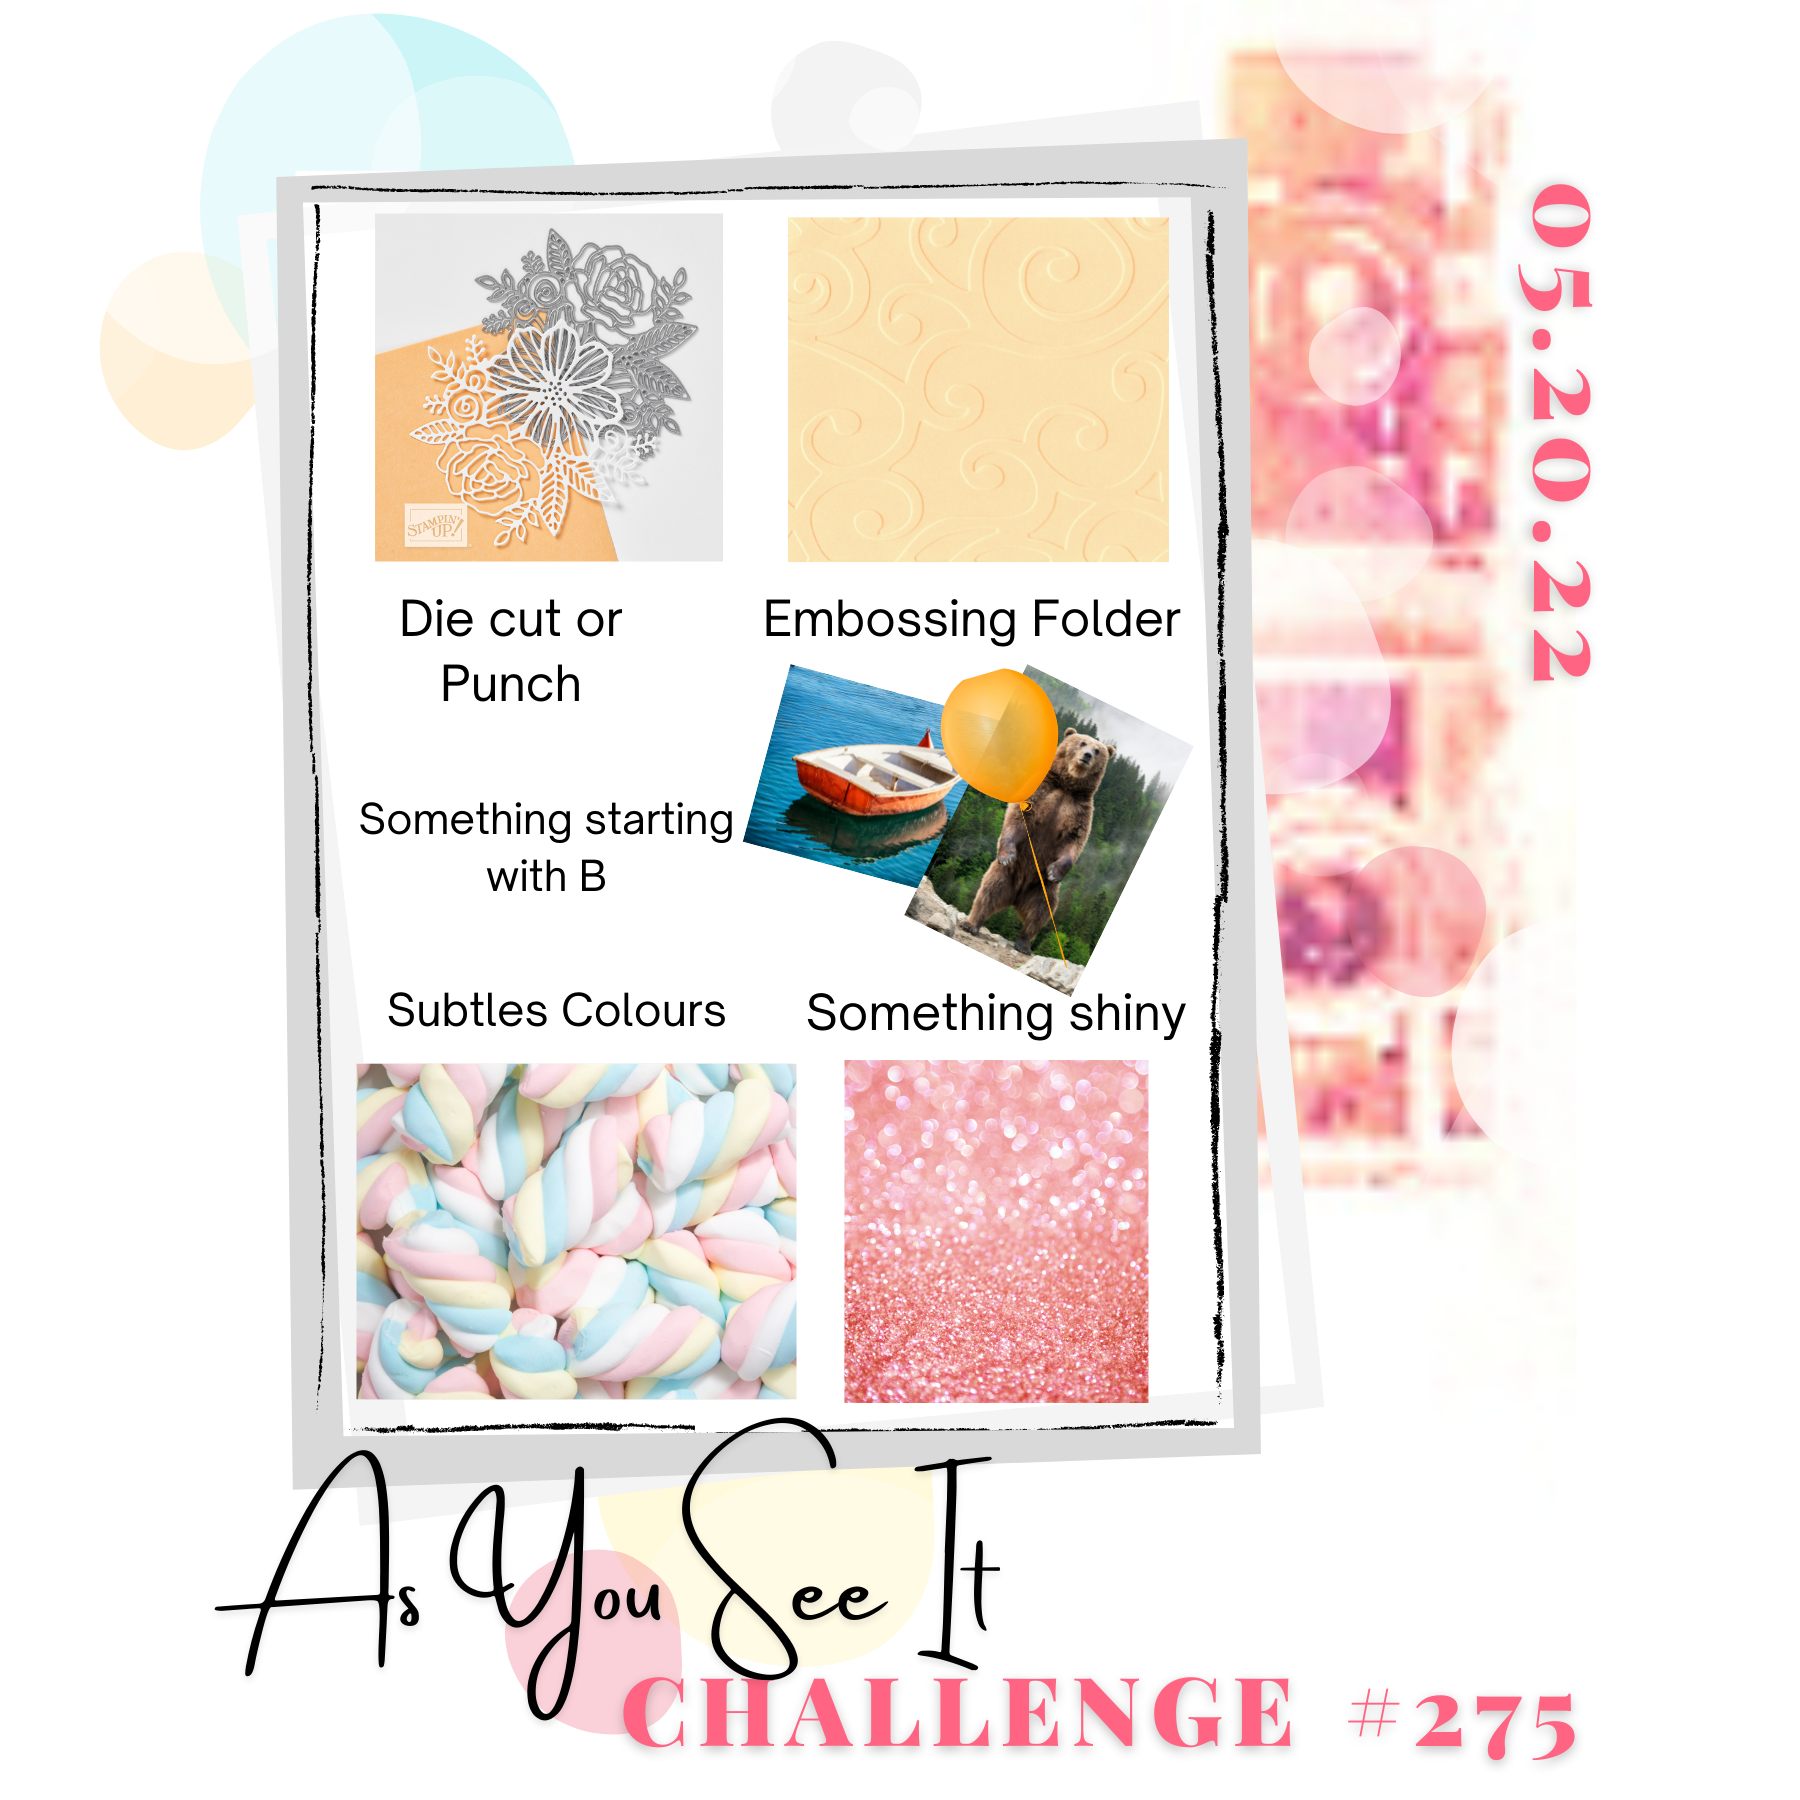
A Recipe For Success - Whilst I was all about bring my creative ideas to fruition this week, it's recipe week over at As You See It and so worth me recapping on how I incorporated the elements of the recipe in my card:
- Diecut or punch - Songbird Builder Punch and Basic Borders Dies (I used the cloud shaped as a stencil to add clouds to my background with a blending brush and some Balmy Blue ink)
- Embossing folder - Merry Melody 3D Embossing Folder (This covers my slider mechanism)
- Something beginning with 'B' - Birds and baby
- Pastel colours - Balmy Blue, So Saffron and Polished Pink
- Something shiny - A sparkly in-colour vellum flower and single rhinestone jewel to decorate mama bird (almost missed this one!)
That's everything - phew! What a sweet little pair:
This was such a fun card to make!
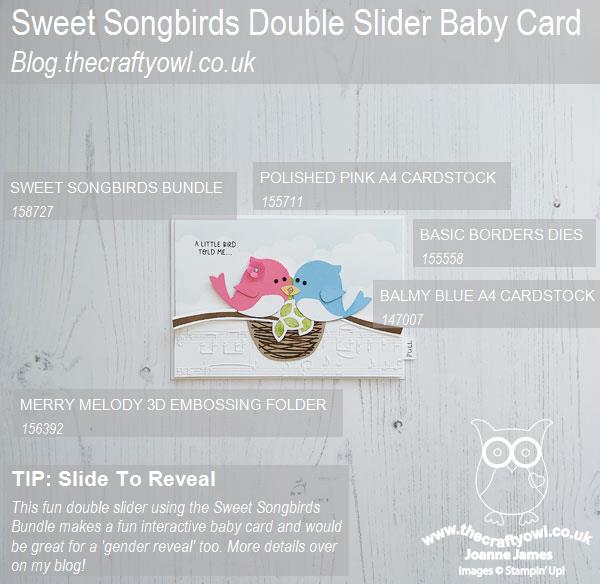
Here is the visual summary of the key products used on today's project for you to pin for easy reference:
You can see all of my 'How To' summaries on my 'How To - Tips and Techniques' Pinterest board in case you've missed any.
Here's a summary of our challenge rules:
- Create any card, scrapbooking page, 3D project or packaging project that fits the challenge.
- Please include the challenge graphic and link back to the challenge in your blog post. Turn off word verification so we can leave you lots of lovely comments. Make sure you link the post not the whole blog to the Linky. Use #AYSIXXX when uploading to a public gallery.
- If you’re unsure about ‘the rules’, check the details under the Challenge Guidelines tab on the As You See It Challenge homepage.
We look forward to seeing your creations in the AYSI gallery.
Enjoy your day and I'll be back tomorrow with another project. Until then, happy stampin'!
Stampin' Up! Supplies Used: