Have A Holly Jolly Christmas FF128

by Joanne James17. February 2023 09:00

Today I have my card for the new challenge over at Festive Friday Card Making and Paper Crafting Challenge


The challenge that we are celebrating this week is 'World Music Therapy Day' which is on March 2nd. Remember the fun thing is that at Festive Friday you do not need to actually celebrate the occasion; your goal is to simply use three or more items from the inspiration list on your project. This week I used the layout over at Sketch Saturday and notes, lyrics and twine from the inspo list and this is what I came up with:


Here's the low-down on today's card:

I went with a Christmas card for today's theme - I know it's February, but you can never start too early with festive preparations! I used the Merry Melody Embossing Folder for my background and continued my musical theme with the lyrics to a seasonal tune (apologies now if you end up singing along to Michael Buble for the rest of the day!), embellished with some stamped holly:


I finished the inside with a little additional co-ordinated stamping:

I think this might be my first Christmas card of 2023 - let's hope I can keep it up!

Here is the visual summary of the key products used on today's project for you to pin for easy reference:


You can see all of my 'How To' summaries on my 'How To - Tips and Techniques' Pinterest board in case you've missed any. 

How does our board inspire you? I can’t wait to see what YOU create! For more inspiration, be sure to visit the rest of the Festive Friday Card Making and Paper Crafting Challenge Design team:


Enjoy your day and I'll be back tomorrow with another project. Until then, happy stampin'!


Stampin' Up! Supplies Used:

Table built using Product Table Builder by The Crafty Owl - Independent Stampin' Up! Demonstrator.

Country Floral Lane Friendship Tag Card

by Joanne James8. January 2023 08:00

Today it's Sunday and time for this week's first challenge of the new year over at The Paper Players! We have three fabulous new guest designers Suzy, Fran and Tara, and this week it's the turn of the fabulous Ann to host and she has a fun theme challenge for us to work with:


Use a tag on your project! I decided to go all-out with the Country Floral Lane Suite for today's card and use lots of different elements to create a pretty card for a friend - take a look:


Here's the low-down on today's card:

Country Floral Lane - Today's card features both the Country Gingham and Country Floral Lane DSPs, both of which feature in this suite. Hearts, flowers and gingham in co-ordinating colours of Balmy Blue, Sweet Sorbet, Mint Macaron and Petal Pink - what's not to love?! 

Seasonal Labels - I made a bespoke tag for my project, using the Seasonal Labels Dies and cutting a straight age across the bottom so that it made a tag as opposed to a label shape. I cut my tag from one of the floral patterns and used it as the base element for the focal point of my card, using an additional (shortened) label from the same set to add my sentiment.

Finishing Touches - I decorated my tag with another heart-shaped flower (you will be seeing a lot of these in coming weeks!), this time punched directly from the Country Floral Lane designer paper and added some foliage from the Country Bouquet set that I stamped and fussy cut, along with a scattering of a few tiny hearts fussy cut from the Country Floral Lane paper:

A little (retired) ribbon tied with some in-colour baker's twine complete my tag and card. I love that this set can be used in so many ways and embraces 'love' in the broadest sense. I'm linking today's card up over at SUO Challenges where the theme is Designer's Choice - this is definitely mine!

Here is the visual summary of the key products used on today's project for you to pin for easy reference:


You can see all of my Product and 'How To' summaries on my 'How To - Tips and Techniques' Pinterest board in case you've missed any. 

Before you reach for your ink and papers, check out what our amazing team has created to inspire you this week:

Here's a quick recap of our challenge rules:
 
1.  Create a new paper project
2.  Upload your creation to your blog with a link back to us and provide a direct link to the post featuring your challenge submission.
3.  Please link your card to no more than four challenges, TOTAL.
4.  Have FUN!

Enjoy your day; nothing special happening here today; it is officially the last day of the school holidays so with the return of the James Juniors to school this week I should see something of a return to a normal schedule. I'll be back tomorrow with another project. Until then, happy stampin'!


Stampin' Up! Supplies Used: 

Table built using Product Table Builder by The Crafty Owl - Independent Stampin' Up! Demonstrator.

Christmas Scotties Card and Treats FF115

by Joanne James5. August 2022 09:00

Today I have my card for the new challenge over at Festive Friday. 


The challenge that we are celebrating this week is 'International Dog Day' which is on August 26th. Remember the fun thing is that at Festive Friday you do not need to actually celebrate the occasion; your goal is to simply use three or more items from the inspiration list on your project. This week I used dog, treat and texture and actually have a couple of co-ordinating projects for you - take a look:


Here's the low-down on today's projects:

Today's project started with the treat - dog shaped, but the human kind! I found these cute Scottie dog shortbread biscuits at the supermarket and thought they would be perfect packaged in a slim cello bag so that they could be seen in all their glory! 


I added a piece of black cardstock to back them, then closed my treat bag with topper made from the Seasonal Labels Dies folded in half in red gingham paper and finished with a diecut wreath and punched Scottie dog, along with a cute sentiment banner: 


I decided to make a co-ordinating Christmas card to go with my treat, incorporating my 'topper' into the centre of my card design:


I added in additional texture by using the (retired) Checks Embossing Folder to emboss the front panel of my card and left the front sentiment-free:

I'm thinking I might give this card and treat to my post lady in the run up to the festive season as a thank you for her care and attention as she does her daily rounds - I'm sure the irony of my Scottie dog won't be lost on her, although there is no chance of these shortbread biscuits biting back!

Here is the visual summary of the key products used on today's project for you to pin for easy reference:


You can see all of my 'How To' summaries on my 'How To - Tips and Techniques' Pinterest board in case you've missed any. 

How does our board inspire you? I can’t wait to see what YOU create! For more inspiration, be sure to visit the rest of the  Festive Friday Challenge Design team:

Ann Schach
Beth McCullough
Sharon Hashimoto Burkert
Melanie Hungerford
Helen Jennings
Stephanie Lanzalotto
Melva Peters
Jaydee
Diane Evans
Joanne James

Enjoy your day and I'll be back tomorrow with another project. Until then, happy stampin'!


Stampin' Up! Supplies Used:

Table built using Product Table Builder by The Crafty Owl - Independent Stampin' Up! Demonstrator.

Painted Christmas PP569

by Joanne James28. November 2021 08:00

Today it's Sunday and time for this week's new challenge over at The Paper Players! It's the turn of the fabulous Anne Marie to host this week and she has my favourite, a sketch challenge for you to work with:


I struggled a little to decide what to do about the split background layer on today's card; I eventually decided to use a single, bright patterned paper from the Painted Christmas pack - take a look:


There are some gorgeous patterns in the Painted Christmas pack, all with a loose watercoloured feel. I love this red and white pattern but it needed an otherwise uncluttered card to show it off to best advantage. So I split the panel into three as per the sketch, then added a red label with a white heat-embossed sentiment, accented with some holly and foliage stamped with the Christmas Season stamp set, some loops of sheer red ribbon and some red sparkly gems to finish:

This card was actually quite straightforward to put together, but I spent ages procrastinating about which paper or papers to feature so seemed to take forever to design!! I really like the pop of red against the white though, with just a little green foliage too. I used one of the sentiments from 'Merriest Moments' - this is most certainly my favourite sentiment set in the current catalogue.

Here is the visual summary of the key products used on today's project for you to pin for easy reference:


You can see all of my Product and 'How To' summaries on my 'How To - Tips and Techniques' Pinterest board in case you've missed any. 

I'm also linking today's card up over at Global Design Project #GDP319 where the theme is 'Christmas'.

Before you reach for your ink and papers, check out what our amazing team has created to inspire you this week:

Here's a quick recap of our challenge rules:
 
1.  Create a new paper project
2.  Upload your creation to your blog with a link back to us and provide a direct link to the post featuring your challenge submission.
3.  Please link your card to no more than four challenges, TOTAL.
4.  Have FUN!

You can see all of my 'How To' summaries on my 'How To - Tips and Techniques' Pinterest board in case you've missed any. 

Enjoy your day; we have had a freezing few days here in the UK so today I will most definitely be staying indoors, keeping warm and might even indulge in a spot of festive baking! I'll be back tomorrow with another project. Until then, happy stampin'!


Stampin' Up! Supplies Used: 

Table built using Product Table Builder by The Crafty Owl - Independent Stampin' Up! Demonstrator.

Peaceful Place Double Box Fancy Fold Christmas Cards PP567

by Joanne James14. November 2021 08:00

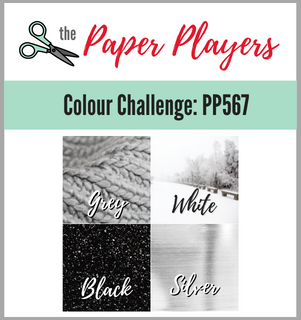
Today it's Sunday and time for this week's new challenge over at The Paper Players! It's my turn to host this week and I have a colour challenge for you to work with:
 

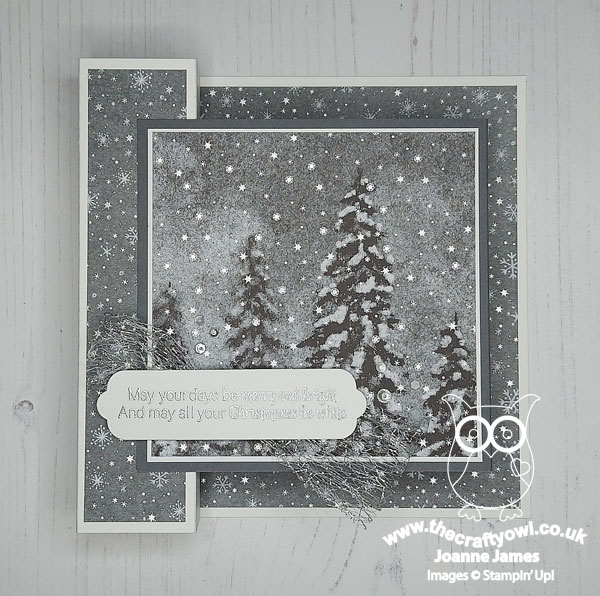
I made a couple of cards to share with you today, both variations on the same theme. Here's the first one - take a look:
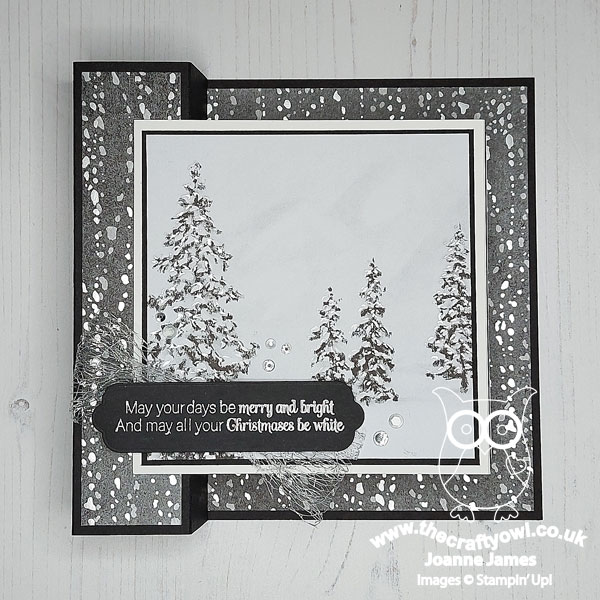
 

Here's the low-down on today's card:

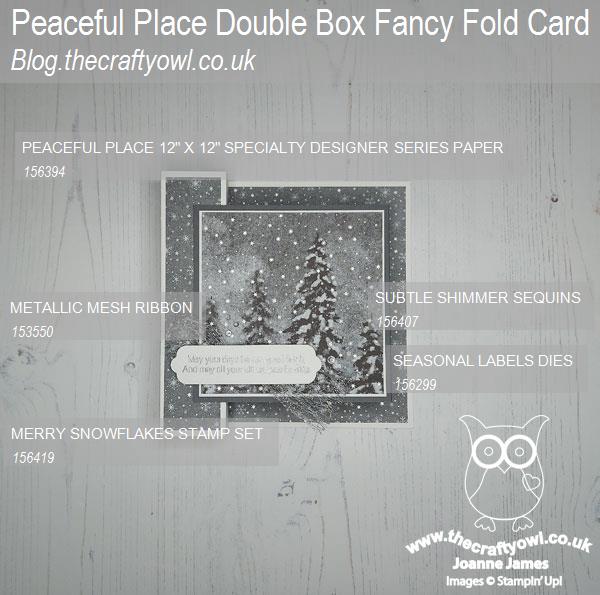
Peaceful Place - So I had an ulterior motive in choosing today's colour combination. I've had a pack of Peaceful Place Specialty Designer Series Paper in my collection since I did my mini catalogue preorder in August, but had yet to use it. I had a feeling that would be the case; I love these papers, but didn't buy the bundle that features in the Peaceful Place Suite. I chose the colour combination that is found in these papers for this week's challenge because it would both force me to cut into these papers and also I am hoping the gallery will have lots of inspiration for me too! I used a combination of two paper patterns from the pack on each of my cards, one for the main panel and a contrasting or co-ordinating one to frame it. The papers are stunning, with beautiful silver foil detailing. Great for special cards!

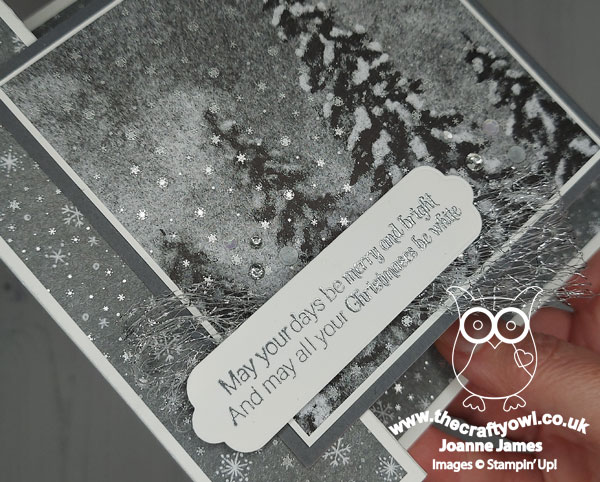
Merry Snowflakes Seasonal Label - Fancy fold aside (more about that in a moment), today's cards really are a showcase of these beautiful papers. Apart from some sequins, rhinestones and a mesh ribbon bow, the only other element to my card is a heat-embossed sentiment from the Merry Snowflakes set, in silver on black or white respectively, and cut out with one of the Seasonal Labels Dies. The words of this sentiment seemed to be perfectly suited to the snowy scenes on my card:
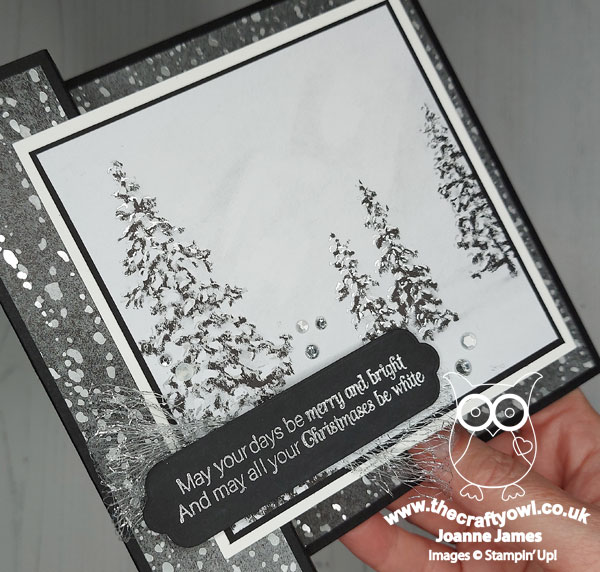
 

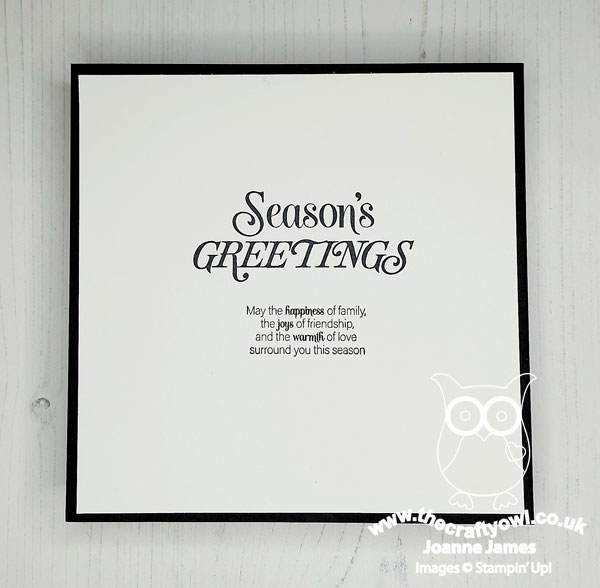
 The only other stamping is on the reverses of the card, where I've stamped a further greeting and left space for a personal message:
 

A Fancy Fold - I thought for today's card I would ring the changes with a fancy fold. I decided on a double box fancy fold because I wanted something with a feature panel and this card is really quite straightforward to create. I had seen this design in an A6 card size on the internet, but adapted the basic principle to suit my own requirements. My finished card measures 6"x6" and easily folds flat for posting, which is a bonus! 
  

I struggled to photograph this one so well - I'm blaming the dark, winter days that we are experiencing here now - so here's another at an angle to try and capture the sentiment detail of the embossed silver against the white:
 

If anyone is interested in the measurements I sued to create my version of a double box fancy fold card, then do leave me a message below and I'll add them in to my post (I would write them in now but don't have them to hand). 

Here is the visual summary of the key products used on today's project for you to pin for easy reference:
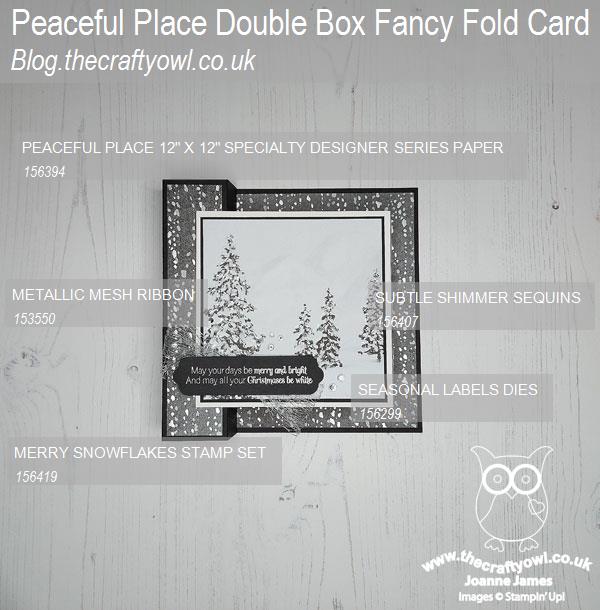
 

And here's the second one:
 

You can see all of my Product and 'How To' summaries on my 'How To - Tips and Techniques' Pinterest board in case you've missed any. 

So what do you think? Which of today's cards do you prefer and what do you think of today's fancy fold? Please do leave me a comment below - I'd love to hear your thoughts!

Before you reach for your ink and papers, check out what our amazing team has created to inspire you this week:

Here's a quick recap of our challenge rules:
 
1.  Create a new paper project
2.  Upload your creation to your blog with a link back to us and provide a direct link to the post featuring your challenge submission.
3.  Please link your card to no more than four challenges, TOTAL.
4.  Have FUN!

You can see all of my 'How To' summaries on my 'How To - Tips and Techniques' Pinterest board in case you've missed any. 

Enjoy your day; Ben is on parade with the other army cadets from school at a Remembrance Day parade and service this morning, so this afternoon will be spent completing homework and the like. I'll be back soon with another project. Until then, happy stampin'!


Stampin' Up! Supplies Used: 

Table built using Product Table Builder by The Crafty Owl - Independent Stampin' Up! Demonstrator.

Christmas Season Festive Foliage CCS 444

by Joanne James2. November 2021 13:00

It's Tuesday and time for a new challenge over at CAS Colours & Sketches. The lovely Vicky has handed over the reins and I am your host for the month of November. Our first challenge is a colour challenge: 


This trio of colours is one of my favourite festive colour combinations and they compliment white beautifully. I am in full Christmas card making mode right now, so I am looking forward to seeing what you make with these colours. For my card today I went with two simple clusters of Christmas Season foliage to accent a central sentiment label:


Here's the low-down on today's card:

The 'Christmas Season' stamp set is perfect for festive foliage in these colours (it also contains some lovely pinecones, although I've not used them on today's card) and I stamped a sentiment from 'Delivering Cheer' on a label cut with the Seasonal Labels dies, which includes dies that also cut out the foliage. Another sentiment on the inside of my card from the same set and a little extra corner detail complete today's card:


I love the Real Red card base for a Christmas card - I also added a trio of rhinestones for some festive sparkle:


This is one of those cards that can be easily mass produced - just stamp a bunch of foliage pieces and sentiment labels and then have fun arranging the pieces. Kind of like flower arranging without the mess!

Here is the visual summary of the key products used on today's project for you to pin for easy reference:


You can see all of my 'How To' summaries on my 'How To - Tips and Techniques' Pinterest board in case you've missed any.


I'm also having another entry into Just Us Girls challenge this week with their wild card theme of 'leaves' - yesterday autumn, today winter!

As a reminder, for our colour challenges, you must use all of the stated challenge colours. You may also use neutral colours; however, the challenge colours should be the most noticeable ones featured on your card. We use Stampin' Up! colour names for reference, but you are welcome to use any other companies' products as long as you match the challenge colours as closely as possible. What will you make with my colours this week? I can't wait to find out and look forward to visiting your blogs in due course.


One last reminder: the Eden's Garden Collection pre-release is now available to order! Read all about it and order yours in this post here.

Enjoy your day and I'll be back tomorrow with another project. Until then, happy stampin'!


Stampin' Up! Supplies Used:

Table built using Product Table Builder by The Crafty Owl - Independent Stampin' Up! Demonstrator.

Beauty Of Tomorrow And A Lesson In CAS CCS 443

by Joanne James26. October 2021 13:00

It's Tuesday and time for a new challenge over at CAS Colours & Sketches. Vicky is hosting this month and for her last challenge of the month she has a great sketch challenge for us: 


Feel free to flip or rotate the sketch when making your card. For my card today I decided to pair the sketch with the colours over at Hand Stamped Sentiments to create a 'thinking of you' card, but must confess it wasn't entirely plain sailing! Initially I had created a completely different card for this challenge - then when I went to upload it on our Design Team page realised I had missed Vicky's reference to 'any non-geometric shape' - I will share that card another day - and back to the drawing board I went! I eventually came up with the following clean and simple card:


Here's the low-down on today's card:

Beauty Of Tomorrow - I reached for the 'Beauty of Tomorrow' stamp set as it has a collection of images in a variety of sizes, including the larger, feathery grass stem that I used on my Smoky Slate card base as the start of my design. I cut a label using my Seasonal Labels dies to which I added my sentiment and some ink splats, then added another seed stem and a bird, which I popped up on a dimensional for extra lift:


 I also used the same set to add a little decoration to the inside of my card:


A Lesson In CAS - I ended up making two cards today and thought I would share the reasons for that here with you, not least because we have a design team call out over at CAS Colours & Sketches this week so for anyone thinking they might like to join the team, it might prove useful! My regular readers will know that my 'go-to' style is generally clean and layered and one of the reasons I initially joined this team was with a view to honing my 'clean and simple' card making skills. I initially laid out the card you see above, but thought it looked a little plain, so I made another card - the one you can see below. Once complete, I no longer felt like it met the CAS brief; whilst there was still lots of 'white space', the additional layering, the coloured gems and diecut detail took this card beyond it. I still love it - and this is the card I'm sharing over at HSS - but I ended up making another card to my original design, the one you see above, and funnily enough once finished I decided I liked it much better than I had the first time around now that I had something else to compare it to - go figure! 

Take Two - Here is that second card! I added in an additional couple of layers, cutting up one of the large leaves from the die set to add interest to the border, along with more splats and coloured gems:

And here's another photo so you can see the extra colour that my subtle changes add: 

I hope you found reading about my trials in card making interesting and useful - our challenge is all about the 'clean and simple', although it can be easy to get carried away with the colours or sketch and forget this. You can see a photo of both cards together below - do you prefer one more than the other? Do leave me a comment - I'd love to hear your thoughts.

Here is the visual summary of the key products used on today's project for you to pin for easy reference:


You can see all of my 'How To' summaries on my 'How To - Tips and Techniques' Pinterest board in case you've missed any. 

As a reminder, for our colour challenges, you must use all of the stated challenge colours. You may also use neutral colours; however, the challenge colours should be the most noticeable ones featured on your card. We use Stampin' Up! color names for reference, but you are welcome to use any other companies' products as long as you match the challenge colours as closely as possible.

Enjoy your day and I'll be back tomorrow with another project. Until then, happy stampin'!


Stampin' Up! Supplies Used:

Table built using Product Table Builder by The Crafty Owl - Independent Stampin' Up! Demonstrator.

Christmas Season Corner Detail Card

by Joanne James21. August 2021 20:06

A quick card from me this evening that was inspired by Jen Mitchell's great sketch over at Freshly Made Sketches this week and the festive inspiration at Inspired By:


I thought those corners would be great for some layered foliage to frame a festive sentiment - take a look at what I came up with:


Lots of foliage, holly, pine cones and berries stamped and cut using the 'Christmas Season' stamp set and dies, and layered to frame a sentiment from the 'Merriest Moments' stamp set:


I wanted to add in a couple of candy canes too, but do you think I could find my retired candy cane dies? Nope, not anywhere! Too many craft supplies and not enough office space, that's my issue!!

Here is the visual summary of the key products used on today's project for you to pin for easy reference:


You can see all of my 'How To' summaries on my 'How To - Tips and Techniques' Pinterest board in case you've missed any. 

Enjoy your evening and I'll be back tomorrow with another project for our new challenge over at The Paper Players. Until then, happy stampin'!


Stampin' Up! Supplies Used:

Table built using Product Table Builder by The Crafty Owl - Independent Stampin' Up! Demonstrator.
 
Delighted that this card was chosen by Jen T as Perfect Princess over at Freshly Made Sketches for Challenge 499 this week!
 

New Online Exclusives

There are new products available exclusively in the online store from 5 November - check them out here.

Latest Kits!

Stampin Cut and Emboss

The Layered Landscapes Kit and Nature's Paintings Kit are the latest kits in the online store - get yours here!

Shop Online

Access my online shop 24 x 7, 365 days of the year:

Current November hostess code:

9NKXDTTR

Shop Online

Mini Catalogue

BROWSE THE CATALOGUE

'Tis The Season - the new Stampin' Up! Mini Catalogue is here! For more details and to download your copy click here

Scrapbooking

Stampin' Up! has introduced a new range of 12x12" scrapbooking product and kit - the full range is now available to purchase online. To download a copy of the new digital Scrapbooking Catalogue click here.

2024-25 Annual Catalogue

BROWSE THE CATALOGUE

Click on the image to download your copy of the 2024-25 annual catalogue. For a full list of current SU! supplies, go to my online store. If you would like any help or advice, please drop me a line at joanne@thecraftyowl.co.uk or give me a call on 07773 421446 - I'd be happy to help.

Join My Team

It's always a great time to join Stampin’ Up! During October you can get even more in your starter kit! New team members can get £160 worth of products for only £99 + free business supplies + free shipping + all the fun being a part of Stampin’ Up! Stampin' Up! has something for everyone: join my growing team and benefit from my support to enjoy Stampin' Up! however you choose.

If you're interested, call me for a chat to understand how I can help you realise your goals. Alternatively, if you have already decided to sign up and you just can't wait, please click here for the link to the online form where you can sign up and order your starter kit right away! 

About Me

Hi I'm Joanne and live in Northampton and when I'm not looking after my husband and two beautiful children, am an avid crafter with a passion for all things Stampin' Up!

I must confess that I have never been a big rubber stamper - until I discovered Stampin' Up! that is. I love the fact that I can get such great results with co-ordinating stamps, inks, papers and punches - the possibilities are endless! Join me on my stamping journey as I share the things I love and be inspired to create amazing things yourself!

Follow Me

Monthly Newsletter

Box Builder

Click the button above to use Box Buster to create your custom box design using the Envelope Punch Board!

Kits Collection Now Available!

Stampin Cut and Emboss

The new Kits Collection from Stampin' Up! is now available!

Click here to see the current kits available and order yours online today.

I Design For


Stampin' Up Stuff

This is my personal blog and is not endorsed by Stampin’ Up! I hope you find it a plentiful source of ideas and personal inspiration but please don't copy my designs for contest submission or use for classes, publication or sale without express permission.