Botanical Builders Happy Birthday

by Joanne James2. May 2016 21:27

I hope you've all had a lovely day and for those of you like me in the UK that you've enjoyed the Bank Holiday. I managed to squeeze in a little gardening before the rain set in this afternoon, at which point I came inside to craft. I made this card for a couple of challenges:


I loved the colour palette and inspiration over at Color Throwdown this week so couldn't resist squeezing in an entry, and I used the new sketch over at Mojo Monday for my layout. Here's my card:

My card was inspired by the Color Throwdown inspiration photo and those amazing cakes and florals - here's the low-down on how I made it:

Stylish Stripes - I used Night of Navy for my card base and adhered a full panel of Night of Navy that I embossed with the Stylish Stripes Textured Impressions Embossing folder to the card front, to echo the diagonal swirls of the cake icing on the photo. This is one of my most used embossing folders and I shall be sad to see it retire at the end of this month; if you haven't got one, snap it up now before it's too late.

Happy Birthday Everyone - The sentiment on my card is from the exclusive hostess set 'Happy Birthday Everyone'. I just love this font and the accompanying finishing sentiments that go with it. I finished the inside of my card with 'to a good friend' as this is where my card is headed as one of mine has a birthday this week.

Botanical Builder Flowers - I never tire of my Botanical Builder framelits and these white and yellow flowers really pop against the navy base of my card. I also added a thin border of Daffodil Delight, cut using my retired large scallop edgelit die. 

Here is the visual summary of the key products used on today's project for you to pin for easy reference:


You can see all of my 'How To' summaries on my 'How To - Tips and Techniques' Pinterest board in case you've missed any. 

A little extra for you today too: I bought my friend a little something to go with her card and wrapped that in a box made using some Regals designer series paper and made with my Box Buster tool and trusty Envelope Punch Board. Here's a picture:

Isn't that pretty? So nice when you can co-ordinate your card and gift and Stampin' Up! certainly does make that easy for us!

That's all from me today; back tomorrow with another project. until then, happy stampin'! 


Stampin' Up! Supplies Used:

Table built using Product Table Builder by The Crafty Owl - Independent Stampin' Up! Demonstrator.

Stampin' Up! 2015-17 In Colours Washi Butterfly

by Joanne James7. April 2016 08:05

Today it's time for a new challenge over at Create With Connie and Mary and this week we have a great sketch for you:


So after everything I said about Delightful Dijon on my CCMC card last week, this week I've gone and used it again - out of choice! My card this week is all about our current in-colours, the 2015-17 In Colours to be exact:

I decided to create a washi tape striped inset background for my white butterfly, using the In Colour Designer Washi Tape that is an exclusive hostess gift which you can purchase with Stampin' Rewards when you host a Stampin' Up! party. I then chose the remaining elements of my card from there: a strip of white corrugated card for texture, a strip of watermelon wonder wide 1" stitched satin ribbon and for the back panel a piece of Colour Me Irresistible Specialty Designer Series Paper - I went with the Delightful Dijon because this is the only uncut piece in my pack! I finished my butterfly with a Mint Macaron  In-Colour Blossom Accent, finished with a rhinestone. I haven't added a sentiment to my card today as I wanted to add it to my stash of 'all purpose' cards, so will probably add one as I'm ready to send it.

Here is the visual summary of the key products used on today's project for you to pin for easy reference:


You can see all of my 'How To' summaries on my 'How To - Tips and Techniques' Pinterest board in case you've missed any. 

Do visit the other Design Team members to see how they interpreted this week's sketch; there's lots of inspiration over on their blogs too!

Enjoy your day and I'll be back tomorrow with another project; until then, happy stampin'!


Stampin' Up! Supplies Used:

  • Bold Butterfly Framelits Dies
  • 2015-2017 In Color Designer Washi Tape
  • Watermelon Wonder 1" Stitched Satin Ribbon
  • Color Me Irresistible Specialty Designer Series Paper
  • 2015-2017 In Color Blossom Accents
  • Kraft And White Corrugated Paper
  • Punch Corner Project Life
  • Rhinestone Basic Jewels
  • Whisper White A4 Thick Cardstock

Love You Sew - You're A Cut Above

by Joanne James5. April 2016 07:00

Today I have another clean and simple card for you, this time for this week's challenge over at CAS(E) This Sketch. I love playing along with their sketches, which can sometimes leave me lost at first glance but then often take me in an unexpected direction. This week's sketch is definitely one of those! Here is the sketch:


I spent considerable time thinking about how I was going to interpret this sketch and then ended up with not one but two very different creations! Here is the first one:

There are a number of key elements that make up this deceptively simple card:

A Cut Above - This great sentiment comes for the current hostess set in the Spring-Summer catalogue 'Love You Sew'. This exclusive set can only be purchased with Stampin' Rewards that are earned with qualifying party sales when you host your own Stampin' Up! party or place an individual order of £150 or more. Perfect for crafters, it includes a number of fun sentiments and craft-themed stamps and has been very popular with party hostesses throughout Sale-A-Bration. It is still available until the seasonal catalogue ends on May 31st, so if you would like to earn it for free then do get in touch to earn yours.

It's My Party - I love the bold and sassy colours and patterns of the It's My Party Suite and this card was perfect for a busy pattern, due to its simple design. What's more, the decision on which side to use was made easy - for today's card, both patterns are visible. Score! I simply cut a line across my DSP with my Stampin' Trimmer, then folded back the sides to create a 'v' in which to stamp my sentiment on the layer below.


Snip, Snip - The scissors stamp can be found in the 'Love You Sew' stamp set too and were the perfect embellishment for my split card front. I coloured them in with my Stampin' Write markers so that I could colour the handles and blades separately and positioned them'in action'.

Sew easy, sew simple! I just love this set and this sentiment makes for a perfect crafty congratulations - I shall probably make a few of these to keep on standby to celebrate my team members' achievements!

Here is the visual summary of the key products used on today's project for you to pin for easy reference:


You can see all of my 'How To' summaries on my 'How To - Tips and Techniques' Pinterest board in case you've missed any. 

I've had a day of hair braiding, manicures and baking in addition to a few household chores today. I'm sure tomorrow will be equally fun! Back tomorrow with another very different interpretation of the same sketch; until then, happy stampin'!


Stampin' Up! Supplies Used: 

Table built using Product Table Builder by The Crafty Owl - Independent Stampin' Up! Demonstrator.

Tags: , , , , , ,

Cards | Host a Party | hosting | Shop Online | Stamping

From Land To Sea Lighthouse

by Joanne James28. February 2016 21:17

I'm popping in with an extra post today to make up for my lack of one yesterday; my card was all ready, however by the time I returned from the swimming gala that the James Juniors were attending yesterday evening, I was truly good for nothing! This card is made with this week's CAS(E) This Sketch and the challenge over at CASology in mind:


I took a rather less obvious approach to the cue word 'distress' and instead of focusing on a technique went with the emotion - here's my card:

I went with a lighthouse - the beacon of safety for mariners in distress - from the 'From Land to Sea' stamp set as the focal image for my card and paired it with the sentiment from 'Best Thoughts', which seemed appropriate. I masked off a section of my card using post-it notes and using a sponge dauber and So Saffron ink, sponged in some light shining from the windows of the lighthouse too. I kept my card fairly monochromatic, apart from a splash of red on the lighthouse and a thin strip of retired patterned paper down the left side, and the beam of light. Some black and white baker's twine finishes my card.

Here's today's visual summary for easy reference:


That's all from me this evening; back tomorrow with another project. until then, happy stampin'!


Stampin' Up! Supplies Used:

Table built using Product Table Builder by The Crafty Owl - Independent Stampin' Up! Demonstrator.

Let's Paint The Town...Red!

by Joanne James11. February 2016 10:00

I've an extra card for you today; my spot of crafting yesterday gave me just enough time to squeeze in this fun card for this week's CAS(E) This Sketch:


I also used the colour palette over at Fab Friday, which seemed rather appropriate given the sentiment on today's card - after all, as the saying goes 'Let's paint the town red' right?


I used the hostess set 'Love You Sew' for my card today. The paint brushes and swish of paint stamp made the perfect backdrop for my sentiment; I stamped each paint swish twice on my mat of Very Vanilla and overlapped them beneath my sentiment oval in order to extend their length. I cut out my sentiment using my Big Shot and Oval Framelits and popped it up on a couple of dimensionals. A few punched hearts and an epoxy sticker on the largest heart finished my card. 

This hostess set is a great set for crafters and non-crafters alike - I just love the fun sentiments and creative possibilities. Whilst this sentiment isn't a particular 'love' themed one, I think my card could be used as a fun invitation to a loved one or group of friends perhaps. 'Love You Sew' is exclusively available to customers who host a Stampin' Up! party or place a single order that qualifies for Stampin' Rewards. Sale-A-Bration is a great time to host a party with extra hostess rewards available for qualifying party sales. If you would like to host a party, do get in touch; I have a few slots left before the end of March if you would like to take advantage of these great offers. in addition, for all of my customers who host a party between now and the end of Sale-A-Bration, I will provide them with a free 'to go' tutorial to make a set of fun cards using the 'Love You Sew' hostess stamp set. So what are you waiting for? Make the call!

That's all from me today; back tomorrow with another project. until then, happy stampin'!


Stampin' Up! Supplies Used:

Table built using Product Table Builder by The Crafty Owl - Independent Stampin' Up! Demonstrator.


Silhouettes & Script Sunny Day Card

by Joanne James21. January 2016 08:05

Today it's time for a new challenge over at Create With Connie and Mary and this week we have an interesting colour combination for you:


I struggled a little with this colour combo - having seen Lisa Martz, one of the other Design Team members, adorable chick card I couldn't see how to use these colours for anything else (does that ever happen to you when you see something that was in your mind's eye all along?!) Finally this week's sketch over at Retrosketches helped me out and I came up with this:


I used Lost Lagoon for my card base then covered this with a piece of the raindrop patterned paper from the Sale-A-Bration 'Wildflower Fields' designer series paper pack and a top layer of Whisper White, stamped with my 'hello' greeting in Memento Black. I added a bright red frame cut with my Big Shot and square framelits and a Hello Honey sun, also from the Silhouettes and Script' hostess stamp set, which I fussy cut and popped up on dimensionals. I added an epoxy heart, adhered to Real Red cardstock, as a little embellishment.

A super clean and simple card that brings these colours together in a slightly unconventional way; it might not be that chick, but I like it!

Do visit the other Design Team members to see what they did with this week's colours; there's lots of inspiration over on their blogs too!

Enjoy your day and I'll be back tomorrow with another project; until then, happy stampin'!


Stampin' Up! Supplies Used:

  • Silhouettes & Script Clear-Mount Stamp Set
  • Wildflower Fields Designer Series Paper
  • Squares Collection Framelits Dies
  • Big Shot
  • Whisper White A4 Cardstock
  • Tuxedo Black Memento Ink Pad
  • Lost Lagoon A4 Cardstock
  • Hello Honey Classic Stampin' Pad
  • Real Red A4 Cardstock
  • Itty Bitty Accents Epoxy Stickers

Sale-A-Bration and The New Stampin' Up! 2016 Spring-Summer Catalogue Is Here!

by Joanne James5. January 2016 07:00


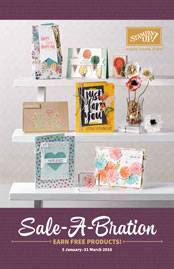
It's time to shake off the January blues, today is THE day - yes, the highlight of the Stampin' Up! calendar, Sale-A-Bration is here! No more sneak peeks - the catalogue is available, the shop is live and from now until 31st March the benefits are yours for the taking. You can click on the icon above or the catalogue on the right hand side of my blog page to access the Sale-A-Bration leaflet to download a copy or go directly to my online shop to place an order - we are LIVE!

So what is Sale-A-Bration? For anyone who hasn't come across it before, it's Stampin' Up!'s annual promotion that is loaded with offers whether you shop, party or join:


Earn a free Sale-A-Bration product for every £45 you spend between 5 January and 31 March. It's the perfect time to purchase those products you've had on your wish list and earn more products for free! 

Pages 4–15 of the Sale-A-Bration brochure show products available throughout the entire Sale-A-Bration sales period (5 January–31 March 2016); Pages 16–19 show limited-time products available only until 15 February, after which another batch of limited-time products will arrive on 16 February!

Earn an additional £20 in hostess credits when you host a party and have party sales of £200 or more (this also applies to individual orders). So for party sales of £200, that makes a whopping £40 of Stampin' Rewards - more freebies! What's more, you can even apply your Stampin' Rewards to a Starter Kit and become a demonstrator yourself - I would love to welcome you to my team!

It’s the best time of year to join Stampin’ Up! During Sale-A-Bration, you can become a demonstrator for just £99 and choose £30 more of FREE products for your Starter Kit. Plus, the kit ships for free! There is plenty of choice and flexibility, whether you want to be a hobby demonstrator and just use your discount to enable you to purchase craft supplies more cheaply, or alternatively would like to build a flourishing direct sales business and sell supplies to others - it's entirely up to you.

If you would like to host a party, real or virtual, please do get in touch; my diary is filling up fast and I would love to share these great benefits with you. If you've ever thought about becoming an SU! demonstrator, now is a great time to do so - I would love to have a no-obligation chat with you about joining my team and the benefits.

As if that wasn't enough, today also sees the launch of the new Spring-Summer catalogue - full of gorgeous new products:
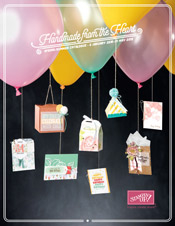
Just click on the image above or in the sidebar on the right to browse the catalogue online, or contact me on 07773 421446 if you would like a paper copy posted out to you and you don't already have a demonstrator. If you are as excited as me and just can't wait, here's the link to my online store - everything is available to purchase from today!

Thanks so much for popping by today - it's always nice to share good news! Check out today's creative post to see a card made featuring a lovely new catalogue product that you are going to be seeing a lot of - click here for more details!

A Happy New Year To You!

by Joanne James31. December 2015 08:05

It's New Year's Eve and it's time for a new challenge over at Create With Connie and Mary and this week we have a great sketch for you:


As soon as I set eyes on this sketch I knew what I was going to do with it - I just love it when that happens! I decided to use up some scraps of Winter Wonderland designer series paper and create a card to celebrate the new year - take a look:


I used a mix of patterns and papers for my banners and then a collection of stars, some solid and some just in outline, cut with my Big Shot and Star Framelits, some metallics star sequins and with my sentiment from the 'Six Sayings' hostess set stamped in Versamark and heat embossed in black across the front of the main star to create the focal point of today's card.

Do visit the other Design Team members to see how they interpreted this week's sketch; there's lots of inspiration over on their blogs too! I will be delivering this card today to my Mother-in-Law who is hosting the annual New Year's James family gathering - I am reliably informed that my brother-in-law's gorgeous puppy Ollie is joining us too, so here's to a day that is likely to be fun and chaotic day!

I'm also linking up today's card over at SUO Challenges where the theme is new years projects.

Enjoy your day and I'll be back tomorrow with another project; until then, happy stampin'!


Stampin' Up! Supplies Used:

  • Winter Wonderland Specialty Designer Series Paper
  • Winter Wonderland Designer Vellum Stack
  • Six Sayings Wood-Mount Stamp Set
  • Stars Framelits Dies
  • Metallics Sequin Assortment
  • Gold Foil Sheets
  • Basic Black 3/8" Stitched Satin Ribbon
  • Banner Triple Punch
  • Big Shot
  • Whisper White A4 Cardstock
  • Embossing Buddy
  • Versamark Pad
  • Heat Tool (Uk)
  • Black Stampin' Emboss Powder
  • Basic Black A4 Cardstock


'Love You Sew' Envelope Punch Board Cotton Reel Card

by Joanne James29. December 2015 22:56

Good evening lovely readers! Have you missed me? I took a week off to celebrate Christmas with my family and friends. Whilst I had plenty of projects to share, my blogging opportunities have been few and far between. I hope you all enjoyed a lovely Christmas and are still making the most of the festivities. Today has seen me back in my craft room though and the first real opportunity to create with my new Spring-Summer catalogue goodies, so I now have lots of sneak peeks to share with you in advance of the catalogue launch next week!

The first is a sweet little project using the new hostess set 'Love You Sew' and showcasing some of the fabby new baker's twine that is in the new catalogue - take a look: 

I made a fun little cotton reel card from a Stampin' Up! notelet using my Envelope Punch Board and stamped it with the cross-stitch hearts and sentiment from 'I love you sew' and wound a long length of the gorgeous new two-tone baker's twine (available in a combo pack with a roll of Basic Black/Mint Macaron twine too), finished with a Melon Mambo Brights button and a bow. An epoxy pink heart embellishment and a decorated envelope finish my card.

I often make these little cotton reel cards to share ribbon and twine samples with customers as it's such a nice way to present it - the addition of a sentiment makes this into a fun card! I'm linking today's card up with the lovely ladies over at 'Less is More' where the theme this week is 'Homespun'; I think my cotton reel works! 

If you like this set, it will be available exclusively to all customers who either place a single order or who have combined party sales of £150 or more. There are some great incentives to host a party during Stampin' Up!'s Sale-A-Bration event that also begins next week on 5th January when the new catalogue launches; more information on this to follow, but if you would like to book a party please contact me now to get a date in the diary. This is such a lovely set for crafters with lots of humorous sayings, you will definitely want to add it to your collection. 

Back tomorrow with another 'sneak peek' project; until then, happy stampin'!


Stampin' Up! Supplies Used:

Hostess set - 140640 Love You Sew - available 5th January

140555 Baker's Twine Combo Pack - available 5th January

Table built using Product Table Builder by The Crafty Owl - Independent Stampin' Up! Demonstrator.


Six Sayings Thankful Fall Card

by Joanne James1. November 2015 09:00

It's Sunday and time for a new challenge over at The Paper Players! This week it is the turn of my good friend Claire to host and she has a seasonal theme to get our creative juices flowing this week:


For today's challenge I just had to use the fabulous scrolled 'Thankful' in the hostess set 'Six Sayings'. That's where I started out - here's where I finished up:


I also used the sketch over at The Friday Mashup and used leaves, so completed both elements of their challenge this week. Isn't that sentiment just fabulous? I decided that I would get a flavour of fall with the patterned leaf paper from the 'Into The Woods' designer series paper, layered on some Early Espresso and a base of Daffodil Delight. This allowed my gold embossed sentiment to really stand out against the Early Espresso banner. I also added a trio of Into The Woods Elements and some gold cord trim: I stamped the leaves in Versamark then heat embossed them in gold and coloured an acorn in with my Early Espresso Stampin' Write marker and stamped the acorn cap in Versamark and heat embossed that with some retired Early Espresso to give a little shine. 

This is such a colourful card and I love the Thankful sentiment - I for one have much to be thankful for and what better time to let others know how much they are appreciated. I'm also linking up with SUO challenges where their current theme is thank you cards.

Before you reach for your ink and papers, check out what our amazing team has created to inspire you this week:

The Paper Players Design Team
Anne Marie Hile - on leave
 
 
Here's a quick recap of our challenge rules:
 
1.  Create a new paper project
2.  Upload your creation to your blog with a link back to us and provide a direct link to the post featuring your challenge submission.
3.  Please link your card to no more than three challenges, TOTAL.
4.  Have FUN! 


I look forward to seeing your thankful fall-themed creations this week. We are having a sport-free weekend for a change, with a lie-in following our trick-or-treat exploits yesterday and a quiet day before returning to school tomorrow. Amen to that!

Back tomorrow with another project; until then, happy stampin'!


Stampin' Up! Supplies Used:

Table built using Product Table Builder by The Crafty Owl - Independent Stampin' Up! Demonstrator.


Mini Catalogue

BROWSE THE CATALOGUE

New Year, new products - the new Stampin' Up! Mini Catalogue is here! For more details and to download your copy click here

Shop Online

Access my online shop 24 x 7, 365 days of the year:

Current March hostess code:

 3JRGYMXT

Shop Online

Join My Team

It's always a great time to join Stampin’ Up! New team members can get £130 worth of products for only £99 + free business supplies + free shipping + all the fun being a part of Stampin’ Up! Stampin' Up! has something for everyone: join my growing team and benefit from my support to enjoy Stampin' Up! however you choose.

If you're interested, call me for a chat to understand how I can help you realise your goals. Alternatively, if you have already decided to sign up and you just can't wait, please click here for the link to the online form where you can sign up and order your starter kit right away! 

Scrapbooking

Stampin' Up! has introduced a new range of 12x12" scrapbooking product and kit - the full range is now available to purchase online. To download a copy of the new digital Scrapbooking Catalogue click here.

Latest Kits!

Stampin Cut and Emboss

The Birthday Bash Kit is just one of the latest kits in the online store - get yours here!

2024-25 Annual Catalogue

BROWSE THE CATALOGUE

Click on the image to download your copy of the 2024-25 annual catalogue. For a full list of current SU! supplies, go to my online store. If you would like any help or advice, please drop me a line at joanne@thecraftyowl.co.uk or give me a call on 07773 421446 - I'd be happy to help.

New Online Exclusives

There are new products available exclusively in the online store from 7 January - check them out here.

About Me

Hi I'm Joanne and live in Northampton and when I'm not looking after my husband and two beautiful children, am an avid crafter with a passion for all things Stampin' Up!

I must confess that I have never been a big rubber stamper - until I discovered Stampin' Up! that is. I love the fact that I can get such great results with co-ordinating stamps, inks, papers and punches - the possibilities are endless! Join me on my stamping journey as I share the things I love and be inspired to create amazing things yourself!

Follow Me

Monthly Newsletter

Box Builder

Click the button above to use Box Buster to create your custom box design using the Envelope Punch Board!

Kits Collection Now Available!

Stampin Cut and Emboss

The new Kits Collection from Stampin' Up! is now available!

Click here to see the current kits available and order yours online today.

I Design For


Stampin' Up Stuff

This is my personal blog and is not endorsed by Stampin’ Up! I hope you find it a plentiful source of ideas and personal inspiration but please don't copy my designs for contest submission or use for classes, publication or sale without express permission.

DSP Special Release

Check out 3 popular designer series paper designs in fresh new colourways! Available exclusively in the online store from 3 December - check them out here