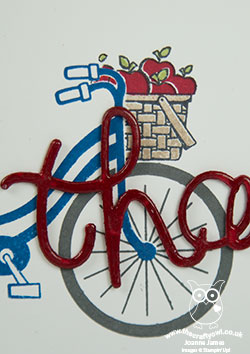
Stampin' Up! Sneak Peek - Bike Ride For The Paper Players

by Joanne James16. April 2017 10:00

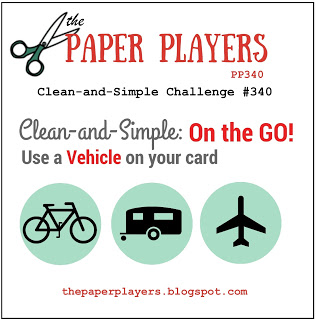
It's Sunday and time for this week's new challenge over at The Paper Players! It's the turn of the amazing LeAnne to host this week and she has a clean and simple challenge for us to work with:
 

So I couldn't resist sharing a sneak peek of a brand new stamp set with you today - a fabulous two-step stamping set called 'Bike Ride', that I received as part of an all-attendee giveaway at Onstage in Amsterdam last week - take a look:
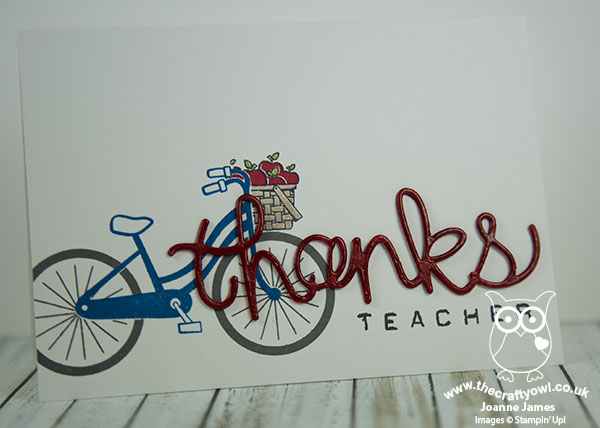
 

Isn't that fun?! Read on for the low-down on today's card:

Demonstrator Perks And A Sneak Peek - One of the best perks about being a Stampin' Up! demonstrator is being able to get your hands on new products before anyone else does! I came home from Onstage last week with some new stamp sets including this fun bicycle stamp set. I was also able to participate in an event-only pre-order which means I am expecting another box of new goodies on Tuesday morning - can't wait! If you are excited by getting your hands on new products early, do get in touch with me about joining my team now so that you can take advantage of these pre-order demonstrator perks too.

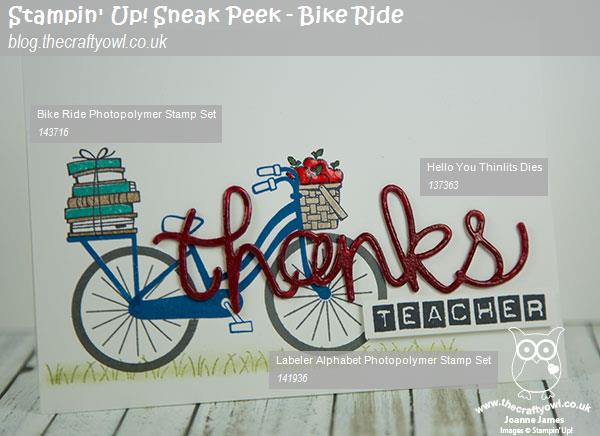
A Bike Ride For Teacher - Today's sneak peek is a set called 'Bike Ride'. Such a fun two-step stamp set with lots of little accessories - everything from flowers to apples and books to an adorable puppy dog! You can build endless combinations to make your two-wheeled creations totally unique. The best bit? This set also has some co-ordinating Build A Bike framelits that will make putting your creations together as easy as can be! My CAS card today uses just the stamp set - I created a few masks to enable me to stamp my bicycle as a single layer and adapted the basket to fit the front of my bike. For my first card I stamped my bicycle slightly off the page and added a basket of apples with an overlaid thanks diecut from the retiring 'Hello You' thinlit set (I cut this out 3 times, stacked them and heat embossed with clear embossing powder for added dimension and shine) and the word teacher stamped with my Layered Alphabet set -so useful for custom greetings. 

Teacher Thank You Take Two - I was having so much fun with my set, I created a second card to share with you too! This time I stamped the whole of my bicycle on the card front so that in addition to my basket of apples (accented with my fine tip glue pen) I could add a stack of books to the rear. I also grounded my bicycle with a little sponging and some stamped grass (from the retiring 'Basket Bunch' stamp set) and stamped the word teacher in bold block lettering and cut it out and popped it up on dimensionals for added impact:
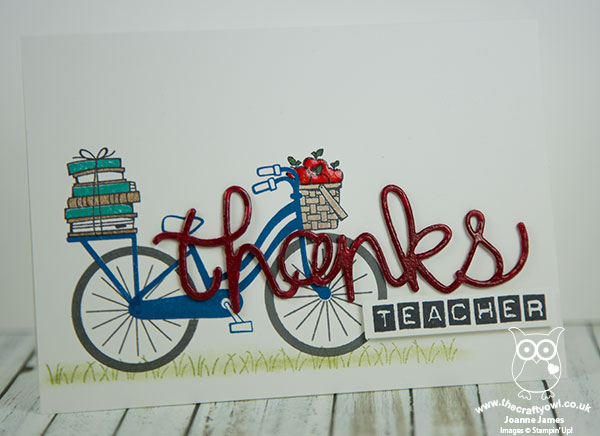
 

I had so much fun playing with this set and making an early start on my teacher thank you cards for the end of next term. I've lots more ideas for this set and I can't wait to get my hands of the framelits when the new catalogue goes live on June 1st! 

Here is the visual summary of the key products used on today's project for you to pin for easy reference:

 

You can see all of my Product and 'How To' summaries on my 'How To - Tips and Techniques' Pinterest board in case you've missed any. 

Before you reach for your ink and papers, check out what our amazing team has created to inspire you this week:

The Paper Players Design Team
 
 
Here's a quick recap of our challenge rules:
 
1.  Create a new paper project
2.  Upload your creation to your blog with a link back to us and provide a direct link to the post featuring your challenge submission.
3.  Please link your card to no more than four challenges, TOTAL.
4.  Have FUN! 

I look forward to seeing your clean and simple creations in the gallery this week. Enjoy the rest of your weekend - we will be either hunting for or eating chocolate as our primary activities today - I think we might need a bike ride later to work some of our calories off! I'll be back tomorrow with another project, also with a travel theme so be sure to tune on for that, Until then, happy stampin'!


Stampin' Up! Supplies Used: 

Table built using Product Table Builder by The Crafty Owl - Independent Stampin' Up! Demonstrator.

Love Sparkles Congratulations Card

by Joanne James23. February 2017 07:00

Today I'm sharing a congratulations card that I made for one of the hard-working members of my team who has been achieving great things during Sale-A-Bration - take a look:


 Here's the low-down on today's card:

A Sparkly Celebration - I took the 'Celebrate' stamp in the 'Love Sparkles' stamp set and decided to create a multi-coloured embossed background to echo the idea of sparklers and fireworks. I used a selection of (retired) coloured embossing powders - Melon Mambo,Blushing Bride and Crushed Curry - but you could equally ink your stamp with the same colour inks and a sponge dauber, then heat emboss with clear embossing powder. 

Going For Gold - I added a stacked gold glimmer 'you', diecut with my Hello You Thinlits, a couple of strips of gold glimmer top and bottom and a starburst of gold glitter stars to add to the celebratory feel.

Be A Hoot Too - My team of demonstrators, known as The Hoots, range from happy hobbyists to full-time business builders - everyone is welcome and they are all united by a love of crafting and more specifically, a love of crafting with Stampin' Up! products. If you have ever considered joining Stampin' Up!, whether to get a discount on your hobby supplies or because you want to run your own successful direct sales company (or somewhere in between), Sale-A-Bration is one of the best times of the year to do so. During Sale-A-Bration, your starter kit is extra special as not only do you get your choice of £130/175 Euros worth of product for £99/129 Euros, but you get to choose an additional 2 stamp sets FOR FREE - that could be worth as much as an extra £93/126 Euros. There are so many ways in which you can benefit from being a Stampin' Up! demonstrator - please do give me a call on 07773 421446 or email me if you'd like to discuss further.

Here is the visual summary of the key products used on today's project for you to pin for easy reference:


You can see all of my 'How To' summaries on my 'How To - Tips and Techniques' Pinterest board in case you've missed any. 

Congratulations Helen and I hope you liked your colourful card! 

Enjoy your day and I'll be back tomorrow with another project. Until then, happy stampin'!


Stampin' Up! Supplies Used:

Table built using Product Table Builder by The Crafty Owl - Independent Stampin' Up! Demonstrator.

Twisted Pop Up Panel Sending Love Card

by Joanne James24. January 2017 07:00

Today I'm sharing a fancy fold card that I made for my first technique class of the year that is also perfect for a couple of challenges this week:


The ladies over at TGIF Challenges are working with a love theme and the gals over at Just Add Ink have a blog hope this week featuring Pop Up and Interactive Cards. I urge you to check it out and the wonderful entries into this week's challenge, there are some fabulous examples of interactive cards on show.

I have been wanting to have a go at the Twisted Pop Up Panel card that has been appearing everywhere over the internet in recent weeks, so having watched a few tutorials I got down to business. On the outside a fairly straightforward looking envelope-style card:


It's when you open it up that the magic happens and the pop-up is revealed:


And here it is fully opened so that you can see the fun fold out panels in all their glory:


 Here's the low-down on today's card:

Twisted Pop Up Panel Card - I looked at several different versions of this card in order to work out how to create my pop-up panel card and in true Crafty Owl fashion didn't follow any one set of instructions, rather combined a number of 'learns' to create my card. I may well shoot my own video tutorial on this later this week, so if you'd like to find out how I did it, then pop back and check it out. One things for sure, the ladies at my technique class loved it and have definitely got the bug for creating more of them now!

Sending Love in Red and White - My technique class featured the Sealed With Love product bundle - used for the 'Sealed with a kiss' button on the front of my card and that fabulous stamped and diecut heart that adorns the 'O' of the word LOVE. For me this card was a real opportunity to showcase the Sending Love Designer Series Paper Stack, with five different patterns on show. The real challenge was which five of the twelve red and white patterns in the DSP stack to choose - check them out:

My team laugh at me as they think I have an unhealthy obsession with designer series paper and to be honest, they are probably right! I'm not one of those to keep it and stroke it though - I do cut into it and use it and am always looking for ways to incorporate it into my designs. I particularly like the 6" x 6" stacks, which are incredibly good value for money.

Large Letters, Big Impact - I've said it before and I'll say it again - the Large Letter Framelits are great and well worth the investment! They are great for a sentiment with impact; I've paired mine with the 'you' from the 'Hello You Thinlits' to complete my Valentine's message. If you are considering purchasing the Large Letter Framelits, now is an even better time to pop them in your shopping basket - add a little something to them and earn two free Sale-A-Bration items or alternatively why not include them in a starter kit? 

Here is the visual summary of the key products used on today's project for you to pin for easy reference:


You can see all of my 'How To' summaries on my 'How To - Tips and Techniques' Pinterest board in case you've missed any. 

Enjoy your day and I'll be back tomorrow with another project. Until then, happy stampin'!


Stampin' Up! Supplies Used:

Table built using Product Table Builder by The Crafty Owl - Independent Stampin' Up! Demonstrator.

A Playful Palette Happy Birthday

by Joanne James16. June 2016 08:05

I'm back from a special day yesterday: Rebecca celebrated her 11th birthday - wherever did that time go?! She was slightly disappointed that it was a school day, although genuinely touched by the number of children that came up to her to wish her a happy birthday yesterday, and two little juniors who even came and sang to her - how sweet! It seems when you're Head Girl everyone knows when it's your birthday!

Anyway - today it's time for a new challenge over at Create With Connie and Mary and this week we have a sketch for you:


For my card today I decided on a showcase of in-colours and one of the new designer series paper stacks - take a look:

Here's the low-down on today's card:

A Playful Palette of Colour - The designer series papers featured on my card today feature four of the five new in-colours (only Dapper Denim is absent) and are one of the products featured in the Playful Palette suite - modern and colourful designs, inspired by brushstrokes and artwork. Here's a photo showing other items in this creative suite:


Layering Squares - I cut each of my four squares with my new Layering Squares framelits and chose to highlight one of the squares with a narrow scalloped border in Peekaboo Peach. These layered squares are great for creating perfectly aligned borders, frames and shaker cards and can be used in endless different combinations to achieve a different effect each time.

Hello You Happy - I finished my card with a sentiment comprising a little banner using words from the 'Crazy About You' stamp set and a die cut 'happy' using one of the 'Hello You' thinlits. I diecut my 'happy' in Emerald Envy, dipped it in Versamark and then heat embossed it with clear embossing powder and repeated the process 3 times to get a smooth and glossy finish. It really stands out against the patterned papers and the Sweet Sugarplum base  - I love it!

Here is the visual summary of the key products used on today's project for you to pin for easy reference:


You can see all of my 'How To' summaries on my 'How To - Tips and Techniques' Pinterest board in case you've missed any. 

Do visit the other Design Team members to see what they did with this week's sketch; there's lots of inspiration over on their blogs too!

Enjoy your day; I'm getting together with some of my team for a catch-up, which should be fun. I'll be back tomorrow with another project; until then, happy stampin'!


Stampin' Up! Supplies Used:

  • Playful Palette Designer Series Paper Stack
  • Hello You Thinlits Dies
  • Layering Squares Framelits Dies
  • Crazy About You Stamp Set
  • Sweet Sugarplum A4 Cardstock
  • Peekaboo Peach A4 Cardstock
  • Emerald Envy A4 Cardstock
  • Very Vanilla A4 Cardstock
  • Tuxedo Black Memento Ink Pad
  • Versamark Pad
  • Clear Stampin' Emboss Powder
  • Heat Tool (Uk)

Hello Sunshine CAS Card

by Joanne James28. March 2016 09:00

I've been having fun playing along with the CASology challenges for the last couple of weeks, so today I have a couple of clean and simple cards for this week's challenge where the theme is weather:

My first card is a fair weather sunshine card using a freehand cut cloud (I stuck lots of different sized punched circles together and created a template to make this oversized cloud) and a sunburst cut using the Sunburst Thinlit and then punched with a 2 1/2 circle punch:


I can't believe I was 'on the fence' about buying this Sunburst Thinlit when I first saw it in the catalogue; it is so much easier than creating sunbursts by hand! I added a sentiment combination of a 'Hello You' diecut and a stamp from the 'Crazy About You' stamp set. A trio of rhinestones completes my fair weather card.

Here's the visual summary of the key supplies used to make this card for you to save for future reference:


Here too is the cheery summer colour combination I used - fee free to save it:


This is the weather I will be hoping for with the children home on school holidays this week; I'm rather thinking it might be a little more like my next card! I'll be along with my second card shortly; until then, happy stampin'!


Stampin' Up! Supplies Used:

Table built using Product Table Builder by The Crafty Owl - Independent Stampin' Up! Demonstrator.


Irresistibly Yours Rainbow Stripes Birthday Card

by Joanne James24. February 2016 15:01

It's mid week Wednesday - happy hump day everyone! I'm a little later posting today as I didn't get a chance to post prior to my Coffee and Card Class at Bells in Northampton this morning. Fun was had by all and we are looking forward to doing it again in two weeks time at the next session on Wednesday 9th March, so I hope to see some of you there! Back to today and I have a card for this week's CAS(E) This Sketch:

There are some fabulous Design Team examples over there this week and I just had to have a go. The weather in the UK has been much brighter the last few days; gone are the rain clouds, with sunny, crisp frosty days in their place - the change in weather made me think of rainbows and I had the urge to create a bold and bright birthday card to this week's challenge:

Using a piece of Real Red for my card base and a Basic Black mat, I took a piece of Irresistibly Yours Speciality Designer Paper (I used some of my last year's Sale-A-Bration paper, but the current pack has a slightly narrower stripe that would work too). I sponged my panel using sponge daubers a line at a time in a rainbow of colours: Calypso Coral, Watermelon Wonder, Real Red - left a few lines blank to house my diecut - Tangerine Tango, Pumpkin Pie, Daffodil Delight, Crushed Curry, Cucumber Crush, Tempting Turquoise, Pacific Point, Rich Razzleberry and Elegant Eggplant. Sponge daubers are great for allowing control and shading without needing to mask off your pre-embossed card. For my sentiment, I used a combination of a diecut sentiment cut with my Big Shot and 'Hello You' thinlits and a stamp that I heat embossed in white on black from the 'Endless Birthday Wishes' stamp set. I also used this stamp set to decorate the inside of my card and the envelope - no naked envelopes today! 

This is one of those cards that is easy to create, bright and suitable for pretty much anyone - young or old, girls and boys; a great card to have on standby! It has a lovely subtle sheen in real life due to the embossing on the white lines and it's also nice and flat, so great for mailing. 

Here's today's visual summary for easy reference:


That's all from me today; I'm off to put the finishing touches to a few more projects. Back tomorrow with a cute card for this week's new challenge over at Create With Connie and Mary. until then, happy stampin'!


Stampin' Up! Supplies Used:

Table built using Product Table Builder by The Crafty Owl - Independent Stampin' Up! Demonstrator.

Love At First Sight

by Joanne James30. January 2016 20:00

I hope you are all enjoying your weekends. So far mine has been spent doing laundry, assisting the James Juniors with their homework (Ted Hughes poetry and an art project today!) and preparing for my technique classes next week. I did find time to finish a card that I started yesterday though: another Valentine's card, using this week's sketch over at Freshly Made Sketches and the top line of the tic-tac-toe board over at Stamps, Ink, Paper and fitting with the 'love' theme over at Paper Craft Crew too.

   SIP Tic Tac Toe 32 800    Love Theme Challenge 179 for the Paper Craft Crew.

In order to fit in my large sentiment, I went with an unusual 8 1/4" x 5 1/2" sized card - take a look:

I stamped the 'l v e' from the 'Larger Than Life Alphabet and Numbers' stamp set in Versamark and heat embossed them in black, then substituted the 'o' from my 'love' sentiment with the heart from the 'First Sight' set, which I stamped in Real Red on Real Red cardstock, then overstamped again in Versamark and heat embossed with clear embossing powder for additional shine. I used a piece of Everyday Chic designer series paper for my border panel and finished off my sentiment inside the card with one of the 'Hello You' thinlits and an outline stamped red heart:


I even created a custom envelope with some Real Red envelope paper and the help of my trusty Envelope Expert tool, which I also decorated with a stamped red heart.

I love the layers of this card and the letters shine beautifully; I think this may be one of my favourite Valentine's cards that I've ever made. Today's blog title comes from the combination of one of the stamp sets I've used today and the sentiment and it got me thinking - I remember meeting my now husband for the first time and thinking even then he would be the man I would one day marry; I do believe there is such a thing as love at first sight - do you? Do leave me a comment below today's post - I would love to know what you think.  

That's all from me today; back tomorrow with a new card for this week's challenge over at The Paper Players. Until then, happy stampin'!


Stampin' Up! Supplies Used: 

Table built using Product Table Builder by The Crafty Owl - Independent Stampin' Up! Demonstrator.

I Did It! A Simple Thank You Card for #TGIFCTD01

by Joanne James23. June 2015 22:47

I'm late today so a quick blog post from me, but none the less an important one; I finally made a card for the TGIF Challenge Throwdown that doesn't break any rules! It's similar to my first attempt (you can read all about that one here) albeit using a different thinlit and no contraband product from my pantry! Here's a reminder of the basket and pantry items:


Once again I managed to use all of the basket items for my card, along with some of the pantry items - here's my card:

I went with a simple white card base, this time stamped with the smaller, squat Work of Art stamp three times across the middle, then die cut my 'hello' out of a top layer of Whisper White and used the negative space so that the colour swatches show through. I finished my sentiment with the 'you' from Work of Art, and added a larger than life, rather over the top gold thinlit butterfly to finish. 

I love using the negative space of thinlits as much as the positive and this sentiment combination reminds me of a particular friend of mine who always says this to me by way of greeting and it never fails to make me smile. The butterfly is such a statement against the clean lines of the rest of the card, yet it looks as if it has just flown in and landed there over the greeting.

Simple, yet not without considerable thought! If you would like to see lots of other ways to use the above product combinations, do pop over to the #TGIFCTD01 page and check out the work of both the design team and the other gallery entrants - there is some great inspiration to be had.

That's me done for today; back tomorrow with another project. Until then, happy stampin'!


Stampin' Up! Supplies Used:

Table built using Product Table Builder by The Crafty Owl - Independent Stampin' Up! Demonstrator.


Work of Art Butterfly Thinlit Card and a Cautionary Tale

by Joanne James17. June 2015 09:51

Mid-week is here - hurrah! Today I'm sharing a card that I set out to make for the TGIF Throwdown Challenge - an intriguing concept where you have to use at least 4 things from a basket of items to make your card whilst also being allowed to use items from the pantry - just like some of the cooking programmes you see on TV! Here is the challenge badge and the basket list:


You have a month to enter so when I sat down at the weekend I thought I would have a go - here's what I came up with using this eclectic mix of products:

I needed a birthday card for my sister-in-law who celebrated her birthday yesterday so thought these colours would make for a lovely feminine card. You know how much I love the 'Hello You' Thinlit dies and decided to go for a rather ambitious paper-pieced affair, using the negative space of the multiple die cut 'happy' to show the wash of colour from the Work of Art stamp set. I merrily stamped, paper pieced, punched and coloured, adding my showcase gold foil butterfly and finishing my sentiment with the two words from the 'Crazy About You' stamp set and the 'you' from Work of Art, the last of which I punched out with my 1 3/4" circle punch and added a couple of solid colour circles beneath my butterfly to balance the design and finishing with a few gold sequins. My overhanging elements necessitated a bespoke envelope - not troubled by that, as Envelope Expert enabled me to make one of those from some co-ordinating DSP in a jiffy. 

So I was feeling suitably pleased with my card and the fact that I'd used not only four but all of the #TGIFCTD01 basket items, when I read yesterday's TGIF blog post and realised I had overlooked one small but important thing when I read the initial challenge post - the pantry items!! Not only do you need to use the basket items, you are restricted in terms of pantry items .... and when I checked before writing this post, I realised my use of the 1 3/4" circle punch, the 'Crazy About you' stamp set  to complete my sentiment, white ink and my sequins causes me to step outside the pantry and fall foul of the TGIF challenge rules - oh bother!

As someone who designs for two challenge teams, you would think I would know better!! I won't therefore be linking up with TGIF for the Throwdown Challenge - those guys and gals are strict enforcers of their challenge rules! - but wanted to share my card with you anyway, as I rather like it! I thought it worth sharing the story behind today's card though for the moral of 'if you are going to enter a challenge, make sure you read and understand ALL of the rules before you start' - if any of you reading this have found your card deleted from a challenge gallery without notification, it's probably because you didn't follow the rules :-) I say this as someone who moderates boards, so trust me - I know what I'm talking about! Maybe I'll try and squeeze in another rule-abiding attempt before next week's deadline - watch this space...

Back tomorrow with our new challenge over at Create With Connie and Mary; until then, happy stampin'!


Stampin' Up! Supplies Used:

Table built using Product Table Builder by The Crafty Owl - Independent Stampin' Up! Demonstrator.


Tags: , , , , , , ,

Cards | Stamping

Teacher Thank You Card

by Joanne James27. May 2015 21:42

So I'm back with the second of my cards for this week's challenge over at CAS(E) This Sketch:


As the end of the school year will be upon us soon enough, I decided to combine this card with this week's theme over at The Challenge and get ahead and make a teacher thank you card:

I used a base of Pear Pizzazz and a mat of real Red - apple colours! - and having cut a stencil of the word 'Thank' using my Silhouette e-cutter, I stamped the word Thanks from the 'Another Thank You' stamp set repeatedly in Memento Black into the space and sponged over the whole space in Pear Pizzazz to give the letters more definition. To complete the sentiment, I die cut the word 'you' using my Big Shot and 'Hello You' thinlits three times out of Real Red cardstock and stuck them together to create a raised piece, then painted it in Crystal Effects to give a glossy finish. I used a snippet of chalkboard paper and stamped the word 'teacher' in white kraft ink to give a chalkboard effect (the stamp is from the retired set 'for my family' - it's a keeper!) and added both to my card, along with a cardboard apple embellishment from my Project Life Playground accessory kit and also a 'vintage' wire paper clip. This final addition also enables me to link up to 'Less is More' this week, where the recipe is to add metal to your card. 

I really love the way this card turned out; I like the collage feel it has, yet still retaining my clean and simple style - here's a close up of the stamping and stencilling detail: 

It's a little more embellished than my usual LIM cards, so I'm hoping it will still be permissible although I know the lovely ladies over there will give me some pointers if I've strayed too far from the brief :-) This is however much more what I had in mind for the sketch, so I hope the CAS(E) This Sketch team like it! The James Juniors are already arguing about which of their teachers will be receiving it - I think I might have to make a few copies before the end of term approaches!

Back tomorrow with my card for this week's new challenge over at Create With Connie and Mary. Until then, happy stampin'!


Stampin' Up! Supplies Used:

Table built using Product Table Builder by The Crafty Owl - Independent Stampin' Up! Demonstrator.


Mini Catalogue

BROWSE THE CATALOGUE

The mini catalogue is now live! Read and download your copy here.

Shop Online

Access my online shop 24 x 7, 365 days of the year:

Current March hostess code:

S9F2XJJW

Shop Online

Join My Team

It's always a great time to join Stampin’ Up! New team members can get £130 worth of products for only £99 + free business supplies + free shipping + all the fun being a part of Stampin’ Up! Stampin' Up! has something for everyone: join my growing team and benefit from my support to enjoy Stampin' Up! however you choose.

If you're interested, call me for a chat to understand how I can help you realise your goals. Alternatively, if you have already decided to sign up and you just can't wait, please click here for the link to the online form where you can sign up and order your starter kit right away! 

Latest Kit!

Stampin Cut and Emboss

The Rock Legend Kit has all you need to make 8 cards with coordinating envelopes. Along with the new Panda Friends Kit, both are available from January 4th for just £14 each - get yours here!

2023-24 Annual Catalogue

BROWSE THE CATALOGUE

Click on the catalogue for a full list of current SU! supplies - if you would like to order any of the items featured, please drop me a line at [email protected] or give me a call on 07773 421446 - I'd be happy to help.

New Online Exclusives

There will be new products available exclusively in the online store from 5 March - check them out here.

About Me

Hi I'm Joanne and live in Northampton and when I'm not looking after my husband and two beautiful children, am an avid crafter with a passion for all things Stampin' Up!

I must confess that I have never been a big rubber stamper - until I discovered Stampin' Up! that is. I love the fact that I can get such great results with co-ordinating stamps, inks, papers and punches - the possibilities are endless! Join me on my stamping journey as I share the things I love and be inspired to create amazing things yourself!

Follow Me

Monthly Newsletter

Box Builder

Click the button above to use Box Buster to create your custom box design using the Envelope Punch Board!

Kits Collection Now Available!

Stampin Cut and Emboss

The new Kits Collection from Stampin' Up! is now available!

Click here to see the current kits available and order yours online today.

I Design For


Stampin' Up Stuff

This is my personal blog and is not endorsed by Stampin’ Up! I hope you find it a plentiful source of ideas and personal inspiration but please don't copy my designs for contest submission or use for classes, publication or sale without express permission.