Playing In The Rain Give It A Whirl Interactive Card PP639

by Joanne James7. May 2023 08:00

Today it's Sunday and time for this week's new challenge over at The Paper Players! It's the turn of the fabulous Claire to host this week and she has a fun theme challenge for us to work with:


Claire took her 'rainy days' theme from the saying "April showers bring May flowers"; well here in the UK we have a bank holiday weekend to celebrate the King's Coronation and those showers are continuing with a vengeance, so this theme is perfectly appropriate. I decided to create a fun interactive card using some neglected dies and take the opportunity to use up some of my Rain or Shine designer paper from the Spring mini catalogue too - take a look:


Here's the low-down on today's card:

I added some of the paper with shiny embossed raindrops to the base of my cardfront and onto a second piece that I diecut with the front plate of the Give It A Whirl Dies, the added a trio of animals snipped from one of the designer paper sheets to the wheel before attaching together with a small brad and adding a sentiment from the Playing In The Rain stamp set and a fox that I diecut from the paper too. The window is cut to the left of the fox so that his friend is revealed:

By rotating the wheel in the direction of the arrow just to the right of the fox's tail, a new friend appears. Here's the second rotation, featuring a pig:


 Finally the third rotation features the turtle, complete with his umbrella too: 

I decorated the inside of my card with some puddles and raindrops to complete my card. 

Here is the visual summary of the key products used on today's project for you to pin for easy reference:
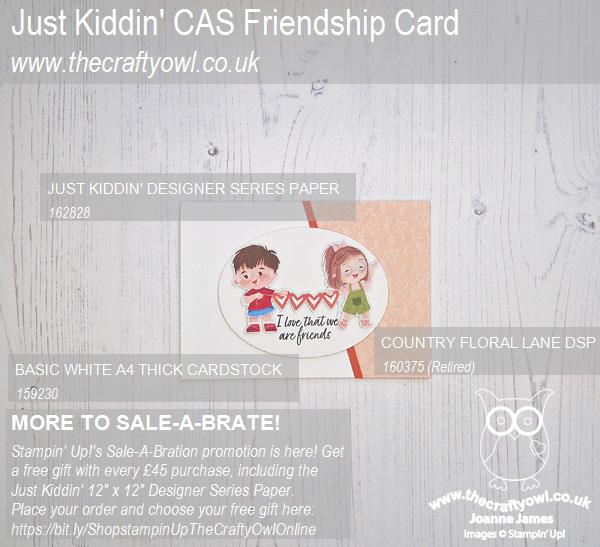
 

You can see all of my Product and 'How To' summaries on my 'How To - Tips and Techniques' Pinterest board in case you've missed any. 

Before you reach for your ink and papers, check out what our amazing team has created to inspire you this week:

Here's a quick recap of our challenge rules:
 
1.  Create a new paper project
2.  Upload your creation to your blog with a link back to us and provide a direct link to the post featuring your challenge submission.
3.  Please link your card to no more than four challenges, TOTAL.
4.  Have FUN!

Enjoy your day; we have a quiet day with nothing much planned. GCSEs have already begun and will soon be followed by A Levels, so the James Juniors are busy studying. Perhaps I'll grab an umbrella and go jump in the puddles - there are many! I'll be back tomorrow with another project. Until then, happy stampin'!


Stampin' Up! Supplies Used: 
Table built using Product Table Builder by The Crafty Owl - Independent Stampin' Up! Demonstrator.

In Colour Oops A Daisy Cards AYSI298

by Joanne James5. May 2023 12:00

Today I'm sharing my design team card for our new challenge over at As you See It where it's time for a timely 'fill in the blank' challenge chosen by me:


It's always fun to be able to play with new craft goodies so this week's challenge gives everyone the chance to do just that! With the launch of the Stampin' up! 2023 Annual Catalogue this week, I have lots of new goodies; I chose to play with my Cheerful Daisies bundle and the new 2023-25 In Colours for my card today - take a look:


Here's the low-down on today's card:

I still had my Alphabet A La Mode Dies out on my desk still from the cards I made last week so I decided to play with one of my favourite sentiments in the Cheerful Daisies bundle and combine the two. I added a panel of in colour designer paper and diecut the letters to the word 'daisy' and fussy cut 'Oops-a-' from the stamped one and mashed them together, decorating with a stamped and diecut daisy, some foliage and a trio of in colour gems to finish:

I finished the inside with one of the other stamps in the set and another masked sentiment:


The card above features the new in colour Wild Wheat, but I also made one in each of the other in colours too - Pecan Pie, Boho Blue, Moody Mauve and Pebbled Path:


What do you think? Do you have a favourite of the in colours yet? Do leave me a comment below - I'd love to hear your thoughts!

I'm linking today's card collection up with the team over at The Paper Craft Crew who are featuring the new 2023-25 in colours this week.

Here is the visual summary of the key products used on today's project for you to pin for easy reference:


You can see all of my 'How To' summaries on my 'How To - Tips and Techniques' Pinterest board in case you've missed any. 

Here's a summary of our challenge rules:

  • Create any card, scrapbooking page, 3D project or packaging project that fits the challenge.
  • Please include the challenge graphic and link back to the challenge in your blog post. Turn off word verification so we can leave you lots of lovely comments. Make sure you link the post not the whole blog to the Linky. Use #AYSIXXX when uploading to a public gallery.
  • If you’re unsure about ‘the rules’, check the details under the Challenge Guidelines tab on the As You See It Challenge homepage.
  • In a Fill in the Blank challenge, complete the sentence in the Challenge Banner with the phrase that is true for you and create your project using the words you used. Tell us what you said in your blog or on your site.

Enjoy your day and I'll be back tomorrow with another project. Until then, happy stampin'!


Stampin' Up! Supplies Used:

Table built using Product Table Builder by The Crafty Owl - Independent Stampin' Up! Demonstrator.


A Big Thank You With Timeless Arrangements CCS510

by Joanne James2. May 2023 12:00

It's Tuesday and time for a new challenge over at CAS Colours & Sketches. The super-talented Cecile is hosting this month and our first challenge is a colour challenge: 


I love Cecile's colour choices this week and since today is the official launch of the new annual catalogue, it seemed only right that my card features some new product! I took some inspiration from the sketch over at Inspired By (flipped as I need the boxes to be the other way around to suit my sentiment) and the idea of decorated boxes - although instead of white flowers on coloured boxes, I used my 'boxes' to house my sentiments and accented with coloured foliage - take a look:


Here's the low-down on today's card:

My card features a new bundle called 'Timeless Arrangements' - a lovely set that allows you to build sentiments in one, two or three phrases and decorate them. The die set is truly fabulous - a set of labels with a pretty stitched detail and a selection of dies that both cut out some of the stamped images, and also contain some foliage on horizontal bands, that act as a guide to enable you to align them both with each other for layering and behind the sentiment label perfectly:


I used two sentiments on the front of my card and carried the detail to the inside of my card with a third sentiment and a little extra background stamping too:


This card is for all of you reading this that continue to support my Stampin' Up! business by shopping with me in person and in my online store and comment both here and elsewhere on my social media channels. It means a lot, so a big thank you to you all from the bottom of my heart!

I really love this bundle and know I am going to get so much use out of it, so be prepared to see lots more it over the next 12 months!

Here is the visual summary of the key products used on today's project for you to pin for easy reference:


You can see all of my 'How To' summaries on my 'How To - Tips and Techniques' Pinterest board in case you've missed any. 

As a reminder, for our colour challenges, you must use all of the stated challenge colours. You may also use neutral colours; however, the challenge colours should be the most noticeable ones featured on your card. We use Stampin' Up! color names for reference, but you are welcome to use any other companies' products as long as you match the challenge colours as closely as possible.

Enjoy your day and I'll be back later this week with another project. Until then, happy stampin'!


Stampin' Up! Supplies Used:

Table built using Product Table Builder by The Crafty Owl - Independent Stampin' Up! Demonstrator.

Stampin' Up! 2023 Annual Catalogue Live and New Confetti Birthday Kit

by Joanne James2. May 2023 10:20

The wait is over - it's May 2nd and the new 2023-24 Stampin' Up! Annual Catalogue is here! You will find a permanent link to the new catalogue on the right hand side of my blog but for today you need look no further than the picture below which will take you straight to the new catalogue: 


The new catalogue is fantastic, with so many great new products to choose from. I've sent paper copies to everyone who has shopped regularly with me in the last 12 months; if you live in the UK, don't have a paper copy of the catalogue but would like one, then do get in touch and I can arrange to send one to you. A digital copy of the new catalogue can be accessed via the image above and it will be permanently linked via my blog on the right hand side if you don’t have a paper copy and wish to browse. If you've already made your shopping list and just want to go straight to the shop to place your order, click here - ordering systems have now fully transitioned from the old stock items to the new so you are good to go! Also, remember to add the current hostess code for May 7DXKGX9G if your order is less than £150 and ensure your preferences are set to 'contactable' to receive a thank you in the post from me.

What will be first on your list - in colours? New or returning colour favourites? A new stamp set, dies or bundle maybe? I'll be sharing my favourites in the coming weeks.

There is also a new kit launched in the online store today: The Confetti Birthday Kit, the newest addition to the Kits Collection by Stampin’ Up!, comes with everything you need to quickly create confetti shaker cards—a total of 9 cards in 3 lively designs. Celebrate in style with bright, bold colours, confetti, and birthday greetings full of joy!


Here's a link to the unboxing video that shows the kit in more detail:

That's a lot of information for one post; if I were you I would put the kettle on, put your feet up and get comfy and settle down with your new catalogue for a browse and start creating that all-important wish list!

Back later this morning with today's creative post; until then, happy shopping!

Easiest Ever Number Birthday Card PPP638

by Joanne James30. April 2023 08:00

Today it's Sunday and time for this week's new challenge over at The Paper Players! It's the turn of the fabulous Anne Marie to host this week since it is the fifth Sunday of the month we have a tic tac toe challenge to work with:


I went bottom left to top right diagonal with sparkle, diecut and embossing (dry) and it just so happens that my card also fits the right hand coloumn of embossing(dry), patterned paper and birthday to create the easiest ever number birthday card - take a look:


Here's the low-down on today's card:

Do you ever need a number card to celebrate a special birthday? I have so many friends and family celebrating milestone birthdays this year that I find myself making lots of this type of card - and I think this must be my most straightforward, easiest yet!

I embossed a panel of Pacific Point cardstock with the birthday embossing folder, then backed this with some (retired gold glimmer paper, having first cut my number 21 out of the centre. I then added a trio of Pacific Point Brights designer paper banners to my card base followed by my rectangle, before finishing with my sparkly number 21 popped up on foam adhesive sheet and a couple of brushed gold metallic dots: 

Not only was this card really quick to make, but this layout would work in any colour, with any co-ordinating patterned paper and glimmer - perfect, I'm off to make a whole bunch more!

Here is the visual summary of the key products used on today's project for you to pin for easy reference:


You can see all of my Product and 'How To' summaries on my 'How To - Tips and Techniques' Pinterest board in case you've missed any. 


Today's card is also my second entry over at Just Add Ink this week and uses the Try Stamping on Tuesday sketch.

Before you reach for your ink and papers, check out what our amazing team has created to inspire you this week:

Here's a quick recap of our challenge rules:
 
1.  Create a new paper project
2.  Upload your creation to your blog with a link back to us and provide a direct link to the post featuring your challenge submission.
3.  Please link your card to no more than four challenges, TOTAL.
4.  Have FUN!

Enjoy your day; nothing much happening here today, although it is lovely to know that it's a Bank Holiday weekend - an extra day off is always welcome! I'll be back tomorrow with another project. Until then, happy stampin'!


Stampin' Up! Supplies Used: 

Table built using Product Table Builder by The Crafty Owl - Independent Stampin' Up! Demonstrator.

Cottage Rose in Moody Mauve JUGS 677

by Joanne James29. April 2023 05:00

Today I'm sharing my final card for my Guest Designer spot over at Just Us Girls. I will be so sad to leave - I've had such a great month crafting alongside these lovely ladies, but I'm sure they have someone wonderful lined up to take over next month. For my final card we have a super fun challenge - CASE a design Team Member:


Now I could have created absolutely anything for my final card this week - but I thought it would be fun if I CASEd one of the Just Us Girls Design Team Members! And it just so happened that I saw this card by the lovely Carol McFarland a week or so ago and actually commented on her socials that I wanted to CASE this card, so I thought today that I would! This is my version - take a look:


 Here's the low-down on today's card:

Whilst I love to colour, I know it's not everyone's cup of tea, so I love exploring alternative ways to add colour to line art images. I took an alternative approach to colouring this rose the last time I used it - you can see that card here. This card gave me another final opportunity to use the Cottage Rose stamp before it retires and also to have some fun with the new 2023-25 In Colours too. I stamped the main rose image around the edge of a piece of Whisper White, then masked off two 'stripes' in turn and blended some Moody Mauve ink first from one edge, then the other. I added a sentiment from the same set and two addition uncoloured diecut roses on dimensionals:


A trio of In Color Dots and black enamel dots complete my card front. I added a little extra detail to the inside of my card too:


I like this card so much, I think I'm going to make 4 more versions in each of the other new in-colours too. CASEing someone else's card can be so much fun - whether you are inspired by the images, colours, layout or technique, there is so much to choose from! I'm looking forward to seeing how everyone is inspired by the JUGS Design Team cards this week and thank you to Carol for inspiring mine! A final thank you too to all the lovely JUGS ladies for their cameraderie this month - you will undoubtedly see me back in the gallery soon!

Here is the visual summary of the key products used on today's project for you to pin for easy reference:


You can see all of my 'How To' summaries on my 'How To - Tips and Techniques' Pinterest board in case you've missed any. 

Enjoy your day; I'm off to the hockey pitch this afternoon and looking forward to a long Bank Holiday weekend here in the UK, even if that means it will probably rain!! I'll be back tomorrow with another project. Until then, happy stampin'!


Stampin' Up! Supplies Used:

Table built using Product Table Builder by The Crafty Owl - Independent Stampin' Up! Demonstrator.

Nothing's Better Than Pizza FF133

by Joanne James28. April 2023 08:00

Today I have my card for the new challenge over at Festive Friday Card Making and Paper Crafting Challenge


The challenge that we are celebrating this week is 'National Eat What You Want Day' which is on 11th May - who knew?! Remember the fun thing is that at Festive Friday you do not need to actually celebrate the occasion; your goal is to simply use three or more items from the inspiration list on your project. This week I did go with a food-themed card; I used pizza, diecutting, gingham and food sentiment and this is what I came up with:


Here's the low-down on today's card:

I decided to create a custom sentiment as the focal point of my card, using a combination of stamped words from the 'Nothing's Better Than' stamp set and letters diecut with the Alphabet a La Mode Dies - perfect for the challenge at Just Add Ink this week too! I paired this with a strip of gingham reminiscent of an Italian pizza parlour table cloth and a slice of punch art pizza:


I added some stamped mushrooms and tomatoes from a (retired) stamp set called 'What's Cookin?' to decorate my pizza slice and added a gingham pocket inside my card to hold a gift card; I will be saving this card to send to my daughter who will hopefully be going off to university later this year and am sure will appreciate some extra funds for a pizza night out to save her having to cook for herself occasionally!

Here is the visual summary of the key products used on today's project for you to pin for easy reference:


You can see all of my 'How To' summaries on my 'How To - Tips and Techniques' Pinterest board in case you've missed any. 

How does our board inspire you? I can’t wait to see what YOU create! For more inspiration, be sure to visit the rest of the Festive Friday Card Making and Paper Crafting Challenge Design team:


Enjoy your day and I'll be back tomorrow with another project. Until then, happy stampin'!


Stampin' Up! Supplies Used:

Table built using Product Table Builder by The Crafty Owl - Independent Stampin' Up! Demonstrator.

Hues of Happiness Slimline Birthday Card TTT 206

by Joanne James27. April 2023 16:00

It's Thursday and time for a new challenge over at TicTacToe! It's the turn of Team X to host this week and the lovely Elizabeth is our featured designer this week. This is the fun board that we are playing along with: 


I went from top left down the diagonal with flowers, yellow and gems and used the layout over at Sketch Saturday to create a pretty, summery birthday card with some pretty retiring product - take a look:


Here's the low-down on today's card:

I had lots of these lovely Daffodil Delight and Mango Melody flowers that I'd previously diecut from the Hues of Happiness designer series paper, so i thought that this would be a good opportunity to put them to good use! I went with a white slimline card as I need the length to fit them all in, added a half panel of So Saffron cardstock which I diecut across the top with one of the Blossoming Happiness edgelit dies ( I also used these dies to cut out the flowers) and added notches to both sides and would it with some white baker's twine, before adding my flowers. A simple birthday sentiment and some sparkly gems finish the outside of my card: 

 I added a little more stamping using the 'Happiness Abounds' stamp set to the inside of my card:


I do love a yellow card - so cheery and sunny and I will miss the Happiness Abounds Suite so much! Both the stamp set and dies are discounted as part of the last chance product promotion - the dies are 50% off, an absolute bargain!

Here is the visual summary of the key products used on today's project for you to pin for easy reference:


You can see all of my Product and 'How To' summaries on my 'How To - Tips and Techniques' Pinterest board in case you've missed any. 

A tictactoe board offers so many creative possibilities - how does this week's board inspire you? Why not have a go? We would love to see you in the gallery and who knows - you might be selected for Designer's Choice and be eligible to be a guest designer on a future challenge. 

Enjoy your day; I'll be back tomorrow with another project. Until then, happy stampin'!


Stampin' Up! Supplies Used: 

Table built using Product Table Builder by The Crafty Owl - Independent Stampin' Up! Demonstrator.

Perfectly Penciled Amazing You

by Joanne James26. April 2023 11:37

Today I'm sharing a card for the current Color Hues challenge:

Purple is one of my favourite colours so I knew I wanted to play along. I decided on some more colouring with my Stampin' Blends using up a little more retiring paper - take a look:


Here's the low-down on today's card:

The Perfectly Penciled papers are great for colouring with your Stampin' Blends markers - I made this card last week where I 'reverse coloured' the same pattern - you can see that card here if you missed it. This time I coloured the actual flowers in shades of purple and green and included a larger vertical panel, accenting with a diecut sentiment in black and white again using the Amazing Thanks Dies and pairing with a stamped 'YOU' from the 'Art Gallery' stamp set.


This paper and those fabulous Amazing Thanks Dies are all retiring at the end of this month - add them to your shopping basket via the links below whilst you still can!

Here is the visual summary of the key products used on today's project for you to pin for easy reference:


You can see all of my 'How To' summaries on my 'How To - Tips and Techniques' Pinterest board in case you've missed any. 

Enjoy your day and I'll be back tomorrow with another project. Until then, happy stampin'!


Stampin' Up! Supplies Used:

Table built using Product Table Builder by The Crafty Owl - Independent Stampin' Up! Demonstrator.

Two Tone Flora Die Window Card FMS582

by Joanne James24. April 2023 17:00

Happy Monday everyone! I've spent the day in my office working on projects to share with you this week and amongst other things also managed to make a card for Karren's fabulous layout over at Freshly Made Sketches today so I need to blog it quickly before they close! Here's Karren's sketch:


I paired it with the colours over at Hand Stamped Sentiments and took the opportunity to play with another new-to-me bundle - take a look:


Here's the low-down on today's card:

I thought the large circle of Karren's sketch would be perfect to showcase the detail of the die plate that is included in the Two Tone Flora Dies, so I cut an aperture using the largest of my circle Stylish Shapes Dies and adhered the diecut behind. I added a panel of (retired) Fine Art Floral designer paper behind it, that features a subtle Pool Party gesso effect, and accented my window with a single Blackberry Bliss flower:


Some Mint Macaron leaves, a trio of glossy dots and a birthday sentiment from 'Something Fancy' complete my card.

I've always loved the combination of Pool Party and Blackberry Bliss and this dies is just amazing - I can't wait to use it more! Both the Two Tone Flora stamp set and dies are carrying over to the new annual catalogue, but the bundle pricing isn't - so if you'd like to purchase both items and receive a 10% saving, you'll need to be quick and place your order for them before the end of the month.

Here is the visual summary of the key products used on today's project for you to pin for easy reference:


You can see all of my 'How To' summaries on my 'How To - Tips and Techniques' Pinterest board in case you've missed any. 

Enjoy your evening and I'll be back tomorrow with another project. Until then, happy stampin'!


Stampin' Up! Supplies Used:

Table built using Product Table Builder by The Crafty Owl - Independent Stampin' Up! Demonstrator.

New Online Exclusives

There are new products available exclusively in the online store from 5 November - check them out here.

Latest Kits!

Stampin Cut and Emboss

The Layered Landscapes Kit and Nature's Paintings Kit are the latest kits in the online store - get yours here!

Shop Online

Access my online shop 24 x 7, 365 days of the year:

Current November hostess code:

9NKXDTTR

Shop Online

Mini Catalogue

BROWSE THE CATALOGUE

'Tis The Season - the new Stampin' Up! Mini Catalogue is here! For more details and to download your copy click here

Scrapbooking

Stampin' Up! has introduced a new range of 12x12" scrapbooking product and kit - the full range is now available to purchase online. To download a copy of the new digital Scrapbooking Catalogue click here.

2024-25 Annual Catalogue

BROWSE THE CATALOGUE

Click on the image to download your copy of the 2024-25 annual catalogue. For a full list of current SU! supplies, go to my online store. If you would like any help or advice, please drop me a line at joanne@thecraftyowl.co.uk or give me a call on 07773 421446 - I'd be happy to help.

Join My Team

It's always a great time to join Stampin’ Up! New team members can get £130 worth of products for only £99 + free business supplies + free shipping + all the fun being a part of Stampin’ Up! Stampin' Up! has something for everyone: join my growing team and benefit from my support to enjoy Stampin' Up! however you choose.

If you're interested, call me for a chat to understand how I can help you realise your goals. Alternatively, if you have already decided to sign up and you just can't wait, please click here for the link to the online form where you can sign up and order your starter kit right away! 

About Me

Hi I'm Joanne and live in Northampton and when I'm not looking after my husband and two beautiful children, am an avid crafter with a passion for all things Stampin' Up!

I must confess that I have never been a big rubber stamper - until I discovered Stampin' Up! that is. I love the fact that I can get such great results with co-ordinating stamps, inks, papers and punches - the possibilities are endless! Join me on my stamping journey as I share the things I love and be inspired to create amazing things yourself!

Follow Me

Monthly Newsletter

Box Builder

Click the button above to use Box Buster to create your custom box design using the Envelope Punch Board!

Kits Collection Now Available!

Stampin Cut and Emboss

The new Kits Collection from Stampin' Up! is now available!

Click here to see the current kits available and order yours online today.

I Design For


Stampin' Up Stuff

This is my personal blog and is not endorsed by Stampin’ Up! I hope you find it a plentiful source of ideas and personal inspiration but please don't copy my designs for contest submission or use for classes, publication or sale without express permission.