by Joanne James17. March 2015 10:29Today I'm sharing a card that I'm entering in a couple of challenges:
I'm not normally one for such pastel colours unless it's a baby card, however I thought I would combine this week's colour palette over at Pals Paper Arts with the great sketch over at CAS(E) This Sketch this week and create a card suitable for a wedding or engagement. Take a look:
I decided to feature the Congratulations sentiment from 'Your Perfect Day' as the centrepiece for my card, adorned with a couple of the floral flourishes from the 'Flowering Flourishes' set in each corner. I turned the sketch on its side as I needed my card to be landscape in order to fit my sentiment on. I stamped the sentiment in Soft Sky and coloured the flourishes with my Stampin' Write markers in each of the challenge colours, adding a few tiny pearls to the flower stamens. I used a piece of Soft Sky for my mat and stamped the whole card on Whisper White; this card looks more vibrant in real life - I find predominantly white cards so tricky to photograph.
Short and sweet from me today - lots to do before attending an Easter Concert this afternoon where both James Juniors are singing and performing piano recitals. I will be back shortly with news of some additional Sale-A-Bration items that will be available free with a £45 spend until the end of the month. until then, happy stampin'!
Stampin' Up! Supplies Used:
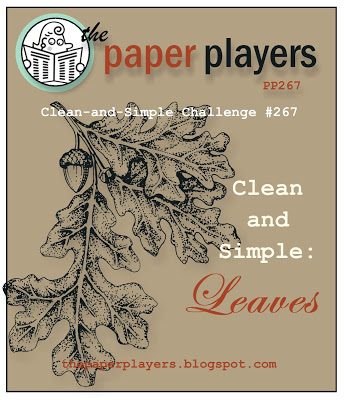
by Joanne James15. March 2015 10:00It's Sunday - my favourite day of the week! Why? Well, I usually get a cup of tea in bed before I start my day (and I definitely will today, as it's Mother's Day here in the UK) and it's time for our new challenge over at The Paper Players. This week the hugely talented Ann has a great clean and simple challenge for us:
I love CAS cards and decided that this week's challenge was the perfect opportunity to use my Lotus Blossom stamp that I received during the current Sale-A-Bration promotion. I also paired it with the colours over at Color Throwdown this week as I just love the purples and green of the inspiration photo - here is my card:
This set has been the most popular of all the Sale-A-Bration promotional items that you can receive free with a £45 spend amongst my customers and whilst I've used mine to demonstrate how to stamp the flower to my customers on a number of occasions, this is the first time I've actually used it to make a card - shocking! It's a great flower and perfect for CAS cards. I stamped the sentiment and my first image of the flower in Elegant Eggplant and the same for the second one, having stamped off first. I then stamped the third solid image in Perfect Plum. I used Old Olive for my stem and then stamped the first image again in Versamark, and overstamped the sentiment in Versamark too and heat embossed both of them in clear embossing powder. Try as I might I couldn't get it to show up in the photo, but this does look lovely in real life with a lovely glossy sheen and it adds a little texture to the flower. I matted my stamped panel on a piece of Elegant Eggplant cardstock and a Whisper White base, which really allows my blossom to take centre stage. To finish, I added a trio of pearls that I coloured with the darkest of my Wisteria Wonder Blendabilities (I'm not ready to part with these just yet, even though they are sadly no longer available). If the Lotus Blossom stamp is still on your wish list, you have until the end of March to receive it free with a £45 spend - 16 days left, so don't leave it too late.
There are a whole host of amazing floral CAS cards from the Design Team this week; do pop by their blogs and take a look:
The Paper Players Design Team
Here's a quick recap of our challenge rules:
1. Create a new paper project
2. Upload your creation to your blog with a link back to us and provide a direct link to the post featuring your challenge submission.
3. Please link your card to no more than three challenges, TOTAL.
4. Have FUN!
I look forward to seeing your floral CAS creations in our gallery this week.
I am off for a morning of hockey and then hopefully home to roast dinner cooked by the men in our house! Back tomorrow with another project; until then, happy stampin'!
Stampin' Up! Supplies Used:
by Joanne James14. March 2015 21:10It's the weekend but no signs of my week slowing down yet! I had a great Stampin' Up! party hosted by the lovely Lucy yesterday and today we visited a science fair and Ben played basketball on his school team at the county quarter finals this evening. So just time for a quick post with a card I made for this week's Mojo Monday challenge:
This is the first sketch designed by Wanda Cullen and I think it's great (go Wanda!) I decided it was the perfect layout for me to cut into one of my favourite pieces of paper in my Painted Blooms DSP pack - here is my card:
I used Soft Sky for my base and matted my paper on a piece of Blackberry Bliss to give a thin border, then layered a paper pierced circle, a piece of Blackberry Bliss satin ribbon and my layered sentiment circle, where I over-stamped the tulips with my thank you, before finally adding my Crushed Curry thinlit butterfly. I just love the detail of the sentiment and the dramatic bright yellow butterfly on this card - here's a close up:
Love it! That's all from me today; back tomorrow with this week's card for our new challenge over at The Paper Players. Until then, happy stampin'!
Stampin' Up! Supplies Used:
421f25bd-a649-4dc9-a3f6-f3f8488735e3|0|.0|96d5b379-7e1d-4dac-a6ba-1e50db561b04
Tags: Painted Blooms, Painted Petals, Big Shot, Butterfly Thinlits Dies, circle punch, Circles Framelits, Paper Piercing, Shop online, Stampin' Up, Stampin' Up Card, Stampin' Up Card ideas, Stampin' Up Supplies
Cards | Stamping
by Joanne James12. March 2015 08:05Today it's time for a new challenge over at Create with Connie and Mary and this week we have a colour challenge for you:
This week's card was a challenge for me in so many ways! I have no Irish connections so St Patrick's Day isn't a big thing for me, although I often make at least one project to celebrate and I thought these colours would be perfect. I decided on my design and really wanted to create a four leaf clover to tie in with a 'lucky' theme, however I couldn't make it work with my layout, so went with a three leaf clover and decided that for my card this would be just as lucky (cardmaker's prerogative ;-)). Here it is:
I made my simple clover leaf using the smallest heart from the Hearts Framelits set, and freehand cut the stem, then offset my sentiment, a combination of stamps using the 'lucky' from the Project Life sentiment set 'Remember This' and the 'you' from the Sale-A-Bration set 'Simply Wonderful'. One last confession from me - I actually used a sheet of Garden Green from the Regals DSP stack for my card - when I went to my folder, I had no Wild Wasabi - oops! The effect would be just the same with a Wild Wasabi polka dot paper though, so I went with it.
Do check out the gallery to see what the other members of the CCMC design team have come up with this week - we look forward to seeing your creations!
Back tomorrow with another project; until then, happy stampin'!
by Joanne James10. March 2015 21:35Today I'm sharing another of the cards that we made at my Monthly Technique Class yesterday, featuring the Indescribable Gift stamp set. This was the simplest of the cards we made, and features the 'spotlight' technique:
The basic idea is that you stamp your chosen image, then stamp it again a second time and punch out one area of the image that you would like to highlight and this is the piece you colour. I kept the layout of my card simple and highlighted one area of the blossom stem and coloured this with my Pink Pirouette, Wild Wasabi and Crumb Cake Blendabilties. Here's a close up of my spotlighted element:
Another simple, yet effective technique that is perfect with an outlined stamp image. I love the sentiment on this card too - there's something very uplifting about it. If you live in or around Northampton and are either a keen cardmaker or someone interested in learning new techniques, my technique classes next month will be held on the 13th and 14th of April and will be featuring masking, sponging and reflection techniques using the stamp set 'Lovely As a Tree'. Full class details here - do get in touch for information and to book your place.
Before I sign off today, I wanted to share with you an important news announcement from Stampin' Up! today regarding the future of our Blendabilties product line. As some of you may be aware, there have been some quality issues with our alcohol markers. Following investigations with the manufacturer, a manufacturing problem has been identified that has resulted in damage to the fine nibs. As a company, Stampin' Up! prides itself on the quality of our products and since the incidence of failure is now outside of acceptable levels and the manufacturer is unable to guarantee a swift solution to the problem, it is with regret that the line is to be stopped with immediate effect in order to prevent further disappointment. If anyone has any issues with Blendabilities purchased from me, do get in touch so that I can arrange an exchange or refund. Meanwhile, I have some cards made and not yet blogged that use them that I will continue to share, although alas you will be unable to purchase the markers if you don't already own them. On the up side, the full range of Stampin' Write markers are unaffected and offer a wealth of colouring opportunities.
Back tomorrow with this week's Wednesday Deals and a new project.
Until then, happy stampin!
Stampin' Up Supplies Used:
by Joanne James9. March 2015 10:44Happy Monday everyone! This is the start of the busiest week for me - classes, parties and a number of family commitments - so I'll do my best to keep up with my blogging schedule. Today I'm sharing one of the cards that I'm making with my ladies in my technique class this week - an oval shaped card, using an interesting vellum technique. Here's my card:
I saw this neat technique where you stamp your image on vellum then rub the back of the image with a round ended stylus to 'colour' it in a video tutorial by Deb Valder here. I used Pink Pirouette for my background, then layered the vellum before adding my black border, cut with the largest shaped oval framelit which I paper-pierced around the edge. I needed a sympathy card for my box, so used a sentiment from the 'Bloom With Hope' set, which I cut out with the Banners framelits, and a little bow to soften the card front. I really like the effect of the vellum - it looks slightly 'raised' following the rubbing and adds a feeling of texture to the card.
I'm looking forward to making this card with my ladies this afternoon and then this evening I'm off to craft with a group of Brownies and then Girl Guides - I'll share these projects later in the week.
Back tomorrow with another project; until then, happy stampin'!
Stampin' Up! Supplies Used:
by Joanne James8. March 2015 10:00Yay it's Sunday and time for another challenge over at The Paper Players. This week it is the turn of the lovely Anne Marie, who has a light and bright colour challenge combo for us:
Laurie's challenge last week has put me firmly in the mood for spring and these colours immediately got me thinking along similar lines. I decided I would have some fun and create an Easter card with a difference - I made a slider card using the 'For Peep's Sake' Easter stamp set. So lots of photos for you today -here's the first one of the outside:
A Crumb Cake base decorated with eggs and a cute little trio of Easter characters stamped using my Stampin' Write markers on Whisper White and fussy cut out, adhered behind some Wild Wasabi grass cut using my fringe scissors - one of this week's Weekly Deals, in case you're thinking of picking up a pair - then you pull the ribbon top to reveal the 'Eggscellent' Easter message and the little chick:
Here's a close up of the sentiment:
Followed by a close up of that cute little chick with his own message on the slide out portion above:
Isn't he so cute? This was such a fun card to make and I think looks lovely in this week's colours. So which stamp set will you reach for to create with these colours? Before you reach for your ink pads, do visit the other design team members to see what interesting ideas they've had this week:
The Paper Players Design Team
Here's a quick recap of our challenge rules:
1. Create a new paper project
2. Upload your creation to your blog with a link back to us and provide a direct link to the post featuring your challenge submission.
3. Please link your card to no more than three challenges, TOTAL.
4. Have FUN!
I look forward to seeing how you interpret this colour combination in our gallery this week.
Back tomorrow with another project; until then, happy stampin'!
Stampin' Up! Supplies Used:
by Joanne James7. March 2015 21:25I've been busy working with my 'Indescribable Gift' stamp set as it is the stamp set that I'll be using in my technique class this month so I decided to use it to create a card for this week's Mojo Monday challenge:
I thought the circle would make a great space for the apple blossom to peek through - take a look:
I used a base of Pink Pirouette and matted it with a piece of the 'Irresistibly Yours' embossed paper - free with an order of £45 or more before the end of March - that I had sponged with Pink Pirouette ink, to add a little interest but not detract from my flower branch. I used Wild Wasabi for the panel and having stamped the blossom onto Whisper White, I coloured it with my Pink Pirouette, Wild Wasabi and Crumb Cake Blendabilities and fussy cut it out. I then positioned it through the aperture and and finally added my sentiment panel across the bottom.
This card was not quick to create - the fussy cutting took a while! - but it was well worth it. I love the finished effect.
Back tomorrow with my card for this week's new Paper Player's challenge. Until then, happy stampin'!
Stampin' Up! Supplies Used:
e5f86ba9-ed62-4e5d-b21b-1db9b8b77687|0|.0|96d5b379-7e1d-4dac-a6ba-1e50db561b04
Tags: Easter, Indescribable Gift, Blendabilities, circle punch, Irresistibly Yours, Sale-A-Bration 2015, Sale-a-bration, Shop online, Stampin' Up, Stampin' Up Card, Stampin' Up Card ideas, Stampin' Up Supplies
Cards | Stamping
by Joanne James5. March 2015 12:00Aren't you all lucky - this is my second post of the day! I have another card to share with you that I would like to link up with this week's CAS(E) This Sketch challenge and The Color Throwdown:
I love that block-striped welly boot and I thought these colours would be perfect for a masculine birthday card that would totally work with the sketch and my 'Hello You' thinlit dies. Here's my card:
I used Crumb Cake for my base and the 'happy' thinlit, and inset the thinlit into a panel of Real Red and Night of Navy, with Tempting Turquoise centres. I then stamped the 'Birthday To You' on the red panel in Night of Navy. A couple of epoxy stars - love these! - one backed with turquoise, one backed with gold foil, and a Navy candy dot finished off my card. I love this card - I think I'm going to have to make a few more of these!
Back tomorrow with another project; until then happy stampin'!
Stampin' Up! Supplies Used:
by Joanne James5. March 2015 08:05Today in addition to my card I have some exciting news for you! I was recently asked by the lovely Connie and Mary to join their Thursday Challenge Team so it's official - I am officially a Create With Connie and Mary Designer:
As my regular readers know, I often play along with the CCMC challenges, so I'm excited to be sharing my first card as designer with you for this week's new challenge, which is a sketch challenge using the following sketch as inspiration:
I decided with Spring on the way and since we are just about to officially embark on 'wedding season', I would break out my 'Something Borrowed' Designer Series Paper and create my first wedding card this year:
I used Sahara Sand for my card base and overlaid this with a piece of 'Something Borrowed' DSP which I cut at an angle, following the line of the sketch, and covered the join with a piece of Blushing Bride Chevron Ribbon. I punched the circles from Whisper White using a variety of circle punches, one of which I matted on circle of Blushing Bride, and I stamped a variety of stamps from the new 'Your Perfect Day' stamp set in Sahara Sand. I used a Blushing Bride marker to highlight the hearts on one of the circles and on the main circle, I also stamped the wreath shape in Pear Pizzazz around my sentiment in Sahara Sand, then added my Blushing Bride flowers punched out with the Itty Bitty Accents flower punch, finished with a pearl in the centre of each. To finish, I added a bow from Blushing Bride chevron ribbon and finished the centre of this with one of the gorgeous new Something Borrowed Embellishments - this really adds a touch of luxury to the finished card I think. I even stamped a co-ordinating envelope - of all the cards that I send, I like wedding cards to be special.
I hope you like today's card - do pop over to the Create With Connie And Mary website to check out the creations of the other members of the design team. There are a few other new designers joining the team too, so go take a look! we look forward to seeing your creations in the gallery this week.
I'll be back tomorrow with a new project; until then, happy stampin'!