Your Last Chance To Sale-A-Brate With Awesome Otters!

by Joanne James26. February 2022 20:00

I've spent a lovely day outside in the fresh air today watching back-to-back hockey matches, still chilly but with glorious sunshine - at last! So I've a super quick post today to share a clean and simple card that uses the colours over at Sunday Stamps and the sketch challenge over at AAA Cards:


I went for the middle rectangle of the nine grid split and chose a cute party-going otter as my favourite animal (of the moment!) as he won't be around for much longer - take a look:


Here's the low-down on today's card:

The Sunday Stamps challenge is entitled 'Winter Blues' but there's nothing sad about today's card! This cute little otter is from the 'Awesome Otters' stamp set: I stamped him and added a party hat from the same set and coloured him with a selection of Stampin' Blends markers (added below, plus a retired Coastal Cobana set) before finishing with a simple sentiment:


The 'Awesome Otters' stamp set is one of a number of items that can be yours FREE with a £45 purchase during Stampin' Up!'s current Sale-A-Bration promotion. If it's still on your wish list, you have until next Monday when the promotion ends to order yours before it's gone forever. Just click on the links below to go to my online store to get yours - remember to add the current host code for a special thank you from me.

Here is the visual summary of the key products used on today's project for you to pin for easy reference:
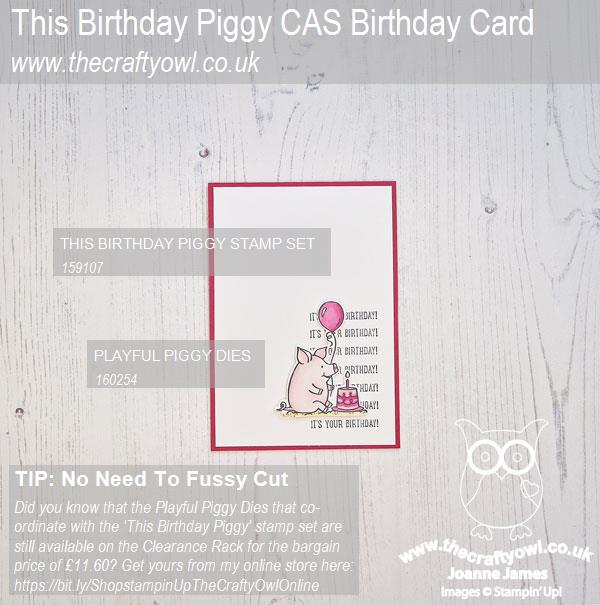
 

You can see all of my 'How To' summaries on my 'How To - Tips and Techniques' Pinterest board in case you've missed any. 

Enjoy your evening and I'll be back tomorrow with another project. Until then, happy stampin'!


Stampin' Up! Supplies Used:

Table built using Product Table Builder by The Crafty Owl - Independent Stampin' Up! Demonstrator.

Sending A Card Instead Of A Text With Flowing Flowers AYSI269

by Joanne James25. February 2022 10:53

Today I'm sharing my design team card for our new challenge over at As you See It where it's time for a recipe challenge:


We have a great recipe for you this week and I can't wait to see what you cook up with it! I paired my ingredients with this week's colour palette over at Color Throwdown (gorgeous!) and the fabulous sketch over at Hand Stamped Sentiments (and thank you to these ladies for choosing my camper van card as one of their Artist's Picks for their last challenge; if you missed it you can see that card here). I decided to go with pretty florals and break open a set I've not had a chance to use yet - take a look:


Here's the low-down on today's card:

Flowing Flowers - I decided to create some two-tone flowers using ink and sponge daubers to decorate my card. The 'Flowing Flowers' stamp set is perfect for stamping straight onto a card base, but I decided to stamp a few flowers and leaves and fussy cut them as I wanted to create a cluster that would accent my sentiment tag. I also curved them a little with my bone folder for added dimension. I also added an extra flower to pretty up the inside of my card:


I used a panel embossed with the painted texture embossing folder on the front of my card; I really like the look behind those blousy flowers:


Pastels - check. Embossing - check.

A Tailor Made Tag - The Tailor Made Tags Dies are great as gift tags; the smaller sizes made really neat sentiment tags on cards too and that's how I used mine today. And it enabled me to tick off another two recipe items: dies - check. Ribbon/twine - check (both!). 

And A Modern Day Sentiment - My tag also features the final item of this week's recipe - my sentiment. Whilst it doesn't overtly say 'thinking of you', I just love this sentiment from the 'Flowing Flowers' stamp set and is perfect to let someone know you are thinking of them in the old fashioned way, with something more meaningful than a text. I mean 'snail mail' is still a thing, right?! Thinking of you - check. Recipe complete! 

Here is the visual summary of the key products used on today's project for you to pin for easy reference:


You can see all of my 'How To' summaries on my 'How To - Tips and Techniques' Pinterest board in case you've missed any. 

Here's a summary of our challenge rules:

  • Create any card, scrapbooking page, 3D project or packaging project that fits the challenge.
  • Please include the challenge graphic and link back to the challenge in your blog post. Turn off word verification so we can leave you lots of lovely comments. Make sure you link the post not the whole blog to the Linky. Use #AYSIXXX when uploading to a public gallery.
  • If you’re unsure about ‘the rules’, check the details under the Challenge Guidelines tab on the As You See It Challenge homepage.
We look forward to seeing your creations in the AYSI gallery.

I love that one of my customers who I see fairly regularly still send me cards and such like in the post. I sometimes share them in my Facebook Group but she is not a Facebook user so doesn't get to see the lovely comments that get left. Here's a picture of one that I received this week, using the Floral Squares Dies that we both love:


Isn't that wonderful? It is always nice to receive something in the post; thank you Gill for this lovely card and to everyone else - if you're reading this and wondering when was the last time you sent a card instead of a text, make that your challenge the next time you pick up your phone. Any excuse for more crafting has to be good!

Enjoy your day and I'll be back tomorrow with another project. Until then, happy stampin'!


Stampin' Up! Supplies Used:

Table built using Product Table Builder by The Crafty Owl - Independent Stampin' Up! Demonstrator.


Friendly Hello Birthday Card TTT150

by Joanne James24. February 2022 16:00

It's Thursday and time for a new challenge over at TicTacToe! It's the turn of Team X to host this week and the lovely Vicky is our featured designer this week. This is the fun board that we are playing along with: 


Vicky chose some great options this week and I could have gone in any direction! In the end I went across the top of the board with pastel colours/designer paper/diecut and grabbed some of my designer paper and paper snips and set to work:


Here's the low-down on today's card:

Friendly Hello Times Two - I decided to use both the 'Friendly hello' stamp set and the co-ordinating papers on today's card. I set to work fussy cutting one of the multi-coloured sheets and created a layered image of the bird surrounded by leaves and flowers. The stamping on my card is limited to my sentiment on the front, that I stampsed twice, once onto the base and then again onto some Pool Party cardstock and fussy-cut the word 'friend' for a contrasting look. I also stamped a birthday sentiment inside and used some left over flowers to decorate my insert:


These papers are gorgeous - I even used a piece to decorate the envelope flap for a card that is pretty both inside and out!

Dots and Circles - I layered my bird, flowers and foliage onto a circle of Granny Apple Green with a black scalloped mat - you can just see it peeking through below all of that fussy-cut goodness below:


I grounded the decorative circle with a strip of dotty paper which is another design in the same Friendly Hello pack.

Still Time To Sale-A-Brate - The 'Friendly Hello' bundle is available FREE with a £90 purchase during Stampin' Up!'s current Sale-A-Bration promotion. If it's still on your wish list, you have until next Monday when the promotion ends to order yours before it's gone forever. Just click on the links below to go to my online store to get yours - remember to add the current host code for a special thank you from me.

Here is the visual summary of the key products used on today's project for you to pin for easy reference:


You can see all of my Product and 'How To' summaries on my 'How To - Tips and Techniques' Pinterest board in case you've missed any. 


Today's card uses the sketch over at Atlantic Hearts for the layout (I did move the sentiment though - and it's my first time of playing too!). There are also lots of dots and circles so I'm linking up over at Global Design Project as that's their theme this week and I'm linking up over at TGIF Challenges where they, like me, are all about Sale-A-Bration (thanks too for chooing me as your winner last week ladies!)

A tictactoe board offers so many creative possibilities - how does this week's board inspire you? Why not have a go? We would love to see you in the gallery and who knows - you might be selected for Designer's Choice and be eligible to be a guest designer on a future challenge. 

Enjoy your day; I'll be back tomorrow with another project. Until then, happy stampin'!


Stampin' Up! Supplies Used: 

Table built using Product Table Builder by The Crafty Owl - Independent Stampin' Up! Demonstrator.

Giving Gifts of Snowflake Stencils CCS458

by Joanne James22. February 2022 13:00

It's Tuesday and time for a new challenge over at CAS Colours & Sketches. This is the final challenge this month and YoonYoung is ending her hostess duties in style with this great sketch for us: 


Feel free to flip or rotate the sketch when making your card. I combined today's card with my entries for the current challenges over at Addicted to CAS where the codeword is 'snowflake' and the lovely ladies over at The Alphabet Challenge Blog where Melanie has chosen 'W is for Winter'. The recent storms we've had here in the UK with wind, sleet and rain definitely had me thinking about the weather and although we have yet to get a proper snowfall here so far this winter I decided YoonYoung's sketch would be the perfect opportunity to add one to my card - take a look:


Here's the low-down on today's card:

Following on from my experiment of using dies as stencils last week (you can see my first example of this in last week's post here), I decided to have another go at this technique. YoonYoung's sketch made me think of a window and I was inspired by the beautiful stencilled snowflakes on Jaydee's ATCAS card, so I took the snowflake die from the now retired giving Gifts Dies from last season and created a stencil by cutting the twice and then masking a central column using some washi tape to create my four quadrants (you can see my mask on the photo further down this post). 

I then used a combination of Balmy Blue and Pacific Point inks with my blending brushes to add ink to my card, concentrating the darker colour across the diagonal and fading to the outer corners. Similarly inspired by Vicky's beautiful stencilled snowflake creation over at ATCAS where she used a contrasting bright orange for her sentiment, I decided to use bright pink and used a simple sentiment from the retired 'Sparkly Seasons' set for a pop of contrasting colour:


I also added some iridescent rhinestones to the centre of some of the snowflakes for a touch of subtle sparkle - I love the way they take on a slightly pink hue to compliment the sentiment too.


I didn't add a sentiment to the inside of my card as I haven't decided whether to use it as a Christmas card or just send as a festive winter notecard and write a note inside. 

The James Juniors have been wishing for snow since the wintry weather arrived in October; anything for a day off school, or so they thought. Rebecca was most perplexed when we received a letter home from school recently stating that the plan should we be subject to inclement weather from this point onwards would no longer involve a day off; instead all learning would simply move online. Covid clearly has a lot to answer for - it would seem that improved use of technologies is not always welcome, for the pupils at least!! 

Enjoy your day and I'll be back tomorrow with another project. Until then, happy stampin'!


Stampin' Up! Supplies Used:

Table built using Product Table Builder by The Crafty Owl - Independent Stampin' Up! Demonstrator.

Catch You Later Monkey Clean and Simple PP579

by Joanne James20. February 2022 09:00

Today it's Sunday and time for this week's new challenge over at The Paper Players! It's the turn of the fabulous Ann to host this week and she has a clean and simple challenge for you to work with:


I decided to use the sketch over at Just Add Ink for my layout this week and used two overlappping hexagons, negative and positive, cut with the Beautiful Shapes Dies for my central shapes and chose to feature the two cute monkeys from the 'Catch You Later' stamp set for my wildlife - take a look:


Here's the low-down on today's card:

I stamped my monkeys onto some white cardstock and coloured them with my new skin tone Blends markers, then masked them off and used some Balmy Blue ink and a stencil I made using my Basic Borders Dies to create a soft and subtle background of clouds with my blender brush behind them:

I added this to my Shaded Spruce card base and then added my top panel, which I ran through my diecutting machine with the Stitched Greenery Die before cutting out the hexagon shape and popping this panel up on dimensionals to frame my little jungle scene. I added a sentiment to another popped-up hexagon and finished my sentiment on the inside, with another stamped-off image of the monkeys too:


So what do you think? Cute, right?! It's my 23rd wedding anniversary today and whilst this didn't start out as a card for my DH, it may well be the one I send as he would appreciate the humour over sweet and smushy love hearts any day!

Here is the visual summary of the key products used on today's project for you to pin for easy reference:


You can see all of my Product and 'How To' summaries on my 'How To - Tips and Techniques' Pinterest board in case you've missed any. 

Before you reach for your ink and papers, check out what our amazing team has created to inspire you this week:

Here's a quick recap of our challenge rules:
 
1.  Create a new paper project
2.  Upload your creation to your blog with a link back to us and provide a direct link to the post featuring your challenge submission.
3.  Please link your card to no more than four challenges, TOTAL.
4.  Have FUN!

Enjoy your day; one of the James Juniors had a friend stay for a sleepover yesterday, so apart from taking him home, we are having a quiet day indoors. The James girls definitely deserve it; as my regular readers know it is not uncommon for us to be out in all weathers either playing or watching hockey at the weekend. Well, despite storm Eunice and the incredible high winds and driving rain we've had here over the past few days, yesterday's match wasn't cancelled. We all turned up and despite a seriously waterlogged pitch, the umpires decided it was safe to play. The end result? Players and parents soaked to the skin and frozen to the bone - and just to give you a flavour of what I'm talking about, here's a photo I managed to snap during 'warm up' before the game started: 


I have genuinely never known anything like it! To make things worse the girls lost 4-2, despite their best efforts. So today we are staying warm - I think we might actually huddle under a blanket and watch 'Encanto' - it's about time we discovered why no-one talks about Bruno!

I'll be back tomorrow with another project. Until then, happy stampin'!


Stampin' Up! Supplies Used: 

Table built using Product Table Builder by The Crafty Owl - Independent Stampin' Up! Demonstrator.

Nothing's Better Than Cookies Card FF103

by Joanne James18. February 2022 09:00

Happy Friday everyone! Today I have my card for the new challenge over at Festive Friday:


The challenge that we are celebrating this week is 'National Peanut Butter Lovers Day' which is on 24th January each year. Remember the fun thing is that at Festive Friday you do not need to actually celebrate the occasion; your goal is to simply use three or more items from the inspiration list on your project. This week I used baked goods, brown and enamel dots for my clean and simple cookie card today - check it out:


Here's the low-down on today's card:

Nothing's Better Than ... - I love the sentiment combinations in the 'Nothing's Better Than' stamp set - I mean, coffee, chocolate, cookies and cocktails!! I'm a tea drinker over coffee, but that would disrupt the 'c's, so I'm good with it! Today's card of course features cookies as my baked goods; the fun thing about the sentiments in this set is that they can be used inside and outside to make fun combinations - this is how I finished the inside of today's card:


... Cookies - I used a simple layered square for the sentiment on the front of my card, backed with a strip of (retired) pink plaid paper, and accented my sentiment with a couple of diecut cookies, complete with crumbs:


A trio of pink enamel dots complete today's card.

Here is the visual summary of the key products used on today's project for you to pin for easy reference:


You can see all of my 'How To' summaries on my 'How To - Tips and Techniques' Pinterest board in case you've missed any. 

How does our board inspire you? I can’t wait to see what YOU create! For more inspiration, be sure to visit the rest of the  Festive Friday Challenge Design team:

Ann Schach
Beth McCullough
Sharon Hashimoto Burkert
Melanie Hungerford
Helen Jennings
Stephanie Lanzalotto
Melva Peters
Jaydee
Diane Evans
Joanne James

Enjoy your day; it's the last day of half-term today however with the impending storm the James Juniors and I shall be battonning down the hatches and spending the day indoors! and I'll be back tomorrow with another project. Until then, happy stampin'!


Stampin' Up! Supplies Used:

Table built using Product Table Builder by The Crafty Owl - Independent Stampin' Up! Demonstrator.


Here For You With A Stencilled Floral Heart

by Joanne James17. February 2022 19:00

Today I'm sharing a second card that combines a couple of challenges:


The trend in focus over at Just Us Girls is to use a die as a stencil and over at Time Out the challenge is to case a card by the fabulous Michele Ferguson of I Card Everyone. I have been experimenting with stencils - and dies as stencils - quite a bit lately, with varying degrees of success so the JUGS team are most definitely onto something! I had also been playing around with ideas to CASE Michele's beautiful card over at Time Out - if you've never seen Michele's work, you should definitely pay a visit to her blog or look her up on social media - she makes the most amazing creations and is just the nicest person! In an effort to create something that was unique but had a clear nod to Michele's card, I decided to combine both challenges. This is what I came up with:


Here's the low-down on today's card:

A Floral Heart - I decided that the Floral Hearts Dies that I've used a few times lately might work as a stencil. I used the die to make a stencil, replacing the heart in the centre then using a blending brush with some Polished Pink ink to add ink and fade from the centre outwards. This is what the finished stencilled panel looked like:


I love the effect of the soft, pale pink and subtle stencilled pattern, although it was tricky to capture on the finished card.

Here For You - I decided to add a 'here for you' diecut sentiment from the Here Together Dies to a white heart for the centrepiece of my stencilled card, tucking in a few additional pieces of white diecut foliage behind my heart and a trio of iridescent rhinestones to finish:


With an alternative sentiment this card would work for a variety of occasions, including a wedding or anniversary I think.

To 'CASE' - I've talked about it here before, but the expression to 'CASE' or Copy And Share Everything' is really about using someone's work to inspire you to create something unique with a nod to the original in a variety of ways. When looking at Michele's original card, I retained the white heart as a focal point with a white-on-white sentiment, and used a combination of pink and white foliage/florals around the outer edge of the heart. Whilst there are similarities, there are also aspects of my card that are unique, such as the ink and stencilling. Side by side, my inspiration is clear - but I also created something that has its own sense of individuality too. I'm not sure that my card does Michele's justice, but it was a fun exercise!

Here is the visual summary of the key products used on today's project for you to pin for easy reference:


You can see all of my 'How To' summaries on my 'How To - Tips and Techniques' Pinterest board in case you've missed any. 

Enjoy your evening and I'll be back tomorrow with another project for our new challenge over at Festive Friday. Until then, happy stampin'!


Stampin' Up! Supplies Used:

Table built using Product Table Builder by The Crafty Owl - Independent Stampin' Up! Demonstrator.

Driving By To Say Hi In A Pink Camper Van

by Joanne James17. February 2022 17:00

Today I'm sharing a card that I made for fun using the sketch over at TGIF Challenges and the pink and blue inspiration board over at Hand Stamped Sentiments , where the same colours feature at Colour Hues too:


I love the pink and blue colours of the HSS board and was particularly drawn to the florals and the pink camper van with the palm trees. It was the perfect opportunity to ink up the cute camper in the Sale-A-Bration 'Driving By' stamp set - take a look:


Here's the low-down on today's card:

I used hexagons cut using my Beautiful Shapes Dies, as opposed to a heart as the basis for design, having cut one in the gold-splattered navy paper from the Abstract Beauty pack, and layered it with gold vellum and a double-edged gold hexagon from the Expressions In Ink Ephemera pack, although you could be forgiven for not being able to tell; I didn't have any palm trees, so I used the retired 'Tropical Chic' stamp set and Tropical Thinlits Dies to create some bi-coloured florals and tropical leaves as a back drop for my fun camper van, that I coloured with Blends. Once I'd started layering, I just couldn't stop! I also added in some gold foliage and gold faceted gems alongside my sentiment to finish:


This is one of those cards that I wanted to create 'just for fun' - the sketch and inspo board were too good to pass up!

Here is the visual summary of the key products used on today's project for you to pin for easy reference:


You can see all of my 'How To' summaries on my 'How To - Tips and Techniques' Pinterest board in case you've missed any. 

Enjoy your day and I'll be back tomorrow with another project. Until then, happy stampin'!


Stampin' Up! Supplies Used:

Table built using Product Table Builder by The Crafty Owl - Independent Stampin' Up! Demonstrator.


Christmas Trimmings Clean And Simple CCS457

by Joanne James15. February 2022 13:00

It's Tuesday and time for a new challenge over at CAS Colours & Sketches. YoonYoung is hosting this month and our challenge this week is a colour challenge: 


I struggled with this week's colours - they were a little dark for me to get my head around. After much to-ing and fro-ing, I decided they would work for Christmas so settled on a simple cluster of festive foliage cut with the Christmas Trimmings Dies and tied with a simple gold twine bow: 


I added a sentiment from a retired Christmas set and then grounded this with some diecut detailing below:


If you'd like to know more about how I created the diecut border detail, then checkout the Tuesday Tip in my 'Crafty Owl Creatives' Facebook Group - if you're not already a member, you can join here. Despite my struggles, I actually quite like the finished card. I'm looking forward to see what you all create with these colours this week!

Here is the visual summary of the key products used on today's project for you to pin for easy reference:


You can see all of my 'How To' summaries on my 'How To - Tips and Techniques' Pinterest board in case you've missed any. 

As a reminder, for our colour challenges, you must use all of the stated challenge colours. You may also use neutral colours; however, the challenge colours should be the most noticeable ones featured on your card. We use Stampin' Up! color names for reference, but you are welcome to use any other companies' products as long as you match the challenge colours as closely as possible.

Enjoy your day and I'll be back tomorrow with another project. Until then, happy stampin'!


Stampin' Up! Supplies Used:

Table built using Product Table Builder by The Crafty Owl - Independent Stampin' Up! Demonstrator.

Awesome Otters Otterly Awesome Card

by Joanne James14. February 2022 14:00

Happy Valentine's Day everyone! Today I'm sharing a card for the current challenge over at Fusion where I used both the sketch and the pink and red hearts in the photo for my inspiration:

No cupcakes on today's card, although I did try and incorporate a little chocolate brown colour! I I have a card that would work for Valentine's, or any other time that you'd like to let someone know how awesome they are - take a look:


Here's the low-down on today's card:

Today's card features one of the cute otters from the 'Awesome Otters' stamp set - one of the many items that can be yours free with a £45 purchase during the current Sale-A-Bration promotion. I coloured him with my new skin tone Blends markers - so great to now have so many neutral tone Blends to choose from! - and then heat embossed a sentiment from the same set onto a red diecut heart for him to hold. I love that the heart is so big it looks like the otter can barely hold it up!


I backed the whole thing with more of my favourite Sweet Talk heart patterned paper, and for the horizontal banner added a red glimmer diecut; what to use for the horizontal caused me most of the thinking time on today's card and I tried a whole range of things before settling on this!

Did you know that otters hold hands so that they don't drift away from each other as they sleep? I think that's so sweet! My other half definitely does not display any otter-like tendencies, preferring plenty of space down the middle of the bed to ensure a good night's sleep! He's thoughtful in other ways though - and will be cooking Valentine's dinner for four this evening, so no complaints from me!

Here is the visual summary of the key products used on today's project for you to pin for easy reference:


You can see all of my 'How To' summaries on my 'How To - Tips and Techniques' Pinterest board in case you've missed any. 

Enjoy your day and I'll be back tomorrow with another project. Until then, happy stampin'!


Stampin' Up! Supplies Used:

Table built using Product Table Builder by The Crafty Owl - Independent Stampin' Up! Demonstrator.

Mini Catalogue

BROWSE THE CATALOGUE

The mini catalogue is now live! Read and download your copy here.

Shop Online

Access my online shop 24 x 7, 365 days of the year:

Current April hostess code:

VDKNV7BH

Shop Online

Join My Team

It's always a great time to join Stampin’ Up! New team members can get £130 worth of products for only £99 + free business supplies + free shipping + all the fun being a part of Stampin’ Up! Stampin' Up! has something for everyone: join my growing team and benefit from my support to enjoy Stampin' Up! however you choose.

If you're interested, call me for a chat to understand how I can help you realise your goals. Alternatively, if you have already decided to sign up and you just can't wait, please click here for the link to the online form where you can sign up and order your starter kit right away! 

Latest Kit!

Stampin Cut and Emboss

The Rock Legend Kit has all you need to make 8 cards with coordinating envelopes. Along with the new Panda Friends Kit, both are available from January 4th for just £14 each - get yours here!

2023-24 Annual Catalogue

BROWSE THE CATALOGUE

Click on the catalogue for a full list of current SU! supplies - if you would like to order any of the items featured, please drop me a line at [email protected] or give me a call on 07773 421446 - I'd be happy to help.

New Online Exclusives

There are new products available exclusively in the online store from 5 March - check them out here.

About Me

Hi I'm Joanne and live in Northampton and when I'm not looking after my husband and two beautiful children, am an avid crafter with a passion for all things Stampin' Up!

I must confess that I have never been a big rubber stamper - until I discovered Stampin' Up! that is. I love the fact that I can get such great results with co-ordinating stamps, inks, papers and punches - the possibilities are endless! Join me on my stamping journey as I share the things I love and be inspired to create amazing things yourself!

Follow Me

Monthly Newsletter

Box Builder

Click the button above to use Box Buster to create your custom box design using the Envelope Punch Board!

Kits Collection Now Available!

Stampin Cut and Emboss

The new Kits Collection from Stampin' Up! is now available!

Click here to see the current kits available and order yours online today.

I Design For


Stampin' Up Stuff

This is my personal blog and is not endorsed by Stampin’ Up! I hope you find it a plentiful source of ideas and personal inspiration but please don't copy my designs for contest submission or use for classes, publication or sale without express permission.