by Joanne James9. September 2022 13:00
Today I'm sharing my design team card for our new challenge over at As you See It where it's time for a seasonal speed challenge:
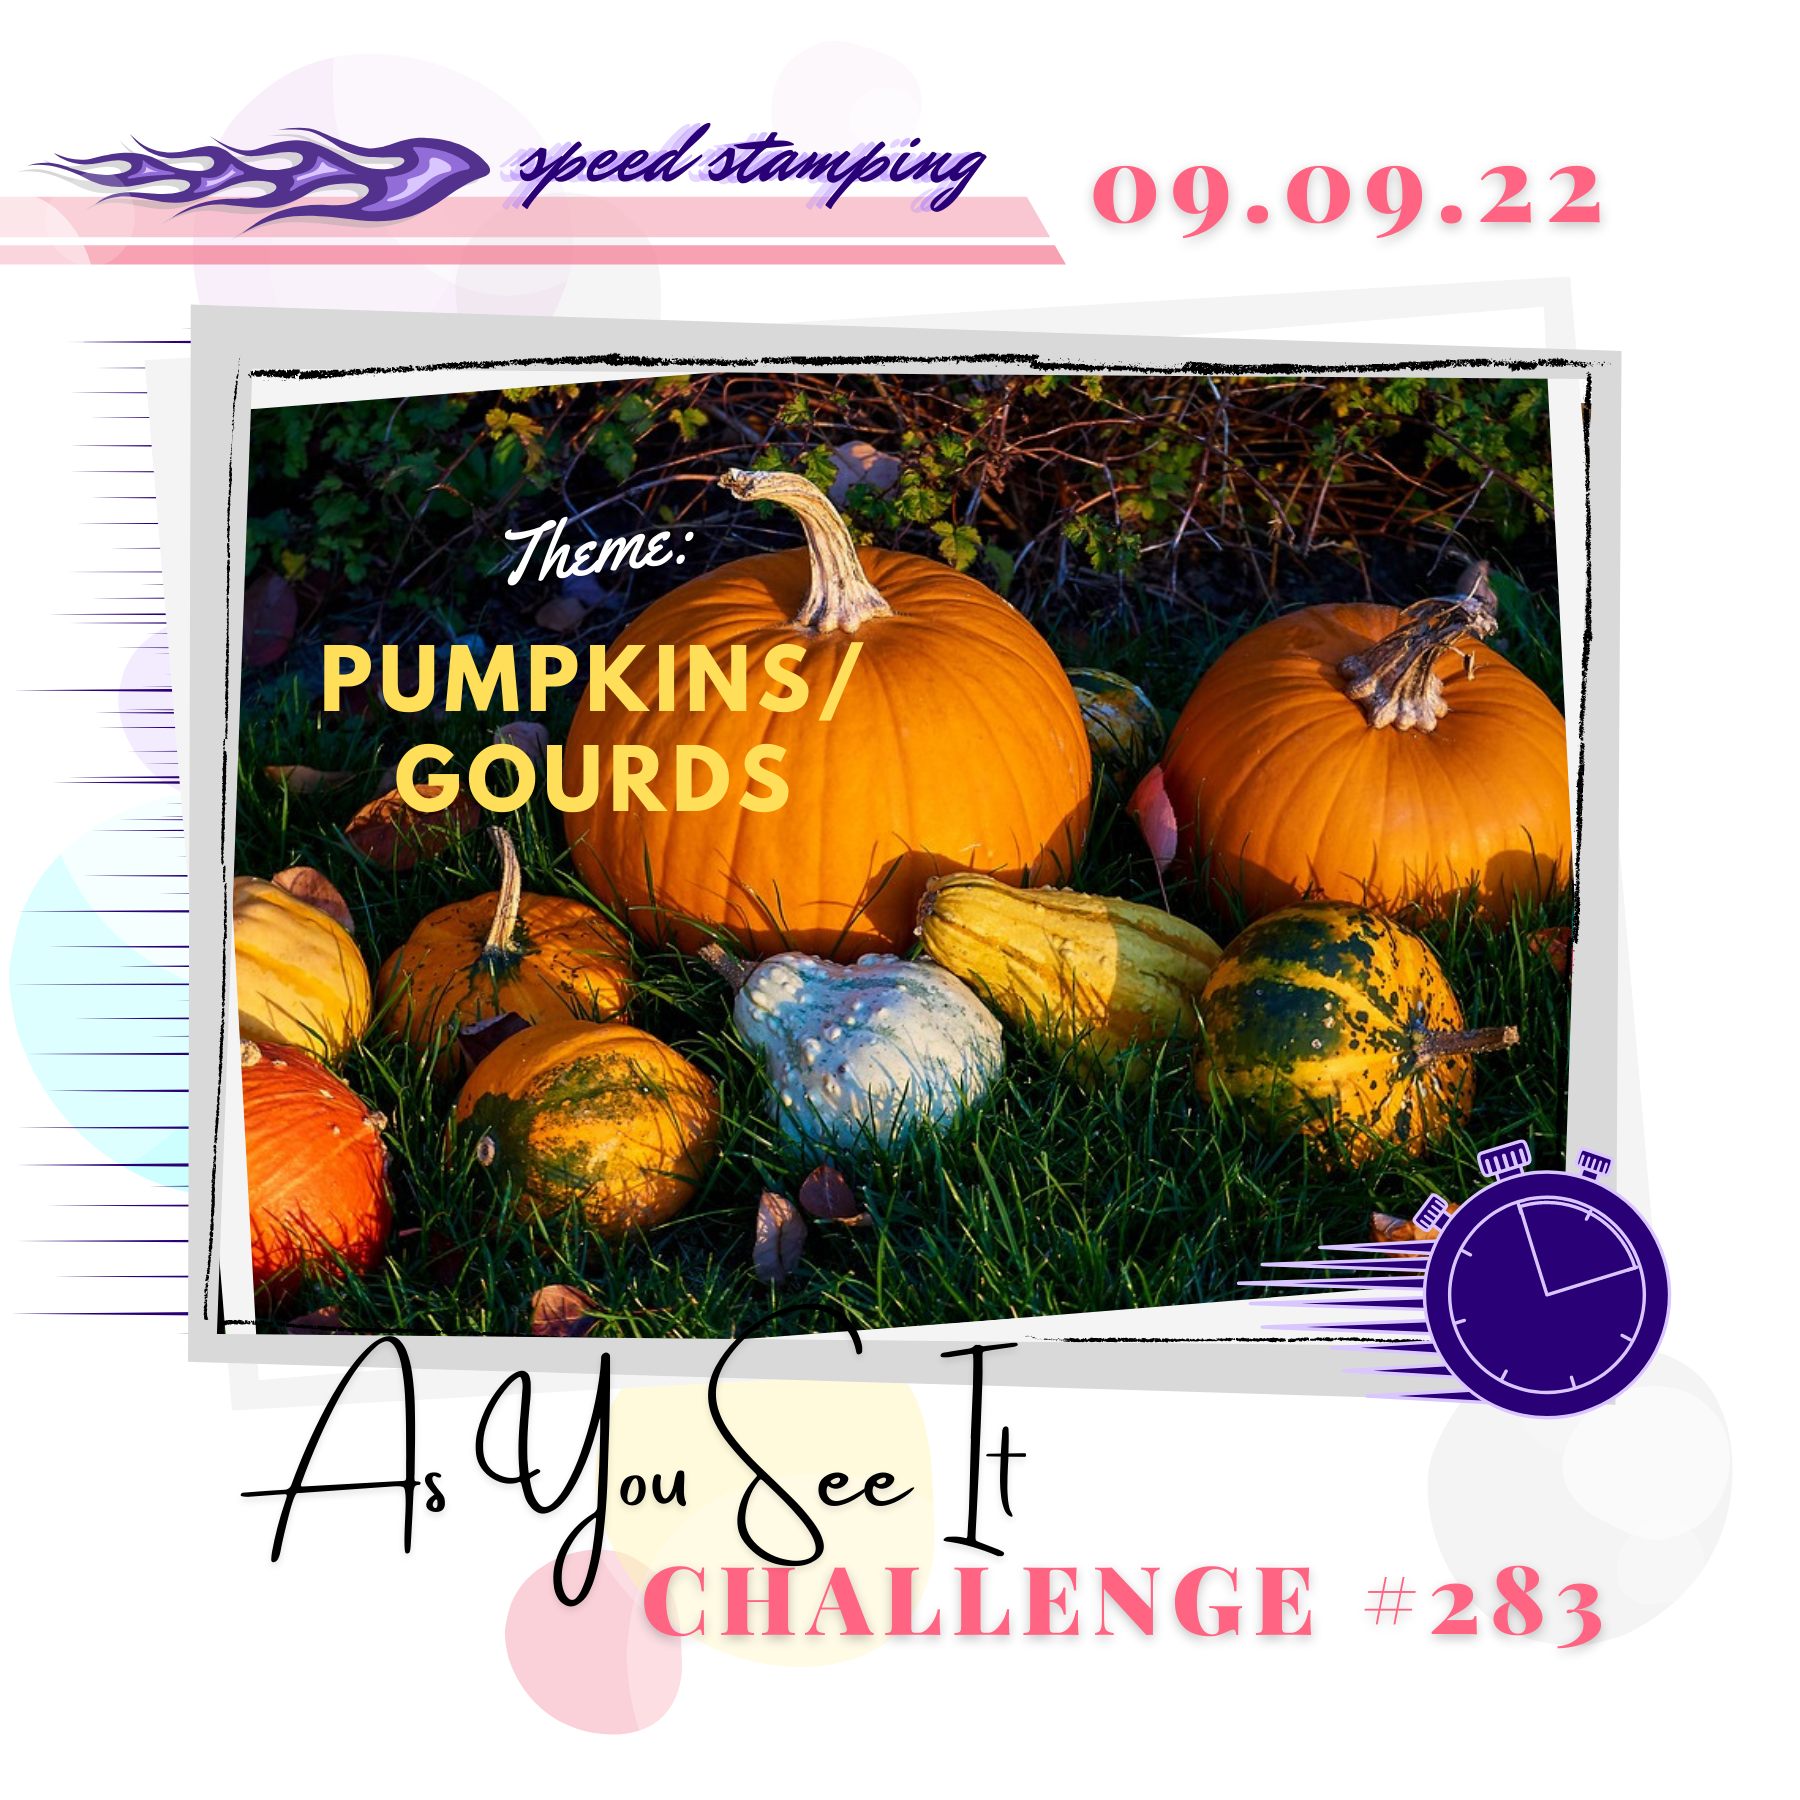
Having cast my eye over my supplies, the only current pumpkin products I had was the 'Celebrate Everything' designer series paper which features this cute pumpkin/ghost patterned paper. So I had a good root through my retired box, grabbed a couple of retired stamp sets and my retired apple punch and decided to CASE a card I saw on social media yesterday by Yvonne Spikmans, one of the current Stampin' Up! artisan designers using my collection of bits and pieces. I started my stopwatch and set to work - this is what I came up with:
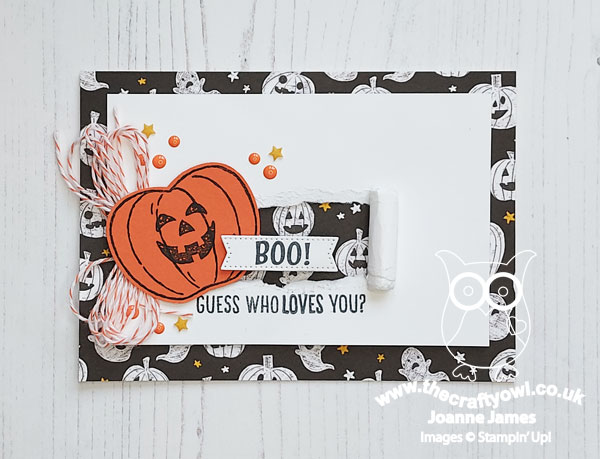
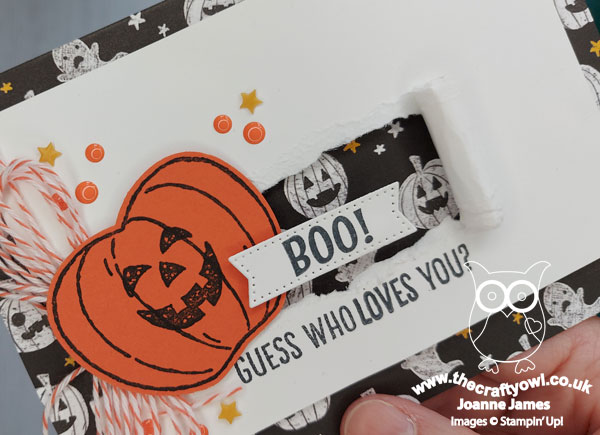
Here's the low-down on today's card:
I added my DSP to a blank card base and then created a 'torn reveal' to a piece of white cardstock. I stamped a pumpkin onto some orange cardstock (Tangerine Tango - retired) using the retired 'Harvest Hellos' stamp set and punched it out with my retired apple builder punch, then added it across my torn section. The sentiment comes from the retired 'Banner Year' stamp set and I stamped the 'Boo' onto a banner that I retrieved from my box of scraps. A bundle of twine and sprinkle of enamel dots and stars complete this fun card:
This card was actually surprisingly quick to make - I remembered to photograph my finished time:
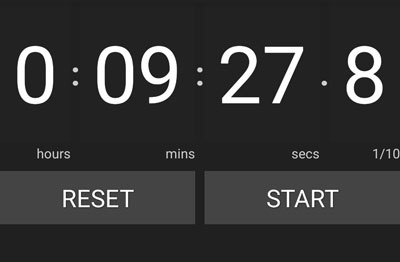
9 minutes and 27 seconds - not too shabby and nicely under the 10 minute mark - result! The key to a quick card is most definitely to be prepared: planning your card and gathering your supplies ahead of time is allowed and will definitely make things easier.
This card will be a good surprise note for one of the James Juniors as Halloween draws nearer.
No visual summary of the key products used on today's project or supplies list as most items I've used are retired; the design could be used in lots of different ways though - what sets would you use? Do leave me a comment below - I'd love to hear your thoughts.
Here's a summary of our challenge rules:
- Create any card, scrapbooking page, 3D project or packaging project that fits the challenge.
- Please include the challenge graphic and link back to the challenge in your blog post. Turn off word verification so we can leave you lots of lovely comments. Make sure you link the post not the whole blog to the Linky. Use #AYSIXXX when uploading to a public gallery.
- If you’re unsure about ‘the rules’, check the details under the Challenge Guidelines tab on the As You See It Challenge homepage.
- In a speed stamping challenge, please time yourself and say in your post how long your card took to complete.
We look forward to seeing your creations in the AYSI gallery.
Enjoy your day and I'll be back on Sunday with another project for our new challenge over at The Paper Players. Until then, happy stampin'!
dad9fd70-56fc-47c2-a795-211dbe2c8a0a|0|.0|96d5b379-7e1d-4dac-a6ba-1e50db561b04
Tags: Stampin' Up, Stampin' Up Card, Stampin' Up Card ideas, Stampin' Up Supplies, Shop online, Shop Stampin' Up online, Shop Stampin' Up! Online, As You See It Challenge, Banner Year, Harvest Hellos, Celebrate Everything, Apple Builder Punch
Cards | Shop Online | Shop Stampin' Up! Online | Stamping
by Joanne James8. September 2022 16:00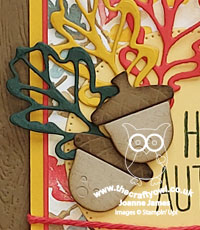
It's Thursday and time for a new challenge over at TicTacToe! It's the turn of Team X to host this week and the lovely Felicita is our featured designer this week. This is the fun board that we are playing along with:
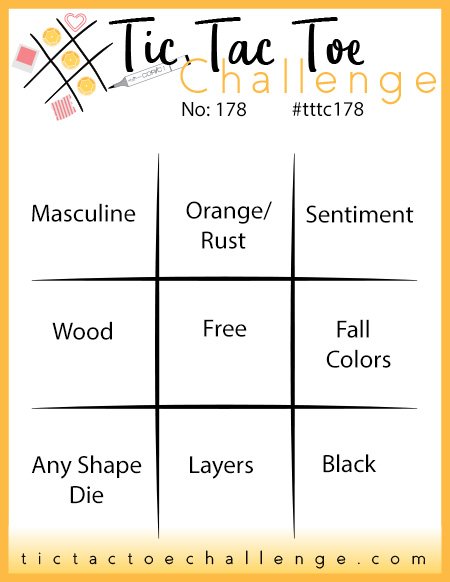


I used the sketch over at Sketch Saturday for my layout and went along the centre row of the board with wood/free/fall colours and incorporated the colours, leaves and acorns of the Hand Stamped Sentiments inspiration photo for my card to welcome autumn - take a look:
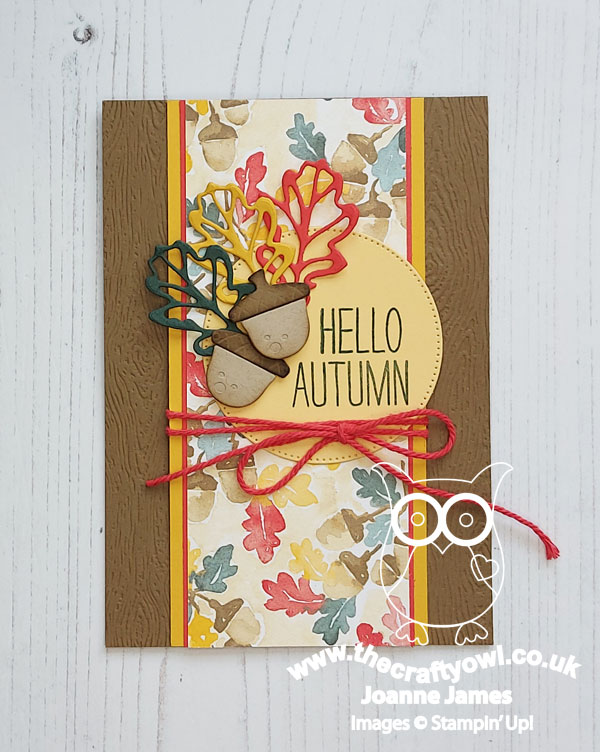
Here's the low-down on today's card:
Timber Texture - I ran my card base through the Timber Embossing Folder for my wood element, then added a piece of the now retired Sale-A-Bration Rings of Love designer series paper down the centre - the pattern is perfect to evoke an autumnal feel.
Chic Leaves - I added a sentiment from a retired set to a stitched circle and embellished this with a trio of diecut oak leaves curtesy of the Chic Dies - such a great die set, with something for every season.
An Acorn Pair - I finished my card with a pair of diecut acorns from the Tree Rings Hybrid Embossing Folder and Dies and some retired Poppy Parade thick baker's twine. Here's a closeup of that diecut detail and those lovely autumn colours:
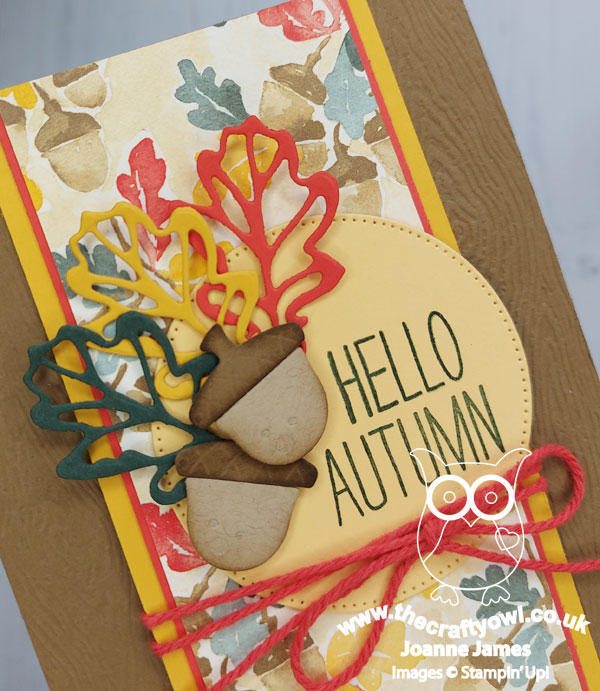
I love the vibrancy that is added by the pop of red from the baker's twine and the additional textures that always seem to accompany my autumn-themed cards.
Here is the visual summary of the key products used on today's project for you to pin for easy reference:
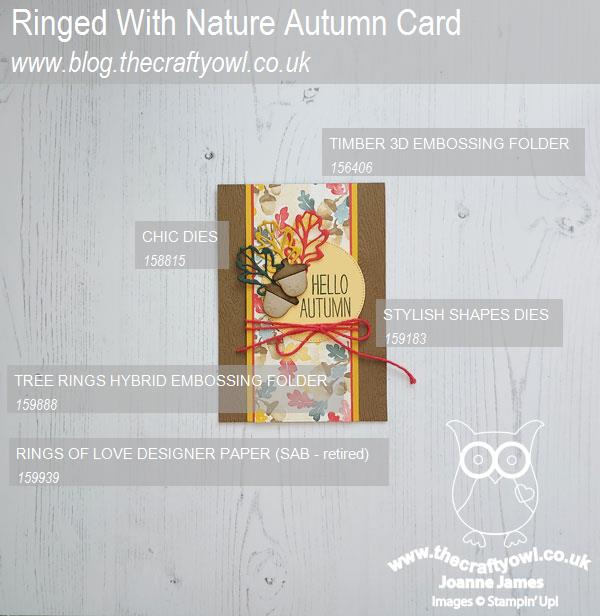
You can see all of my Product and 'How To' summaries on my 'How To - Tips and Techniques' Pinterest board in case you've missed any.
A tictactoe board offers so many creative possibilities - how does this week's board inspire you? Why not have a go? We would love to see you in the gallery and who knows - you might be selected for Designer's Choice and be eligible to be a guest designer on a future challenge.
Enjoy your day; I'll be back tomorrow with another project for our new challenge over at As You See It. Until then, happy stampin'!
Stampin' Up! Supplies Used:
7510f0a0-b362-4fee-a886-813cfffec7d2|0|.0|96d5b379-7e1d-4dac-a6ba-1e50db561b04
Tags: Stampin' Up, Stampin' Up Card, Stampin' Up Card ideas, Stampin' Up Supplies, Shop online, Shop Stampin' Up online, Shop Stampin' Up! Online, TicTacToe Challenge, Timber 3D Embossing Folder, Chic Dies, Tree Rings Hybrid Embossing Folder, Stylish Shapes Dies
Cards | Shop Online | Shop Stampin' Up! Online | Stamping
by Joanne James6. September 2022 13:00
It's Tuesday and time for a new challenge over at CAS Colours & Sketches. Valerie is hosting this month and our first challenge is a colour challenge:
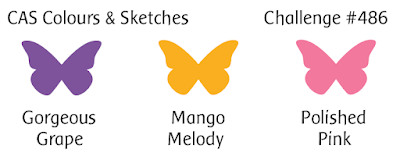
For my card today I decided to colour one of the fun birthday images in the 'This Birthday Piggy' stamp set - take a look:
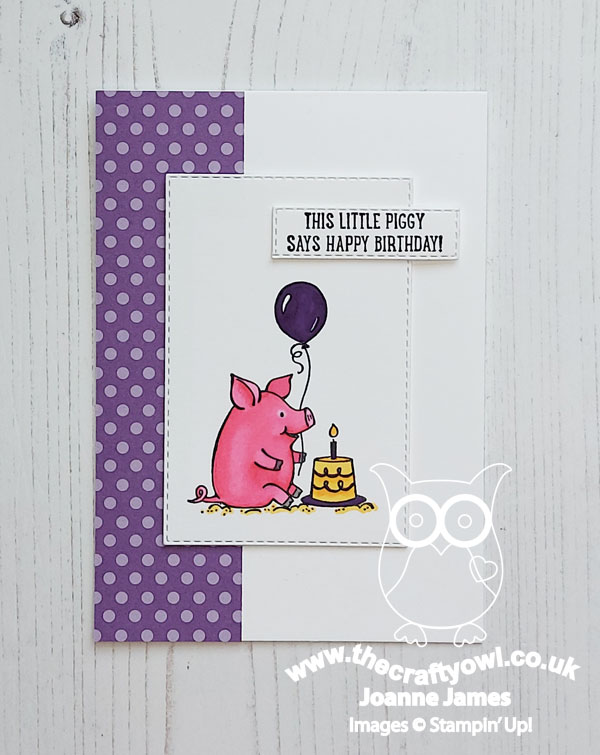
Here's the low-down on today's card:
I used a combination of Stampin' Blends and Stampin' Write markers to colour my image and added a strip of brights DSP to my card base for a pop of extra colour:
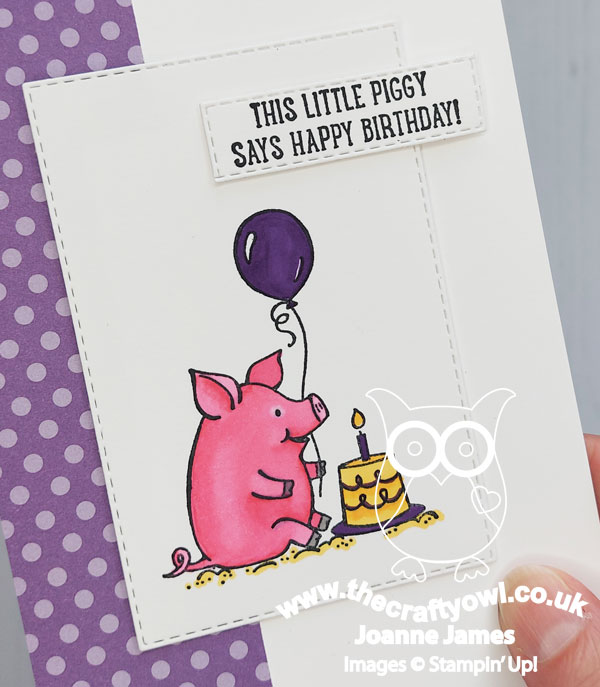
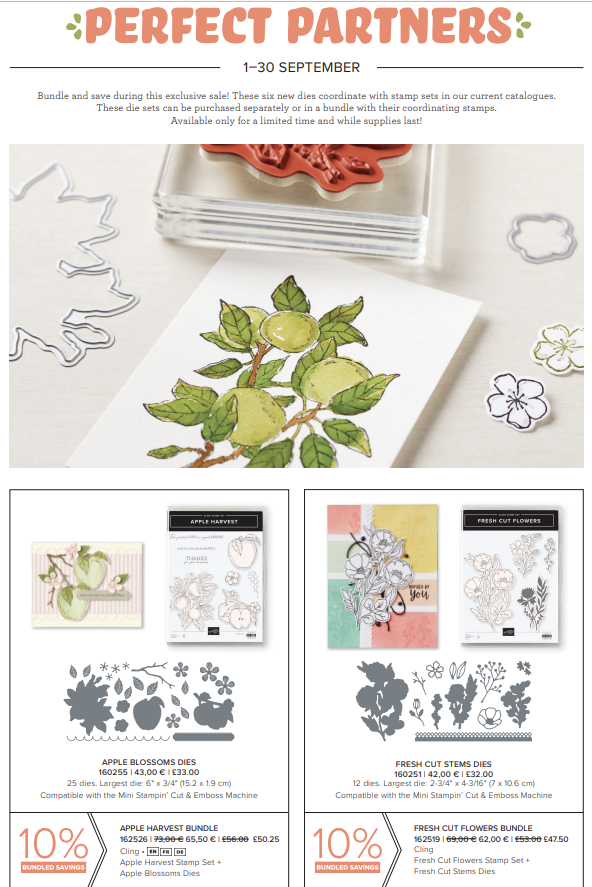
This pattern is retired, but I've added a link below to the current equivalent. Whilst I didn't use them on today's card, this is the perfect opportunity to mention that the 'This Birthday Piggy' stamp set also has a new set of co-ordinating dies that will be available this month only, as part of the Perfect Partners promotion. It is one of six stamp sets from the annual and June-December catalogues that feature - see the other sets below:
.png)
Stamp set and dies are available separately, but if you don't already have the stamp set you can purchase both and receive a 10% bundle saving - bonus! This promotion runs until 30th September, so grab your dies without delay.
Here is the visual summary of the key products used on today's project for you to pin for easy reference:
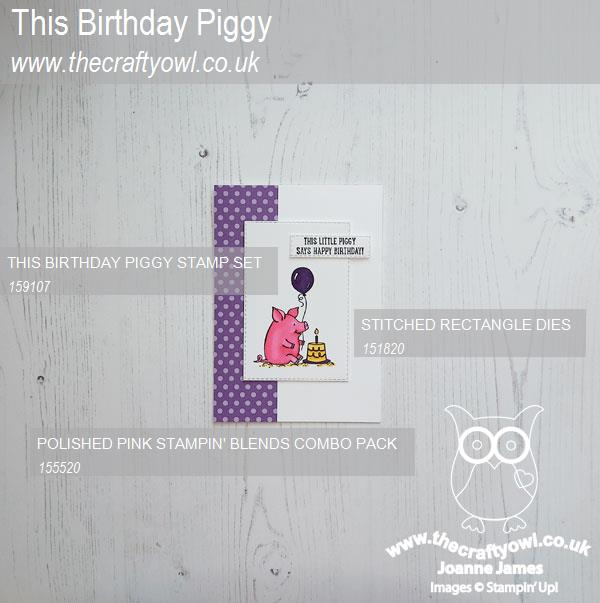
You can see all of my 'How To' summaries on my 'How To - Tips and Techniques' Pinterest board in case you've missed any.
As a reminder, for our colour challenges, you must use all of the stated challenge colours. You may also use neutral colours; however, the challenge colours should be the most noticeable ones featured on your card. We use Stampin' Up! color names for reference, but you are welcome to use any other companies' products as long as you match the challenge colours as closely as possible.
Enjoy your day and I'll be back tomorrow with another project. Until then, happy stampin'!
Stampin' Up! Supplies Used:
f966eb4e-f29b-4372-b81b-94b9b0d9de93|0|.0|96d5b379-7e1d-4dac-a6ba-1e50db561b04
Tags: Stampin' Up, Stampin' Up Card, Stampin' Up Card ideas, Stampin' Up Supplies, Shop online, Shop Stampin' Up online, Shop Stampin' Up! Online, CAS Colours and Sketches, This Birthday Piggy, Rectangle Stitched Framelits Dies, Perfect Partners
Cards | Promotions | Shop Online | Shop Stampin' Up! Online | Stamping
by Joanne James4. September 2022 08:00
Today it's Sunday and time for this week's new challenge over at The Paper Players! It's the turn of the fabulous Ann to host this week and she has a seasonal theme for us to work with:
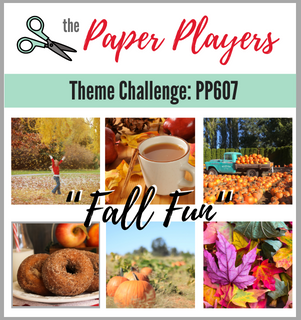

I'm back following my week off last week; I've been enjoying a well-earned break in the Florida sunshine so Ann's theme this week of 'Fall Fun' brought me back down to earth with a bump! I'm not ready for pumpkins and spiced lattes just yet though; I took my inspiration from the bright autumn leaves in our challenge badge and paired them with the lovely Kim's fantastic sketch over at Freshly Made Sketches to come up with this colourful creation - take a look:
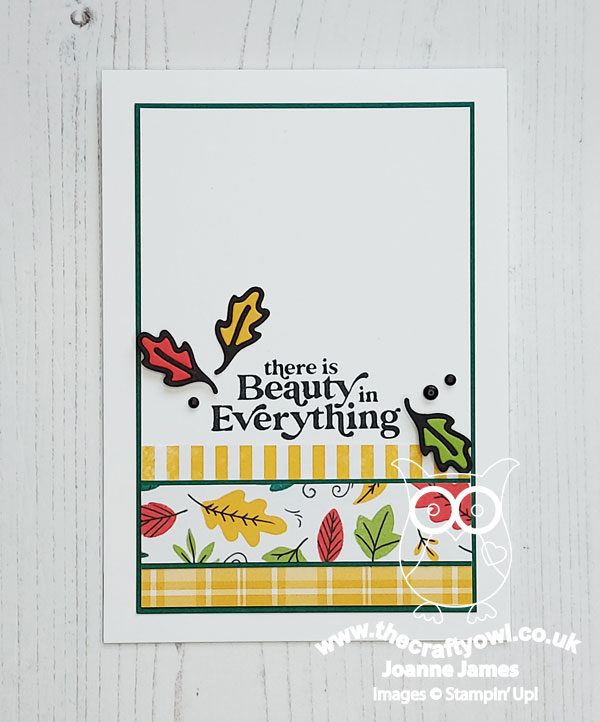
Here's the low-down on today's card:
Celebrate Everything - Kim's sketch features a trio of stripes - perfect to feature a trio of designer papers. A great sketch if you have some co-ordinating scraps to use up: I paired a scrap of yellow gingham with two new papers cut from the Celebrate Everything designer series paper stack; this is a hostess reward and contains 48 sheets of 12" x 12", so is such great value for many and has a range of fabulous seasonal patterns and designs. I love the colourful autumn leaves, so used a stip of this paper in the centre and built the rest of my card around it.
Simply Fabulous - I chose a sentiment from one of my most favourite stamp sets, 'Simply Fabulous', that works perfectly for a seasonal card - I think the changing colours of the autumn leaves is one of the true beauties of nature, don't you agree?
Country Wreaths Diecut Leaves - I accented my sentiment with some matte enamel dots and a trio of diecut leaves from one of the leaves in the Country Wreaths Dies set - I thought they co-ordinated nicely with that central strip of paper. I stuck one on flat and popped the other two up on dimensionals to complete my card:
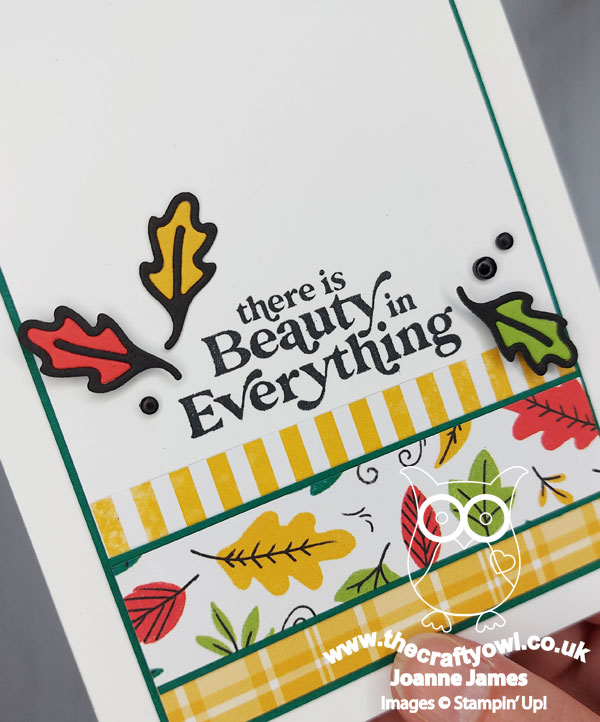
That's my card complete - a seasonal notecard for my stash.
Here is the visual summary of the key products used on today's project for you to pin for easy reference:
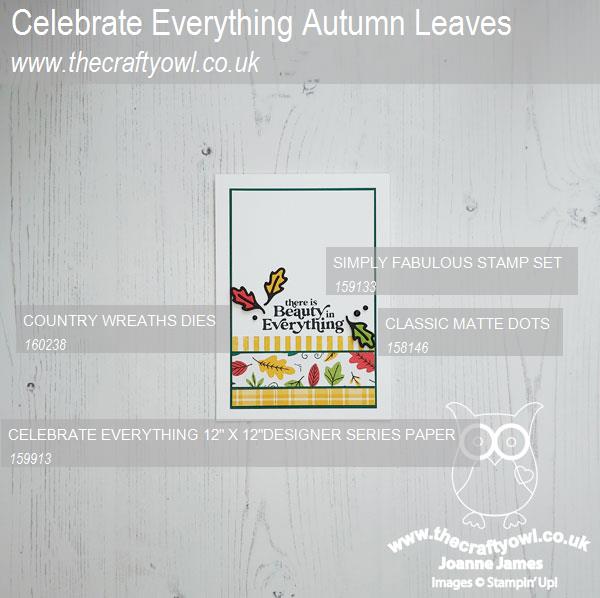
You can see all of my Product and 'How To' summaries on my 'How To - Tips and Techniques' Pinterest board in case you've missed any.
Before you reach for your ink and papers, check out what our amazing team has created to inspire you this week:
The Paper Players Design Team
Here's a quick recap of our challenge rules:
1. Create a new paper project
2. Upload your creation to your blog with a link back to us and provide a direct link to the post featuring your challenge submission.
3. Please link your card to no more than four challenges, TOTAL.
4. Have FUN!
Enjoy your day; we are getting ready for the James Juniors to return to school this week and finishing the last of the post-vacation ironing - joy! I'll be back tomorrow with another project. Until then, happy stampin'!
Stampin' Up! Supplies Used:
bbd801fe-6d9f-4512-97df-d55af498172f|0|.0|96d5b379-7e1d-4dac-a6ba-1e50db561b04
Tags: Shop Stampin' Up! Online, Stamping Shop Stampin' Up online, Shop online, Stampin' Up, Stampin' Up Card ideas, Stampin' Up Supplies, Stampin' Up Card, The Paper Players, Celebrate Everything, Country Wreaths Dies, Simply Fabulous
Cards | Shop Online | Shop Stampin' Up! Online | Stamping
by Joanne James23. August 2022 13:00
It's Tuesday and time for a new challenge over at CAS Colours & Sketches. This week's challenge is a sketch challenge and Nancy has asked that we repeat an element and overlay a sentiment:
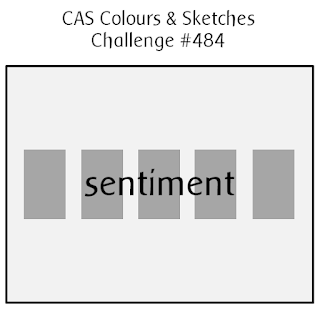
Feel free to flip or rotate the sketch when making your card.
For my card today I went all autumnal and went for a quintet of leaves from the Season of Chic stamp set - take a look:
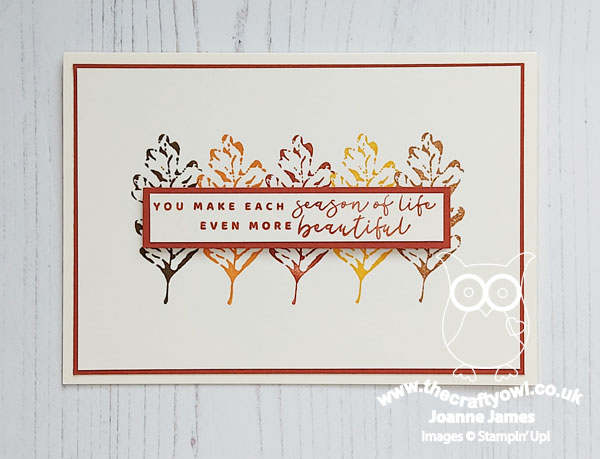
I stamped them in a selection of yellows and browns, then added my sentiment across the centre, having layered it onto a piece of Cajun Craze to tie in with the border:
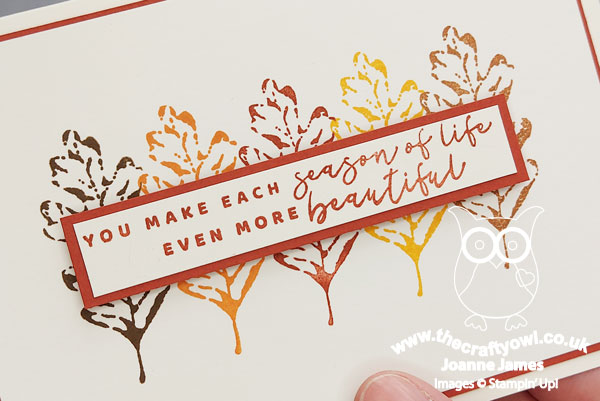
I stamped today's card on Very Vanilla cardstock instead of my usual white; I often find I use Vanilla more that White for autumnal projects as I think it adds a nice warm tone that seems to fit with the season. And that's all there is to it - another example of #simplestamping with nothing more than stamps, ink and paper!
Here is the visual summary of the key products used on today's project for you to pin for easy reference:
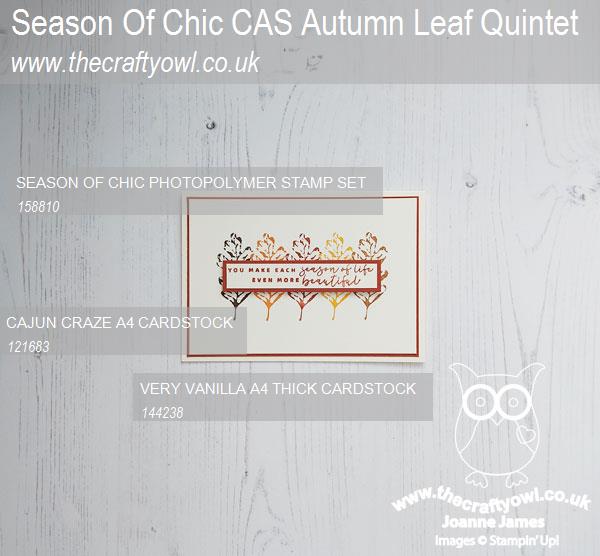
You can see all of my 'How To' summaries on my 'How To - Tips and Techniques' Pinterest board in case you've missed any.
As a reminder, for our colour challenges, you must use all of the stated challenge colours. You may also use neutral colours; however, the challenge colours should be the most noticeable ones featured on your card. We use Stampin' Up! color names for reference, but you are welcome to use any other companies' products as long as you match the challenge colours as closely as possible.
Enjoy your day and I'll be back soon with another project. Until then, happy stampin'!
Stampin' Up! Supplies Used:
by Joanne James21. August 2022 08:00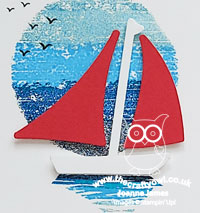
Today it's Sunday and time for this week's new challenge over at The Paper Players! It's the turn of the fabulous Laurie to host this week and she has a Clean and Simple challenge for us to work with:
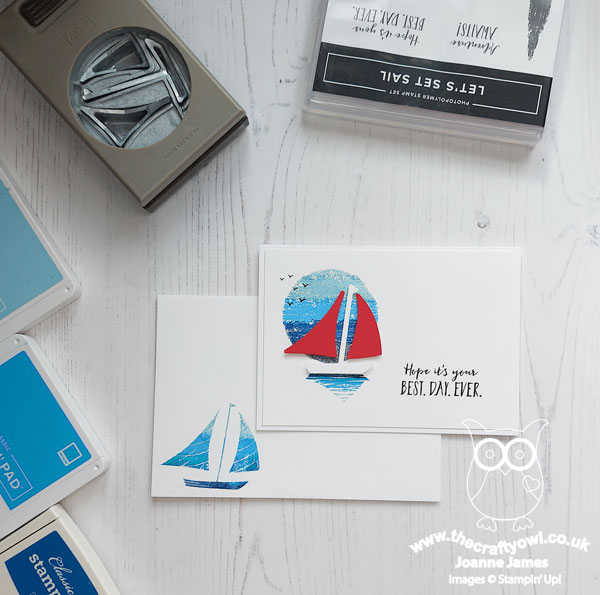
I decided to whip up a quick card using the Let's Set Sail bundle for my project today - take a look:
Here's the low-down on today's card:
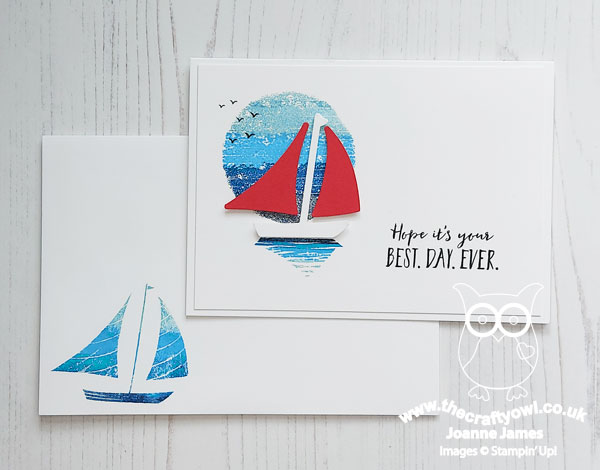
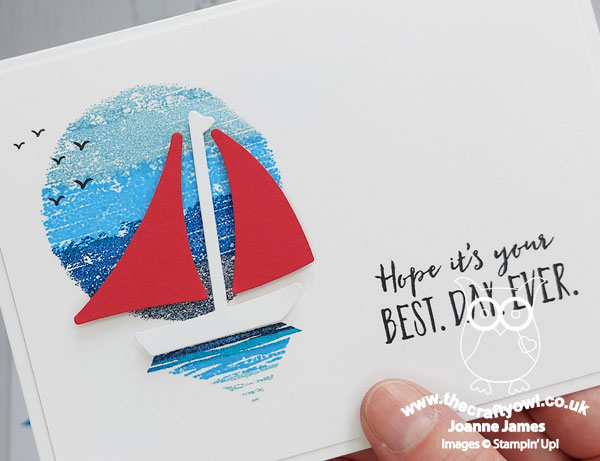
I went super simple and having masked a circle aperture, used the long 'seascape' stamp to create an ombre effect, by repeat stamping in various shades of blue. I inked the reflection stamp in the same way, then added some birds and a sentiment, and a sailboat courtesy of the Sailboat Builder Punch with bright red sails popped up on dimensionals to finish:
I liked this card so much i created another one in shades of aqua green, this time using a sailboat that was completely white:
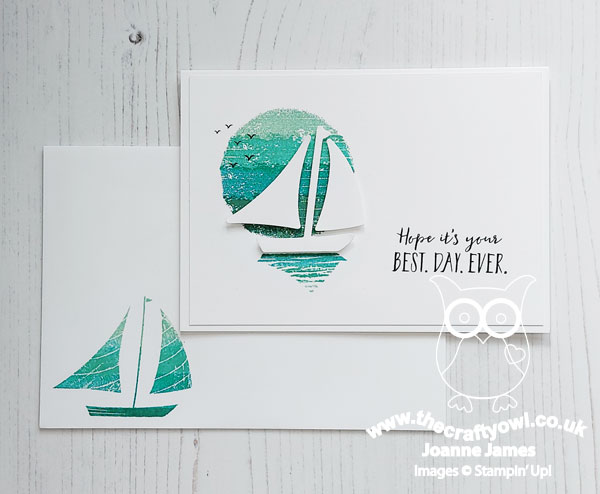
This is a great set for a clean and simple nautical card - the pattern detail in the stamps adds interest and 'texture' without adding anything else:
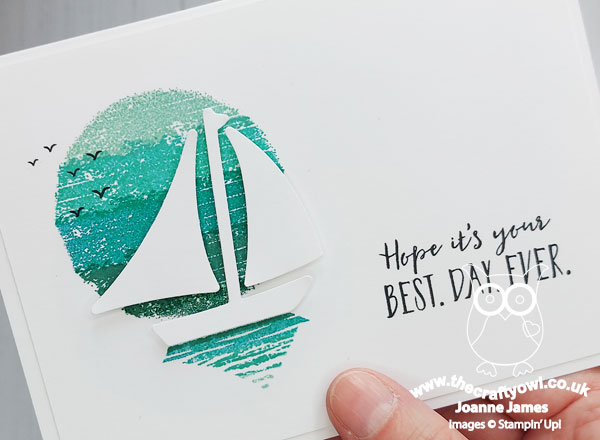
I also added a stamped sailboat with ombre detail to the envelope for added detail. So which of these cards do you prefer? Here's a shot of both side by side to compare:
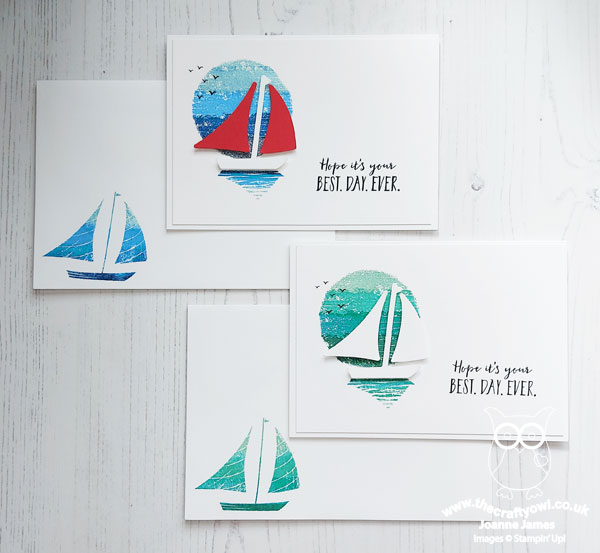
I think I'm still partial to the first one - I love the pop of red from the sails! - but the all-white of the second one definitely makes for a super clean and simple card. I'd love to know what you think - do leave me a comment below and share your thoughts.
Here is the visual summary of the key products used on today's project for you to pin for easy reference:
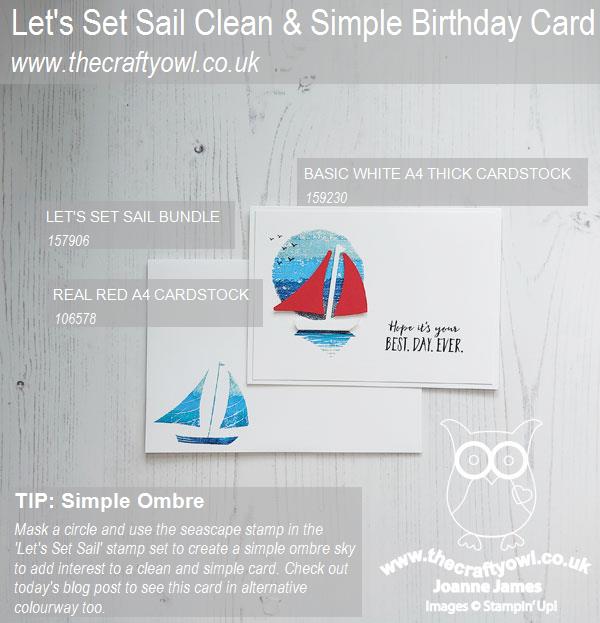
You can see all of my Product and 'How To' summaries on my 'How To - Tips and Techniques' Pinterest board in case you've missed any.
Before you reach for your ink and papers, check out what our amazing team has created to inspire you this week:
The Paper Players Design Team
Here's a quick recap of our challenge rules:
1. Create a new paper project
2. Upload your creation to your blog with a link back to us and provide a direct link to the post featuring your challenge submission.
3. Please link your card to no more than four challenges, TOTAL.
4. Have FUN!
Enjoy your day; I'll be back on Tuesday with my card for a new CAS Colours & Sketches challenge. Until then, happy stampin'!
Stampin' Up! Supplies Used:
041c2715-cd2c-4f55-a96c-06df98eeeec3|0|.0|96d5b379-7e1d-4dac-a6ba-1e50db561b04
Tags: Shop Stampin' Up! Online, Stamping Shop Stampin' Up online, Shop online, Stampin' Up, Stampin' Up Card ideas, Stampin' Up Supplies, Stampin' Up Card, The Paper Players, Lets Set Sail, Sailboat Builder Punch, Clean and Simple
Cards | Shop Online | Shop Stampin' Up! Online | Stamping
by Joanne James18. August 2022 08:00
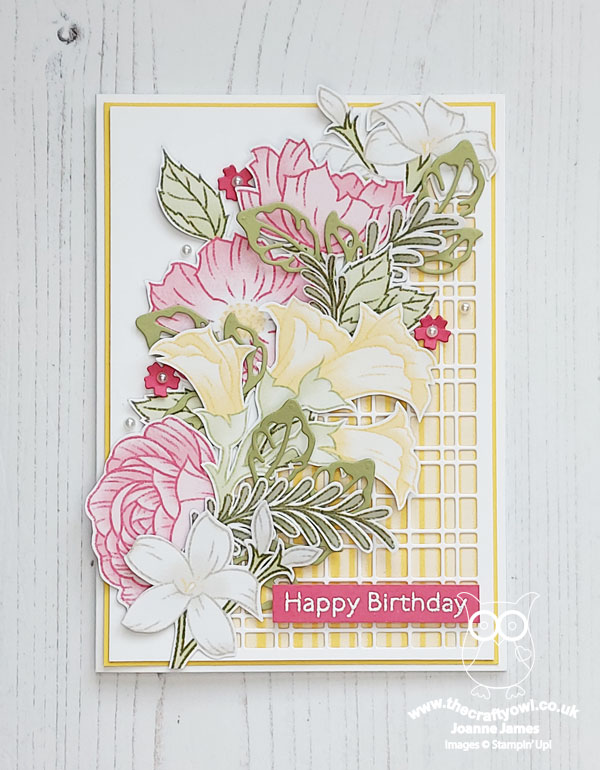
Today I'm sharing a card that I made a few weeks ago but haven't had time to type up until now, featuring more of the lovely Wonderful World designer series paper that can be yours free with a £90 order during the current Sale-A-Bration promotion - take a look:
Here's the low-down on today's card:
Sale-A-Brate with a Wonderful World - I had fussy-cut a whole bunch of flowers from the Wonderful World paper and decided to CASE a card shared by one of Stampin' Up!'s current artisans, the talented Berdien Weideveld, that she posted a while ago on Instagram. I simply layered them along the diagonal, with a mix of white, yellow and pink flowers and an additional piece of the yellow striped DSP on the base layer.
Split Card Textures - the diagonal for the flowers is taken from the line of the Split Card Texture Die - these come as a set of two standalond dies and are great for adding detail and texture to a cardfront.
Finishing Touches - I added some pearls, small diecut flowers and diecut leaves to my fussy cut flowers to add interest:

Lastly, a simple heat-embossed sentiment from hte 'Art Gallery' stamp set completes my card. It took a while to cut out all the flowers, but I must say I love the finished effect!
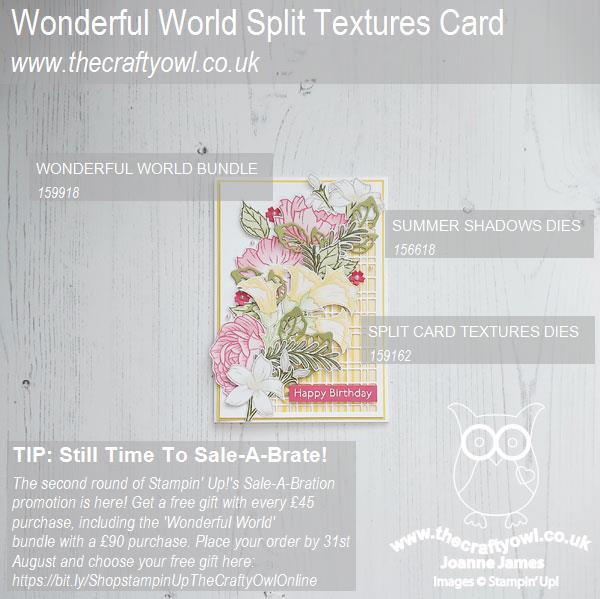
Here is the visual summary of the key products used on today's project for you to pin for easy reference:
You can see all of my 'How To' summaries on my 'How To - Tips and Techniques' Pinterest board in case you've missed any.
I'm writing this post in advance of my vacation so I hope as you are reading it that the Wonderful World papers are still available; if not, I hope you already snapped them up whilst supplies lasted and you are still excited to use them!
Enjoy your day and I'll be back tomorrow with another project. Until then, happy stampin'!
Stampin' Up! Supplies Used:
7ea81c9b-6fd8-49ac-bfb9-ea633251dd24|0|.0|96d5b379-7e1d-4dac-a6ba-1e50db561b04
Tags: Stampin' Up, Stampin' Up Card, Stampin' Up Card ideas, Stampin' Up Supplies, Shop online, Shop Stampin' Up online, Shop Stampin' Up! Online, Wonderful World, Split Card Textures, Sale-A-Bration 2022, Summer Shadow Dies, Sending Dies, Art Gallery
Cards | Sale-a-bration | Shop Online | Shop Stampin' Up! Online | Stamping
by Joanne James16. August 2022 13:00
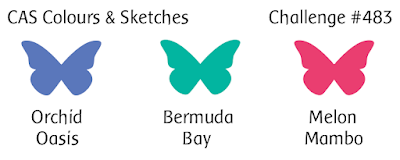
It's Tuesday and time for a new challenge over at CAS Colours & Sketches. Nancy is hosting this month and I today it's her second a colour challenge:
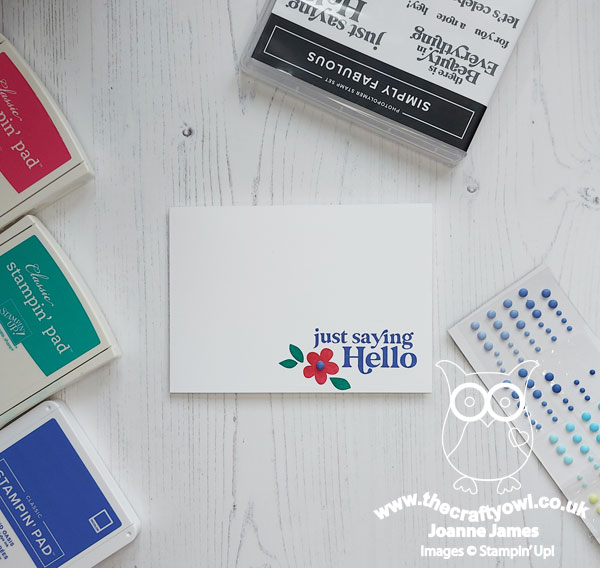
For my card today I went super clean and simple with this week's colours (love them!) and my favourite 'Simply Fabulous' stamp set - take a look:
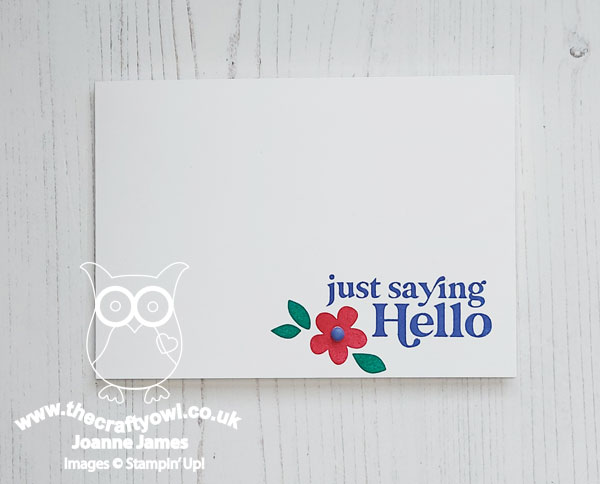
Here's the low-down on today's card:
This really is a card that needs no explanation: I stamped the sentiment, popped in the flower and added a single matte dot to the centre:
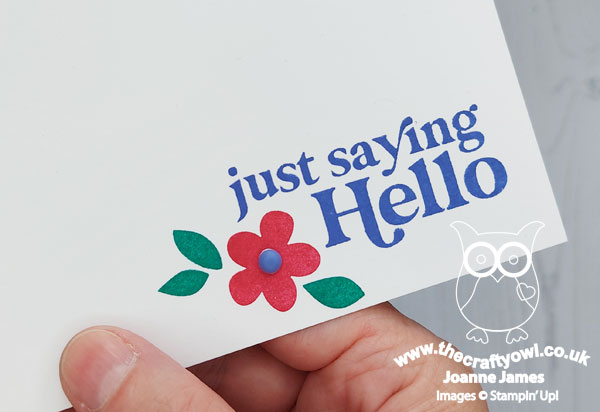
#simplestamping at its best!
Here is the visual summary of the key products used on today's project for you to pin for easy reference:
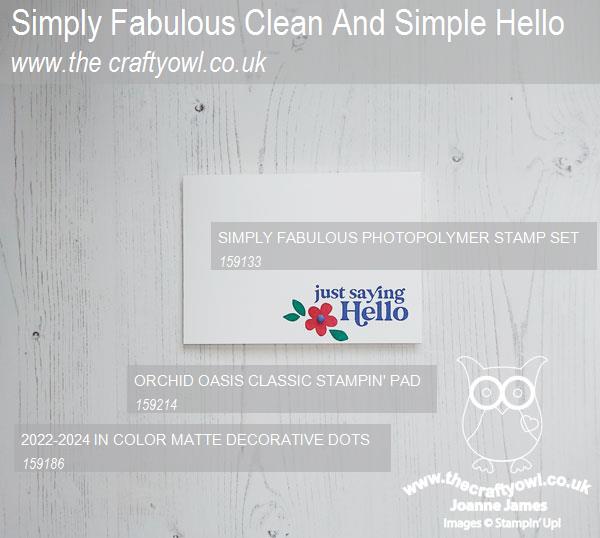
You can see all of my 'How To' summaries on my 'How To - Tips and Techniques' Pinterest board in case you've missed any.
As a reminder, for our colour challenges, you must use all of the stated challenge colours. You may also use neutral colours; however, the challenge colours should be the most noticeable ones featured on your card. We use Stampin' Up! color names for reference, but you are welcome to use any other companies' products as long as you match the challenge colours as closely as possible.
Enjoy your day and I'll be back at the weekend with my card for the new challenge over at The Paper Players. until then, happy stampin'!
Stampin' Up! Supplies Used:
by Joanne James14. August 2022 08:00
Today it's Sunday and time for this week's new challenge over at The Paper Players! It's the turn of the fabulous Ann Marie to host this week and she has an interesting colour challenge for you to work with:
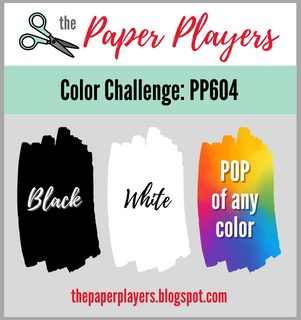
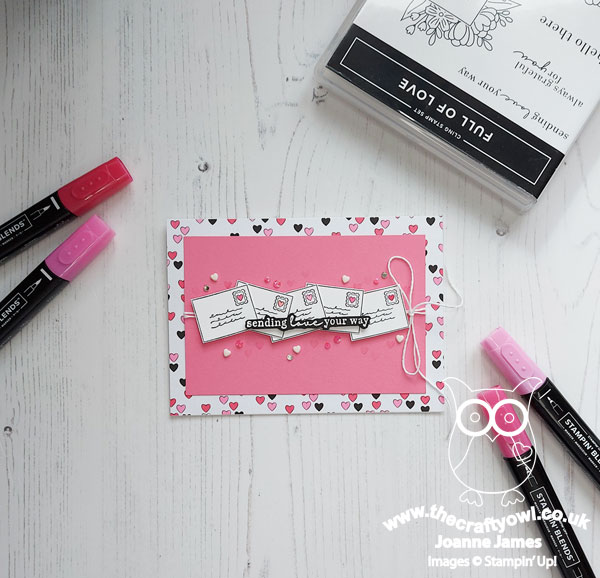
Black and white and a pop of any colour - how fun! I reached for some black and white designer paper, my 'Full of Love' stamp set and some Polished Pink cardstock and a selection of pink Stampin' Blends and set to work. This is what I came up with:
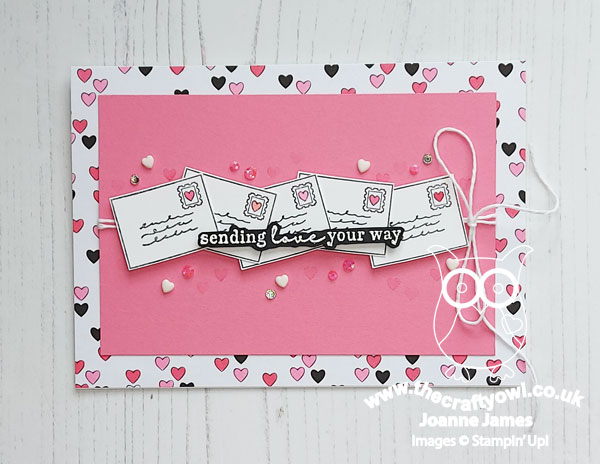
Here's the low-down on today's card:
I originally reached for my Perfectly Pencilled DSP, but having decided to use the 'Full of Love' stamp set, I decided some (retired) All together DSP would be a better choice with its heart pattern, to tie in with the stamps on the stamped envelopes. I coloured the blank hearts on the paper with both shades of my Polished Pink Blends markers, then added a panel of Polished Pink cardstock, that I stamped some tone-on-tone hearts across the centre. I added some twine, then a row of stamped envelopes that I fussy cut from one of the main stamps, before overlaying a heat embossed sentiment:
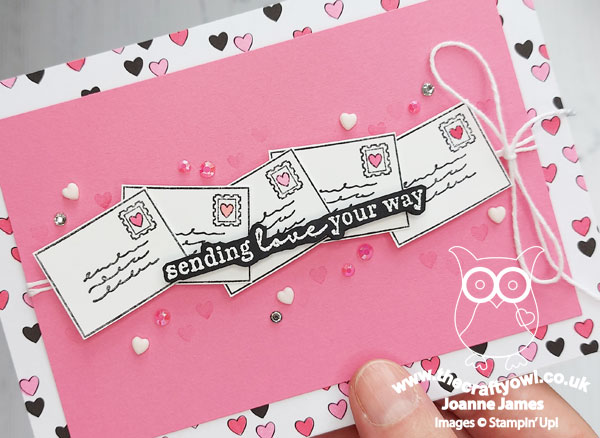
A sprinkling of (retired) white resin hearts, in-colour gems and rhinestones complete my card.
I originally made this card with something else in mind, but I got a little carried away and it evolved into a pretty card perfect for today's challenge and just the card to send a little love someone's way!
Here is the visual summary of the key products used on today's project for you to pin for easy reference:
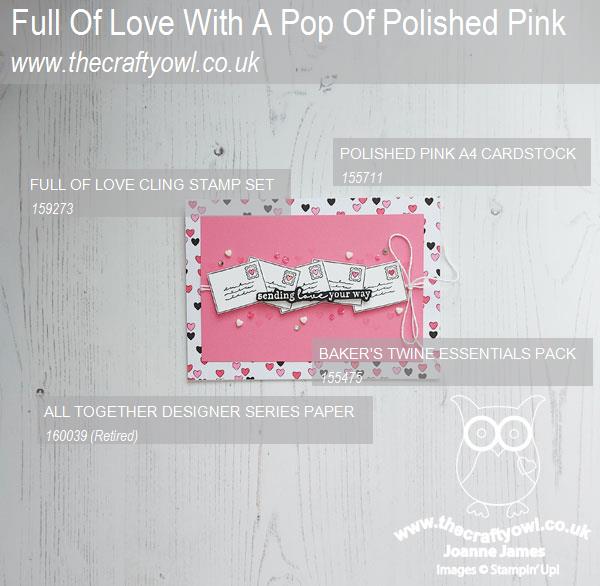
You can see all of my Product and 'How To' summaries on my 'How To - Tips and Techniques' Pinterest board in case you've missed any.
Before you reach for your ink and papers, check out what our amazing team has created to inspire you this week:
The Paper Players Design Team
Here's a quick recap of our challenge rules:
1. Create a new paper project
2. Upload your creation to your blog with a link back to us and provide a direct link to the post featuring your challenge submission.
3. Please link your card to no more than four challenges, TOTAL.
4. Have FUN!
Enjoy your day; I'll be back on Tuesday with another project. Until then, happy stampin'!
Stampin' Up! Supplies Used:
by Joanne James12. August 2022 12:00
Today I'm sharing my design team card for our new challenge over at As you See It where it's time for a recipe challenge:
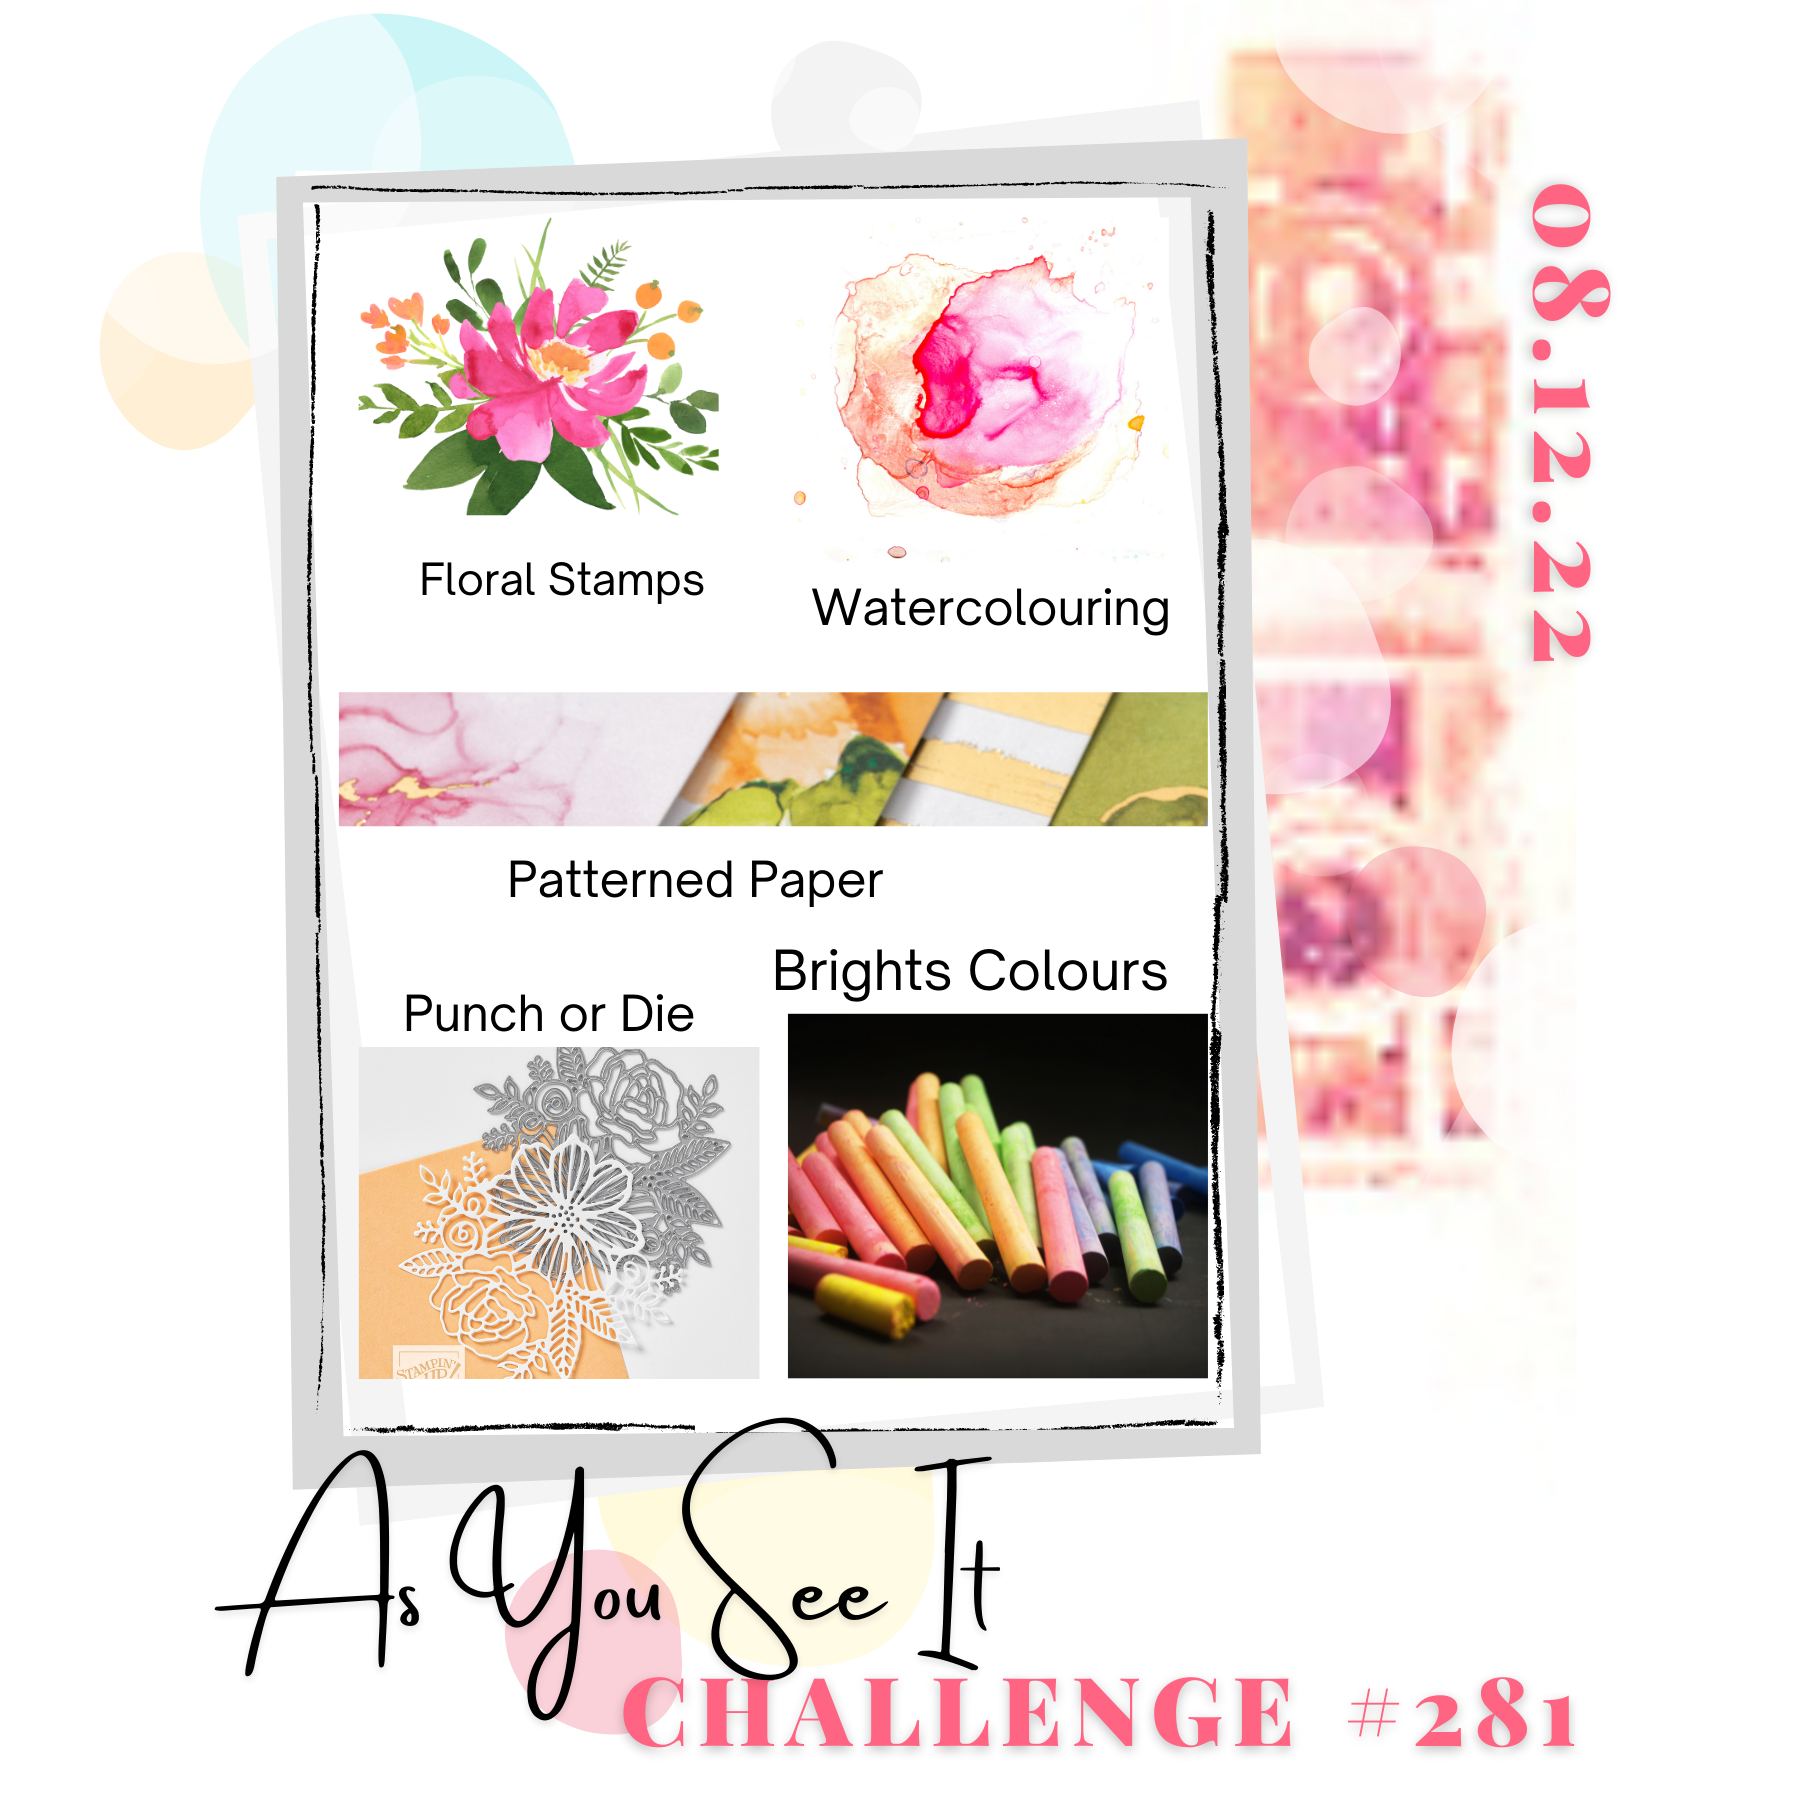
There were lots of things on this week's board that I loved - DSP, bright colours, dies and even florals - but I was slightly unnerved by the addition of watercolouring into the mix! I find watercolouring a little hit and miss (sometimes my attempts are a hot mess!) so I decided to play safe and watercolour my stamped florals and take it from there. Take a look at where I ended up:
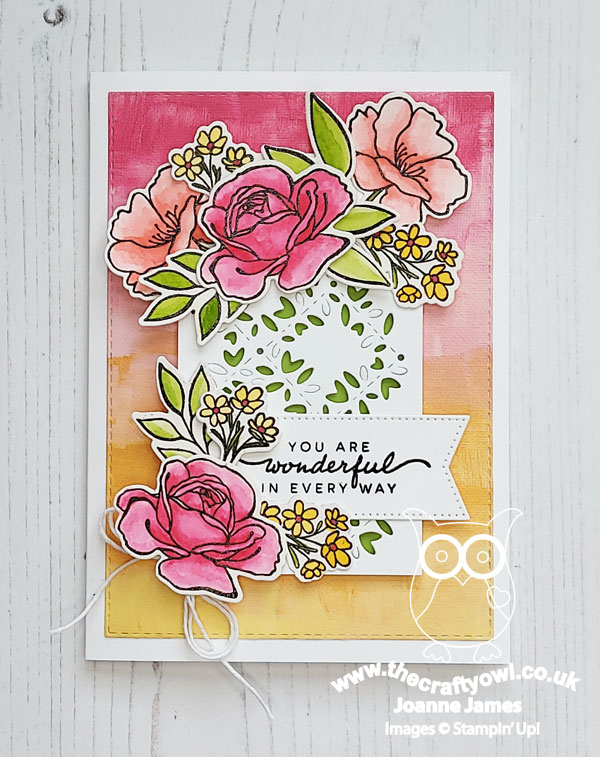
Here's the low-down on today's card:
I decided to use some of the brightly coloured Hues of Happiness DSP for my background and use this as the starting point for my card. I resisted the urge to use some of my florals diecut from another sheet in this pack and instead I stamped a whole bunch of flowers from the 'Happiness Abounds' stamp set onto Shimmery White cardstock and heat embossed them in black. Shimmery White cardstock is great for watercolouring as it's not too absorbent and so is very forgiving. I watercoloured my flowers in the same colours that featured on my background paper, and positioned them around a central diecut piece, also from the co-ordinating Blossoming Happiness Dies:
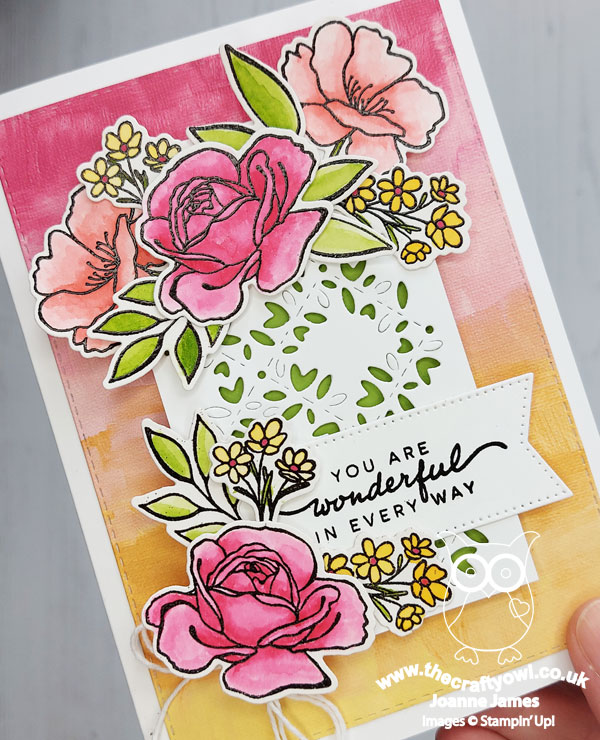
I heat embossed my sentiment onto a Stylish Shapes diecut banner, added a twine bow and my card is complete - all elements of the recipe included, phew!
Here is the visual summary of the key products used on today's project for you to pin for easy reference:
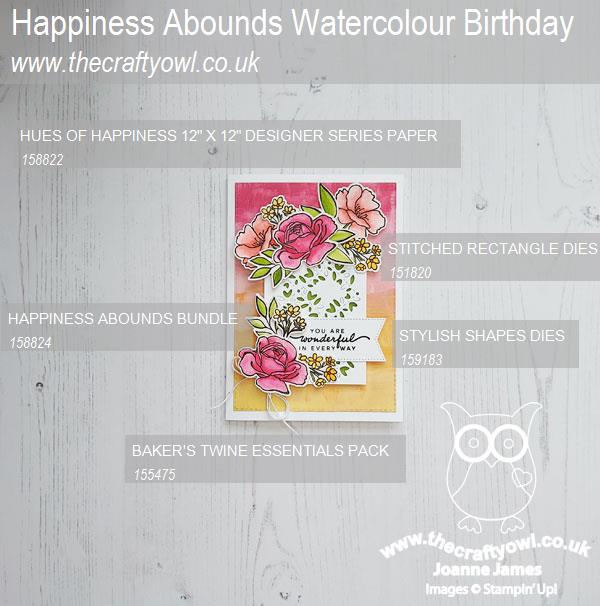
You can see all of my 'How To' summaries on my 'How To - Tips and Techniques' Pinterest board in case you've missed any.
Here's a summary of our challenge rules:
- Create any card, scrapbooking page, 3D project or packaging project that fits the challenge.
- Please include the challenge graphic and link back to the challenge in your blog post. Turn off word verification so we can leave you lots of lovely comments. Make sure you link the post not the whole blog to the Linky. Use #AYSIXXX when uploading to a public gallery.
- If you’re unsure about ‘the rules’, check the details under the Challenge Guidelines tab on the As You See It Challenge homepage.
We look forward to seeing your creations in the AYSI gallery.
Enjoy your day and I'll be back on Sunday with my project for The Paper Players. Until then, happy stampin'!
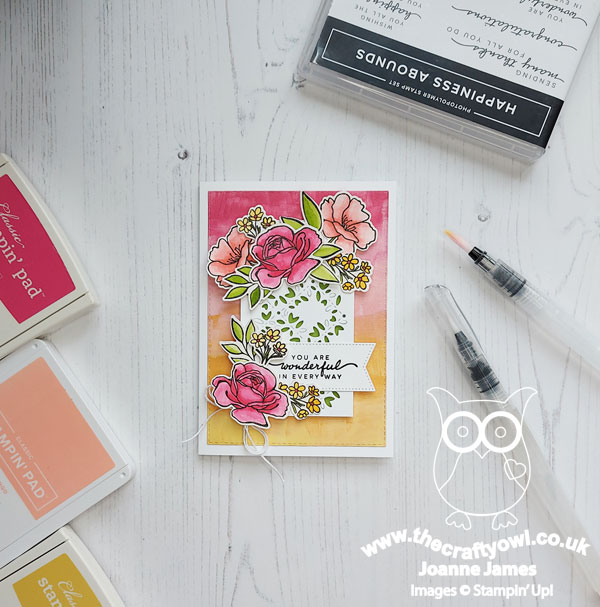
Stampin' Up! Supplies Used:
3629a47a-3935-44cb-af77-2fc016c2cf92|0|.0|96d5b379-7e1d-4dac-a6ba-1e50db561b04
Tags: Stampin' Up, Stampin' Up Card, Stampin' Up Card ideas, Stampin' Up Supplies, Shop online, Shop Stampin' Up online, Shop Stampin' Up! Online, As You See It Challenge, Happiness Abounds, Blossoming Happiness Dies, Watercolouring, Hues of Happiness, Stylish Shapes Dies
Cards | Shop Online | Shop Stampin' Up! Online | Stamping