Today I've been invited by my good friend and team leader over at The Paper Players, the lovely Nance Leedy, to be the Guest Designer over at Inspired By All The Little Things - what an honour!
I love this challenge, also set up originally by the creative powerhouse that is the lovely Lesley Croghan, and although I don't get to play along as often as I would like I can often be found browsing the gallery each week, for inspiration from the awesome team of designers, the challenge for the week and also to have a little nosey at the invited guest - you see they have a fun feature where they do a little interview and you get to find out what inspires them, along with some interesting things that you might not know about the featured designers. Yes, that includes me - I included one or two fun things that even my regular readers might not know about me too, so hop on over and have a read if you'd like to find out more! You could even have a go at this week's challenge - I would love to see what you make of it!
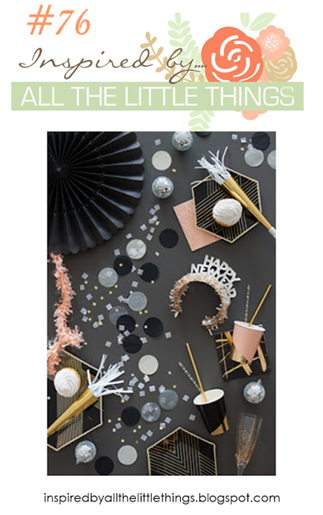
And so to my card! Here is the inspiration photo for this week's challenge:
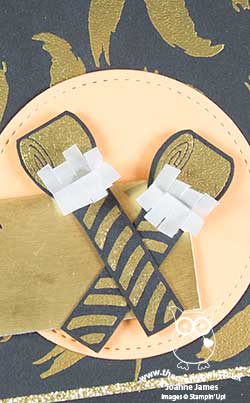
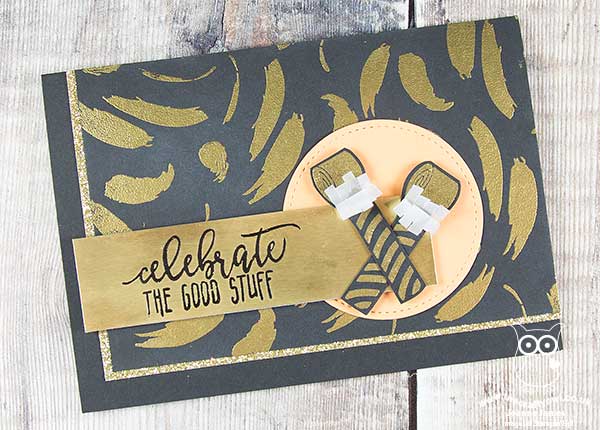
Now I must confess, I thought long and hard about this card and had a false attempt too before I produced something that I felt embodied the feeling of 'party' evoked in the inspiration picture. Here's what I came up with:
Here's the low-down on today's card:
Inspired By All The Little Things - I thought I would give you a little insight into how I used the inspiration photo to get to my final card design today, as I often get asked "where do you start?" when making a card. The photo has lots of elements: black, gold, peach, vellum, white, confetti, hexagons, squares, circles, art deco, party blowers, glitter balls, happy new year, a rosette, a champagne glass to name just some - and whilst I could have used any or all of them on my card, I chose to zone in on a few. I decided to major in on the black and gold colours for my colour scheme, with just a pop of peach, and create a card with a party theme that could be used for new year but would also work for any other kind of party celebration. Then I browsed my stamp sets and accessories to see what would work and set to work.
A Playful Background - I originally set about creating some rather fancy art deco-inspired hexagons using gold washi tape and black cardstock, but eventually decided these were too busy on my card so they are now waiting in my scrap box for another project! I decided to go with something less geometrical and create a background using one of the stamps in the Playful Backgrounds stamp set that mimicked the mat beneath the peach party cup in the photo (I selectively inked it so that the little dots on the stamp are omitted from my design) and heat embossed it in gold. I then did the reverse colour combination for my sentiment, i.e. black heat embossed on gold foil, so that it provides contrast yet is still in keeping with my theme.
A Picture Perfect Party - My card needed a focal point, so what better than a couple of party blowers? And a new stamp set that I acquired at Stampin' Up!'s Onstage event recently provided just the thing - the 'Picture Perfect Birthday' set has ribbon bows, candles, confetti and party sentiments galore, but also has the bits to construct a party blower - how fun! I made two and gave them each a vellum frill that I cut with my fringe scissors, as another nod to the inspiration photo. I wanted to make them stand out from the rest of the card, hence to addition of my Peekaboo Peach stitched circle behind; I didn't want peach to be a major feature of my design yet it serves a useful purpose here to highlight my blowers and ensure they don't get lost against the busyness of the background pattern. Picture Perfect Birthday is in the new Spring-Summer Stampin' Up! catalogue out on January 3rd - be sure to get in touch with me if you'd like a copy.
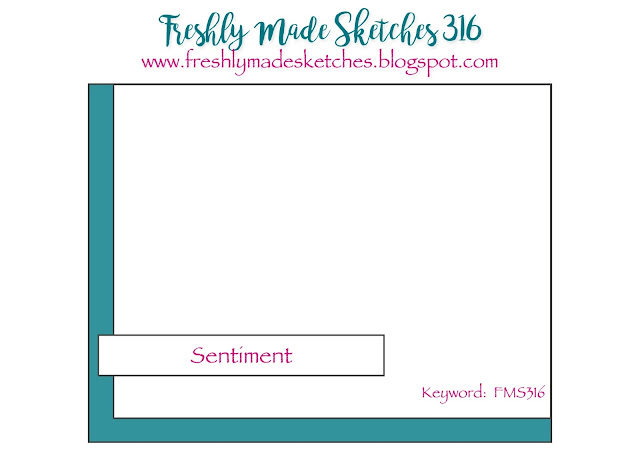
And that's how I did it! I'm also linking my card up with the team over at Freshly Made Sketches - what can I say, I love a good sketch :-)
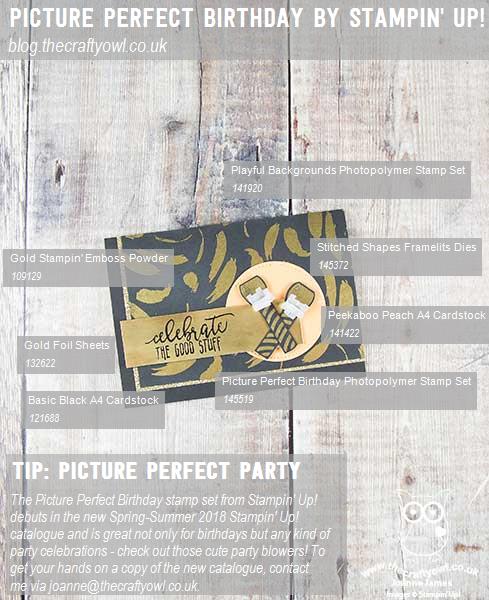
Here is the visual summary of the key products used on today's project for you to pin for easy reference:
You can see all of my 'How To' summaries on my 'How To - Tips and Techniques' Pinterest board in case you've missed any.
Enjoy your day and I'll be back tomorrow with another project for the last challenge of the year (gulp!) over at The Paper Players. Until then, happy stampin'!
Stampin' Up! Supplies Used: