Happy Friday everyone - the end of the week is here! This also means I'm sharing my design team card for our new challenge over at As you See It where it's time for a fun sketch challenge:

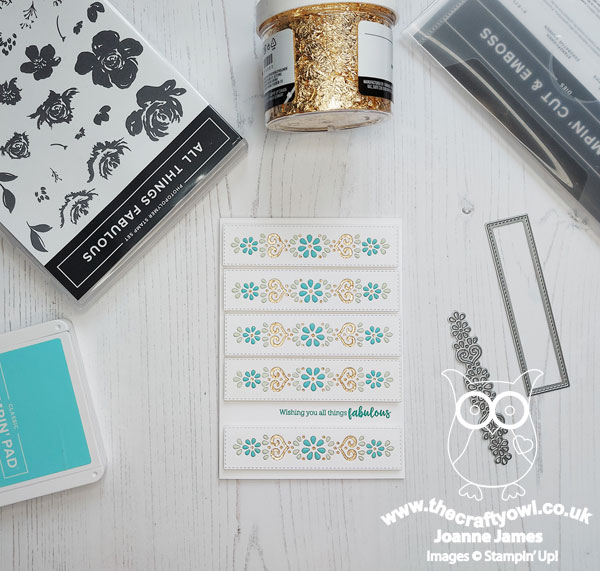
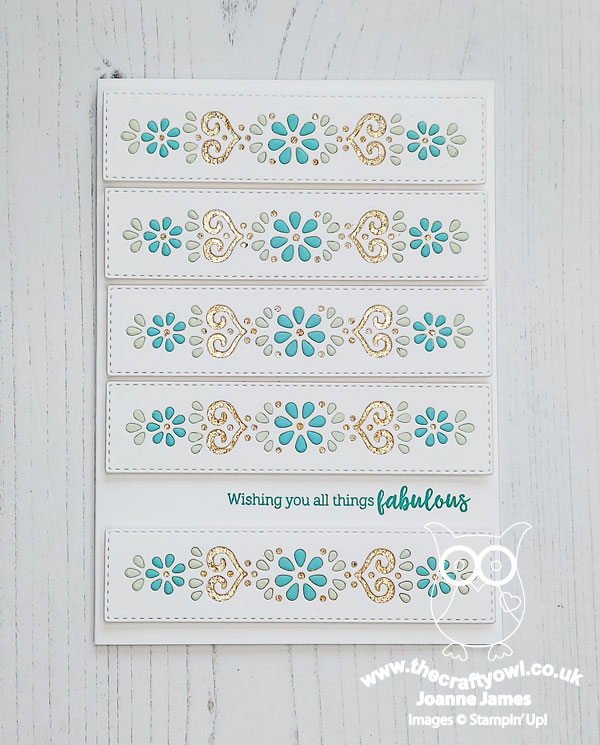
I paired our sketch full of horizontals with this week's Color Throwdown colours and set to work. Initially this sketch had me stumped; my 'go to' would normally be designer series paper but I just wasn't inspired (check out what some of my teamies did with DSP though - amazing!) I perused my catalogue and then happened upon a retiring die that I thought would make a pretty repeating design - take a look at what I came up with:
Here's the low-down on today's card:
Do you recognise this die? Or actually dies, as it uses two? Both the stitched rectangle and the floral line are from the retiring Ornate Layers Dies. In addition to the fancy frames in this set, there are two pretty floral diecut elements too and this is one of them. What this card lacks in supplies - you need literally just a handful of items to recreate it - it more than makes up for in time: all of the tiny floral elements have been paper-pieced into the negative of the white rectangles and yes it took a while! It's so worth it though; I considered leaving the panels white with the negative space unfilled and also considered cutting the panels from coloured cardstock, but they just didn't look as good. Instead I cut five rectangles with the negative die inset, then diecut the floral band an additional five times each in Coastal Cabana and Soft Sea Foam and using some Press 'n' Seal and the putty end of my Take Your Pick Tool, paper-pieced the pieces into each white panel (having first adhered it to a piece of cardstock using an adhesive sheet.
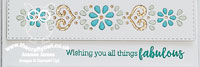
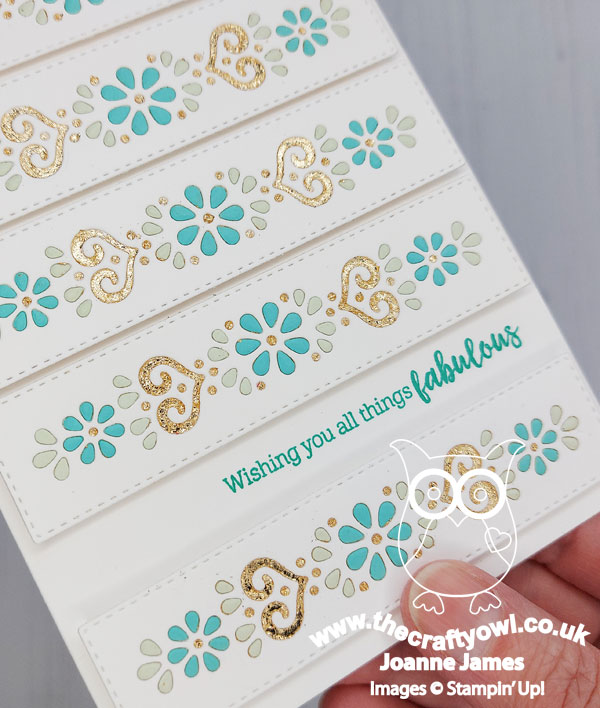
For the gold elements, instead of using gold foil I rubbed the remaining areas with gold gilded leafing; this stuff gets everywhere, but I love the bright shine and slightly textured effect that it gives - you can see it more closely below:
I finished with a sentiment from the retiring 'All Things Fabulous' which has sadly already sold out here in the UK (love this set!) So what do you think? This card took a while but was so worth it - I love it! I'm also linking today's card up over at The Flower Challenge where they want us to add a heart to our floral cards; is it me, or are those not 'hidden' gold hearts on their sides either side of the central flower? For all you Walt Disney World fans out there, think of it like a hunt for 'hidden Mickey's' - you see them, right?!
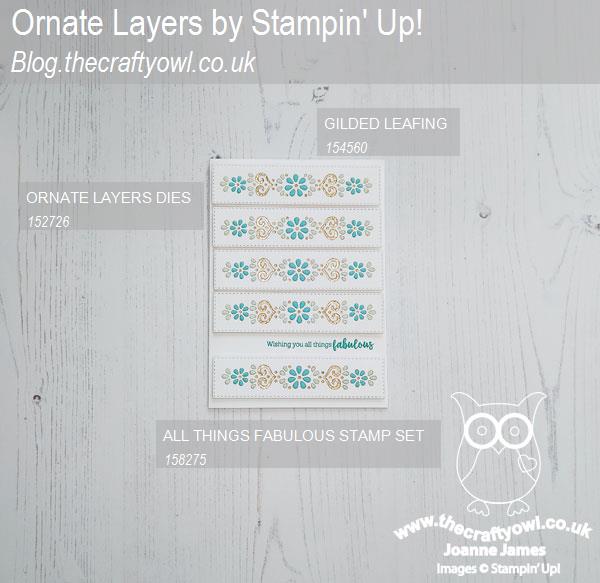
Here is the visual summary of the key products used on today's project for you to pin for easy reference:
You can see all of my 'How To' summaries on my 'How To - Tips and Techniques' Pinterest board in case you've missed any.
Here's a summary of our challenge rules:
- Create any card, scrapbooking page, 3D project or packaging project that fits the challenge.
- Please include the challenge graphic and link back to the challenge in your blog post. Turn off word verification so we can leave you lots of lovely comments. Make sure you link the post not the whole blog to the Linky. Use #AYSIXXX when uploading to a public gallery.
- If you’re unsure about ‘the rules’, check the details under the Challenge Guidelines tab on the As You See It Challenge homepage.
- In a sketch challenge, you are welcome to rotate or flip a sketch. You can replace shapes used such as substituting a circle panel for a square panel. However, we must be able to still see the basis of the original sketch in your finished product.
We look forward to seeing your creations in the AYSI gallery.
Enjoy your day; I have my usual list of Friday chores to complete today, including amongst other things trying to line-dry my washing in between the April showers (so far this week the score is 'Weather 2 - Joanne 0'!) but I'm hoping since I have a helper or two I met get done quicker and be able to squeeze in a little crafty time too. I'll be back tomorrow with another project. Until then, happy stampin'!
Stampin' Up! Supplies Used: