Today I'm sharing a card for the final challenge over at CAS(E) This Sketch:

I'm so sad this challenge is ending! I thought this sketch was a tricky one, and I did take quite a liberal interpretation, but since it was the very last one I couldn't not play along. After much consideration, I decided to go with dandelions for my card - take a look:

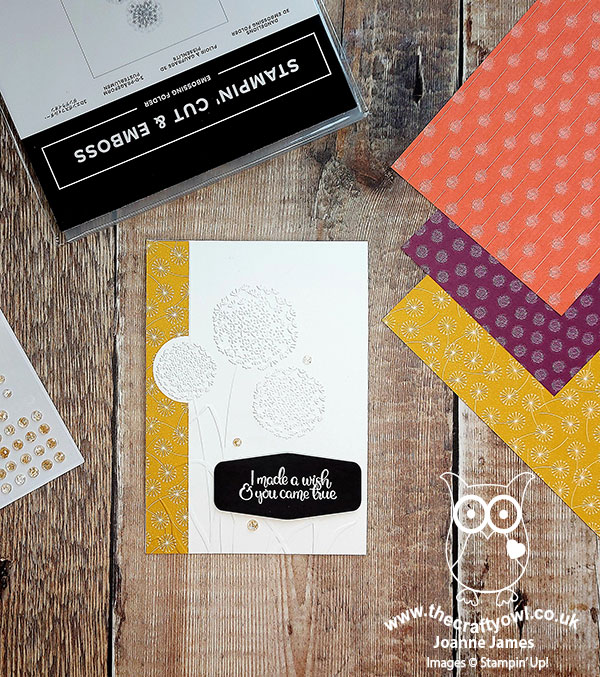
Here's the low-down on today's card:
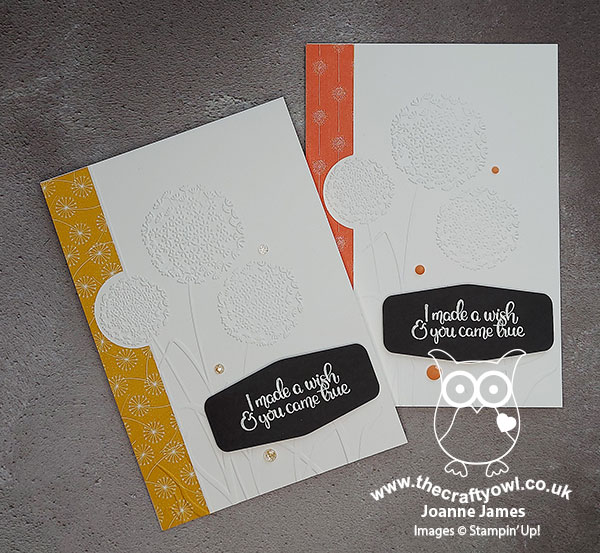
A Dandelion Trio - I've both a trio of dandelions and a trio of dandelion products on today's card! The first is the beautiful Dandelions 3D embossing folder from the main catalogue. This embossing folder is the makings of a card in itself and I thought the positioning of the dandelion seed heads worked really well for the tag elements of the sketch - just check out the detail:
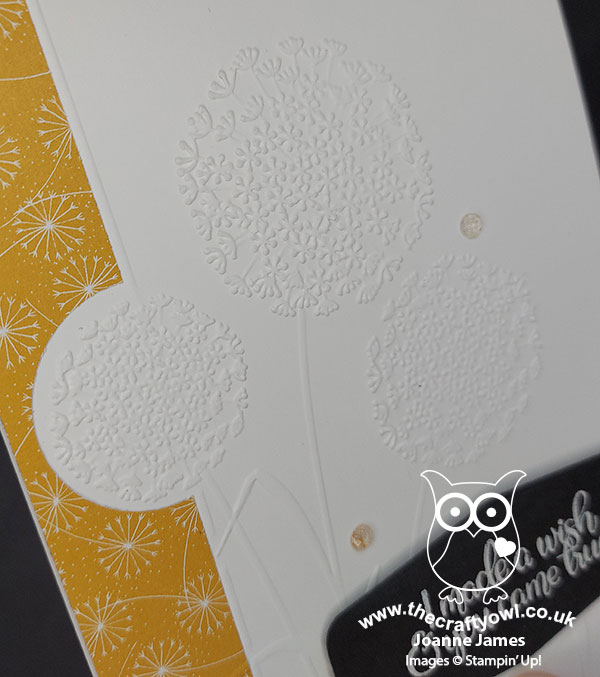
I addition to the embossed dandelions, Once I'd added my strip of DSP (more on that in a moment) I added a scored line at the edge of the paper to tie it into my embossed design, which you can just see on the photo above. A small and subtle detail, but it really adds to the finished appearance of the card.
Dandy Garden - I decided I needed something to represent the vertical element of the sketch, so decided that some of the dandelion-patterned paper from the Dandy Garden DSP pack in the current mini catalogue woould do the trick. I used a strip of white and Bumblebee for my first card, then I also made a second card and used a strip of the Calypso Coral design. On both cards I used a circle punch to remove a semi-circle so that my strip fit around my embossed dandelion head:
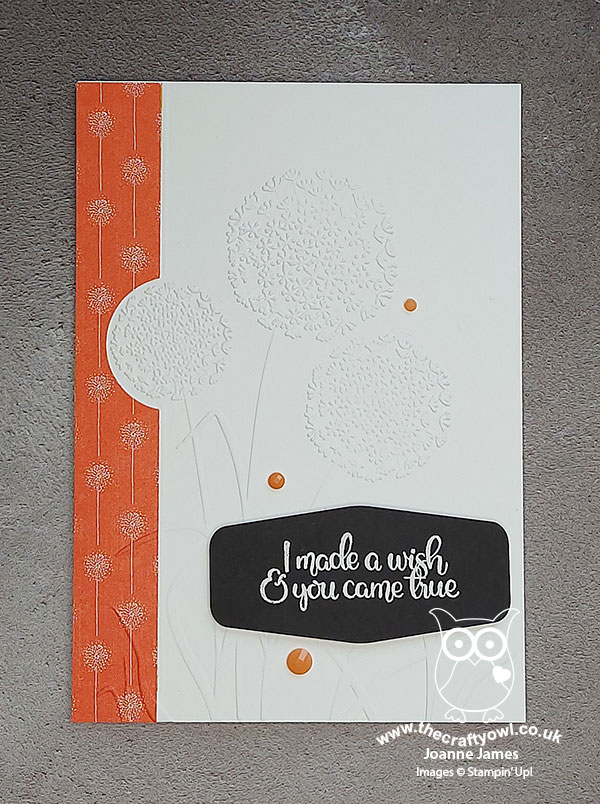
My customes and team know how much I have a love-hate relationship with the dandelion designs in the Dandy Garden DSP pack; I am not keen on the bold designs of proper yellow dandelions in this pack (they realy are just weeds, right?!) but I do love the reverse patterns that depict the more whispy dandelion seed heads that I've used here. Here's a shot of each of the cards together - which one do you prefer?
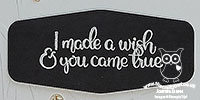
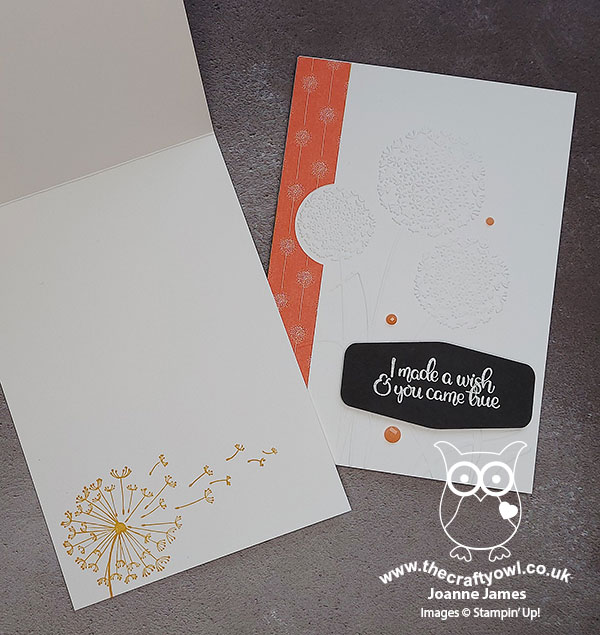
Dandelion Wishes - Finally, I paired my embossed design and DSP border with a heat-embossed sentiment from the 'Dandelion Wishes' stamp set - the third dandelion element. I also used the dandelion stamp in this set to add some decoration to the inside of my card:
I added a trio of faceted gems to the front to complete my card. So what do you think - did I do the final CAS(E) This Sketch justice? I hope so.
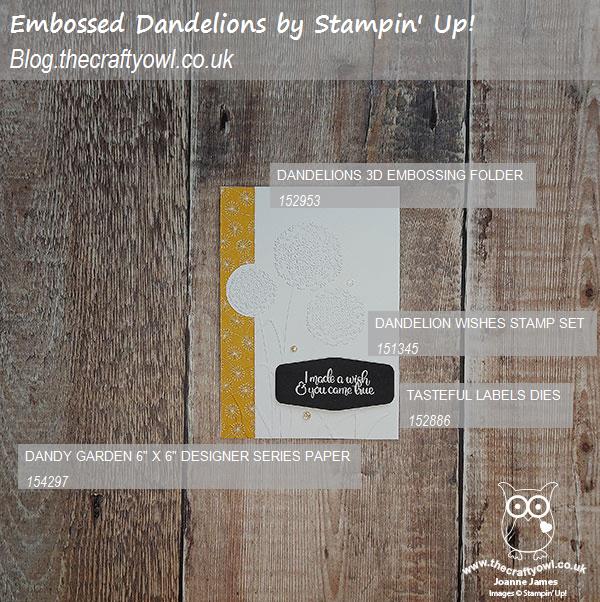
Here is the visual summary of the key products used on today's project for you to pin for easy reference:
You can see all of my 'How To' summaries on my 'How To - Tips and Techniques' Pinterest board in case you've missed any.
Enjoy your day and I'll be back tomorrow with another project. Until then, happy stampin'!
Stampin' Up! Supplies Used: