Tea Boutique Teapot Trio For CCS471

by Joanne James24. May 2022 12:00

It's Tuesday and time for a new challenge over at CAS Colours & Sketches. This week's challenge is a sketch challenge and Shannon has asked that we include a trio of any type of shape, surrounding a sentiment. Feel free to flip or rotate the sketch when making your card.


For my card today I decided to get fussy cutting for those three shapes on Shannon's sketch and I reached for my Tea Boutique papers and a couple of designs in particular that were inspired by the gorgeous pinky-reds and blues over at Sunday Stamps - take a look:


Here's the low-down on today's card:

I love the colour combinations in the Tea Boutique papers and decided to choose one panel for a background to 'frame' my white space in the centre and from another sheet I fussy cut a trio of teapots for my three shapes. Now I know fussy cutting isn't for everyone and these are a little fiddly, especially if you cut out the handle piece, but I find cutting quite relaxing and quite enjoyed choosing my pot designs and then cutting them out:


I allowed the handles of my teapots to overhang the white panel, with the thin white border around them helping them to stand out from the background. I added a little stamped tag for my sentiment, tied with some of the new Starry Sky in-color baker's twine. This is a little fussy for a CAS card and in hindsight I maybe should have stamped my sentiment straight onto the white panel, but it's done now so too late  - and I like it! :-)

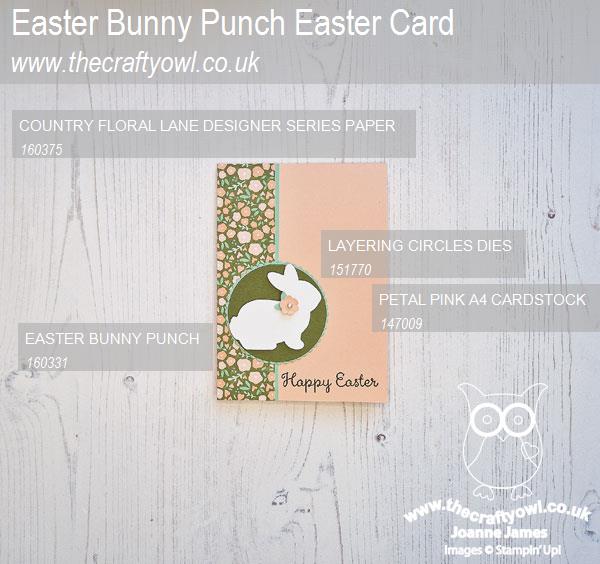
Here is the visual summary of the key products used on today's project for you to pin for easy reference:
 

You can see all of my 'How To' summaries on my 'How To - Tips and Techniques' Pinterest board in case you've missed any. 

So no need to hoard that new designer series paper - this is my call to 'get snipping'!

Enjoy your day and I'll be back tomorrow with another project. Until then, happy stampin'!


Stampin' Up! Supplies Used:
Table built using Product Table Builder by The Crafty Owl - Independent Stampin' Up! Demonstrator.

Simply Fabulous Butterfly Kisses PP592

by Joanne James22. May 2022 08:00

Today it's Sunday and time for this week's new challenge over at The Paper Players! It's the turn of the fabulous LeAnne to host this week and she has my favourite, a sketch challenge for you to work with:


I went simple and bright with today's card and used it as an opportunity to play with some new products - take a look:


Here's the low-down on today's card:

Butterfly Kisses - Today's card is all about the patterned paper! I used both a panel of dotted paper and a trio of butterflies that I fussy-cut from a sheet of Butterfly Kisses designer series paper. From the all-occasion Butterfly Kisses Suite, this pretty paper is full of bold colours and patterns - just my kind of thing. The Build A Butterfly Dies co-ordinate with the paper but the butterflies are super-easy to fussy cut by hand too:


New In Colours - The Butterfly Kisses papers feature two of the new in-colours - Parakeet Party and Starry Sky - and I chose to zone in on both of those on today's card. I love the fresh zing of Parakeet Party green and the darker Starry Sky blue compliments it beautifully. I also stamped some tone-on-tone flowers across my blue strip for a little extra detail.

Simply Fabulous - The sentiment on my card is from the 'Simply Fabulous' stamp set. I added another from the set to the inside of my card, along with some of the butterflies from the edge of the DSP pack to decorate:


This was a really easy card to create and is so cheery - I can't wait to make more! It's also perfect for this week's bug-themed challenge over at Global Design Project #GDP343 this week and over at SUO Challenges where they are celebrating birthdays. 

Here is the visual summary of the key products used on today's project for you to pin for easy reference:


You can see all of my Product and 'How To' summaries on my 'How To - Tips and Techniques' Pinterest board in case you've missed any. 

Before you reach for your ink and papers, check out what our amazing team has created to inspire you this week:

Here's a quick recap of our challenge rules:
 
1.  Create a new paper project
2.  Upload your creation to your blog with a link back to us and provide a direct link to the post featuring your challenge submission.
3.  Please link your card to no more than four challenges, TOTAL.
4.  Have FUN!

Enjoy your day; we are having a quiet one since both of the James Juniors have exams next week so they are doing some final revision as we were all out yesterday either playing sport or at school functions. I'll hopefully be back tomorrow with another project. Until then, happy stampin'!


Stampin' Up! Supplies Used: 

Table built using Product Table Builder by The Crafty Owl - Independent Stampin' Up! Demonstrator.

Sweet Songbirds Double Slider Card AYSI275

by Joanne James20. May 2022 12:00

Happy Friday everyone - the weekend is in sight! Today I'm sharing my design team card for our new challenge over at As you See It where it's time for a recipe challenge:


I made a very special card to share with you today! You know when you get an idea and you just can't rest until you make it a reality? Yes, that was today's card! My card to welcome a new baby features the new Sweet Songbirds bundle - take a look:


Here's the low-down on today's card:

Sweet Songbirds - Everyone loves a good punch bundle and the Sweet Songbirds bundle, comprising the stamp set of the same name and the Songbird Builder Punch, is definitrly a great addition to your crafting collection. Perfect to welcome someone to a new home or to welcome a new baby, for thank yous, news notes or any kind of celebration (even Christmas - these birds would make great robins!), the Sweet Songbirds bundle has it all. The punch will either punch the stamped image of the large bird in the set, or allow you to simply punch a bird from cardstock. This is particularly useful to easily create mirrored birds, as I've done on my card today. 

Double Slider Reveal - What might not be immediately obvious at first glance, is that today's card is a double slider card. When you pull the tab at the side of the card, the mama and papa birds slide out to reveal their baby bird in the nest:


I might be biased, but I think this is such a cute idea! 

Here's a short video clip showing you how that works:

I'm mindful that today's post doesn't show the detail of the 'how' I created my double slider; I watched a number of actually very frustrating YouTube videos, and ultimately ended up re-engineering the mechanism until it is so super easy! It really needs a video to explain it though and I didn't then have time to film one this week, but I will pick this up and share in another post with you next week since I feel like I owe it to the crafting community to demystify this type of card!! I finished my sentiment and re-stamped my baby songbird on the inside of my card to finish.


A Recipe For Success - Whilst I was all about bring my creative ideas to fruition this week, it's recipe week over at As You See It and so worth me recapping on how I incorporated the elements of the recipe in my card:

  • Diecut or punch - Songbird Builder Punch and Basic Borders Dies (I used the cloud shaped as a stencil to add clouds to my background with a blending brush and some Balmy Blue ink)
  • Embossing folder - Merry Melody 3D Embossing Folder (This covers my slider mechanism)
  • Something beginning with 'B' - Birds and baby
  • Pastel colours - Balmy Blue, So Saffron and Polished Pink
  • Something shiny - A sparkly in-colour vellum flower and single rhinestone jewel to decorate mama bird (almost missed this one!)

That's everything - phew! What a sweet little pair:


This was such a fun card to make!

Here is the visual summary of the key products used on today's project for you to pin for easy reference:


You can see all of my 'How To' summaries on my 'How To - Tips and Techniques' Pinterest board in case you've missed any.  

Here's a summary of our challenge rules:

  • Create any card, scrapbooking page, 3D project or packaging project that fits the challenge.
  • Please include the challenge graphic and link back to the challenge in your blog post. Turn off word verification so we can leave you lots of lovely comments. Make sure you link the post not the whole blog to the Linky. Use #AYSIXXX when uploading to a public gallery.
  • If you’re unsure about ‘the rules’, check the details under the Challenge Guidelines tab on the As You See It Challenge homepage.
We look forward to seeing your creations in the AYSI gallery.

Enjoy your day and I'll be back tomorrow with another project. Until then, happy stampin'!


Stampin' Up! Supplies Used:

Table built using Product Table Builder by The Crafty Owl - Independent Stampin' Up! Demonstrator.

Home Life New Home Congratulations Card TTT162

by Joanne James19. May 2022 18:00

It's Thursday and time for a new challenge over at TicTacToe! It's the turn of Team X to host this week and the lovely Betty is our featured designer this week. This is the fun board that we are playing along with: 


I have needed a few 'new home' cards lately so I went down the middle column with flowers/free/embellishments to create a new home congratulations card with a difference - take a look:


Here's the low-down on today's card:

A Golden Oldie - When I made my new home card for our challenge over at The Paper Players this week (you can see that card here if you missed it), I realised how few current stamps I have that work for a new home card. This had given me cause to rummage through the retired shelf and I came across the retired 'Home Life' stamp set with the co-ordinating Welcome Home Dies (also retired) so decided to use them for today's card. 

Fresh FloralsThis is a 3 step layered photopolymer stamp and the layers can be used separately or together, as I've done here, to create a house packed with florals. I paired my retired stamps with Blushing Bride and two of the 2021-23 In colours, Polished Pink and Pale Papaya, for a fresh new look. I accented the centres of some of the larger pink flowers with some of last year's in-color jewels for a touch of sparkle too.

Shape It - The house die in the Welcome Home Dies set fits the front of a standard card perfectly, but I thought it would be fun to follow the contours of the die to create a card that was actually shaped like a house. It was really straightforward to do and just required a little extra measuring and slicing with my trimmer to achieve the desired result:

The card hinges on the left and opens conventionally and I simple added a shaped insert to the inside too. Do you ever create shaped cards? Leave me a comment below and let me know - I'd love you to share your favourite tips too.

Here is the visual summary of the key products used on today's project for you to pin for easy reference:


You can see all of my Product and 'How To' summaries on my 'How To - Tips and Techniques' Pinterest board in case you've missed any. 

A tictactoe board offers so many creative possibilities - how does this week's board inspire you? Why not have a go? We would love to see you in the gallery and who knows - you might be selected for Designer's Choice and be eligible to be a guest designer on a future challenge.

Challenges: I'm also entering today's card over at Just Us Girls where it's trend week and they are looking for shaped cards and at The Card Concept where my clean and layered card was inspired by the flowers in the vase and the soft pink and peach tones of their colour palette this week. I'm also linking up over at Retro Rubber Challenge where the challenge is 'flowers' - my 'Home Life' stamp is definitely retro, dating back to 2017.

      RRCB 182

Enjoy your evening; I'll be back tomorrow with another project, this time for our new challenge over at As You See It - and it's recipe week. Until then, happy stampin'!


Stampin' Up! Supplies Used: 

Table built using Product Table Builder by The Crafty Owl - Independent Stampin' Up! Demonstrator.

Waves of Inspiration CAS Shaker Card CCS 470

by Joanne James17. May 2022 12:00

It's Tuesday and time for a new challenge over at CAS Colours & Sketches. Shannon is hosting this month and this week we have our second colour challenge of the month: 


I love Shannon's fresh colour palette of aquas with a touch of silver this week! These colours immediately made me think of the sea so for my card today I had to make another card using the Waves of Inspiration bundle - take a look: 


Here's the low-down on today's card:

Waves of Inspiration - These beautiful sea greens were perfect to showcase another of those cresting waves from the Waves of Inspiration stamp set. Since this card is all about the clean and simple, I wanted to minimise the layers on my card and be sure to preserve my 'white space'. I masked off the centre of my card base so that only a portion of the wave would be visible, leaving me a wide unstamped border. The Stamparatus is a must for easily achieving this kind of stamping - masking paper would be easier, but this is how I did it using post-it notes:


To Shake Or Not To Shake? - I decided to create a simple shaker card, using a mix of sparkle & shine sequins for a touch of silver along with a few odd Coastal Cabana coloured sequins from my stash, and a simple window frame in white made using my Stitched Rectangle Dies:


I debated with myself whether a shaker card could be considered clean and simple, but having consulted with my lovely teamies we agreed it could: this card meets our 'clean and simple' criteria of 'uncluttered, with white or open space and minimal layers and embellishments' - so I hope you like it!

Silver Surfer - I decided to add a touch more silver and cut out one of the wave dies from some retired metallic silver glimmer paper and added it to the front of my shaker window for some extra sparkle. 

Here is the visual summary of the key products used on today's project for you to pin for easy reference:


You can see all of my 'How To' summaries on my 'How To - Tips and Techniques' Pinterest board in case you've missed any. 

As a reminder, for our colour challenges, you must use all of the stated challenge colours. You may also use neutral colours; however, the challenge colours should be the most noticeable ones featured on your card. We use Stampin' Up! colour names for reference, but you are welcome to use any other companies' products as long as you match the challenge colours as closely as possible.

I'm also linking today's card up over at Paper Craft Crew where their 'shiny celebration' inspiration challenge closes today.

Enjoy your day and I'll be back tomorrow with another project. Until then, happy stampin'!


Stampin' Up! Supplies Used:

Table built using Product Table Builder by The Crafty Owl - Independent Stampin' Up! Demonstrator.

Artfully Layered Clean And Simple Leaf Card

by Joanne James16. May 2022 10:30

Happy Monday everyone! Today I'm sharing another card using Amy's fabulous sketch over at Freshly Made Sketches this week:


I went for a slightly more conventional take on the sketch than I did with yesterday's card. I was also inspired by that cheese plant leaf in the blue vase that is bottom left on the Hand Stamped Sentiments Inspiration photo badge - take a look:


Here's the low-down on today's card:

I already had a blank banner cut on my desk from making yesterday's card, and the piece of Artfully Composed designer series paper and the inside dark green pieces of my leaf were leftovers from other projects, so I cut another leaf in Bermuda Bay and paper-pieced the insides and border edge together, stamped the banner and added to my layered cardbase - simple!


This is a great sketch for using up bits and pieces and is definitely a keeper - thank you Amy! I'm also linking today's card up over at CASology where the cue word this month is 'botanical'.

Here is the visual summary of the key products used on today's project for you to pin for easy reference:


You can see all of my 'How To' summaries on my 'How To - Tips and Techniques' Pinterest board in case you've missed any. 

Enjoy your day - I am off to open my Stampin' Up! parcel that has just been delivered by my UPS driver - full of new catalogue goodies, how exciting!! I'll be back tomorrow with another project for the new challenge over at CAS Colours & Sketches. Until then, happy stampin'!


Stampin' Up! Supplies Used:

Table built using Product Table Builder by The Crafty Owl - Independent Stampin' Up! Demonstrator.

On The Horizon CAS New Home Card PP591

by Joanne James15. May 2022 08:00

Today it's Sunday and time for this week's new challenge over at The Paper Players! It's the turn of the fabulous Laurie to host this week and she has a clean and simple challenge for us to work with:


I needed a couple of new home cards so I used Amy's fab sketch over at Freshly Made Sketches this week for my layout and set to work. This is what I came up with:


Here's the low-down on today's card:

On The Horizon - I have been making samples for my next class so had the Horizon Dies out on my desk and thought the trio of houses would be perfect for today's card. I combined them with a piece of green New Horizons designer paper for the horizontal element (I stacked three of the diecut house pieces for extra thickness). I diecut a circle from the same sheet of New Horizons paper and stamped the trees onto it directly in Garden Green to sit behind the houses and give depth to my simple scene.

Stitched Detail -  The stitched detail on my circle and banner are courtesy of the new Stylish Shapes Dies - I just love the subtle extra detail:

I also added a pink enamel heart to accent one of the houses to complete the front of my card.

New Home - The sentiment on the front of my card is also from the 'On the Horizon' stamp set and I thought it would work for a 'new home' card. I added another sentiment to the inside of my card to continue the theme, this time from the retired 'Home life' set

I think this trio of house dies are perfect for a clean and simple new home card - how about you? Leave me a comment below - I'd love to hear your thoughts.

Here is the visual summary of the key products used on today's project for you to pin for easy reference:


You can see all of my Product and 'How To' summaries on my 'How To - Tips and Techniques' Pinterest board in case you've missed any. 

Before you reach for your ink and papers, check out what our amazing team has created to inspire you this week:

Here's a quick recap of our challenge rules:
 
1.  Create a new paper project
2.  Upload your creation to your blog with a link back to us and provide a direct link to the post featuring your challenge submission.
3.  Please link your card to no more than four challenges, TOTAL.
4.  Have FUN!

Enjoy your day; the James Juniors both start end of year exams at school next week so we will be interspersing revision with a trip to the poultry centre to see the new delivery of hens that has just arrived (although the children have been warned we will not be bringing some home with us!) I'll be back tomorrow with another project. Until then, happy stampin'!


Stampin' Up! Supplies Used: 

Table built using Product Table Builder by The Crafty Owl - Independent Stampin' Up! Demonstrator.

Ladybug Builder Punched Bee Duo FF109

by Joanne James13. May 2022 08:00

Happy Friday one and all! Today I have my card for the new challenge over at Festive Friday:


The challenge that we are celebrating this week is 'World Bee Day' which is on May 20th. Remember the fun thing is that at Festive Friday you do not need to actually celebrate the occasion; your goal is to simply use three or more items from the inspiration list on your project. This week I totally went with the bee theme and used bees, yellow, black, embossing, twine and hexagons and this is what I came up with:


Here's the low-down on today's card:

Hello Ladybug Bundle - The bees on my card today are courtesy of the Ladybug Builder Punch. I know, it's its first outing and I'm not making ladybirds, but bees - go figure! I paired my bee duo with a sentiment from the 'Hello Ladybug' stamp set. I think it works just as well for bees as ladybirds and makes for such a great card to send to a friend to let them know they can always count on you. 

Ladybug Builder Punch Tip - I want to share a tip that makes getting perfect stripes on your bee a doddle! Just cut a number of strips of yellow cardstock (I used 3 which were each 5mm wide) and glue them to some basic black cardstock (use a spare one as a 'space' to make sure they are equally spaced). Once dry, simply feed your already striped cardstock into the punch and punch out your bee. Perfectly smooth edges and fuss free! Here's the negative space from my punched cardstock strip that shows what I mean:


You're welcome! I added some wings punched from vellum and brushed with some clear Wink of Stella for a subtle sparkle.

Hive 3D  - I backed my bees with a panel of Daffodil Delight, embossed with the Hive 3D Embossing Folder - the perfect way to add some co-ordinating texture to my clean and simple card. I wrapped it with some black baker's twine, adding a couple of notches to keep it straight and enable it to sit neatly. This is a useful trick -  you can just see the detail on the close-up below:


Here is the visual summary of the key products used on today's project for you to pin for easy reference:


You can see all of my 'How To' summaries on my 'How To - Tips and Techniques' Pinterest board in case you've missed any. 

How does our board inspire you? I can’t wait to see what YOU create! For more inspiration, be sure to visit the rest of the  Festive Friday Challenge Design team:

Ann Schach
Beth McCullough
Sharon Hashimoto Burkert
Melanie Hungerford
Helen Jennings
Stephanie Lanzalotto
Melva Peters
Jaydee
Diane Evans
Joanne James

Today's cards was also inspired by the following challenges: over at Color Dare the challenge is to use black, white and one colour (I obviously chose yellow!) and at Addicted to CAS where the codeword is 'Friendship'.


Today is Friday 13th - not unlucky for you, as this is a two-post Friday! Are you superstitious about this kind of thing? I can't say I am and am not averse to putting an umbrella up in the house to dry, although I don't go out of my way to walk under ladders! Do you have any superstitions that you follow? Do leave me a comment below - I'd love to hear about them! Enjoy your day and remember to check out today's second post here. Until then, happy stampin'!


Stampin' Up! Supplies Used:

Table built using Product Table Builder by The Crafty Owl - Independent Stampin' Up! Demonstrator.

Beautiful Wings Happy And Heartfelt Congratulations Card

by Joanne James13. May 2022 08:00

Today I have a second post for you in addition to my Festive Friday post: this time with a card for the new challenge over at CAS on Friday where I am the Guest Designer this week following my previous win in their sketch challenge (here's that winning card if you missed it). The theme for the new challenge is 'butterflies'; take a look at what I came up with:


Here's the low-down on today's card:

Beautiful Wings - I haven't featured butterflies on a card for some time, however the Beautiful Wings Dies have been sitting on my shelf for some time so this was the perfect opportunity to get them opened for their first outing! There are a ton of dies in this set, both for individual detailed diecuts like the one on today's card but also one single die that cuts out all of the stamped images in one go from the co-ordinating 'Butterfly Brilliance', along with a number of dies that are great for adding diecut splatter and brick detail. If you're thinking of adding butterflies to you collection, the Beautiful Wings Dies are worth a look!

Colour Inspiration - I took inspiration for the layout for today's card from this week's Global Design Project sketch #GDP342 but the colours for my 1cm vertical strips (I added two pieces of each colour for subtle additional depth) were inspired by something else entirely: the new Glossy Dots Assortment on page 143 of the new Stampin' Up! Annual Catalogue. Always a fan of an enamel dot (or three!), I couldn't resist adding these to my shopping basket. Each pack contains the four colours on today's card, and includes dots in three sizes, which you can see more closely on the photo below:


Isn't that shine just gorgeous?! I can see many more packs of these in my crafting future ;-)

Heartfelt Congratulations - Finally, the sentiment on today's card comes from the 'Happy & Heartfelt' stamp set in the January-June mini catalogue. Featuring lots of sentiments in this fun, handwritten-style font, it was perfect for a final touch of whimsy to today's card.

Here is the visual summary of the key products used on today's project for you to pin for easy reference:


You can see all of my 'How To' summaries on my 'How To - Tips and Techniques' Pinterest board in case you've missed any. 

Enjoy your day; mine will be full of chores unfortunately but they have to be done at some point, right?! I'll be back tomorrow with another project. Until then, happy stampin'!


Stampin' Up! Supplies Used:

Table built using Product Table Builder by The Crafty Owl - Independent Stampin' Up! Demonstrator.


Let's Set Sail Adventure Awaits CCS469

by Joanne James10. May 2022 13:00

It's Tuesday and time for a new challenge over at CAS Colours & Sketches. This week's challenge is a sketch challenge and Shannon has asked that we layer some shapes along a vertical panel. Feel free to flip or rotate the sketch when making your card.


For my card today I did just that - I turned the sketch through 90 degrees and went with a very fluid interpretation of Shannon's sketch using the Let's Set Sail bundle:


Here's the low-down on today's card:

Let's Set Sail - The Let's Set Sail bundle is perfect for clean and simple cards and it works for everything from (masculine) birthdays and encouragement to baby cards. I added the sea directly to my white cardbase, along with my sentiment and some birds, then added my punched sailboat with dimensionals for a little extra lift. I love the sketchy appearance of the stamps in this set: 


Tuesday Tip - The Tuesday Tip that I'm sharing over in my Crafty Owl Creatives Facebook Group today is around the Sailboat Builder Punch - some clever stamping enables you to stamp and punch it out in one go:


This is such a time-saver and econimcal use of cardstock too. You can get the detail, see other Tuesday Tips and more by joining my Facebook Group here

Here is the visual summary of the key products used on today's project for you to pin for easy reference:


You can see all of my 'How To' summaries on my 'How To - Tips and Techniques' Pinterest board in case you've missed any. 

Today's card was also inspired by a couple of other challenges: the team over at Color Hues are asking us to create cards using the colours blue and tan and over at Time Out where the theme is 'vacation':


As a keen scuba diver, I am more like to be found beneath the waves rather than in a sailboat, but each to their own (and I don't have a stamp featuring a scuba diver ;-) )

Enjoy your day and I'll be back tomorrow with another project. Until then, happy stampin'!


Stampin' Up! Supplies Used:

Table built using Product Table Builder by The Crafty Owl - Independent Stampin' Up! Demonstrator.

New Online Exclusives

There are new products available exclusively in the online store from 5 November - check them out here.

Latest Kits!

Stampin Cut and Emboss

The Layered Landscapes Kit and Nature's Paintings Kit are the latest kits in the online store - get yours here!

Shop Online

Access my online shop 24 x 7, 365 days of the year:

Current November hostess code:

9NKXDTTR

Shop Online

Mini Catalogue

BROWSE THE CATALOGUE

'Tis The Season - the new Stampin' Up! Mini Catalogue is here! For more details and to download your copy click here

Scrapbooking

Stampin' Up! has introduced a new range of 12x12" scrapbooking product and kit - the full range is now available to purchase online. To download a copy of the new digital Scrapbooking Catalogue click here.

2024-25 Annual Catalogue

BROWSE THE CATALOGUE

Click on the image to download your copy of the 2024-25 annual catalogue. For a full list of current SU! supplies, go to my online store. If you would like any help or advice, please drop me a line at joanne@thecraftyowl.co.uk or give me a call on 07773 421446 - I'd be happy to help.

Join My Team

It's always a great time to join Stampin’ Up! New team members can get £130 worth of products for only £99 + free business supplies + free shipping + all the fun being a part of Stampin’ Up! Stampin' Up! has something for everyone: join my growing team and benefit from my support to enjoy Stampin' Up! however you choose.

If you're interested, call me for a chat to understand how I can help you realise your goals. Alternatively, if you have already decided to sign up and you just can't wait, please click here for the link to the online form where you can sign up and order your starter kit right away! 

About Me

Hi I'm Joanne and live in Northampton and when I'm not looking after my husband and two beautiful children, am an avid crafter with a passion for all things Stampin' Up!

I must confess that I have never been a big rubber stamper - until I discovered Stampin' Up! that is. I love the fact that I can get such great results with co-ordinating stamps, inks, papers and punches - the possibilities are endless! Join me on my stamping journey as I share the things I love and be inspired to create amazing things yourself!

Follow Me

Monthly Newsletter

Box Builder

Click the button above to use Box Buster to create your custom box design using the Envelope Punch Board!

Kits Collection Now Available!

Stampin Cut and Emboss

The new Kits Collection from Stampin' Up! is now available!

Click here to see the current kits available and order yours online today.

I Design For


Stampin' Up Stuff

This is my personal blog and is not endorsed by Stampin’ Up! I hope you find it a plentiful source of ideas and personal inspiration but please don't copy my designs for contest submission or use for classes, publication or sale without express permission.