Season of Chic Autumn Leaves CC&S 524 Double

by Joanne James31. October 2023 12:00

It's Tuesday and time for a new challenge over at CAS Colours & Sketches. We have a third Tuesday in the month so Patricia has designed a retro-double for us, featuring a retired colour palette and a sketch we've used previously: 


These colours were perfect for autumn so for my card today I decided to feature the 'Season of Chic' stamp set and co-ordinating Chic Dies - take a look:


I blended all three colours and added some autumnal stencilling using one of the Abundant Beauty Decorative Masks into the triangles. I tied some twine to define the triangle borders and added a couple of diecut leaves as a focal point:


Inking my sentiment in two colours added a little extra interest and completed my card.

Here is the visual summary of the key products used on today's project for you to pin for easy reference:


You can see all of my 'How To' summaries on my 'How To - Tips and Techniques' Pinterest board in case you've missed any. 

As a reminder, for our colour challenges, you must use all of the stated challenge colours. You may also use neutral colours; however, the challenge colours should be the most noticeable ones featured on your card. We use Stampin' Up! color names for reference, but you are welcome to use any other companies' products as long as you match the challenge colours as closely as possible.

Enjoy your day and I'll be back tomorrow with another project. Until then, happy stampin'!


Stampin' Up! Supplies Used:

Table built using Product Table Builder by The Crafty Owl - Independent Stampin' Up! Demonstrator.

Season of Chic Speedy Seashells AYSI 301

by Joanne James16. June 2023 12:00

Today I'm sharing my design team card for our new challenge over at As you See It where it's time for the 'dreaded' speed challenge:


I know some of you dread the idea of creating a card in under 10 minutes, but with a little preparation it doesn't have to be tricky - take a look:


Here's the low-down on today's card:

I knew that I would be using the shell stamps and dies from the Seasons of Chic stamp set and Chic Dies for my card today as they are my only current seashells, so I grabbed each of the dies and laid up each of the stamps and found a piece of the co-ordinating (retired) Texture Chic designer series paper to use for my background. This is the easiest way to get big design impact in the shortest possible time. Having found my sheet of paper, I pulled out the co-ordinating ink pads and cardstock (Petal Pink, Pebbled Path and an offcut of distressed gold), started my timer and set to work!

I cut a piece of designer paper to cover my entire cardbase, stamped a shell and diecut it along with three more in solid cardstock colours all in one go to save time, the stamped my sentiment onto a banner of Basic White and attached it to my cardfront, anchored with my shells. I added some clear Wink of Stella to my stamped shell and a sprinkling of basic pearls to complete my cardfront:


I did a quick timecheck and was doing so well, I even managed a quick stamped detail on the inside of my card within the allotted time:


And - stop the clock! I used a total of 7 minutes 59 seconds to create today's card - I managed to surprise myself at just how much time I had left over! My desk was a mess and I hadn't cleaned a single stamp, but it just goes to show if you need a card in a hurry, it can be done! The designer paper definitely does the heavy lifting on this card - the same background could be created using the stamps in the set, but it would take sooo much longer! I am also sharing today's beach-inspired card with thoughts of summer with the team over at Inkspirational where they are looking for seasonal cards.

Here is the visual summary of the key products used on today's project for you to pin for easy reference:


You can see all of my 'How To' summaries on my 'How To - Tips and Techniques' Pinterest board in case you've missed any. 

Here's a summary of our challenge rules:

  • Create any card, scrapbooking page, 3D project or packaging project that fits the challenge.
  • Please include the challenge graphic and link back to the challenge in your blog post. Turn off word verification so we can leave you lots of lovely comments. Make sure you link the post not the whole blog to the Linky. Use #AYSIXXX when uploading to a public gallery.
  • If you’re unsure about ‘the rules’, check the details under the Challenge Guidelines tab on the As You See It Challenge homepage.
  • In a speed stamping challenge, please time yourself and say in your post how long your card took to complete. 
We look forward to seeing your creations in the AYSI gallery.

Enjoy your day and I'll be back tomorrow with another project. Until then, happy stampin'!


Stampin' Up! Supplies Used:

Table built using Product Table Builder by The Crafty Owl - Independent Stampin' Up! Demonstrator.

Season of Chic Christmas Snowflakes CCS 497

by Joanne James22. November 2022 13:00

It's Tuesday and time for a new challenge over at CAS Colours & SketchesThis week's challenge is a sketch challenge and Cecile has asked that we overlay an image and background element: 


Feel free to flip or rotate the sketch when making your card. For my card today I used my snowflake and 'swoosh' stamps from the 'Season of Chic' stamp set along with some diecut snowflakes cut with the Chic Dies for some winter birthday or Christmas inspiration:


Here's the low-down on today's card:

I added a simple border with my white chalk marker then stamped some tone-on-tone snowflakes stamped in Orchid Oasis to my cardfront, along with a swoosh in Starry Sky for contrast, and complimented this with a white heat-embossed sentiment and some white glimmer diecut snowflakes, trimmed with Opal Rounds:


I added some stamped snowflakes and a greeting to the inside of my card, and carried the detail over to the envelope too:


A card that works for a winter birthday or Christmas - and easy to make too!

Here is the visual summary of the key products used on today's project for you to pin for easy reference:


You can see all of my 'How To' summaries on my 'How To - Tips and Techniques' Pinterest board in case you've missed any. 

Enjoy your day and I'll be back tomorrow with another project. Until then, happy stampin'!


Stampin' Up! Supplies Used:

Table built using Product Table Builder by The Crafty Owl - Independent Stampin' Up! Demonstrator.

Kindest Gnomes and Christmas Blues AYSI 287

by Joanne James4. November 2022 13:00

Today I'm sharing my design team card for our new challenge over at As you See It where it's time for a recipe challenge:


I normally struggle with recipe challenges, but this one came together really easily, especially with the layout over at Atlantic Hearts this week - take a look:


Here's the low-down on today's card:

My starting point for today's card was the Storybook Gnomes designer series paper, and specifically the pattern that I used for the rectangular panels at the back that you can barely see on the finished card! It has a lovely mix of blues and earth tones, so ticked off two of my ingredients. Having layered these panels, I decided to build a scene using a combination of stamped diecut elements (my toadstool - check) and some other elements I'd already cut out from other patterns in this pack, namely the moose and the gnome. I added in a precut snowflake and some smaller snowflakes cut with the Chic Dies, to which I added some glittery gems - even a masculine card can have a little sparkle, right?!


I added a panel with my stamped sentiment and wrapped this in some (retired) white and Early Espresso baker's twine (check) to continue the earthy tones and tick off my final ingredient. 

Here is the visual summary of the key products used on today's project for you to pin for easy reference:


You can see all of my 'How To' summaries on my 'How To - Tips and Techniques' Pinterest board in case you've missed any. 

This is one of those cards that just evolved with a mish-mash of bits and pieces until I felt like I had a cohesive scene. I think I'll send this to an old university friend who has an adorable little boy - I think Mr Gnome will be right up his street!

Here's a summary of our challenge rules:

  • Create any card, scrapbooking page, 3D project or packaging project that fits the challenge.
  • Please include the challenge graphic and link back to the challenge in your blog post. Turn off word verification so we can leave you lots of lovely comments. Make sure you link the post not the whole blog to the Linky. Use #AYSIXXX when uploading to a public gallery.
  • If you’re unsure about ‘the rules’, check the details under the Challenge Guidelines tab on the As You See It Challenge homepage.
We look forward to seeing your creations in the AYSI gallery.

Enjoy your day; I have a helper to complete my chores today as the oldest of the James Juniors is enjoying an extended half-term break. Keep your fingers crossed that the weather stays dry this evening please as we are off to a fireworks display at the school of James Junior number 2. It is usually a fantastic display and as it's within the school grounds, far enough away from residential housing to cause undue trauma to the neighbourhood cats and dogs. I'll be back on Sunday with my project for our new challenge over at The Paper Players. Until then, happy stampin'!


Stampin' Up! Supplies Used:

Table built using Product Table Builder by The Crafty Owl - Independent Stampin' Up! Demonstrator.

Clean And Simple Autumn Leaves TT182

by Joanne James6. October 2022 17:00

It's Thursday and time for a new challenge over at TicTacToe! It's the turn of Team X to host this week and the lovely Betty is our featured designer this week. This is the fun board that we are playing along with: 


Lots of seasonal delights on today's board! I went across the middle row with orange, free and autumn leaves to make a clean and simply thank you card - take a look:


Here's the low-down on today's card:

Today's card is clean and simple in style, although took a little effort to achieve. My Cajun Craze cardbase with heat embossed sentiment from 'Lovely You' was easy enough, but for the top layer I wanted to create a diecut edge detail using the oak leaf die in the Chic die set. It may look at first glance as if this card is simply a split panel with a trio of leaves adhered in a diagonal on top, but that's not the case! I created a mask using a trio of diecut leaves and some masking paper, and used this to mask the Vanilla panel and then added colours to the area below the mask where my leaf diecuts would ultimately sit. I used the Color Dare colours (bottom row, plus top left orange), then adhered my distressed gold leaf diecut leaves on top, so that my blended colour showed through. Finally I trimmed my border to the bottom outer edge of my leaf shapes. This was a little time-consuming, but I really love the effect - the leaves look so autumnal to me and the touches of gold with the distressed paper I used for the outlines and a few sequins to finish add to the richness:  


I am super happy with my clean and simple card so will also be linking up with the lovely peeps over at Addicted to CAS where the codeword is 'Autumn' - for me, synonymous with the changing colours of the leaves. I hope you like today's creation!

Here is the visual summary of the key products used on today's project for you to pin for easy reference:


You can see all of my Product and 'How To' summaries on my 'How To - Tips and Techniques' Pinterest board in case you've missed any. 

A tictactoe board offers so many creative possibilities - how does this week's board inspire you? Why not have a go? We would love to see you in the gallery and who knows - you might be selected for Designer's Choice and be eligible to be a guest designer on a future challenge. 

Enjoy the rest of your day; I'll be back tomorrow with another project. Until then, happy stampin'!


Stampin' Up! Supplies Used: 

Table built using Product Table Builder by The Crafty Owl - Independent Stampin' Up! Demonstrator.

Ringed With Nature Autumn Card

by Joanne James8. September 2022 16:00

It's Thursday and time for a new challenge over at TicTacToe! It's the turn of Team X to host this week and the lovely Felicita is our featured designer this week. This is the fun board that we are playing along with: 


I used the sketch over at Sketch Saturday for my layout and went along the centre row of the board with wood/free/fall colours and incorporated the colours, leaves and acorns of the Hand Stamped Sentiments inspiration photo for my card to welcome autumn - take a look:


Here's the low-down on today's card:

Timber Texture - I ran my card base through the Timber Embossing Folder for my wood element, then added a piece of the now retired Sale-A-Bration Rings of Love designer series paper down the centre - the pattern is perfect to evoke an autumnal feel.

Chic Leaves - I added a sentiment from a retired set to a stitched circle and embellished this with a trio of diecut oak leaves curtesy of the Chic Dies - such a great die set, with something for every season. 

An Acorn Pair - I finished my card with a pair of diecut acorns from the Tree Rings Hybrid Embossing Folder and Dies and some retired Poppy Parade thick baker's twine. Here's a closeup of that diecut detail and those lovely autumn colours:

I love the vibrancy that is added by the pop of red from the baker's twine and the additional textures that always seem to accompany my autumn-themed cards.

Here is the visual summary of the key products used on today's project for you to pin for easy reference:


You can see all of my Product and 'How To' summaries on my 'How To - Tips and Techniques' Pinterest board in case you've missed any. 

A tictactoe board offers so many creative possibilities - how does this week's board inspire you? Why not have a go? We would love to see you in the gallery and who knows - you might be selected for Designer's Choice and be eligible to be a guest designer on a future challenge. 

Enjoy your day; I'll be back tomorrow with another project for our new challenge over at As You See It. Until then, happy stampin'!


Stampin' Up! Supplies Used: 

Table built using Product Table Builder by The Crafty Owl - Independent Stampin' Up! Demonstrator.

Texture Chic Memories and More Card FF114

by Joanne James22. July 2022 09:00

Hurrah it's Friday! Today I have my card for the new challenge over at Festive Friday where the challenge that we are celebrating this week is 'International Owl Awareness Day' which is on Friday 5th August.
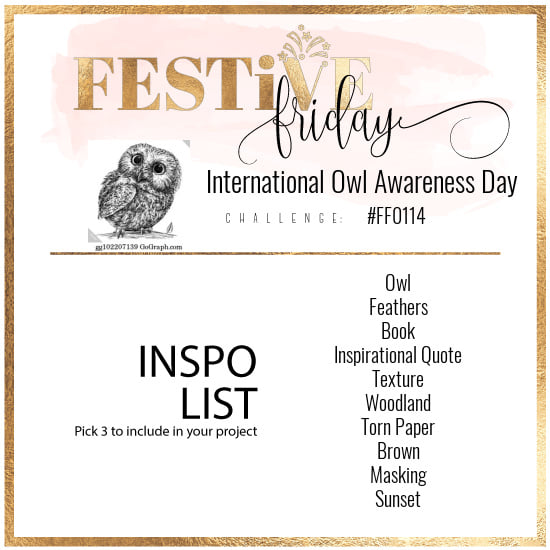
 

Remember the fun thing is that at Festive Friday you do not need to actually celebrate the occasion; your goal is to simply use three or more items from the inspiration list on your project. This week I was tempted to go with an owl theme for obvious reasons, but my search for an inspirational quote took me in a completely direction. I ended up using inspirational quote, texture and brown and this is what I came up with:
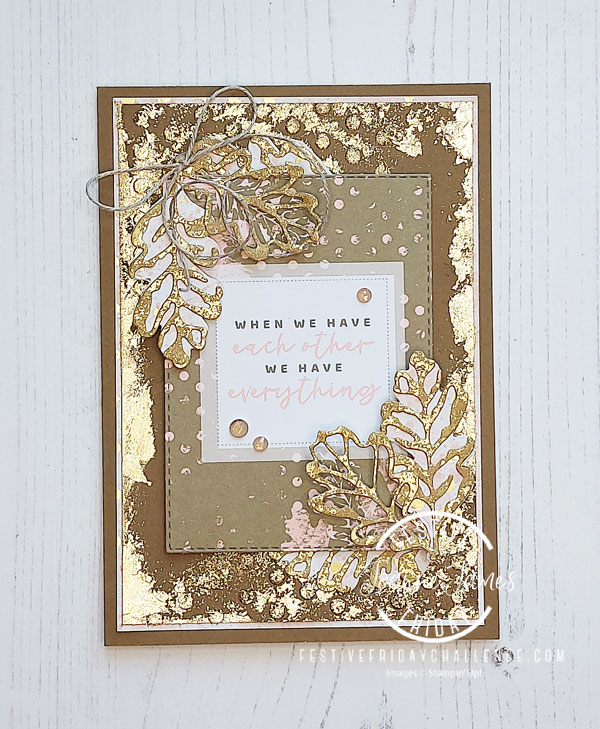
 

Here's the low-down on today's card:

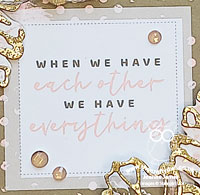
Memories and More - The starting point for today's card was the quote on the front of my card. One of the best places to look for inspirational quotes is a Memories and More card pack - and that's where I found this one, in the Texture Chic card pack. I thought these words would make a lovely card for an anniversary, or a much-loved friend to let them know how much they mean to you. I added a stitched edge by running the card through my diecutting machine and then set about incorporating other elements from the Texture Chic Suite into my design.

Texture, Texture - There is an abundance of texture on today's card: the beautiful Texture chic designer paper is used for both a mat layer and for the base layer to my leaves (which I cut out of the middle of the mat layer to be economical!), then there is the stunning distressed gold speciality paper that I used for the top layer 'skeleton' leaves. I decided that my Soft Suede mat was too plain, so picking up the pattern on the quote card, I partially embossed it on opposing corners with one of the (retired) Checks and Dots embossing folders, then applied heat and stick powder and gold Gilded Leafing to these areas and the panel edges to add to tie in with the other gold elements. You do lose some of the definition of the embossing I think, but it does add tons of textural detail:
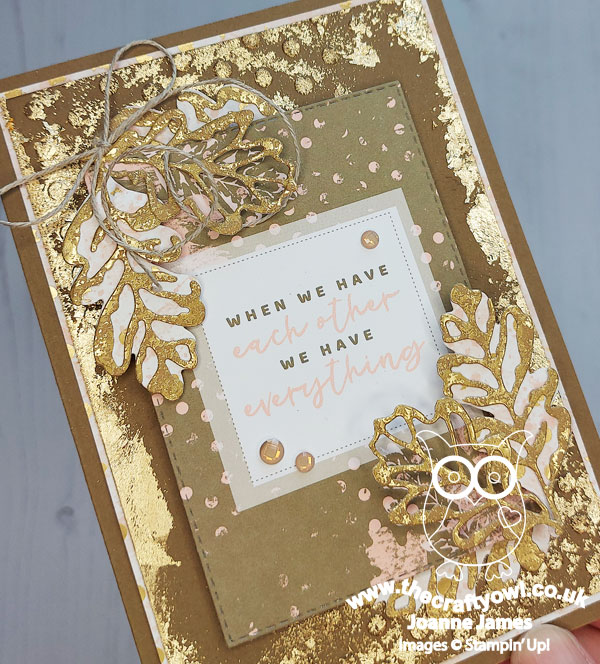
 

Some linen thread and Elegant Faceted Gems also add texture to the front of my card.

Seasons of Chic - Having used the Chic Dies to cut the leaves to decorate the front of my card, I used the co-ordinating 'Season of Chic' stamp set for my inside sentiment, along with some extras for decoration:
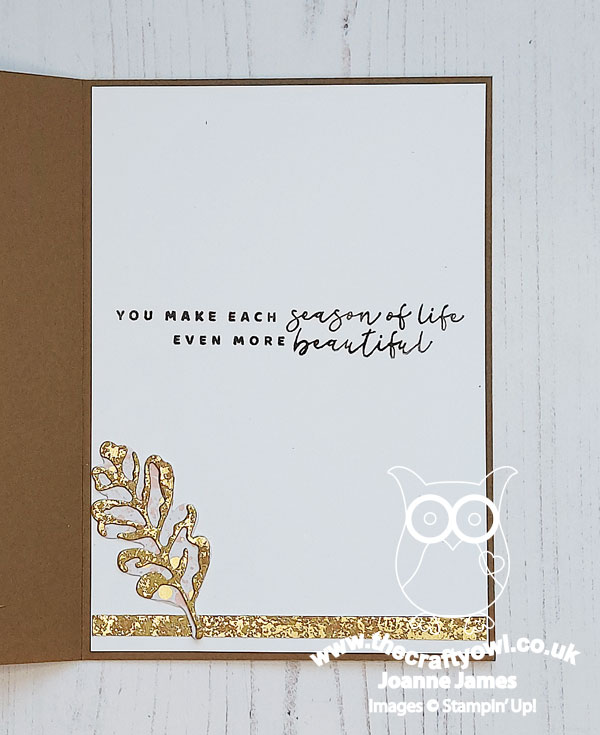
I rarely make this sort of card, which is quite shabby chic in it's look and feel and contrasts to my usual clean and layered style, but it just sort of evolved and I'm actually quite happy with how it turned out; it's always fun to step out of one's comfort zone once in a while!

Here is the visual summary of the key products used on today's project for you to pin for easy reference:
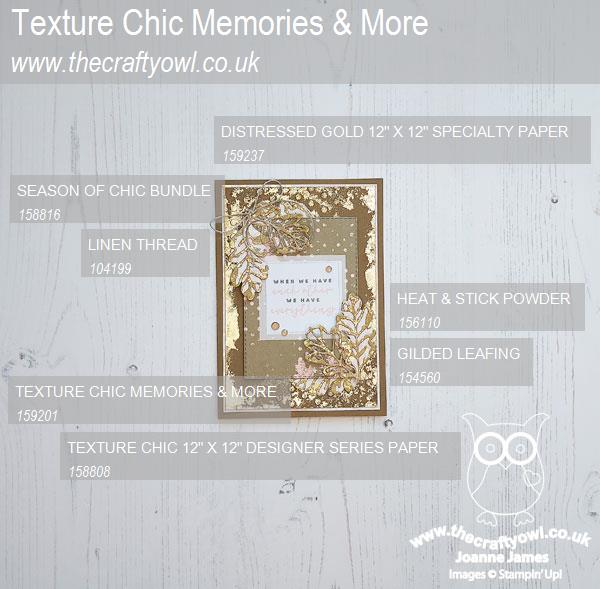
 

You can see all of my 'How To' summaries on my 'How To - Tips and Techniques' Pinterest board in case you've missed any. 

How does our board inspire you? I can’t wait to see what YOU create! For more inspiration, be sure to visit the rest of the  Festive Friday Challenge Design team:

Ann Schach
Beth McCullough
Sharon Hashimoto Burkert
Melanie Hungerford
Helen Jennings
Stephanie Lanzalotto
Melva Peters
Jaydee
Diane Evans
Joanne James

Enjoy your day and I'll be back tomorrow with another project. Until then, happy stampin'!


Stampin' Up! Supplies Used:
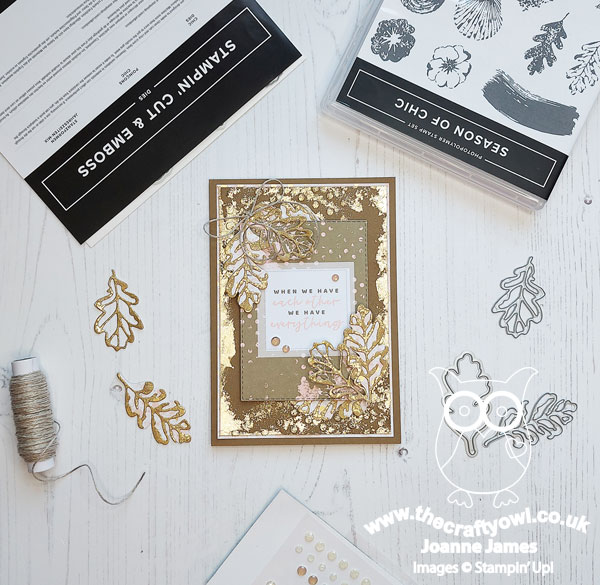
Table built using Product Table Builder by The Crafty Owl - Independent Stampin' Up! Demonstrator.

Mini Catalogue

BROWSE THE CATALOGUE

The mini catalogue is now live! Read and download your copy here.

Shop Online

Access my online shop 24 x 7, 365 days of the year:

Current April hostess code:

VDKNV7BH

Shop Online

Join My Team

It's always a great time to join Stampin’ Up! New team members can get £130 worth of products for only £99 + free business supplies + free shipping + all the fun being a part of Stampin’ Up! Stampin' Up! has something for everyone: join my growing team and benefit from my support to enjoy Stampin' Up! however you choose.

If you're interested, call me for a chat to understand how I can help you realise your goals. Alternatively, if you have already decided to sign up and you just can't wait, please click here for the link to the online form where you can sign up and order your starter kit right away! 

Latest Kit!

Stampin Cut and Emboss

The Rock Legend Kit has all you need to make 8 cards with coordinating envelopes. Along with the new Panda Friends Kit, both are available from January 4th for just £14 each - get yours here!

2023-24 Annual Catalogue

BROWSE THE CATALOGUE

Click on the catalogue for a full list of current SU! supplies - if you would like to order any of the items featured, please drop me a line at [email protected] or give me a call on 07773 421446 - I'd be happy to help.

New Online Exclusives

There are new products available exclusively in the online store from 5 March - check them out here.

About Me

Hi I'm Joanne and live in Northampton and when I'm not looking after my husband and two beautiful children, am an avid crafter with a passion for all things Stampin' Up!

I must confess that I have never been a big rubber stamper - until I discovered Stampin' Up! that is. I love the fact that I can get such great results with co-ordinating stamps, inks, papers and punches - the possibilities are endless! Join me on my stamping journey as I share the things I love and be inspired to create amazing things yourself!

Follow Me

Monthly Newsletter

Box Builder

Click the button above to use Box Buster to create your custom box design using the Envelope Punch Board!

Kits Collection Now Available!

Stampin Cut and Emboss

The new Kits Collection from Stampin' Up! is now available!

Click here to see the current kits available and order yours online today.

I Design For


Stampin' Up Stuff

This is my personal blog and is not endorsed by Stampin’ Up! I hope you find it a plentiful source of ideas and personal inspiration but please don't copy my designs for contest submission or use for classes, publication or sale without express permission.