So Much Love Hearts Trio

by Joanne James13. February 2024 18:41

Happy Galentine's Day everyone! It has been so wet and miserable here in the UK today - thank heavens for the opportunity to escape to my craft room! Today I'm sharing a card made with tomorrow - Valentine's Day - in mind that combines a few current challenges:


Here's my clean and simple Valentine's card:


Here's the low-down on today's card:

Today's card is all heart - perfect for the challenge over at Addicted to CAS. I took my favourite trio of reds and pinks (Real Red, Sweet Sorbet and Flirty Flamingo) for the challenge over at Color Hues and used the sketch layout over at Sunday Stamps to create a trio of oversize hearts. I paired them with an oversize sentiment from the Love For You Dies and a stamped 'For You' from a retired set:


A trio of sparkly enamel dots complete my card. I'm also linking my Valentine up over at CAS on Friday as that's their theme this week too.

Here is the visual summary of the key products used on today's project for you to pin for easy reference:


You can see all of my 'How To' summaries on my 'How To - Tips and Techniques' Pinterest board in case you've missed any. 

That's all from me; I have a late pickup this evening as the youngest of the James Juniors has been taking part in the House Singing Competition at school. I'll be back tomorrow with another project. Until then, happy stampin'!


Stampin' Up! Supplies Used:

Table built using Product Table Builder by The Crafty Owl - Independent Stampin' Up! Demonstrator.

Happy Galentines Day Hearts Cards

by Joanne James11. February 2023 20:00

Today I've a quick post to share a couple of cards I made using this week's Color Throwdown palette and SUO Challenges #SUOC319 theme of Galentine's Day:


I created two cards in the same design - take a look:


This card uses some striped Country Floral Lane DSP in Sweet Sorbet; I also created a second, brighter version, using Poppy Parade and some retired host DSP from the previous mini catalogue:


The coolest thing about both cards is the sentiment:


I made a custom 'Happy Galentine's Day' sentiment using the Valentine's stamp in the 'Love For You' stamp set and stamping it by masking the 'v' and heat embossing the sentiment in gold, then selectively masking the 'g' in the word 'gets' on one of the other sentiments in the set and then heat embossing for a second time. This results in the perfect sentiment for the occasion:


A few gold enamel shapes added a final touch of sparkle to my cards. Finally, here's a photo of both cards together:


Galentine's Day is traditional celebrated on 13th February - will you be sending girly greetings to the women in your life?

Here is the visual summary of the key products used on today's project for you to pin for easy reference:


You can see all of my 'How To' summaries on my 'How To - Tips and Techniques' Pinterest board in case you've missed any. 

Enjoy your evening; I spent the day at the side of the hockey pitch again; spring is clearly on the way - I managed a short coat and could still feel my toes when the final whistle blew - progress! I'll be back tomorrow with another project. Until then, happy stampin'!


Stampin' Up! Supplies Used:

Table built using Product Table Builder by The Crafty Owl - Independent Stampin' Up! Demonstrator.


Love is Kindness and Blessed Easter TTT196

by Joanne James9. February 2023 16:00

It's Thursday and time for a new challenge over at TicTacToe! It's the turn of Team X to host this week and the lovely Elizabeth is our featured designer this week. This is the fun board that we are playing along with: 

       RRCB 199

I took the diagonal of heart/free/diecut on our board (it also works for the first column heart/red/stitching) and was totally inspired by the image over at The Card Concept too for my clean and layered card - those pretty tulips and the chalkboard hearts. This led me to go rooting through my retired stamps for the perfect stamp - and I ended up finding not one but two stamps, so I made two cards! Since they are old stamps and my colours also match the current challenge over at Retro Rubber (I used pink, white and green) I'm linking up there too. So here's my first card - take a look:


Here's the low-down on today's card:

Love Is Kindness - 'Love is Kindness' is a stamp from way back in 2015 but one I couldn't part with! I love those wrapped tulips and that sentiment quote is just so beautiful and true. It is actually a single wood-mount stamp, but for today's card I stamped just the sentiment first in Versamark onto Basic Black cardstock so that I could heat emboss it in white and cut it out with my (retired) Sweet & Sassy Hearts Framelit Dies. I then stamped the stamp again in black onto white cardstock, so that I could fussy cut the tulips and colour them with my Stampin' Blends. I added a piece of Sweet Sorbet baker's twine before adding to the edge of my chalkboard heart. 


Stitched Greenery - The background for both of my cards features the current Stitched Greenery coverplate die. I don't use this nearly enough - it gives such a delicate background detail and adds interest without overwhelm. A few complimentary pink sequins was the final finishing touch for my cards - here's a photo of them both together:


A Blessed Easter Bonus - As I mentioned above, whilst rooting through my retired stamps, the next one on the shelf was 'Blessed Easter' from 2014 and I thought these tulips would also work in this colourway. I switched out the heart for an oval and added an Easter sentiment. A little extra envelope decoration on this one too:


 Here's a close up of this one - which version do you prefer? Do leave me a comment below - I'd love to hear your thoughts. 


I have to say for me I think the first one wins - but I love them both and hope you enjoyed seeing the same idea with two different sets.

Here is the visual summary of the key products used on today's project for you to pin for easy reference:


You can see all of my Product and 'How To' summaries on my 'How To - Tips and Techniques' Pinterest board in case you've missed any. 

A tictactoe board offers so many creative possibilities - how does this week's board inspire you? Why not have a go? We would love to see you in the gallery and who knows - you might be selected for Designer's Choice and be eligible to be a guest designer on a future challenge. 

Enjoy your day; I'll be back tomorrow with another project. Until then, happy stampin'!


Stampin' Up! Supplies Used: 

Table built using Product Table Builder by The Crafty Owl - Independent Stampin' Up! Demonstrator.


Forever And Always Valentines Card CCS455

by Joanne James1. February 2022 13:00

This is my second post of today - to read all about the pre-release of skin-tone Blends and the exclusive 'All Together' bundle, please see my earlier post here.

It's Tuesday and time for a new challenge over at CAS Colours & Sketches. YoonYoung is hosting this month and our first challenge is a colour challenge: 


These colours are perfect for Valentine's so I dug out a bunch of my favourite retired Valentine's bits and pieces and along with the Try Stampin' on Tuesday sketch and some inspiration from my talented blog friend Kim Singdahlsen, I set to work! This is what I came up with:


Here's the low-down on today's card:

I absolutely loved this card that Kim made for last week's Freshly Made Sketches challenge - isn't that stencilled background amazing?! I didn't have anything similar in my stash, but decided that the TSOT sketch was perfect for a trio of (retired Sweet & Sassy Framelits) diecut hearts in this week's challenge colours, so I made my own stencil from a retired Detailed Hearts Die and blended all three colours into the central background circle to bring the diecuts together. I added a diecut and stamped sentiment from another retired stamp and die set, 'Forever & Always' and the Always Dies to complete my card:


These will always be some of my most favourite Valentine's items - so timeless and therefore super useful! 

Here is the visual summary of the key products used on today's project for you to pin for easy reference:


You can see all of my 'How To' summaries on my 'How To - Tips and Techniques' Pinterest board in case you've missed any. 

As a reminder, for our colour challenges, you must use all of the stated challenge colours. You may also use neutral colours; however, the challenge colours should be the most noticeable ones featured on your card. We use Stampin' Up! color names for reference, but you are welcome to use any other companies' products as long as you match the challenge colours as closely as possible.

Enjoy your day and I'll be back tomorrow with another project. Until then, happy stampin'!


Stampin' Up! Supplies Used:

Table built using Product Table Builder by The Crafty Owl - Independent Stampin' Up! Demonstrator.

Heart Happiness Valentine PP380

by Joanne James11. February 2018 09:00

It's Sunday and time for this week's new challenge over at The Paper Players! It's the turn of the wonderful Laurie to host this week and she has a fun colour challenge for you to work with:


I debated about where to take these colours and when I saw the current inspiration photo over at Inspired By All The Little Things I decided another Valentine's card was in order. All those red and white hearts, the love and even the bicycle against the neutral background - take a look:


Here's the low-down on today's card:

Heart Happiness - Today's card like last week's features hearts-a-plenty: I stamped a whole bunch of hearts from the 'Hearts Happiness' stamp set in Real Red onto Whisper White cardstock, diecut them with the Sweet & Sassy Framleits, along with a few additional red glimmer ones, and arranged them across my cardfront, along with a couple of doilies and some linen thread.

Love(ly Words) - Whilst I didn't use a bicycle on my card, I was inspired by the bike in the Inspired By photo to add my 'love' sentiment in black amongst my plethora of hearts. The thin frame of my love heart, like the thin frame of the bicycle, was made using the 'lovely' diecut from the Lovely Words framelits set - I snipped the sentiment between the 'e' and the 'ly' to make 'love' and tucked it in between my other hearts so that only 'love' was visible. 

A Custom Sentiment - Whilst this card could be used as a Valentine, it is also my wedding anniversary next week and so I actually made this card for my husband with that in mind. Inside I stamped two of the sentiments from the Petal Palette stamp set, but customised one of them with another stamp in the same set to change the meaning - take a look:


I altered the wording from 'you' to 'us' on the sentiment in the bottom right-hand corner  - a great way to make this sentiment appropriate for a partner rather than another couple; I used the 'US' from the sentiment I used in the centre of my card. Here are the stamps circled so you can see how they look before they were altered:


I hope you like my clever trick - yet another way to make the most of this fabulous set!

Here is the visual summary of the key products used on today's project for you to pin for easy reference:


You can see all of my Product and 'How To' summaries on my 'How To - Tips and Techniques' Pinterest board in case you've missed any.  I'm also linking up today's card with the team over at CAS-ual Fridays - it is after all hearts, hearts and more hearts!

Before you reach for your ink and papers, check out what our amazing team has created to inspire you this week:

Here's a quick recap of our challenge rules:
 
1.  Create a new paper project
2.  Upload your creation to your blog with a link back to us and provide a direct link to the post featuring your challenge submission.
3.  Please link your card to no more than four challenges, TOTAL.
4.  Have FUN!

I can't wait to see what you create with this week's colours and look forward to visiting your blogs this week! Enjoy the rest of your weekend as it will be over all too quickly. I'm off to the swimming pool today for the County Championships with one of my James Juniors - wish us luck! I'll be back tomorrow with another project; until then, happy stampin'!


Stampin' Up! Supplies Used: 

Table built using Product Table Builder by The Crafty Owl - Independent Stampin' Up! Demonstrator.

A Magical Knight and Baby Bear Valentine

by Joanne James5. February 2018 07:00


Happy Monday everyone! I have a couple of love-themed cards to share today for the challenges over at CASology, Just Add Ink and Freshly Made Sketches


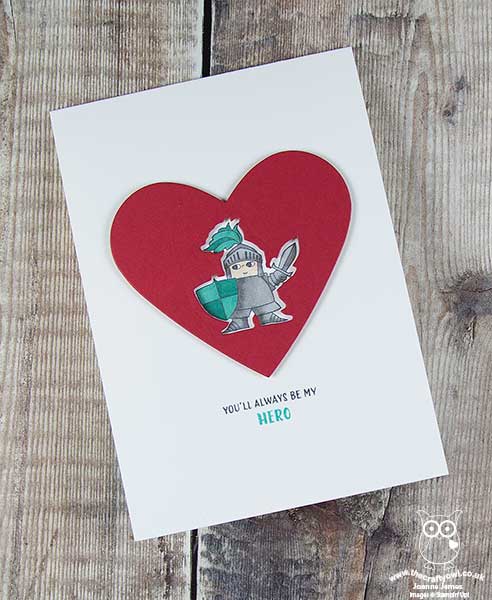
The first one is for CASology and Just Add Ink - when I think 'swoon', I immediately think of a knight in shining armour and the romance that goes with it! Here's mine - take a look:
 

Here's the low-down on the first of today's cards:

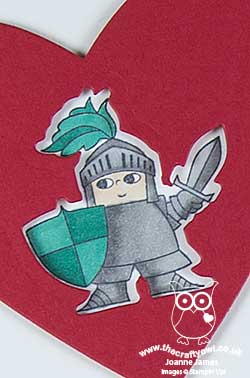
A Magical Knight - I just love the Magical Day stamp set: knights, dragons, mermaids, wizards and a unicorn - what's not to love? I simply stamped my knight in Memento Black onto an extra thick white cardstock base and coloured him in with my Stampin' Blends alcohol markers. 

An Inset Diecut - To add interest to my design, I decided to frame him with a Real Red heart cut with my Sweet and Sassy Framelits. I cut my heart out first, then cut the aperture of the knight's outline using the framelit of his outline from the Magical Mates Framelits set - I then popped my heart up on dimensionals around my stamped knight. 

An Everyday Hero - My sentiment is from the retired stamp set from last year 'Everyday Hero' - perfect for my card! If you don't have this set, you could always recreate the sentiment using the Labeler Alphabet, which would have been my next best 'go to' - no sentiment is out of reach with this one.

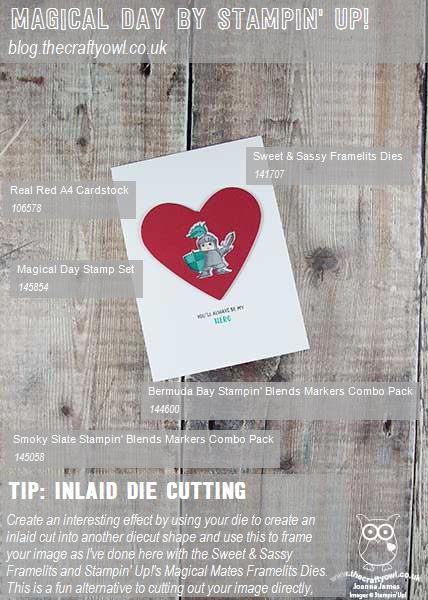
Here is the visual summary of the key products used on today's project for you to pin for easy reference:
 

You can see all of my 'How To' summaries on my 'How To - Tips and Techniques' Pinterest board in case you've missed any. 

Stampin' Up! Supplies Used:

Table built using Product Table Builder by The Crafty Owl - Independent Stampin' Up! Demonstrator.


My second card today is for Freshly Made Sketches:
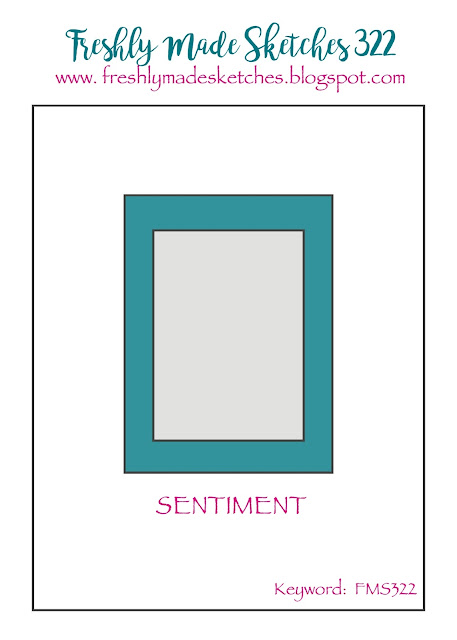
I love a good sketch and I decided this one would be perfect to highlight an annual catalogue set I haven't used in ages - take a look:
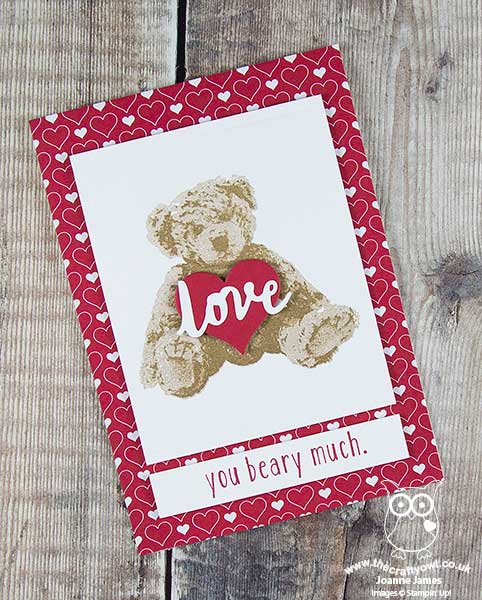
 

Here's the low-down on the second of my cards today:

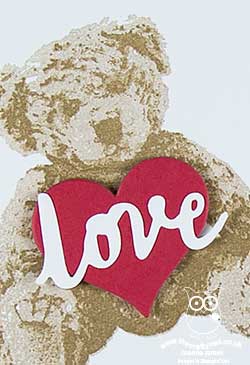
A Baby Bear Valentine - I've only used Baby Bear previously to make new baby cards and whilst I was browsing my catalogue for inspiration remembered he had a sentiment that is perfect for Valentine's Day or simply to send a card full of love too. 'Love you beary much' - both punny and sweet! I stamped my bear in Crumb Cake and Soft Suede for a traditional teddy look.

A Split Sentiment - Whilst my sentiment across the bottom as per the sketch comes from the Baby Bear stamp set, I creatively masked it to omit the word 'Love' as I had other plans for that! I snipped the word 'love' out of the 'lovely' heart diecut in the Lovely Words Thinlits set and mounted it on a Sweet and Sassy red diecut heart for my teddy bear to hold. I'm guessing it could be a cushion or maybe a box of chocolates - here's hoping anyway!

All Heart - With the neutrals of my teddy bear, I wanted some traditional red to add to my 'sending love' card, so I paired my diecut red heart with some retired 'Stacked With Love' retired designer series paper from my stash - only an abundance of red hearts will do! I love this fun colour combination - here it is if you'd like to save it for your future inspiration:
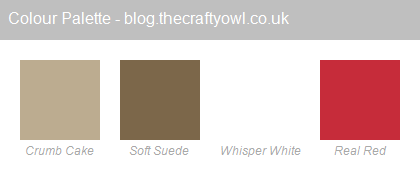
 

Here is the visual summary of the key products used on today's project for you to pin for easy reference:
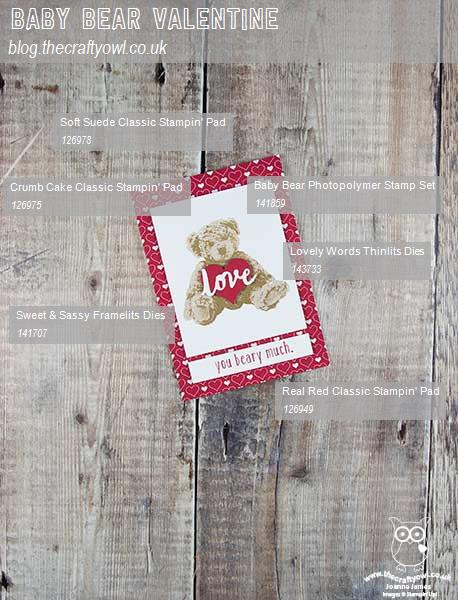
 

You can see all of my 'How To' summaries on my 'How To - Tips and Techniques' Pinterest board in case you've missed any. I'm also linking this card up for my second entry at SUO Challenges - my background definitely has hearts-a-plenty to fit with their theme this week!

Enjoy your day and I'll be back tomorrow with another project. Until then, happy stampin'!


Stampin' Up! Supplies Used:

Table built using Product Table Builder by The Crafty Owl - Independent Stampin' Up! Demonstrator.

Painted With Love Hearts Valentine Card and Co-ordinating Fold Flat Top Heart Box

by Joanne James4. February 2018 09:00

It's Sunday and time for this week's new challenge over at The Paper Players! It's the turn of my lovely and talented friend Claire to host this week and she has a rather timely theme challenge for you to work with:


February at last and Valentine's is on the way! I have both a card and gift box to share with you this week and hearts were definitely on my mind when I started creating - take a look:


Here's the low-down on today's card:

Painted With Love - Whilst I used this week's sketch over at As you See It as the inspiration for the layout for my card today, the Painted With Love papers are most certainly the inspiration for my colour scheme. I couldn't wait to use these colourful papers with their gold foil accents on my project, and carried through the shades of purple and pink to the rest of my card design. Here's my colour palette in case you would like to save it for your future inspiration:


Hearts A Plenty - Both the teams over at CAS-ual Fridays and SUO Challenges are looking for hearts, hearts and more hearts this week. I've used a combination of hearts in all different sizes stamped from the 'Heart Happiness' stamp set and some diecuts using the Sweet and Sassy Framelit Dies, along with a sprinkling of gold metallic heart shapes for my full heart quota.

Love You - My sentiment is a combination of a 'love' diecut from the Sunshine Wishes Framelits and 'YOU' from the Sale-A-Bration 'Celebrate You Thinlits' - I love being able to play around and take bits and pieces from my collection to create the perfect combination. I also added a little stamping to the inside - this lovely stamp from the 'Petal Passion' set: 

I also created a co-ordinating box with a heart fold flat closure in the same paper, perfect to enclose a Valentine's treat - here it is with my card: 


I may well do another blog post on the box - it's very pretty and turned out even better than I hoped it would! Here is the visual summary of the key products used on today's project for you to pin for easy reference:


You can see all of my Product and 'How To' summaries on my 'How To - Tips and Techniques' Pinterest board in case you've missed any. 

Before you reach for your ink and papers, check out what our amazing team has created to inspire you this week:

Here's a quick recap of our challenge rules:
 
1.  Create a new paper project
2.  Upload your creation to your blog with a link back to us and provide a direct link to the post featuring your challenge submission.
3.  Please link your card to no more than four challenges, TOTAL.
4.  Have FUN!

I can't wait to see how you interpret this week's theme and look forward to visiting your blogs this week! Blogland has lots of challenges with love in mind so I think this could be something of a theme around here in coming days! Enjoy the rest of your weekend as it will be over all too quickly. We were out at a swimming gala yesterday and Ben has a basketball tournament today, so it's all go here. I'll be back tomorrow with another project; until then, happy stampin'!


Stampin' Up! Supplies Used: 

Table built using Product Table Builder by The Crafty Owl - Independent Stampin' Up! Demonstrator.

Sweet And Sassy Hearts Trifold Card

by Joanne James19. June 2017 13:00

This is my second card for today (you can see my first one here if you missed it). Today's card uses Cecile's sketch over at Freshly Made Sketches:

Before I share my card, I would like to take a moment to give a quick shout to Amy on the FMS team for choosing my card in last week's challenge as her pick for the 'Princess of Clean' (you can see that card here) - thanks Amy, so great to be recognised! This week's sketch was perfect for an idea I had in mind following a crafty conversation with one of my customers recently. Here's my card completely flat: 


This is not how I normally photograph my cards, but is necessary for you to properly see the similarity to the sketch because this is what it looks like when stood up - because it's a trifold card!


Here's the low-down on today's card:

Ways With Nesting Dies - I had a recent conversation with a lovely customer of mine (hello Gill!) who shared with me a trifold card featuring a diamond aperture. I had been thinking about ways to use my range of Stampin' Up!'s shaped layering dies to create a similar effect when Cecile's sketch this week provided me with the perfect opportunity. Whatever your shape of choice, you can either layer them centrally or as I've done here to remian faithful to the sketch by offsetting them slightly, which I personally really like. This card is really simple to create once you've worked out the measurements: for the base, you need a piece of cardstock measuring 14.9cm (5 3/4") by 29.7cm (11 3/4") and scored on the long side at 10.5cm (4") and 21cm (8"), with 3 additional panels (one white) measuring 14.9cm (5 3/4") x 10.2cm (3 7/8"). Here are some other shots to show you what the card looks like when opened:


And this one completely opened:


Apertures are created in the outer flaps and the piece that lines the middle section, and the white lining piece, so that each layer of colour can be seen. 

A Purple Trio - I decided to go with purples as opposed to pinks for today's card - I think I've overdosed on Flirty Flamingo of late! - and kept my card pattern-free in order that the diecuts would have maximum impact. Here's my ombre colour palette should you wish to use it on your future projects:


Love And Sunshine Wishes - I finished my card with another diecut, the love from the Sunshine Wishes thinlits set, in white. I cut it from extra thick Whisper White three times, having first added some multipurpose adhesive sheets to the back of the top two pieces of cardstock, for mess-free adhesion - love these! I wanted it to be a little more sturdy as it was only attached to the cardbase on one side. There almost wasn't any stamping - I did add a 'you' on my white panel from Sunshine Sayings, but if you don't have this set or something similar I think it would work fine without. 

I actually really like this card and can see me making a few more using different shapes for other occasions, so thank you Cecile and Gill for the inspiration!

Here is the visual summary of the key products used on today's project for you to pin for easy reference:


You can see all of my 'How To' summaries on my 'How To - Tips and Techniques' Pinterest board in case you've missed any. 

Enjoy your day. It's hot, hot, hot here in the UK so I am enjoying the nice weather from the confines of my office as I prepare for the first of this month's technique classes tomorrow. I'll be back tomorrow with another project. Until then, happy stampin'!


Stampin' Up! Supplies Used:

Table built using Product Table Builder by The Crafty Owl - Independent Stampin' Up! Demonstrator.


Sale-A-Bration Any Occasion Baby Cards

by Joanne James30. March 2017 19:30

Today I'm sharing a couple of cards that I made for my last Sale-A-Bration class using Stampin' Up!s precut notelets and envelopes - take a look:


These cards would be great for a note to welcome a new baby boy or girl and would also make nice birth announcement cards. I made a video showing how I put these together - here it is if you would like to see just how quick and easy they are to make:

This stamp set contains lots of fun bits and pieces - I'm sure there are lots of similar combinations you could make for well, any occasion! 

Here is the visual summary of the key products used on today's project for you to pin for easy reference:


You can see all of my 'How To' summaries on my 'How To - Tips and Techniques' Pinterest board in case you've missed any. 

The links to my online store for the supplies to make today's cards are included below, but bear in mind you only have until 10.50pm GMT tomorrow evening to snap up your own 'Any Occasion' stamp set before we say goodbye to Sale-A-Bration for another year.

I'll be back tomorrow with another project. Until then, happy stampin'!


Stampin' Up! Supplies Used:


Table built using Product Table Builder by The Crafty Owl - Independent Stampin' Up! Demonstrator.


Sale-A-Bration Metallic Ribbon Woven Anniversary Heart

by Joanne James28. March 2017 19:30

Today I'm sharing a card for this week's Less Is More challenge where the recipe is to use a frame:

I used a heart diecut to frame a panel of ribbon weaving as a feature on a wedding anniversary card - take a look:


I made today's card to showcase the metallic ribbon that is one of the Sale-A-Bration products available FREE with a £45 order before the end of the month - only a couple more days to go to get yours! This gorgeous smooth ribbon ties beautiful bows, but I wanted to show another way that ribbon can be used on your project. I made a video tutorial to explain how you too could recreate this card with the same metallic ribbon or something similar:

I hope you found that useful - I haven't made any video tutorials in a while, I'd forgotten how much fun they are! 

Here is the visual summary of the key products used on today's project for you to pin for easy reference:


You can see all of my 'How To' summaries on my 'How To - Tips and Techniques' Pinterest board in case you've missed any. 

I'll be back tomorrow with another project. Until then, happy stampin'!


Stampin' Up! Supplies Used:

Table built using Product Table Builder by The Crafty Owl - Independent Stampin' Up! Demonstrator.

Mini Catalogue

BROWSE THE CATALOGUE

The mini catalogue is now live! Read and download your copy here.

Shop Online

Access my online shop 24 x 7, 365 days of the year:

Current April hostess code:

VDKNV7BH

Shop Online

Join My Team

It's always a great time to join Stampin’ Up! New team members can get £130 worth of products for only £99 + free business supplies + free shipping + all the fun being a part of Stampin’ Up! Stampin' Up! has something for everyone: join my growing team and benefit from my support to enjoy Stampin' Up! however you choose.

If you're interested, call me for a chat to understand how I can help you realise your goals. Alternatively, if you have already decided to sign up and you just can't wait, please click here for the link to the online form where you can sign up and order your starter kit right away! 

Latest Kit!

Stampin Cut and Emboss

The Rock Legend Kit has all you need to make 8 cards with coordinating envelopes. Along with the new Panda Friends Kit, both are available from January 4th for just £14 each - get yours here!

2023-24 Annual Catalogue

BROWSE THE CATALOGUE

Click on the catalogue for a full list of current SU! supplies - if you would like to order any of the items featured, please drop me a line at [email protected] or give me a call on 07773 421446 - I'd be happy to help.

New Online Exclusives

There are new products available exclusively in the online store from 5 March - check them out here.

About Me

Hi I'm Joanne and live in Northampton and when I'm not looking after my husband and two beautiful children, am an avid crafter with a passion for all things Stampin' Up!

I must confess that I have never been a big rubber stamper - until I discovered Stampin' Up! that is. I love the fact that I can get such great results with co-ordinating stamps, inks, papers and punches - the possibilities are endless! Join me on my stamping journey as I share the things I love and be inspired to create amazing things yourself!

Follow Me

Monthly Newsletter

Box Builder

Click the button above to use Box Buster to create your custom box design using the Envelope Punch Board!

Kits Collection Now Available!

Stampin Cut and Emboss

The new Kits Collection from Stampin' Up! is now available!

Click here to see the current kits available and order yours online today.

I Design For


Stampin' Up Stuff

This is my personal blog and is not endorsed by Stampin’ Up! I hope you find it a plentiful source of ideas and personal inspiration but please don't copy my designs for contest submission or use for classes, publication or sale without express permission.