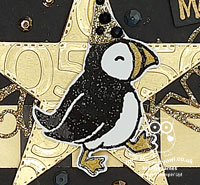
Sparkly New Year Stars Clean and Simple

by Joanne James10. January 2024 20:30

Today I'm sharing a card that I made a few days ago just for fun! A number of challenges combined to inspire this clean and simple New Year card:


The sketch over at AAA Cards, combined with the colours at TGIF Challenges and the similar palette and clean and graphic designs at Inkspirational caused me to root through my scrap box for a gold foil made me think of stars and specifically the starry swirl in the retired Stitched Stars die set:


I cut it out of gold foil, then infilled the gaps with some sparkly stars in gold, silver and black metallic glimmer paper and added a few more around the outside, before finishing with a simple new year sentiment from another retired set 'Gnome For Christmas':


The glimmer paper makes this simple card so sparkly - perfect for the challenge over at SUO Challenges too where they are currently all about the glitter!

Enjoy your evening and I'll be back soon with another project. Until then, happy stampin'!


Merry Bold And Bright Modern Christmas Trees FMS610

by Joanne James6. November 2023 09:00

Today I'm sharing a card using Jen T's fabulous layout over at Freshly Made Sketches this week:


This is a sketch with so many possibilities! I decided to make a contemporary Christmas card using one of the Christmas tree designs in the Merry Bold & Bright designer series paper pack - take a look:


Here's the low-down on today's card:

I'm also playing along with my friends at Just Us Girls again this week who have my favourite festive colour combo, red and green, as their inspiration this week. I would ordinarily go with something much more traditional, maybe Real Red and Shaded Spruce (my all-time favourite festive combo!) however the contemporary Christmas tree design in the Merry Bold and Bright designer series paper pack changes things up and pairs Lemon Lime Twist with Poppy Parade and a little white. My card was actually designed around the sentiment in the first instance, as I wanted something that would build across the three strips of the sketch and I love the way the text on the 'Joy to You' stamps gets bolder as it builds. I used both retired Stitched Stars Dies and Stitched Triangle Dies to create my accent trees; you could punch these but I like the addition of the stitched detail:


An unusual colour combination, but I actually rather like it; so much so I made two cards whilst I was at it! Here's a peek at the inside too where I added another of the stamps from the 'Joy To You' set and added a leftover strip of paper to decorate:


Perhaps this one needs a warning on the envelope to wear sunglasses on opening!!

Here is the visual summary of the key products used on today's project for you to pin for easy reference:


You can see all of my 'How To' summaries on my 'How To - Tips and Techniques' Pinterest board in case you've missed any. 

Enjoy your day; I'm having a day of catching up with lots of little jobs today - the sun is shining, so I'm feeling motivated! I'll be back tomorrow with another project. Until then, happy stampin'!


Stampin' Up! Supplies Used:

Table built using Product Table Builder by The Crafty Owl - Independent Stampin' Up! Demonstrator.

Halloween Boo To You FF120

by Joanne James14. October 2022 08:00

Today I have my card for the new challenge over at Festive Friday. 


The challenge that we are celebrating this week is 'Halloween' which is on October 31st. Remember the fun thing is that at Festive Friday you do not need to actually celebrate the occasion; your goal is to simply use three or more items from the inspiration list on your project. This week I bowed to the theme and used pumpkin, orange, stars, black and ghost and using the sketch layout over at Try Stamping on Tuesday this is what I came up with:


 Here's the low-down on today's card:

My card started out with the starry and pumpkin/ghost patterned paper from the 'Celebrate Everything' hostess designer series paper pack - these papers really are the pack that keeps on giving with a pattern for every occasion! Normally I wouldn't mix two such bold papers, but the yellow stars on the pumpkin/ghost sheet mean the two work together perfectly. I used my Pumpkin Pie Stampin' Blends markers to colour the pumpkins on the designer paper instead of leaving the whole design white - I love that you can do this! - and I added these papers to my cardbase, then used a strip of black glimmer paper and a collection of diecuts (all retired - Boo to You, Harvest Hellos, Apple Punch and Stitched Stars Dies) to create a focal point that picked out the detail of the papers:


Cute, right?! I really wanted to stamp 'trick or treat' on the orange banner, but could I find a retired stamp anywhere in my collection with those words? Nope. I'm sure there's one here somewhere ... I just have to find it!

I am also linking this card up with the lovely ladies over at SUO Challenges where their theme is 'Halloween' currently too. 

Here is the visual summary of the key products used on today's project for you to pin for easy reference:


You can see all of my 'How To' summaries on my 'How To - Tips and Techniques' Pinterest board in case you've missed any. 

How does our board inspire you? I can’t wait to see what YOU create! For more inspiration, be sure to visit the rest of the Festive Friday Challenge Design team:

Ann Schach
Beth McCullough
Sharon Hashimoto Burkert - off this week
Melanie Hungerford
Helen Jennings
Melva Peters
Jaydee
Diane Evans
Joanne James

Enjoy your day and I'll be back tomorrow with another project. Until then, happy stampin'!


Stampin' Up! Supplies Used:

Table built using Product Table Builder by The Crafty Owl - Independent Stampin' Up! Demonstrator.


Party Puffins For A Birthday Celebration FF100

by Joanne James7. January 2022 09:00

Today I have my card for the new challenge over at Festive Friday and this week we are celebrating something very special:
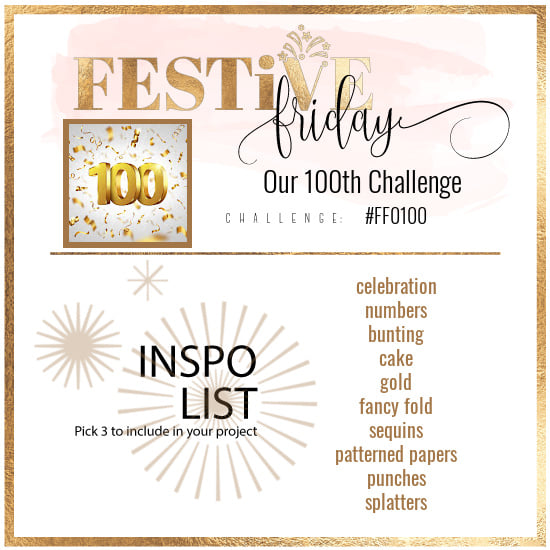
 

Our 100th challenge - woohoo! Whilst you do not need to actually celebrate the occasion to play along - your goal is to simply use three or more items from the inspiration list on your project - this week's list is sure to generate lots of celebratory cards!  This week I really went to town with the inspo list; I used celebration, numbers, gold, sequins, patterned paper and splatters (I even included a cake on the inside!) and this is what I came up with:
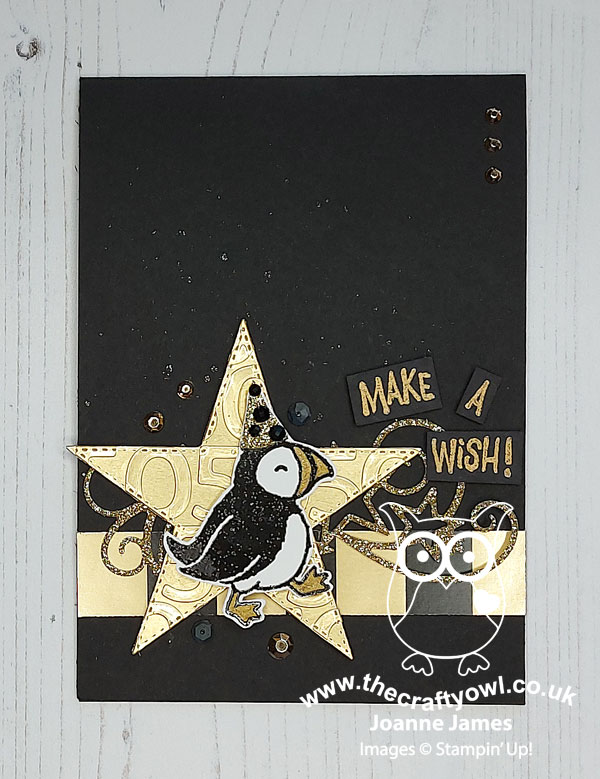
 

 Here's the low-down on today's card:

A Special Party Puffin - I decided to add a puffin from the 'Party Puffins' stamp set as the focal point for my card today, but a special celebration definitely requires a special puffin, so this one is dressed to impress! I heat embossed him in black, colouring his beak and feet with gold Wink of Stella and fussy cutting him a hat from gold glimmer paper with black jewels for added pizzazz! This little fella is so sparkly! 

Two Reasons To Celebrate - You may be wondering why when we are celebrating our 100th challenge at Festive Friday, why my card has 50s on it. Well, later this year I will be celebrating a milestone birthday - my 50th, to be exact. I was the oldest in my year at school so will be the first of my school peers to reach this momentous occasion; what this means though is that starting in September I will be needing a large number of 50th birthday cards to send out during the 12 months thereafter, so I thought I'd start making now so that I was prepared! I created a fun faux-embossed star by cutting a bunch of 5s and 0s with my Playful Alphabet Dies and adhering them to gold foil, before cutting a star with my Stitched Star Dies to create a subtle nod to this birthday milestone:
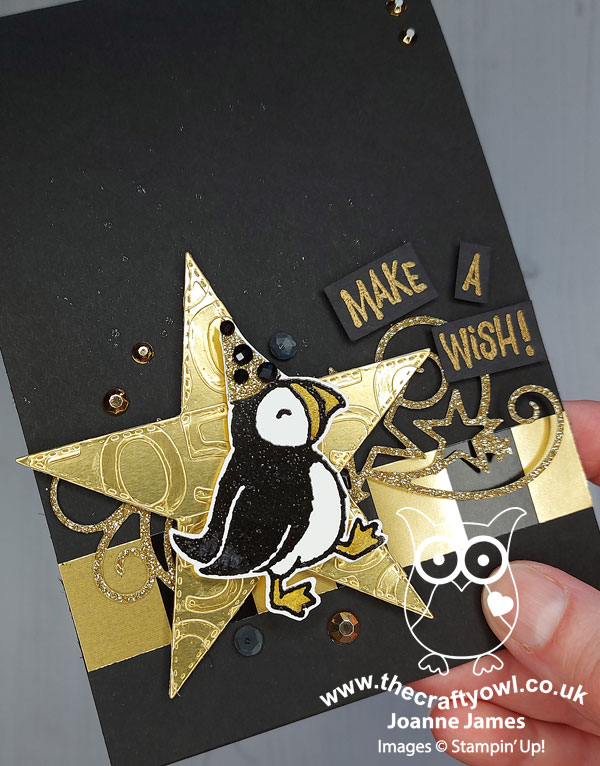
 

I thought this would make a good masculine card design - what you do think?

Gold, Gold and More Gold - With a solid black background, I majored on gold to give this card birthday bling: gold foil, gilded gems, gold glimmer paper and a touch of black and gold (retired) striped designer paper, along with some subtle gold Wink of Stella splatters on the base of my card (difficult to see on the photos, but so sparkly in real life!). I also added a gold-on-black heat-embossed sentiment; and along with a simple birthday greeting inside my card, a birthday cake topped with gold icing and sparkly candles: 
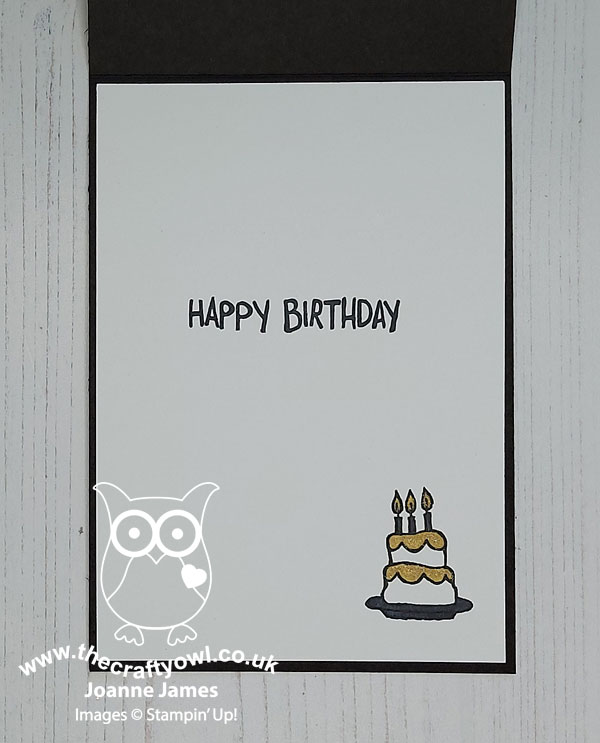
So what do you think - a suitably glamourous sparkly birthday card to celebrate a milestone birthday alongside our milestone challenge this week? Do leave me a comment below - I'd love to hear your thoughts!

Here is the visual summary of the key products used on today's project for you to pin for easy reference:
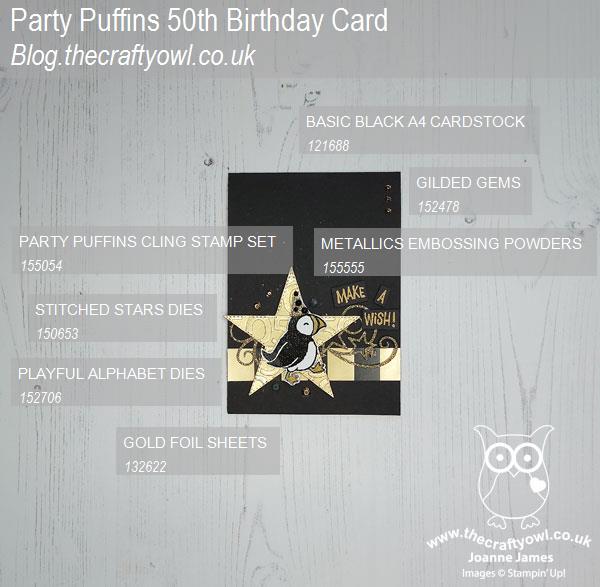
 

You can see all of my 'How To' summaries on my 'How To - Tips and Techniques' Pinterest board in case you've missed any. 

How does our board inspire you? I can’t wait to see what YOU create! For more inspiration, be sure to visit the rest of the  Festive Friday Challenge Design team:

Ann Schach
Beth McCullough
Sharon Hashimoto Burkert
Melanie Hungerford
Helen Jennings
Stephanie Lanzalotto
Melva Peters
Jaydee
Diane Evans
Joanne James

I am also playing along with Color Throwdown (I used black, white and gold) and over at Try Stamping on Tuesday where they have a great sketch this week - and of course I'm playing with the optional theme of 'celebrate' too.


Enjoy your day and I'll be back tomorrow with another project. Until then, happy stampin'!


Stampin' Up! Supplies Used:
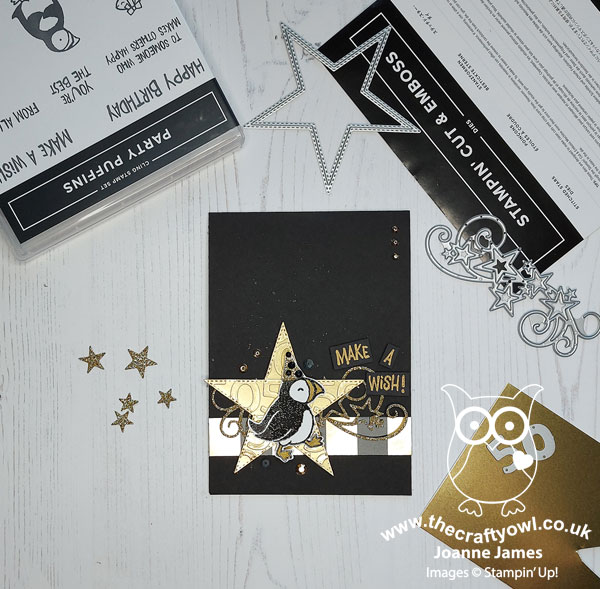
Table built using Product Table Builder by The Crafty Owl - Independent Stampin' Up! Demonstrator.


Strong & Beautiful Starry Congratulations Card

by Joanne James20. October 2020 19:25

Today I'm sharing a card that is based on the current Fab Friday Challenge sketch, which I love:


I decided it would be the perfect layout for a card I needed to make for the newest member of my Stampin' Up! team who recently achieved a 'rising star' milestone for consistent sales during her first quarter; an achievement to be celebrated! Here's my card:


Here's the low-down on today's card:

Shoot For The Stars - I thought the starry flourish from the Stitched Stars Dies was perfect for the flourish in the sketch and totally fitting with my congratulatory theme, so I cut it out of copper foil for a swirl of shiny stars.

Brightly Gleaming - I picked up on the starry theme with a piece of Brightly Gleaming designer paper and used the Night of Navy/copper colour combo as the basis for the rest of my card. I also added a narrow copper scalloped border and a trio of copper star embellishments to my card. I love this paper - great for all kinds of occasions, not just Christmas.

Strong & Beautiful - The 'Strong and Beautiful' stamp set has some wonderful empowering sentiments and I chose to feature two on today's card; one on the front of this card and another on the inside:


Here is the visual summary of the key products used on today's project for you to pin for easy reference:


You can see all of my 'How To' summaries on my 'How To - Tips and Techniques' Pinterest board in case you've missed any. 

Enjoy your evening and I'll be back tomorrow with another project. Until then, happy stampin'!


Stampin' Up! Supplies Used:

Table built using Product Table Builder by The Crafty Owl - Independent Stampin' Up! Demonstrator.

Flight of Fancy Christmas Whoops-A-Daisy Angel

by Joanne James22. September 2020 11:25

Tuesday already! This is my first post for today; you will definitely want to check out my next post too about tomorrow's 24 hour flash stamp sale and details of my upcoming classes - you can see that here.

For today's creative post I'm sharing a card for a couple of challenges:


The team at Just Add Ink are asking us to 'Just Add A' to our cards and from the inspo list over at Festive Friday I chose stars, metallics and blue - with a little added glitter thrown in! The team at Festive Friday are celebrating World Space Week and whilst there are no planets on my card, I did feature a celestial being of another kind - take a look:


Here's the low-down on today's card:

A Is For ... - ... Angel! I adore this whimsical line-drawn angel in the 'Flight of Fancy' stamp set - she looks just like she stepped off the set of a primary school nativity play! I decided to give mine ginger red hair, a coat of clear Wink of Stella and super-sparkly Dazzling Diamonds wings for an overdose of cuteness. 

B Is For ... - ... Brightly Gleaming Specialty Designer Series Paper! This fabulous copper-foiled paper is a returning favourite from last year and mine was still on the shelf; my Paper Player teamie Ann, who also designs with the Festive Friday team, used the same paper on her card this week and it reminded me how fabulous it is. It inspired the whole colour scheme for my card - so pretty!

C Is For ... - ... Copper Brushed Metallic Cardstock! I used this cardstock for my mat and to diecut a swirly star die cut to tuck behind my main image for some added detail. I wanted to see how it paired with the starry paper and whilst it isn't as super shiny as copper foil, it does add a beautiful sheen to compliment it.

This little angel totally reminds me of a play that the James Juniors did at Christmas once when they were at primary school called 'Whoops-A-Daisy Angel' (hence the title of today's blog post) - is there anything more adorable than little children, with wings and halos all askew, singing along at the tops of their voices to Christmas carols? Priceless!

Here is the visual summary of the key products used on today's project for you to pin for easy reference:


You can see all of my 'How To' summaries on my 'How To - Tips and Techniques' Pinterest board in case you've missed any. 

Enjoy your day and I'll be back tomorrow with another project. Until then, happy stampin'!


Stampin' Up! Supplies Used:

Table built using Product Table Builder by The Crafty Owl - Independent Stampin' Up! Demonstrator.

Stitched Stars Exam Congratulations Card

by Joanne James22. August 2019 09:00

Today I'm sharing a card using this week's CAS(E) This Sketch layout that is also perfect for the theme over at Global Design Project #GDP203 this week:


Today is the day when for lots of students in the UK the wait is finally over as GCSE results are announced. My nephew is one of those students for whom today represents the culmination of months of study and hard work and whilst I don't know his results at the time of writing this, I am confident that a card to congratulate him on his exam success will be in order. Since my card is for a boy I didn't want anything too fussy, so the above sketch layout was perfect. I took the opportunity to play with some new product from my Autumn-Winter catalogue pre-order to create a cool and colourful card - take a look:


Here's the low-down on today's card:

Not Just For Christmas - Stitched Stars are one of the few stitched shapes now missing from the Stampin' Up! collection - but not any more! The Autumn-Winter catalogue has a great bundle called 'So Many Stars' featuring both stitched and decorative stars and that great rolling, starry die that I've used on my card today. I inset the die into my top layer of Granny Apple Green and used a base of Mango Melody so that the base colour shows through the star shapes (I paper-pieced the non-star elements back in) before finishing with my sentiment in a larger stitched star. Great for Christmas, but perfect for a congratulations card too! 

A Punny Sentiment - My sentiment comes from the Darling Label Punch Box stamp set - one of my favourites for a cool congratulations card for a discerning teenager. I masked off the stripes that surround it so that I had just the words, which fit inside my stitched star perfectly. I finished the inside of my card with a sentiment from the now retired 'Amazing Congratulations' stamp set and some stars from the new So Many Stars stamp set:


Two Cards, Four Colours - I chose a bright and colourful palette for my card today and couldn't initially decide whether to add Granny Apple Green or Poppy Parade to my pairing of Mango Melody and Blueberry Bushel. So I created two cards featuring each of the colours. Here's the second one:

And here's a photo of the cards together - which one do you prefer? Leave me a comment below - I'd love to hear your thoughts!

Either way, here's the colour palette I used in case you would like to save it to inspire your future crafting projects:


Here is the visual summary of the key products used on today's project for you to pin for easy reference:


You can see all of my 'How To' summaries on my 'How To - Tips and Techniques' Pinterest board in case you've missed any. 

Enjoy your day and I'll be back tomorrow with another project. Until then, happy stampin'!


Stampin' Up! Supplies Used:

Table built using Product Table Builder by The Crafty Owl - Independent Stampin' Up! Demonstrator.

Mini Catalogue

BROWSE THE CATALOGUE

The mini catalogue is now live! Read and download your copy here.

Shop Online

Access my online shop 24 x 7, 365 days of the year:

Current April hostess code:

VDKNV7BH

Shop Online

Join My Team

It's always a great time to join Stampin’ Up! New team members can get £130 worth of products for only £99 + free business supplies + free shipping + all the fun being a part of Stampin’ Up! Stampin' Up! has something for everyone: join my growing team and benefit from my support to enjoy Stampin' Up! however you choose.

If you're interested, call me for a chat to understand how I can help you realise your goals. Alternatively, if you have already decided to sign up and you just can't wait, please click here for the link to the online form where you can sign up and order your starter kit right away! 

Latest Kit!

Stampin Cut and Emboss

The Rock Legend Kit has all you need to make 8 cards with coordinating envelopes. Along with the new Panda Friends Kit, both are available from January 4th for just £14 each - get yours here!

2023-24 Annual Catalogue

BROWSE THE CATALOGUE

Click on the catalogue for a full list of current SU! supplies - if you would like to order any of the items featured, please drop me a line at [email protected] or give me a call on 07773 421446 - I'd be happy to help.

New Online Exclusives

There are new products available exclusively in the online store from 5 March - check them out here.

About Me

Hi I'm Joanne and live in Northampton and when I'm not looking after my husband and two beautiful children, am an avid crafter with a passion for all things Stampin' Up!

I must confess that I have never been a big rubber stamper - until I discovered Stampin' Up! that is. I love the fact that I can get such great results with co-ordinating stamps, inks, papers and punches - the possibilities are endless! Join me on my stamping journey as I share the things I love and be inspired to create amazing things yourself!

Follow Me

Monthly Newsletter

Box Builder

Click the button above to use Box Buster to create your custom box design using the Envelope Punch Board!

Kits Collection Now Available!

Stampin Cut and Emboss

The new Kits Collection from Stampin' Up! is now available!

Click here to see the current kits available and order yours online today.

I Design For


Stampin' Up Stuff

This is my personal blog and is not endorsed by Stampin’ Up! I hope you find it a plentiful source of ideas and personal inspiration but please don't copy my designs for contest submission or use for classes, publication or sale without express permission.