Pampered Pets Layered Birthday Card

by Joanne James15. August 2020 19:25

Today I'm sharing a card for the current challenge over at Festive Friday where they are celebrating National Dog Day which i'm also linking up over at The Card Concept where they have a cute inspiration photo featuring a dog front and centre: 


I have been looking for an opportunity to break into the products in my Pampered Pets suite and this challenge gave me the perfect reason - take a look:


Here's the low-down on today's card:

Pampered Pets - A collection featuring cute cats and dogs, the Pampered Pets Suite is perfect for cards for animal lovers. I decided to make a birthday card for a dog-mad friend of one of the James Juniors. She loved it! Today's card is definitely all about the layers - there are 11 in total!

Pets Dies - The dies in the suite not only cut out the images in the stamp set, but also fit some of the dogs on the DSP and since I was featuring several of the paper designs on my card today, I also die cut one of the cute dogs too. Check out another neat die trick - did you notice that the horizontal die piece that features pawprints? Don't throw away the inside pieces if you are going to use the negative space diecut - the 'paws' also make cute hearts when turned the other way up - I used mine in front of my dog. You're welcome ;-)

Suite Treats - The Pampered Pets Suite has a ton of cute elements that can be used to decorate your creations, including ribbon, twine and these cute heart and bone trinket embellishments, one of which I added to my dog's collar:

I know I only needed three items from the inspo list on my card today, but I couldn't resist going to town on this card: I included red, black, baker's twine, heart, paw print, dog, bone and embossing (heat-embossed sentiment). I think stripes and a love/loyalty sentiment are the only two things I didn't include!!

Here is the visual summary of the key products used on today's project for you to pin for easy reference:


You can see all of my 'How To' summaries on my 'How To - Tips and Techniques' Pinterest board in case you've missed any. 

Enjoy your evening and I'll be back tomorrow with another project. Until then, happy stampin'!


Stampin' Up! Supplies Used:

Table built using Product Table Builder by The Crafty Owl - Independent Stampin' Up! Demonstrator.


Playful Patterns HB2U Birthday Cards

by Joanne James10. August 2020 18:25

Today I'm sharing a couple of cards I made using this week's Freshly Made Sketches layout:

I thought Kim's sketch this week was great with so many possibilities, especially for a patterned paper lover like me! I decided that I would try and be faithful to the diagonal stripes too so reached for my Playful Patterns pack and created a teen-inspired birthday card - take a look:


Here's the low-down on today's card:

I used my Playful Alphabet Dies to create a 'text speak' birthday sentiment and layered them onto a stitched square, using the colours of the designer series paper to determine my colour choices. I then added some simple stamping to the inside of my card:


A few Playful Patterns resin dots complete my card. I liked this card so much, I made another one in a similar colourway using another strip of the same paper:


Here they are together - which colourway do you prefer?


I know this kind of text speak isn't to everyone's taste, but as I find myself making more and more birthday cards for teenagers, I know this will be a top choice when the children go rifling through by box looking for a last-minute card! Here is the visual summary of the key products used on today's project for you to pin for easy reference:


You can see all of my 'How To' summaries on my 'How To - Tips and Techniques' Pinterest board in case you've missed any. 

Another quick Monday post for me as I've been busy today preparing for a milestone birthday of one of the James Juniors tomorrow - more on that later in the week! Enjoy your envening and I'll be back tomorrow with another project. Until then, happy stampin'!


Stampin' Up! Supplies Used:

Table built using Product Table Builder by The Crafty Owl - Independent Stampin' Up! Demonstrator.

I Got You A Cake Birthday Goat TTT76

by Joanne James6. August 2020 18:00

It's Thursday and time for a new challenge over at TicTacToe! It's the turn of Team X to host this week and the lovely LeAnne is our featured designer. This is the fun board that we are playing along with: 


I went with the diagonal of primary colour (red or black), square and animal for today's card and paired some old papers with a fun new stamp set - take a look:


Here's the low-down on today's card:

Today's card features the fun new stamp set 'Way To Goat'; I just love this set, I mean check out the expression on that goat's face - priceless! I stamped my goat and coloured him with Smoky Slate Blends, cut him out with a Stitched Square Framelit and paired him with some retired Broadway Birthday designer series paper. I couldn't stop there though - I had to add this cheeky soul to the inside too:

And I liked this card so much, I made a a few more for my box: 

Here is the visual summary of the key products used on today's project for you to pin for easy reference:


You can see all of my Product and 'How To' summaries on my 'How To - Tips and Techniques' Pinterest board in case you've missed any. 

A tictactoe board offers so many creative possibilities - how does this week's board inspire you? Why not have a go? We would love to see you in the gallery and who knows - you might be selected for Designer's Choice and be eligible to be a guest designer on a future challenge. 

Enjoy your day; I'll be back tomorrow with another project. Until then, happy stampin'!


Stampin' Up! Supplies Used: 

Table built using Product Table Builder by The Crafty Owl - Independent Stampin' Up! Demonstrator.

Today's Plan: Consume Cocktails

by Joanne James30. July 2020 11:00

Today I'm just squeaking in my card for the current Fab Friday challenge, helped along by the sketch at Hand Stamped Sentiments:


I love these bold, bright colours, but they did cause me to procrastinate over how to use them to best effect! There are some lovely cards in the gallery that use them as accents against a primarily white background, which looks great. In the end I decided to go full-on colour and even add a little sparkle  - take a look:


Here's the low-down on today's card:

Anyone For Cocktails? - I decided to make another card using the 'Nothing's Better Than' stamp set and co-ordinating dies and featuring a colourful cocktail. These tropical colours reminded me of those fabulous rainbow-ombre type cocktails that you get that have red in the bottom, rising through orange to yellow and I wanted to recreate that on my card. It's really easy to do: just ink your stamp in yellow, then with a sponge dauber add orange and then lastly red to the bottom of the stamp respectively before stamping to achieve an easy ombre effect.

Ombre Sparkle - I cut into my Rainbow Glimmer Paper to create a fun, sparkly orange/yellow ombre diecut to mimic the colours and effect of my cocktail. I also added some clear WInk of Stella to my cocktail glass too for a little added shimmer - check it out here:


Stitched Rectangles Windows - Instead of adding mats to the top of my card as per the HSS sketch, I decided to get creative with my Rectangle Stitched Dies and create a custom aperture in my Bermuda Bay card base, then added some in-colour DSP in Bermuda Bay featuring the circle design, to echo my feature circle, behind.

Here is the visual summary of the key products used on today's project for you to pin for easy reference:

You can see all of my 'How To' summaries on my 'How To - Tips and Techniques' Pinterest board in case you've missed any. 

I was supposed to post this card yesterday but my day just seemed to run away with me - do you ever have days like that? I've just finished a fun online demonstration session this morning so wanted to squeeze this in before cracking on with the rest of today's activities, which unfortunately do not include consuming cocktails!! Ah well, never mind. Enjoy your day and I'll be back tomorrow with another project. Until then, happy stampin'!


Stampin' Up! Supplies Used:

To follow.


A Summer Cocktails Kind Of Day TTT70

by Joanne James25. June 2020 10:00

It's Thursday and time for a new challenge over at TicTacToe! It's the turn of Team X to host and the lovely Shannon is our featured designer this week. This is the fun board that we are playing along with: 


I must confess I totally struggled with our board this week! I found myself getting 2 out of 3 squares, but struggling to make a complete row. In the end I grabbed this week's CAS Colours & Sketches sketch for my layout and went down the first column with polka dots, sequins and summer and this is what I came up with:


Here's the low-down on today's card:

A Dotty Dilemma - I got hung up on so many things on this card, including the polka dots! I couldn't find any dotty papers in summery colours but found a scrap of retired polka dot Brights DSP in Daffodil Delight lurking in the scrap box, so went with it!!

A Cocktails Kind of Day - The weather has been glorious here in the UK this week, with yesterday being the hottest day of the year at 31.8 degrees centigrade recorded and the forecasters are predicting that today will be hotter still! For me cocktails are definitely associated with summer - either a vacation treat or something to be enjoyed on a warm summer evening in the garden. I may or may not have indulged in a rhubarb gin cocktail already this week and this inspired the pink drink on my card. The cocktail and diecut sentiment are courtesy of the new 'Nothing's Better Than' bundle that allows options for cocktails, cookies, coffee and chocolate-themed cards too; I love this set and know I will use it lots!

Sunshine and Sprinkles - To further emphasise the sunshine element of my card, I added a stamped and fussy cut sun from the retired set 'Day at The Beach' which I seem to be getting a lot of use out of lately and a scattering of retired iridescent sequins and sprinkles in co-ordinating colours. Check out that sparkle:


I actually really love this card and looking at the end result I can't believe it took me so long to get there!! I am also linking up with the lovely ladies over at SUO Challenges who are also challenging us to celebrate summer this week and I'm definitely doing that!

Here is the visual summary of the key products used on today's project for you to pin for easy reference:


You can see all of my Product and 'How To' summaries on my 'How To - Tips and Techniques' Pinterest board in case you've missed any. 

A tictactoe board offers so many creative possibilities - how does this week's board inspire you? Why not have a go? We would love to see you in the gallery and who knows - you might be selected for Designer's Choice and be eligible to be a guest designer on a future challenge. 

Enjoy your day; I have lots to do today and will be trying to get everything done without melting into a heap. I might have to reward myself this evening with a cocktail! I hope you are enjoying the lovely weather and I'll be back tomorrow with another project. Until then, happy stampin'!


Stampin' Up! Supplies Used: 

Table built using Product Table Builder by The Crafty Owl - Independent Stampin' Up! Demonstrator.

Ornate Garden Ornate Thanks Card For The Paper Adventures Blog Hop

by Joanne James19. June 2020 12:00

I have another post for you today! I was asked by the lovely Kelly Kent, of mypapercraftjourney.com and one of the talented design team members over at one of my favourite challenge sites, Just Add Ink (read more about that team in today's other post!) to be the guest designer on her Paper Adventures Team Monthly Blog Hop this month and I was delighted to say yes! This month they have a fun kit challenge! We were all asked to come up with a kit containing the following items and then to make a card from them:


I chose the following items from the Ornate Garden Suite for my kit:

  • Ornate Garden Designer Series Paper
  • Ornate Floral 3D Embossing Folder for dry embossing
  • Old Olive Ribbon from the Ornate Garden Ribbon Combo Pack
  • A flower trinket from the (retired) Bird Ballad embellishments

And using the sketch over at Inspire.Create as the basis for my card, this is what I made:


Here's the low-down on today's card:

Ornate Garden - I decided to keep things simple and choose a few co-ordinating products for my kit card. I cut out a piece of the Ornate Garden DSP with my Stitched Shapes Dies and tied my Old Olive Ribbon around it in a bow making this a featur of my card, and chose some co-ordinating Mint Macaron cardstock for my card base.

An Embossing Dilemma - I debated between heat embossing my sentiment or dry embossing my background and in the end the dry embossing won - look at the lovely dimension the Ornate Floral 3D embossing folder adds to the base:


Just To Say ... - I love the numerous combinations of sentiment that can be made using the Ornate Thanks stamp set; I can see the 'just wanted to say' going with so many phrases even those not thanks-related; in this instance I stayed with thanks and used these other stamps to complete the inside of my card:


I added my retired Bird Ballard flower embellishment to the sentiment on the front to complete my card. 

Here is the visual summary of the key products used on today's project for you to pin for easy reference:


You can see all of my 'How To' summaries on my 'How To - Tips and Techniques' Pinterest board in case you've missed any. 

Now that you've had a chance to see what I made, why not click here to go to the next stop on the hop and see what the lovely Kelly has made with her kit supplies! Thank you so much to the Paper Adventures team for inviting me to participate in their hop today.

Enjoy your day and I'll be back tomorrow with another project. Until then, happy stampin'!


Stampin' Up! Supplies Used:

Table built using Product Table Builder by The Crafty Owl - Independent Stampin' Up! Demonstrator.

Outdoor Barbeque Love Is In The Air Birthday Card

by Joanne James26. May 2020 20:00

I've had a busy day so a quick post from me today! I'm sharing a card using this week's layout over at CAS(E) This Sketch:

This is a great sketch and just perfect for me to make another quick card using the retiring 'Outdoor Barbeque' set:


Here's the low-down on today's card:

I decided to make the beef burger the feature of my card, and paired it with some check gingham in Poppy Parade - it reminded me of a picnic table cloth! Super simple and a perfectly punny card for another of the James family BBQ-lovers!

Here is the visual summary of the key products used on today's project for you to pin for easy reference:


You can see all of my 'How To' summaries on my 'How To - Tips and Techniques' Pinterest board in case you've missed any. 

Enjoy your evening and I'll be back tomorrow with another project. Until then, happy stampin'!


Stampin' Up! Supplies Used:

Table built using Product Table Builder by The Crafty Owl - Independent Stampin' Up! Demonstrator.

Let's Just Roll With It and Quarantini For #ShareSunshine

by Joanne James6. May 2020 10:30

Hi everyone! Wednesday already? Oh my! I've had a busy start to my week with online card classes which are really starting to take off as we get used to the technology. I had my main class on Monday using 'Beautiful Friendship' one of my most favourite sets (cards to follow). In order to stave off boredom for a lot of my regular crafty ladies, I've been following up each class with a couple of shorter 30 minute sessions that use the same set we used in our class but using different techniques. This is more like a Facebook live but we still use Zoom so that we are in a classroom format and can all see and talk to each other as I'm demonstrating. I don't do many Facebook lives and must confess I much prefer the classroom format. If anyone is reading this and thinking they would like to know more about online classes or these little demo sessions, then do check out my Facebook page or leave me a comment below and I can add you to my group.

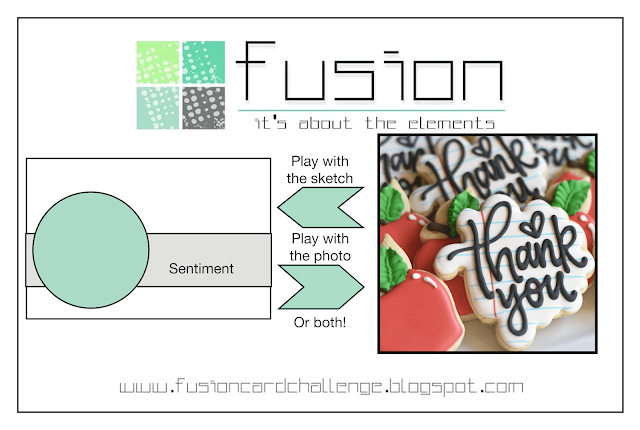
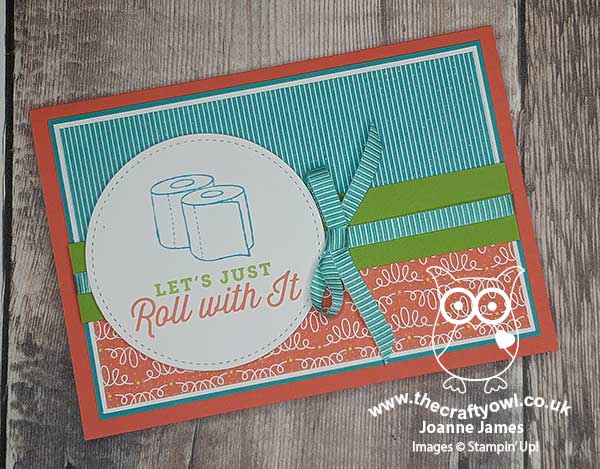
Anyway - time for a blog post! I've had a few server issues with my hosting company earlier this week, so if you popped by and couldn't reach my blog, please accept my apologies - things should all be sorted now I'm told! So today I'm sharing another couple of cards using the #ShareSunshine product giveback download that Stampin' Up! has released to raise funds for Covid-19 related charities - you can read all about it and purchase the download if you are interested in my previous post here. For the first one I used the current Fusion sketch for my layout (great sketch!):
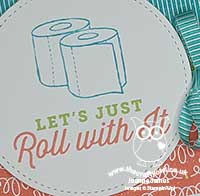
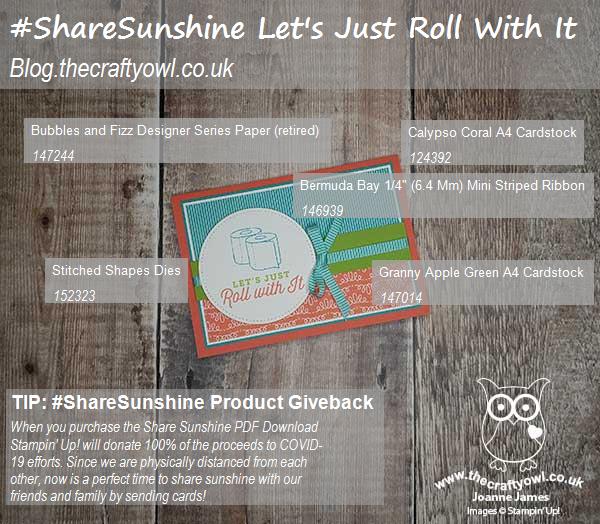
I used the fun loo roll image and once printed die cut it with a stitched circle, and paired it with some retired Bubbles & Fizz Sale-A-Bration papers - take a look:
 

I added some striped Bermuda Bay ribbon and another of the print out sentiments to the inside of my card:
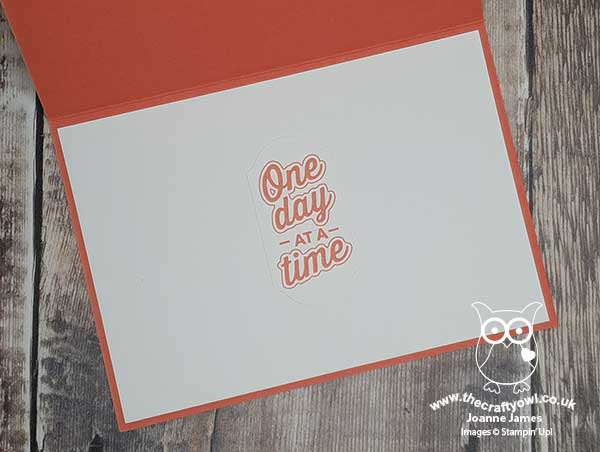
 

That's pretty much all we can do right?!

One of my lovely customers, Jane, shared some fabulous cards using this download over on my Facebook page and I noticed that she had used some of these papers and they actually match quite a lot of the sentiments and images, so I got to use up some paper too. If you would like to see Jane's cards, you can see them here - thanks for the inspiration Jane!

Here is the visual summary of the key products used on today's project for you to pin for easy reference:
 

You can see all of my 'How To' summaries on my 'How To - Tips and Techniques' Pinterest board in case you've missed any. 

I also managed a quick second card this afternoon, using this week's CAS(E) This Sketch:

I used another or the retired Bubble and Fizz papers and paired it with the martini glass that I coloured with Blends and this fun sentiment:
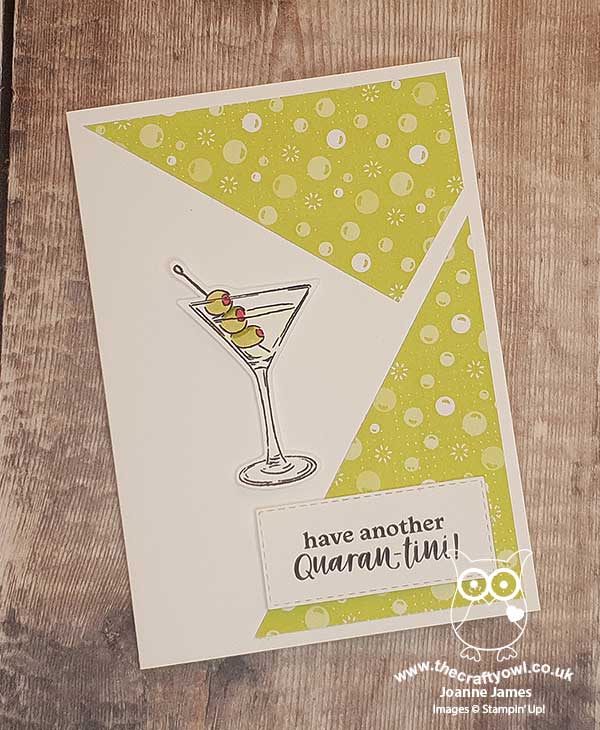
 

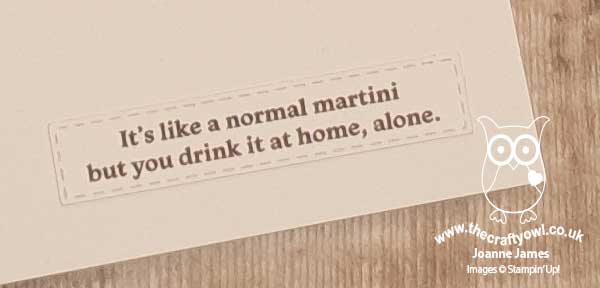
It finishes inside the card like this:
 

Enjoy your evening. I spent my day editing and uploading some online class videos and enabling my oven repair man to do his job whilst social distancing - why do these things always break down at the most inconvenient times?! I'll be back tomorrow with another project. Until then, happy stampin'!


Stampin' Up! Supplies Used:

#ShareSunshine Digital Download: get yours here

Forget Your Trebles Music From The Heart Card

by Joanne James28. April 2020 17:00


Today I'm sharing another quick card that I made for this week's Just Add Ink challenge - you know I can't resist a good sketch:

I decided to make a fun card using the retiring 'Music From My Heart' stamp set - take a look:


Since three out of four members of the James household play piano, and we have a guitarist and singer too, it stands to reason that this set would be one of the first into my shopping basket when the Spring-Summer catalogue launched last December and I am sad that it isn't carrying over as we haven't had anything like it before. I just love this set and it is a keeper for me! 

This card is just some random stamping of the treble clef and the 'forget your trebles' sentiment onto a white cardbase, with a black top panel and then some layering of a stave, a wavy piano keyboard and a stitched square to highlight my piano. I like the heart detail on the treble clef, which allows for some quick pops of rainbow colour. I did the same with the notes on the stave, although this layer did blend into the background more than I would have liked; smaller black notes would have worked better in hindsight. No matter - this card will be perfect for a musical friend; in fact, I might run off a batch to send to my choir ladies to let them know I'm missing them!

Here is the visual summary of the key products used on today's project for you to pin for easy reference:


You can see all of my 'How To' summaries on my 'How To - Tips and Techniques' Pinterest board in case you've missed any. 

Enjoy your evening and I'll be back tomorrow with another project. Until then, happy stampin'!


Stampin' Up! Supplies Used:

Table built using Product Table Builder by The Crafty Owl - Independent Stampin' Up! Demonstrator.

Everyday Hero For Everyday Heroes

by Joanne James27. April 2020 09:00

I have another quick post for you today with some extra cards that I managed to make in the last couple of days for a few challenges: the first is using a retired set that is perfect for the current challenge over at Retro Rubber where 'anything goes' this week, that uses the Freshly Made Sketches layout and uses red/blue/superheroes and appreciation sentiment from the Inspo List over at Festive Friday

RRCB 133   

I wanted a couple of quick cards to send to some nursing friends who are currently working really hard during the Corona virus pandemic in hospitals to let them know what an awesome job they are doing so inspired too by the lovely Jen Timko's take on her own FMS sketch this week I dug out my retired 'Everyday Hero' stamp set from 2017 which had just the sentiment I needed:


I went really clean and simple and stamped the cape onto a stitched oval and coloured it with my Blends before adding a star punched out of gold glimmer paper because, well, even a super hero needs some bling, right? And here's a picture showing both the outside of the card and how the sentiment resolves on the inside:


This card was actually quite a quick make so I am going to run a few more of these off - there are so many everyday heroes at the moment keeping the country both safe and moving, from doctors and nurses to supermarket staff and refuse collectors, that I thought it would be nice to have a pile on hand to give out whenever I came across one of mine.  

Here is the visual summary of the key products used on today's project for you to pin for easy reference - the stamp set is retired but the other basic items are available:


You can see all of my 'How To' summaries on my 'How To - Tips and Techniques' Pinterest board in case you've missed any. 

Enjoy your day and I'll be back tomorrow with another project. Until then, happy stampin'!


Stampin' Up! Supplies Used:

Table built using Product Table Builder by The Crafty Owl - Independent Stampin' Up! Demonstrator.


New Online Exclusives

There are new products available exclusively in the online store from 5 November - check them out here.

Latest Kits!

Stampin Cut and Emboss

The Perpetual Beauty Calendar Kit and Cherry Blossoms Treat Boxes Kit are the latest kits in the online store - get yours here!

Shop Online

Access my online shop 24 x 7, 365 days of the year:

Current December hostess code:

9NKXDTTR

Shop Online

Mini Catalogue

BROWSE THE CATALOGUE

'Tis The Season - the new Stampin' Up! Mini Catalogue is here! For more details and to download your copy click here

Scrapbooking

Stampin' Up! has introduced a new range of 12x12" scrapbooking product and kit - the full range is now available to purchase online. To download a copy of the new digital Scrapbooking Catalogue click here.

2024-25 Annual Catalogue

BROWSE THE CATALOGUE

Click on the image to download your copy of the 2024-25 annual catalogue. For a full list of current SU! supplies, go to my online store. If you would like any help or advice, please drop me a line at joanne@thecraftyowl.co.uk or give me a call on 07773 421446 - I'd be happy to help.

Join My Team

It's always a great time to join Stampin’ Up! New team members can get £130 worth of products for only £99 + free business supplies + free shipping + all the fun being a part of Stampin’ Up! Stampin' Up! has something for everyone: join my growing team and benefit from my support to enjoy Stampin' Up! however you choose.

If you're interested, call me for a chat to understand how I can help you realise your goals. Alternatively, if you have already decided to sign up and you just can't wait, please click here for the link to the online form where you can sign up and order your starter kit right away! 

About Me

Hi I'm Joanne and live in Northampton and when I'm not looking after my husband and two beautiful children, am an avid crafter with a passion for all things Stampin' Up!

I must confess that I have never been a big rubber stamper - until I discovered Stampin' Up! that is. I love the fact that I can get such great results with co-ordinating stamps, inks, papers and punches - the possibilities are endless! Join me on my stamping journey as I share the things I love and be inspired to create amazing things yourself!

Follow Me

Monthly Newsletter

Box Builder

Click the button above to use Box Buster to create your custom box design using the Envelope Punch Board!

Kits Collection Now Available!

Stampin Cut and Emboss

The new Kits Collection from Stampin' Up! is now available!

Click here to see the current kits available and order yours online today.

I Design For


Stampin' Up Stuff

This is my personal blog and is not endorsed by Stampin’ Up! I hope you find it a plentiful source of ideas and personal inspiration but please don't copy my designs for contest submission or use for classes, publication or sale without express permission.

DSP Special Release

Check out 3 popular designer series paper designs in fresh new colourways! Available exclusively in the online store from 3 December - check them out here

Last Chance Products

Last Chance Products will now be updated every other month - check them out here.