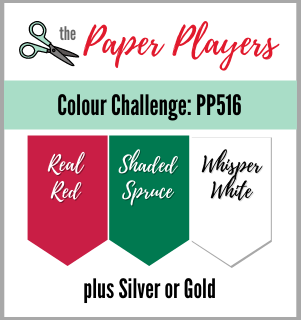
Today it's Sunday and time for this week's new challenge over at The Paper Players! It's my turn to host this week and I have a festive colour challenge for you to work with:

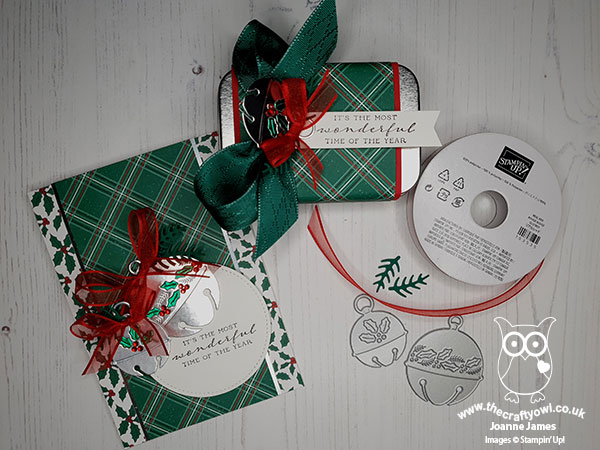
I'm also linking up with the challenge over at Festive Friday, where I used diecut, pattern paper, ribbon and sentiment from the inspo list. The colours I chose for this week's challenge are some of my favourite to work with when creating cards and projects for the festive season, and whilst you are free to create whatever you like with the palette, I couldn't resist creating a card and matching gift box ready for Christmas. This is a rather photo-heavy post, so here goes! First up - here's my card and co-ordinating gift packaging together:
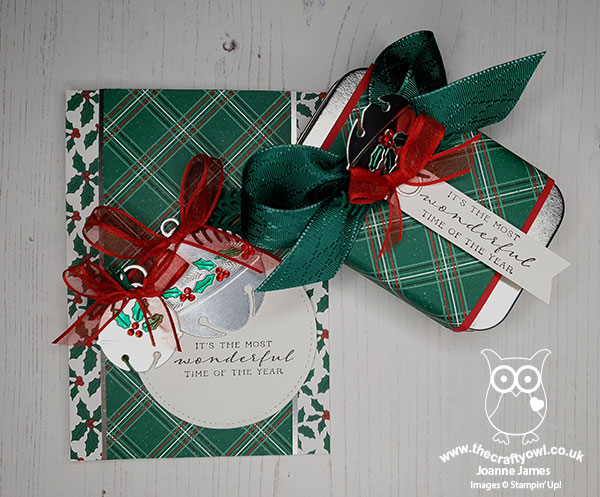
Pretty, right? Let's take a close look at each on turn. First up - here's the card I made:
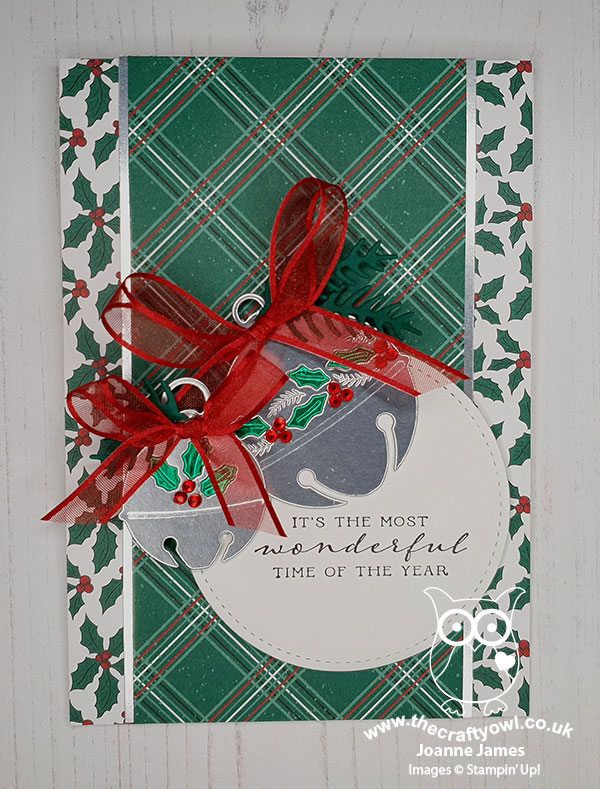
Here's the low-down on today's card:
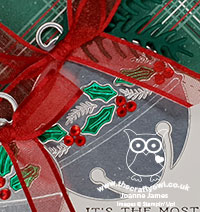
Sounds of The Season - A pair of silver foil jingle bells from the Sounds of the Season Dies are the centrepiece of today's card. I used these larger-than-life bells to frame my sentiment from the 'Wrapped in Christmas' stamp set and paper-pieced the holly leaves with a second set cut from green foil for contrast. I added Real Red Rhinestone jewels for my berries, added some diecut pine sprigs and finished with a Real Red sheer ribbon bow to each. These bows do make the card a little less post-friendly, but I think the extra detail is worth it. You can see the detail on the bells on the close-up below:
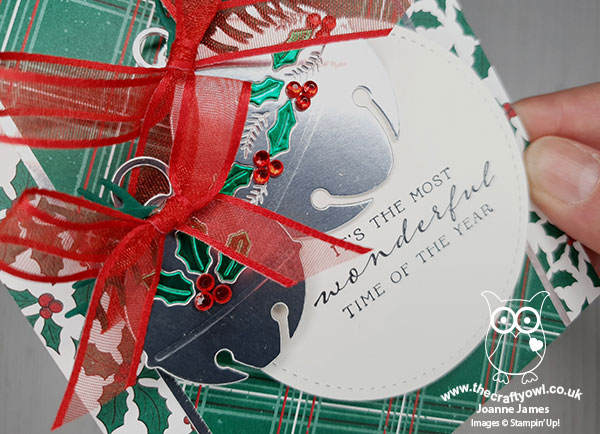
'Tis The Season - I used a combination of a Shaded Spruce/Real Red/Black/White plaid and a holly pattern from the 'Tis The Season designer series paper pack to compliment my silver bells and added a thin border of silver between the layers for added shine. I love the white splatter on the plaid pattern - and it's part of the design, no extra effort required!
Rectangle Gift Tin - I liked my card so much that I decided to create a belly band wrap for one of the silver rectangle tins that are in the Autumn-Winter catalogue. Available in packs of 4, they are great for a gift card or to hold a small item such as a piece of jewellery or item of make up, for example. Here's my finished tin:
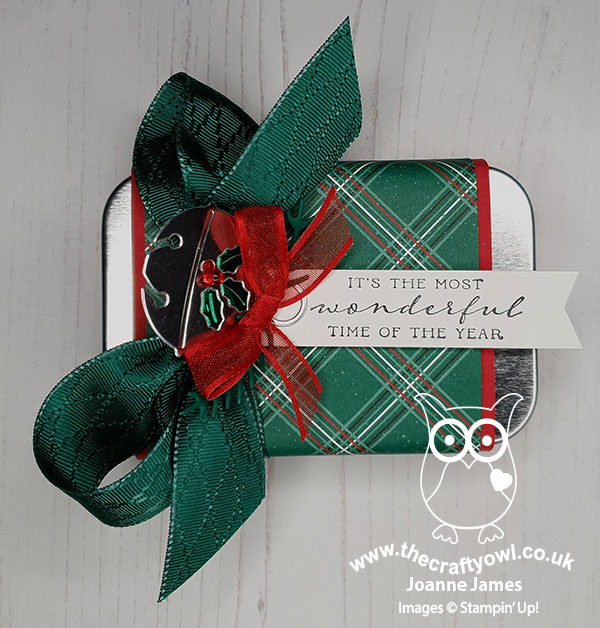
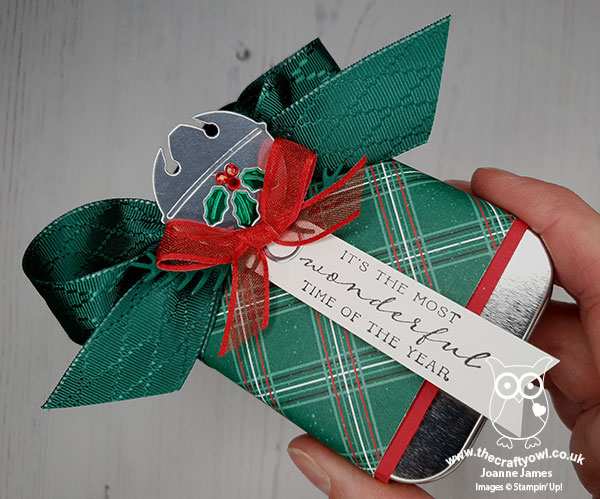
I've decorated it in much the same way, strengthening the band with a piece of Real Red cardstock for the base layer and adding a wrapped bow in the wide Shaded Spruce ribbon from the Wonder Of The Season Ribbon combo pack. Here's a close up from another angle with a better view of the bell decoration:
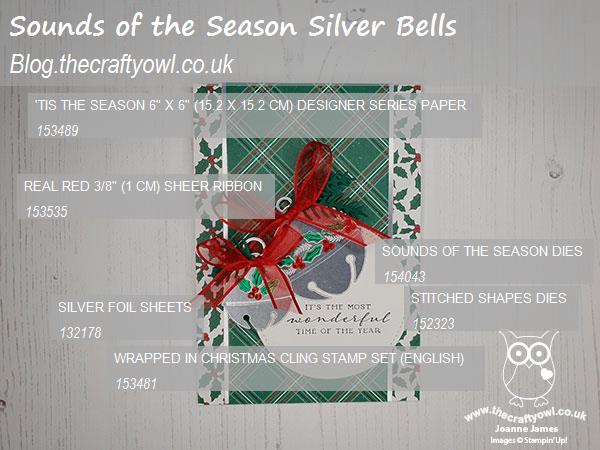
Here are the visual summaries of the key products used on today's projects for you to pin for easy reference:
And for the tin:

You can see all of my Product and 'How To' summaries on my 'How To - Tips and Techniques' Pinterest board in case you've missed any.
Before you reach for your ink and papers, check out what our amazing team has created to inspire you this week:
The Paper Players Design Team
Here's a quick recap of our challenge rules:
1. Create a new paper project
2. Upload your creation to your blog with a link back to us and provide a direct link to the post featuring your challenge submission.
3. Please link your card to no more than four challenges, TOTAL.
4. Have FUN!
You can see all of my 'How To' summaries on my 'How To - Tips and Techniques' Pinterest board in case you've missed any.
Enjoy your day; I'm hoping to do a little bit of crafting, a little bit of cooking and generally catch up on everything I've avoided doing whilst I've been at Stampin' Up!'s Onstage at Home virtual online event these past couple of days. I'll be back tomorrow with another project. Until then, happy stampin'!
Stampin' Up! Supplies Used: