Today I'm sharing a card for the current challenge over at CASology where there is watery theme:

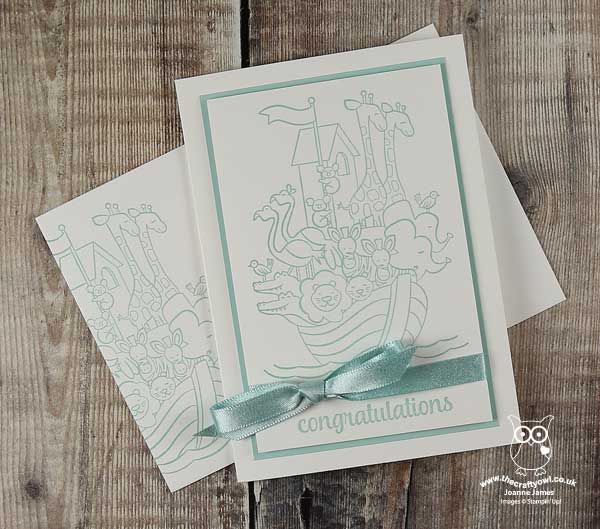
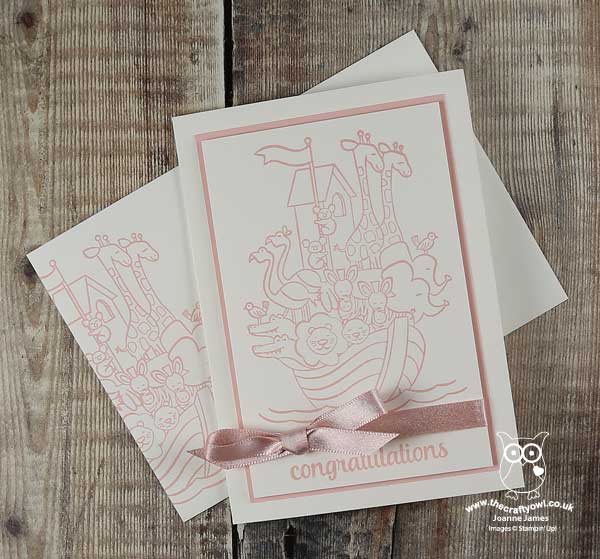
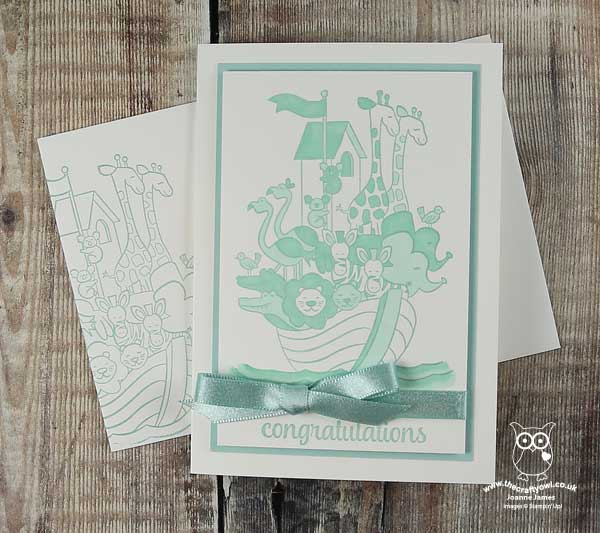
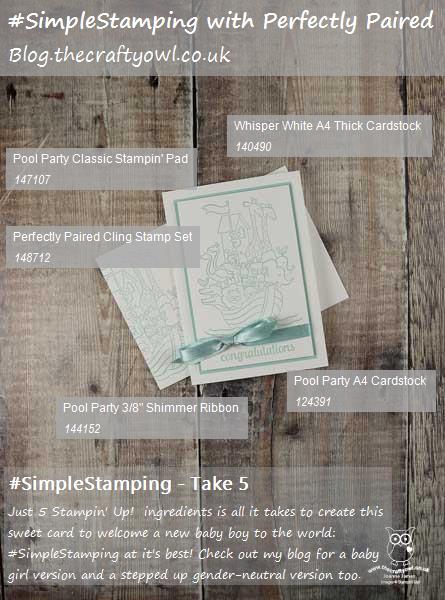
I also decided to combine it with this month's #SimpleStamping challenge set by Stampin' Up!, which was to create an occasion card (new baby, wedding, sympathy) with nothing more than stamps, ink, paper and ribbon. I decided to make a card to welcome a new baby using the 'Perfectly Paired' and created both boy and girl versions. First up, I have an ultra quick and easy #SimpleStamping card - the boy version:
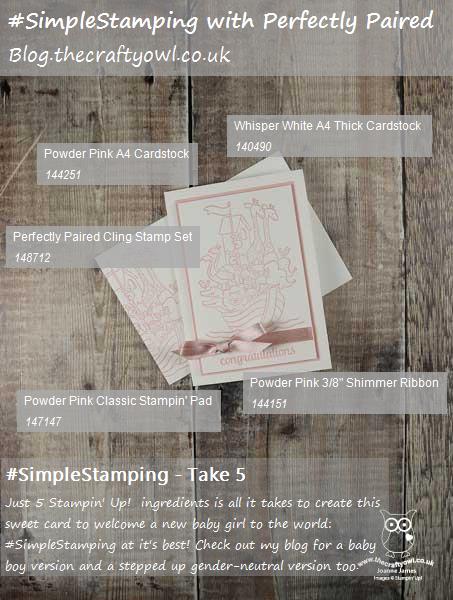
Here is my second #SimpleStamping card - the girl version:
This really took just a minute to make - I even made a video to show you how I did it! Here you go:
Easy, right? #SimpleStamping with minimal supplies to produce great results (even if I say so myself!!)
Perfectly Paired is a great set for new baby cards if you're starting out: one main image with a couple of smaller ones too and three sentiments that work for the inside and outside of your cards, tags or even a home decor piece for a new baby's nursery. You could also adapt it to form the basis of christening invitations, so lots of creative possibilities for a single stamp set.
The images can be inked in a single colour or coloured using Blends or watercolour pencils, or you can choose to highlight certain parts of the main image by masking or spotlighting specific area of the main image. Adding a simple bow in a co-ordinating ribbon colour adds a simple touch of luxury to a #SimpleStamping card.
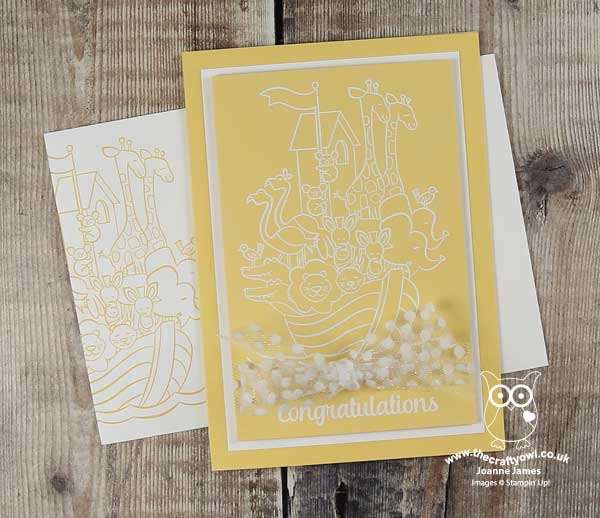
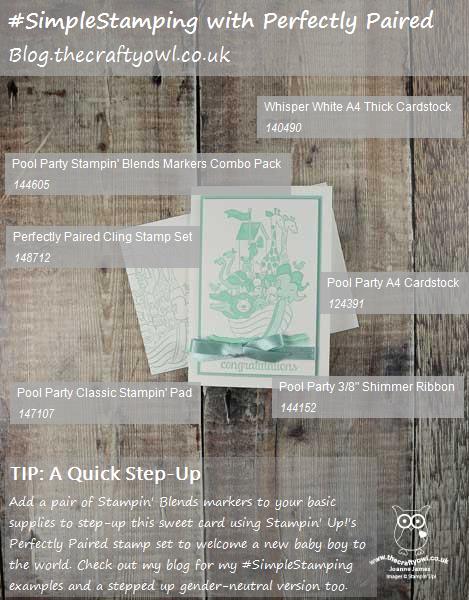
Here's an example of the above card coloured with my combo of Pool Party Stampin' Blends to show how a little extra colour really brings the image to life, but still making it a relatively inexpensive card with only a couple of extra supplies needed:
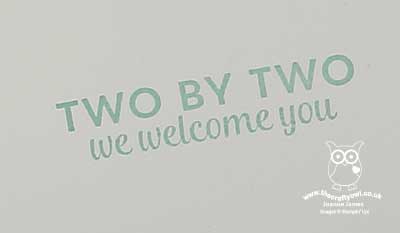
To really get the most from my supplies, I also stamped a partial image on the front of my envelope and this sentiment on the inside of my card:
Not a naked piece of paper in sight! By keeping things simple and using a basic monochromatic colour scheme, this is a card that can be easily mass-produced with limited supplies and would work well in pretty much any colour.
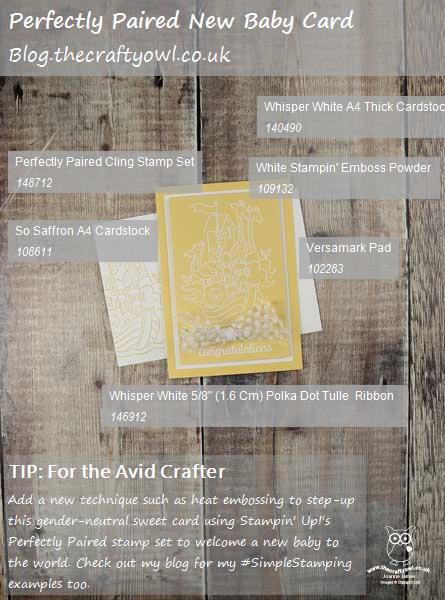
Having created my #SimpleStamping cards, I decided to create a stepped up version that is still super simple in style and design but introduces a new technique - heat embossing - for the more adventurous casual or avid crafter. I went with a neutral pale yellow base for this card (always useful to have in your stash if you need a quick baby card but don't know the gender) and this time using a white ribbon - a good choice if you've limited supplies and will go with any colour theme:
You could also add a little selective colour to these images to highlight some of the images if you have a marker of the same colour to give some tonal highlights and just pick out a few of the animals.
Here are the visual summaries of the key products used on each of today's projects for you to pin for easy reference:
You can see all of my 'How To' summaries on my 'How To - Tips and Techniques' Pinterest board in case you've missed any.
Enjoy your day and I'll be back tomorrow with another project. Until then, happy stampin'!
Stampin' Up! Supplies Used: