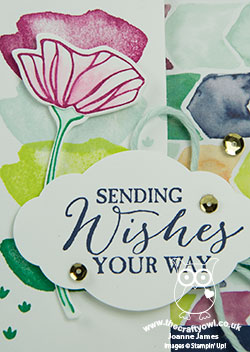
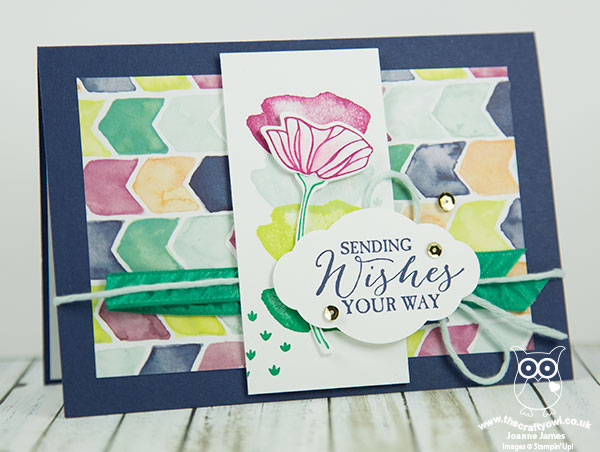
Today I have another Oh So Eclectic card from this month's technique class which is actually a CASE of the card on the front cover of the current 2017-18 Annual Stampin' Up! catalogue:
The eye-catching front cover was in part what attracted my ladies to the Oh So Eclectic Bundle in the first place, so it seemed only right that we should make some of the cards showcased. I thought I would use today's post to actually talk about ways in which you can use the catalogue to help you on your creative journey and inform the sets that you buy when you shop for Stampin' Up! products.
Here's the low-down on today's card:
CASE The Catalogue - The catalogue is not only the place to find the details for all of the products that Stampin' Up! sells, it is also a valuable resource of tips, tricks and ideas and serves as a source of inspiration in and of itself. It's choc-full of great examples of how many of the products can be used and I always encourage my customers to use their catalogues to their full potential, whether in doing a 'Copy and Share Everything' or 'Copy And Selectively Edit' (both fit the acronym CASE) or to use the ideas as inspiration to create something different entirely. Today's card is my CASE of the one that sits in the middle of the front cover page. I changed out the sentiment for one that I have - I used one from the 'Butterfly Basics' stamp set, a 'go to' for me - but otherwise stayed pretty true to the sample.
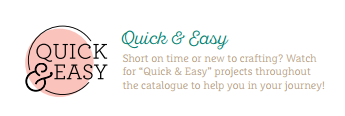
A Sample For Everyone - The catalogue might seem a little overwhelming at first glance, with so many stamp sets, tools and accessories and lots of colourful images showing samples galore. The trick is to look out for the clever signposts that are dotted throughout the catalogue that help you navigate your way, whatever type of crafter you are. On pages 6 and 7, there are lots of useful pointers of things to look out for as you browse, whether you are new to crafting or someone looking for more creative freedom. Either way, the catalogue has you covered. Particular signposts that I would encourage you to pay attention to are the 'quick and easy' icon:
Equally, the 'step it up' icon shows how you can start with a simple project, then 'step it up' with additional tools and embellishments:
.png)
There are also lots of tips and information panels that describe how to do lots of techniques - invaluable if you don't get to attend a class and benefit from the knowledge of your Stampin' Up! demonstrator in person or aren't able to get online to look something up, read their blog or watch a YouTube video. Last but not least, the 'You Can Make It' panels show you a project and are accompanied by a shopping list of the supplies you will need in order to recreate it yourself. Stampin' Up! really does try and make it easy for you!
One Step Up - So the card above is the first or interim stepped-up version using the Oh So Eclectic stamp set. The central panel is stamped, however it also includes a stamped and diecut flower, a label printed with the Pretty Label Punch and a sentiment from an alternative set, along with some Naturally Eclectic Designer Series Paper, some Pool Party Solid Baker's Twine and some Emerald Envy ribbon. If you are a regular stamper and have lots of supplies, this card is a great example of how you can bring various sets and tools together, yet is still relatively quick and easy to produce.
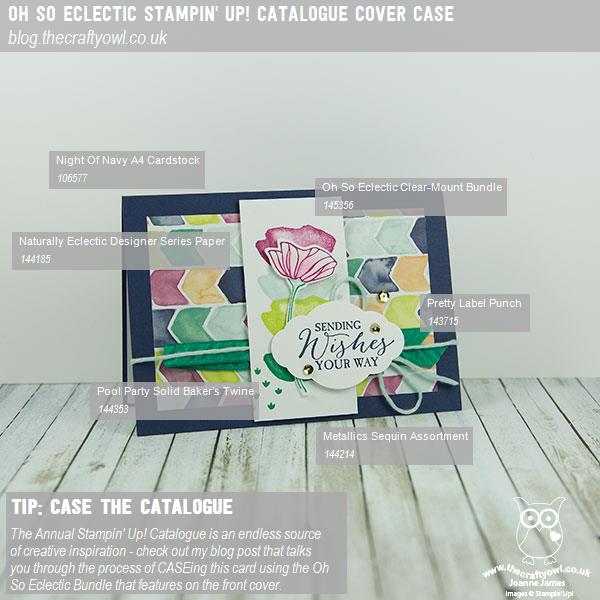
Here is the visual summary of the key products used on today's project for you to pin for easy reference:
You can see all of my 'How To' summaries on my 'How To - Tips and Techniques' Pinterest board in case you've missed any.
I'll be back soon with another 'CASE The Catalogue Cover' card, this time showcasing the bells-and-whistles fully stepped up version using the Oh So Eclectic product suite. Until then, happy stampin'!
Stampin' Up! Supplies Used: