It's Sunday and time for this week's new challenge over at The Paper Players! I am the hostess this week and I have a timely theme for you to work with:
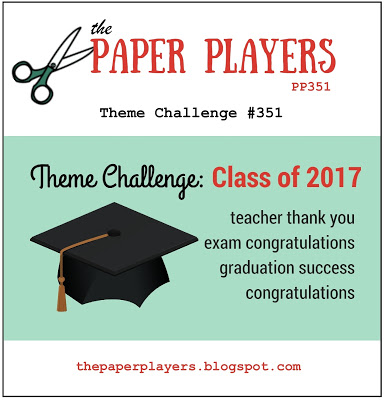

We are almost at the end of the academic year here in the UK and so it's the perfect time for teacher thank you cards. It's also the start of exam results season: everything from Common Entrance Exams, to the 11 Plus, graduate degrees and next month GCSE and A Level results. Since our challenge is an international one and all countries have these things happening at different times, I thought I would broaden this week's theme to encapsulate all of these things. So whether it's a thank you for your favourite teacher or a message of congratulations, we would love to see them all in the gallery this week.
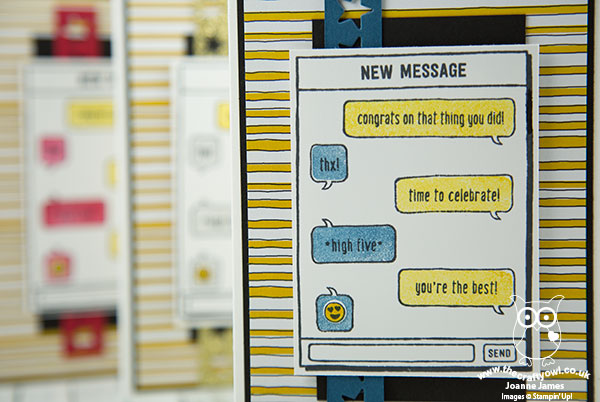
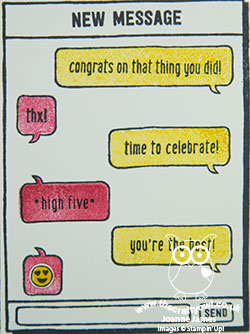
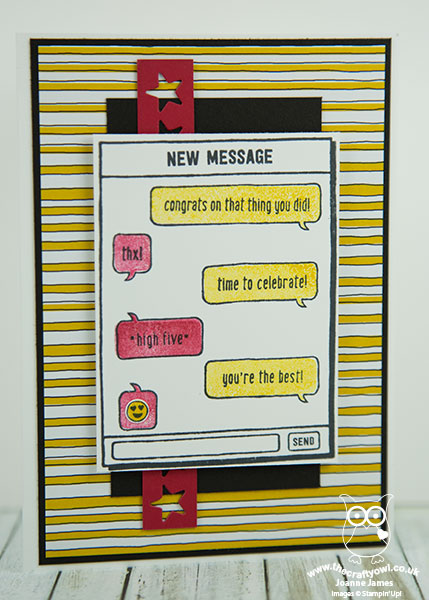
I've made my teacher thank yous already, however I know a number of children that sat GCSE exams this year and so will be requiring a few more congratulations cards than usual. I used today's challenge as an opportunity to get started! This week's sketch over at Freshly Made Sketches inspired my layout - I turned it through 90 degrees - and created a few cards using the same design; take a look:
Here's the low-down on today's card:
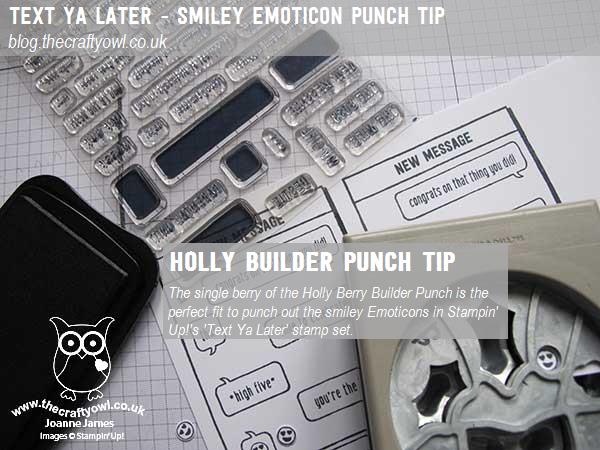
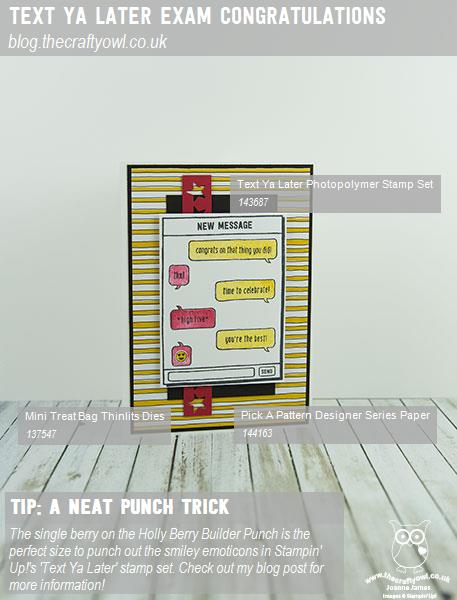
Text Ya Later - This set was one of the first on my wish list; perfect for those tricky teenager cards, this on-trend stamp set, with it's text-speak and humorous emoticons works for children and adults alike. How many of us are in family message groups that span generations and often result in some hilarious texting faux-pas? There is so much fun to be had with these stamps, with the ability to tailor the messages to a number of different occasions. There are also some great background stamps that enable you to infill the speech bubbles with colour with ease.
Stars In Their Eyes - For the strip detail, I cut a row of stars out of coloured cardstock using one of the thinlits in the Mini Treat Bag Thinlits set, to add to the celebratory feel.
A Neat Little Trick - If you look really closely at my card, you will see that the smiley face emoticon has been punched out and added to my coloured speech bubbles. Want to know how I did it? I discovered that the single berry on the Holly Berry Builder Punch i just the right size to punch out these emoticons - handy, right?
Here is the visual summary of the key products used on today's project for you to pin for easy reference:
You can see all of my Product and 'How To' summaries on my 'How To - Tips and Techniques' Pinterest board in case you've missed any.
Before you reach for your ink and papers, check out what our amazing team has created to inspire you this week:
The Paper Players Design Team
Here's a quick recap of our challenge rules:
1. Create a new paper project
2. Upload your creation to your blog with a link back to us and provide a direct link to the post featuring your challenge submission.
3. Please link your card to no more than four challenges, TOTAL.
4. Have FUN!
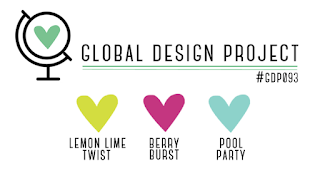
Before I go, I also have another card that I made at the same time using the same sketch and stamp set whilst everything was out on my desk that uses this week's colours over at The Global Design Project:
Rebecca saw my congratulations cards and immediately requested a fun card for one of her friends whose birthday it is this week:
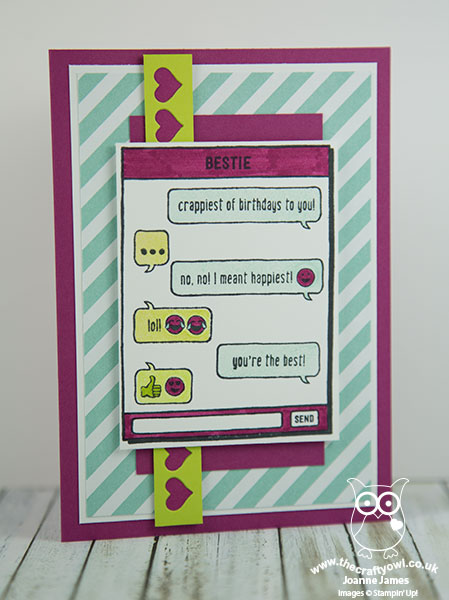
Those words just crack me up every time I read them - gotta love predictive text right? I just know this set is going to get a lot of use this year!
Here is the visual summary of the key products used on today's project for you to pin for easy reference:
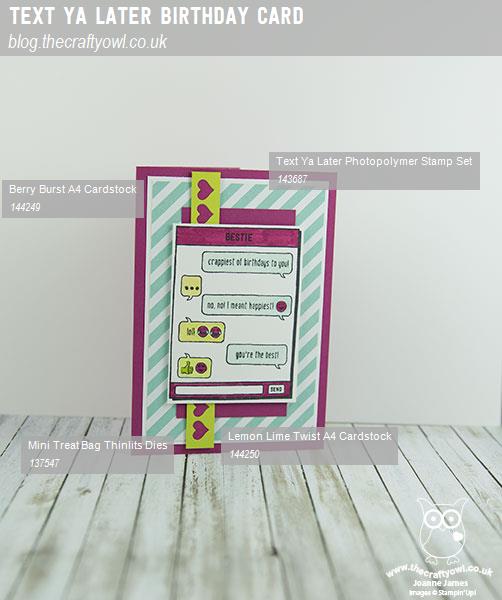
You can see all of my Product and 'How To' summaries on my 'How To - Tips and Techniques' Pinterest board in case you've missed any.
I look forward to seeing what you create with this week's theme. Enjoy the rest of your weekend as it will be over all too quickly; we are having the a relatively quiet day today since having had a very busy week it's the first day in over a week that the entire family will be at home together - how crazy is that?!
I'll be back tomorrow with another project; until then, happy stampin'!
Stampin' Up! Supplies Used: