
I'm a little later posting today - I blame trying to catch up with my latest favourite TV drama last night (The Catch - if you want to check it out - I'm addicted!) Anyways, 152 days until the big 'C' day - it must be time for Christmas in July! Lots of card makers start preparing for Christmas at this time of year, in addition to which us lucky Stampin' Up! demonstrators get to see and pre-order from the new Stampin' Up! Autumn Winter catalogue - which if you're a customer you have to wait until 2nd September for! I've seen some sneak peeks and can assure you there are some new products that you are going to LOVE!!!!
If you would like to get ahead of the curve and be able to see and order these products before everyone else, do get in touch to find out more about joining my team. In the meantime, I thought I would make a card for this week's colour challenge over at Fab Friday, where although a Christmas card is not compulsory the colour scheme this week is certainly festive:

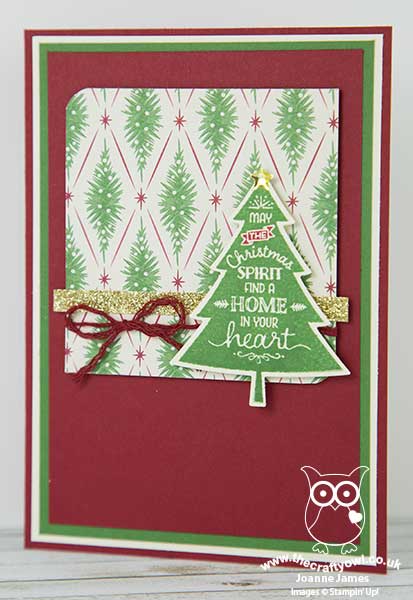
For my card today I decided to go with the new Christmas papers in the annual catalogue and one of the carryover Christmas sets, Perfect Pines to create a simple holiday card:
Here's the low-down on today's card:
More For You This Christmas - At Stampin' Up! we do Christmas all year round however in your excitement to see everything in the new Annual Catalogue you might have missed a key detail about the new This Christmas Specialty Designer Series Paper: like the now retired Typeset Specialty Designer Series Paper, This Chrismas is printed in lightweight paper - similar to a newspaper print. As a result, you also get 4 sheets of each of the 6 designs in the pack, so 24 sheets in total as opposed to 12 - bonus!
Double-Up - Because the This Christmas paper is not a thick paper, it's tricky to pop up on dimensionals if it's not backed with something thicker. I wanted to be able to tie my baker's twine around my DSP layer, so in order to make it more sturdy, I backed it with a piece of extra thick Whisper White that was the same size, by simply gluing together. Easy!
Paper-Pieced Perfect Pines - I decided to use one of the Perfect Pines Christmas trees to act as both sentiment and focal point on my card today. I stamped my tree in Garden Green and cut it out with the co-ordinating framelits, then stamped it again in Cherry Cobbler on some scrap cardstock and fussy cut the banner so that I could add the tiniest paper-pieced detail to my tree. This, in addition to a gold metallic enamel star, a sliver of gold glimmer paper and some split Cherry Cobbler baker's twine (I divided the twine into three so that it would add less bulk to my card) complete today's festive masterpiece (even if I say so myself!!)
One more for the Christmas pile - I guess that means I'm in danger of appearing organised, right?
Here is the visual summary of the key products used on today's project for you to pin for easy reference:
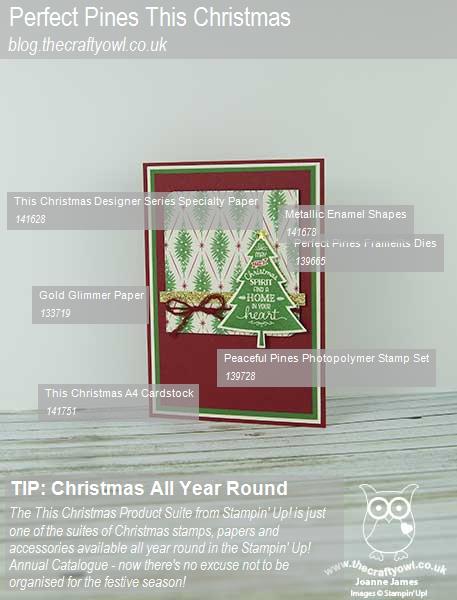
You can see all of my 'How To' summaries on my 'How To - Tips and Techniques' Pinterest board in case you've missed any.
I have a rare child-free day today, so I am making the most of it to get through a chunk of activities on my growing 'to do' list. Enjoy your day and I'll be back tomorrow with another project; until then, happy stampin'!
Stampin' Up! Supplies Used: