Today it's Sunday and time for this week's new challenge over at The Paper Players! It's the turn of the fabulous Jaydee to host this week and she has a clean and simple challenge for us to work with:

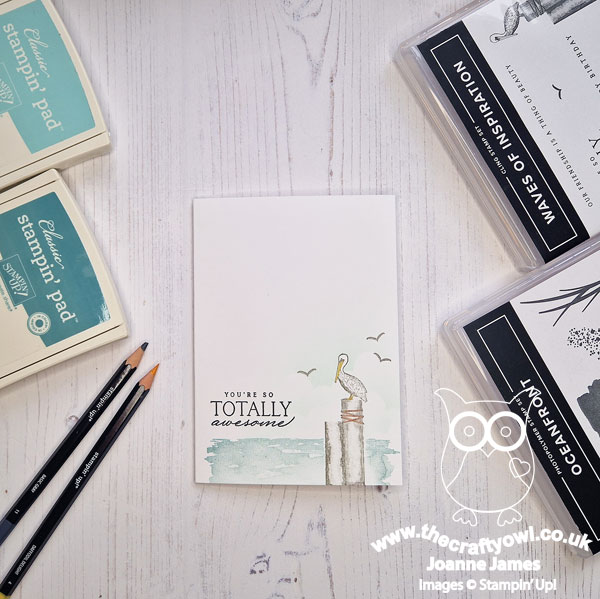
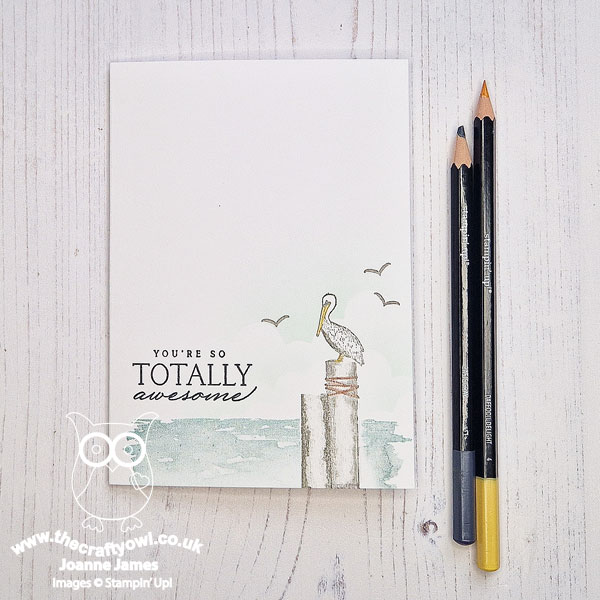
I know they aren't everyone's cup of tea, but I do love a good one layer card! I decided to use the 'everything beach' inspiration from another of my favourite clean and simple challenges, AAA Cards, to create my one layer wonder for you today - take a look:
Here's the low-down on today's card:
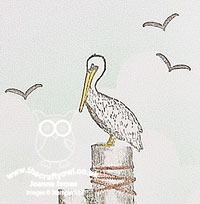
One of the challenges with a one layer card is the ability to create a scene with depth, without having actual layers to do it. This is where technique such as masking and stencilling can prove really useful. For my card today, I first stamped the pelican from the 'Waves of Inspiration' stamp set in Smoky Slate. I added a touch of colour to this image with my watercolour pencils; not generally my first choice of colouring medium, but super useful when creating a one layer card, as you won't get any bleeding of colour onto the reverse, something which is unavoidable if you are colouring with Stampin' Blends markers, for example. I then stamped the same image onto a post-it note and fussy cut it to create a mask; I positioned this over the stamped image on my card so that I could add my background.
I decided to stamp my sea in Lost Lagoon (I applied the ink to my stamp using a blending brush for a soft finish), using the sea stamp in the 'Oceanfront' stamp set. It isn't wide enough to cover the width of the card, but it was easy to extend the stamp by first stamping one side of the mask, then repositioning the card and stamping the other side, being careful to ink only the edge of the sea stamp and not overstamp the sea to the left of the mask. I then used a cloud stencil and some Pool Party ink and a blending brush to add in a hint of cloudy sky behind the pelican - you can see that better on the close up below:
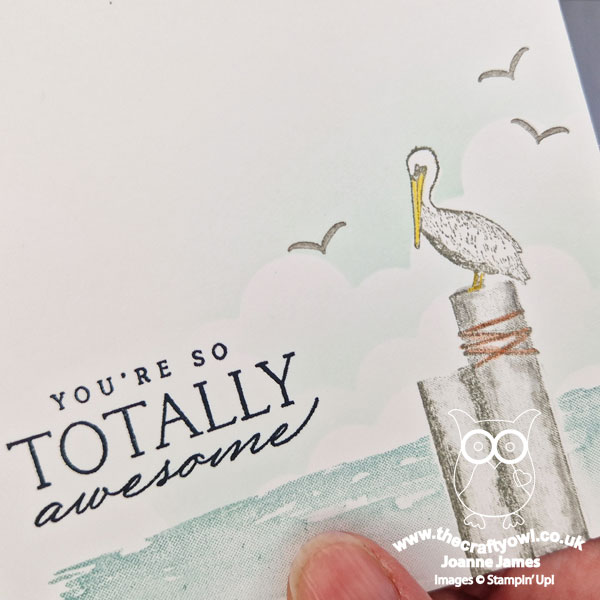
Finally I added a trio of seagulls in Basic Grey and stamped my sentiment in black just above the horizon line. I didn't add any embellishments and by keeping my design to the bottom third of my card managed to preserve that all-important 'white space' of a clean and simple card too.
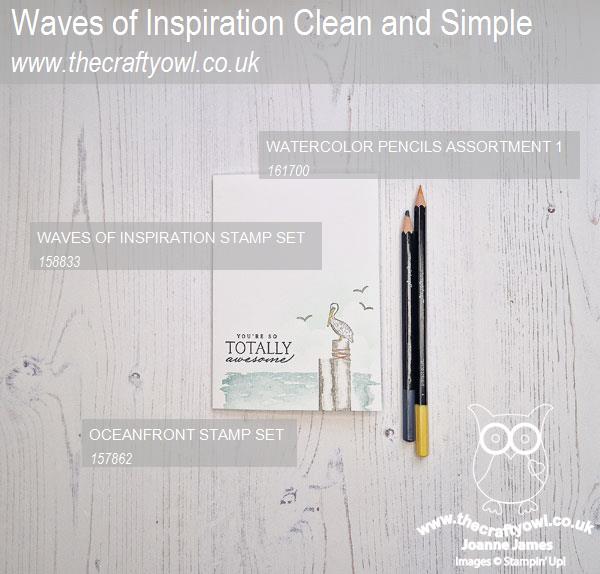
Here is the visual summary of the key products used on today's project for you to pin for easy reference:
You can see all of my Product and 'How To' summaries on my 'How To - Tips and Techniques' Pinterest board in case you've missed any.
Before you reach for your ink and papers, check out what our amazing team has created to inspire you this week:
The Paper Players Design Team
Here's a quick recap of our challenge rules:
1. Create a new paper project - remember for this challenge your design should be clean and simple
2. Upload your creation to your blog with a link back to us and provide a direct link to the post featuring your challenge submission.
3. Please link your card to no more than four challenges, TOTAL.
4. Have FUN!
Enjoy your day; It's Father's Day here in the UK today so whilst I might be looking forward to enjoying another day of sunshine and relaxation (fingers crossed!), I suspect it might be the DH who will have his feet up! I'll be back tomorrow with another project. Until then, happy stampin'!
Stampin' Up! Supplies Used: