I have another card to share with you today, this time inspired by the challenges over at Festive Friday (I chose green, thread and interactive) and the butterfly inspiration over at TGIF Challenges:


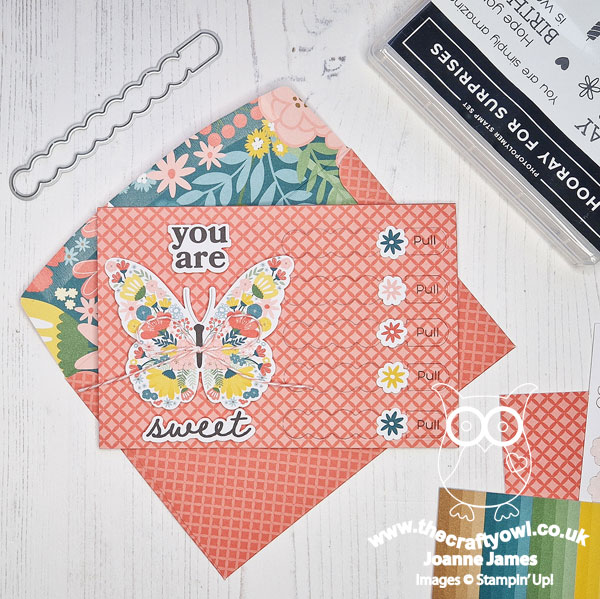
I love Memories & More cards both for scrapbooking and card making and I've used lots of them previously to make quick clean and simple cards. Today I've something a little different though; whilst my card still focuses on the Sweet Thoughts Memories & More card pack and card base and envelopes, I've paired with the Hooray For Surprises bundle to make a fun interactive card - take a look:

Here's the low-down on today's card:
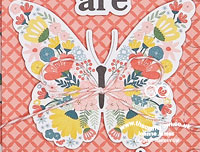
Sweet Thoughts - The Sweet Thoughts Memories & More cards and card and envelope sets are perfect for quick cards. All of the main elements I used to decorate my printed card base came from the card pack - a large butterfly and two sentiments:
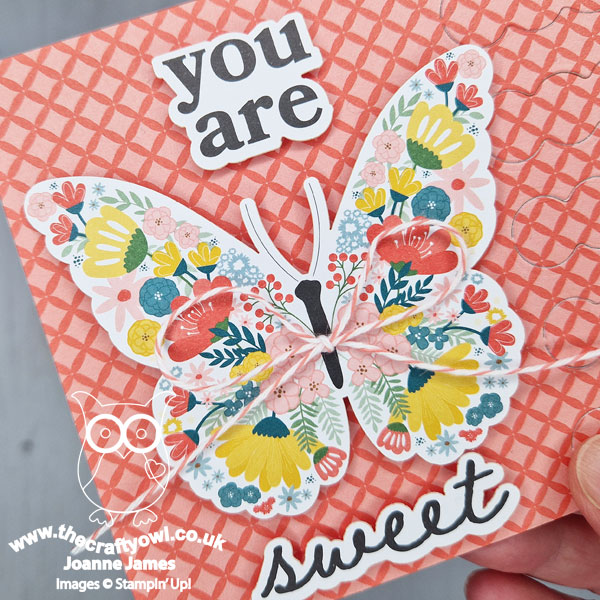
All of them are stickers so have self-adhesive backs, but you can easily add with dimensionals too if you'd prefer a little lift as I've done here. The only other thing I added was a twine bow using some coordinating retired thread that I had in my stash.
Hooray For Surprises - I could have stopped there, but I thought another of the cards in the Sweet Thoughts pack would make a fun 'reveal'. I spent a little time marking my card front where I needed to place my Hooray For Surprises long pull tab. The die is longer than I wanted, given the addition of my large butterfly, but this wasn't a problem; I simply used a partial diecutting technique to diecut each one in two stages, which allowed me to shorten it without issue. I stamped the word 'pull' onto the end of each tab, and added a flower sticker from the card pack to embellish each one:
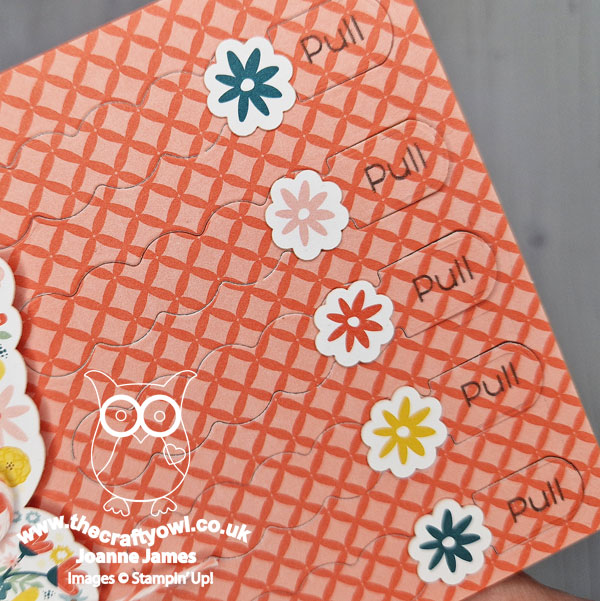
The second M&M card that I used is placed underneath the top layer, being careful to adhere around the edges and leave the tabbed area free.
The Big Reveal - So what's underneath the tabs? I created a 'false top' template using some spare card so that you can see what you'll see when those tabs are pulled:
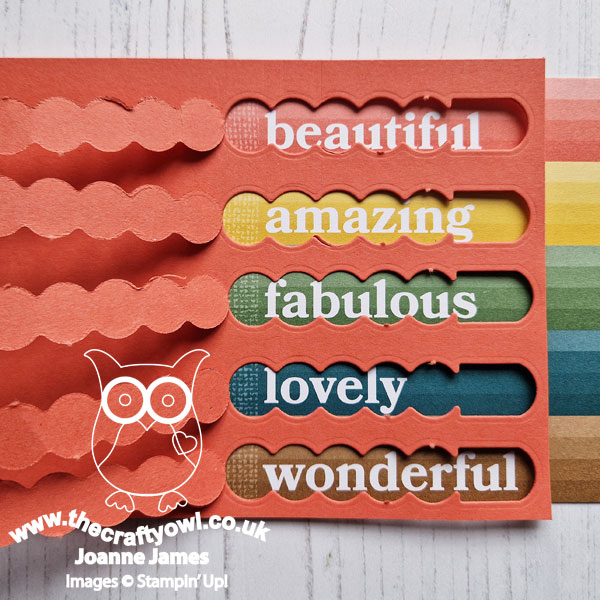
So not only is the recipient sweet - but beautiful, amazing, fabulous, lovely and wonderful too! The hooray For Surprises Dies are such a great way to add a fun interactive element to card. One last thing - you will notice that I needed to trim the second M&M card down so that the sentiment would appear where I wanted to. Don't discard the spare edge piece though - I added mine as a little extra decoration to the inside of my card.
So what do you think? A fun way to combine these products, right? I will be sending this card to my lovely daughter who is at university - I'm sure she will love it. This is a great opportunity to remind you that the Hooray For Surprises bundle is just one of those featured in the monthly tutorials I create with my good friend and fellow demonstrator Jan Clothier. This tutorial contains lots more ideas and ways to use this bundle and is yours for FREE when you purchase the Hooray For Surprises bundle from either Jan or myself. So why not add it to your basket now - add some Memories & More cards and you can have a go at today's card too!
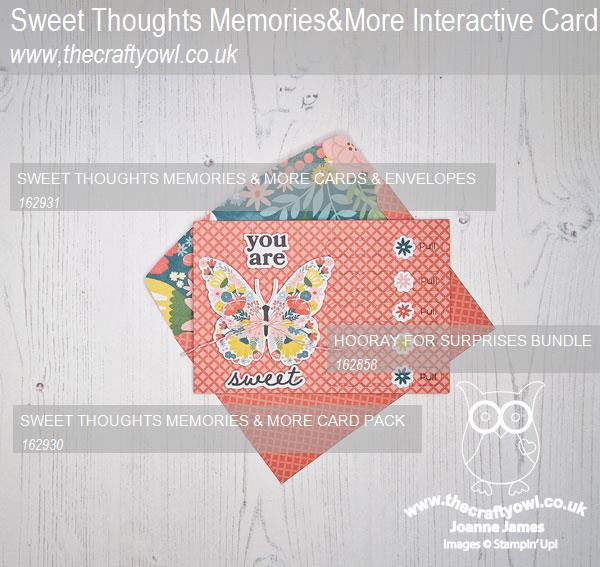
Here is the visual summary of the key products used on today's project for you to pin for easy reference:
You can see all of my 'How To' summaries on my 'How To - Tips and Techniques' Pinterest board in case you've missed any.
Enjoy your day and I'll be back on Friday with another project for our new challenge over at As You See It. Until then, happy stampin'!
Stampin' Up! Supplies Used: