I've a busy day today - out for a netball match this morning, then school Spring fair and a swimming gala for both James Juniors this evening, so I'm squeezing in my blog post whilst everyone else is doing homework before heading out the front door again for the next activity of the day!
Today I'm sharing a card that I made whilst preparing for this month's technique class featuring the Dragonfly Dreams bundle. In addition to featuring a particular technique in these classes, I also try and use each of the stamps in the set. My technique classes are product-based and always feature one particular stamp set or product bundle and I like to give my class attendees as many ideas as possible for how they can continue to create with their sets long after the class has finished. The techniques in this month's class are all around sponging in various forms and as this card doesn't have any sponging, it didn't make the class cut. I still love it though and since I'm always encouraging my ladies to check out my blog for additional ideas, it's right and proper that I share it with you today - take a look:
Here's the low-down on today's card:
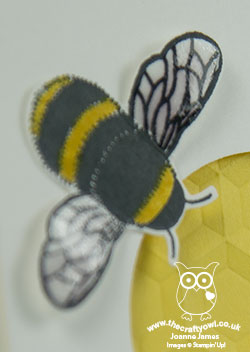
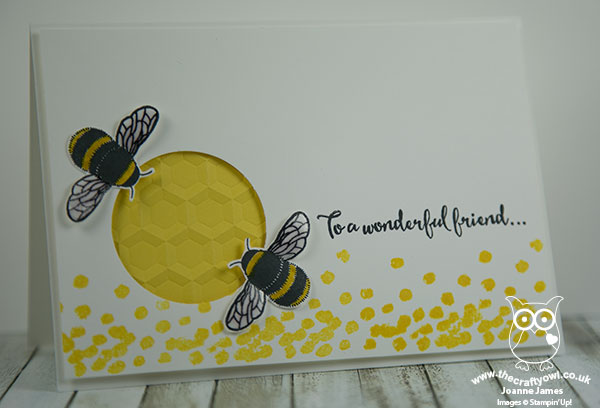
Dragonfly Dreams of Bees - I chose to use the bee stamp from the Dragonfly Dreams stamp set for my card today, stamping and fussy cutting two of them to frame my circle of honeycomb. I could have just as easily cut these bees out with their coordinating thinlit, however I didn't want to loose the detail on the wings for my card. I left the bee bodies matt black with just a little yellow coloured in, but their wings in real life are so pretty: I brushed each liberally with clear Wink of Stella then when dry covered that with a further layer of fine tip glue and left it to dry. The result is some beautifully glossy, shimmery wings - just like the real thing.
Hexagonal Honeycomb - I placed my bees either side of a 1 3/4" punched circle, with a layer of Daffodil Delight behind that I had embossed with my Hexagons Dynamic Textured Impressions Embossing Folder (TIEF). This is one of the new embossing folders that gives a deep, dimensional embossed impression - just like real honeycomb!
Pollen Border - To finish, I added a border of dots using the border stamp in the Dragonfly Dreams stamp set, along the bottom of my card. This is one of those really useful stamps that will work both with the stamps in the same set and others; here it reminded me of pollen, given that my bees were not too far away! It's also perfect for the new challenge over at As You See It - check out their 'seeing spots' sketch inspiration this week:

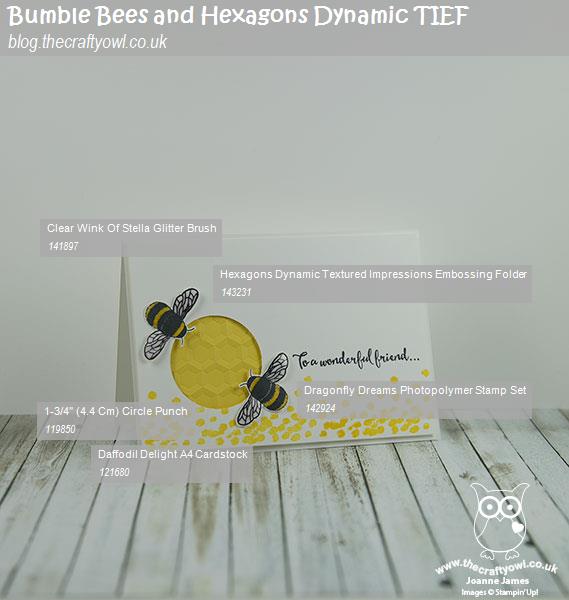
Here is the visual summary of the key products used on today's project for you to pin for easy reference:
You can see all of my 'How To' summaries on my 'How To - Tips and Techniques' Pinterest board in case you've missed any.
If you like this card and would be interested in my Technique Class featuring the Dragonfly Dreams Bundle, do get in touch. I will be offering this as a 'Class to Go' free with a purchase of the Dragonfly Dreams Bundle from my online store and will be featuring further cards from this set later this week, so stay tuned.
Enjoy the rest of your day and I'll be back tomorrow with another project for this week's new colour challenge over at The Paper Players. Until then, happy stampin'!
Stampin' Up! Supplies Used: