Today I'm sharing the second of the cards from my second of this month's technique class featuring the very on-trend Jar of Love stamp set and co-ordinating Everyday Jars Framelits Dies. Each of the ladies received the bundle and as always I was on a mission to use as wide a variety as possible of the stamps in this set to showcase its versatility.
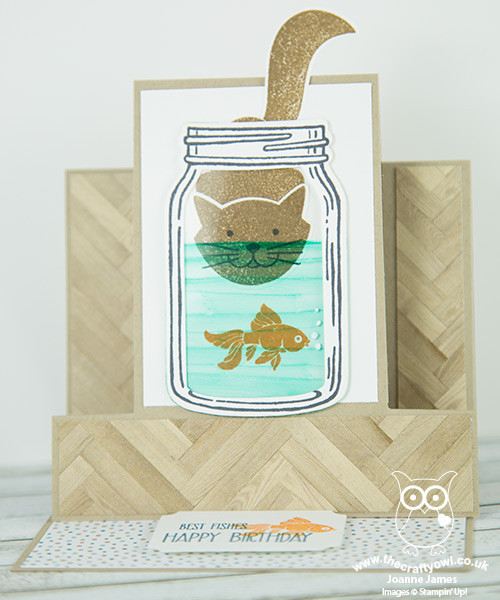
This card was a punny fun-fold card using the goldfish and a feline friend - take a look:
Here's the low-down on today's card:
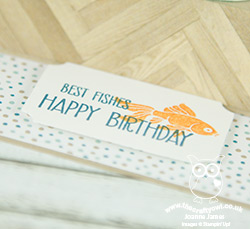
Here Fishy, Fishy - I wanted to create something using the punny 'Best Fishes' sentiment and decided to have a little fun. Whilst my goldfish is swimming innocently in his jar, he is being watched by a mischievous pussy cat - and he has no idea! I stamped both my goldfish and my stalking kitty directly onto a panel of Whisper White (I stamped and punched his tail separately so that it would overhang) then stamped my jar separately and using the framelit cut out the centre too. To this I adhered a piece of window sheet that I had coloured with one of my retired Blendabilities - a light blue Sharpie or similar would also do the job - and stuck this over the top of the stamped panel. Lastly, I added a few bubbles with my white gel pen.
Serene Scenery Parquet - I used a couple of the patterned papers from the Serene Scenery DSP stack to decorate my card: a spotted one to highlight my greetings label, and one of the photographic images with a pattern that reminds me of a wooden parquet floor to the sides.
A Fun Fold - I chose to create a centre step easel card to showcase my kitty and jar. I have admired a number of versions of this type of card create by my fellow demonstrator, the talented Amanda Bates at the Craft Spa however I wanted a card that would still fit into a C6 envelope when complete, so I created my own mini version.
Here's a quick step-by-step tutorial should you wish to have a go:
Mini Centre Step Easel Card (portrait) - Metric Version
Using the diagram below as your guide:
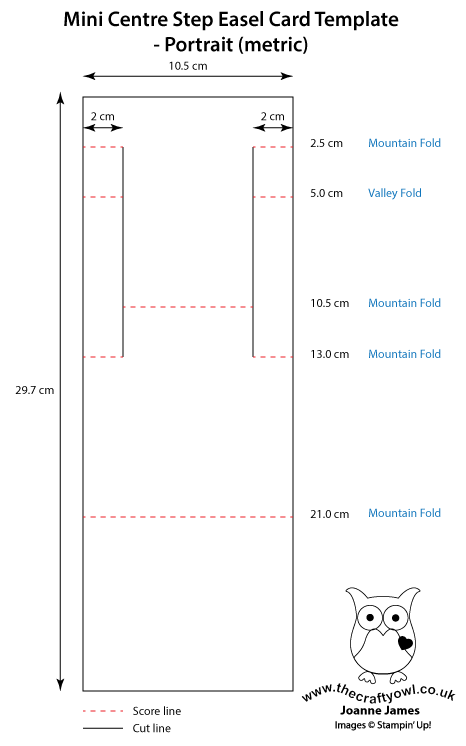
- Cut A4 cardstock to 10.5cm wide ( xA4L i.e. 29.7cm long)
- PORTRAIT at 2cm on Top Bar RHS ( i.e. to Right Hand Side)
- Cut 2.5 to 13cm
- PORTRAIT at 2cm on Top Bar LHS ( i.e. to Left Hand Side)
- Cut 2.5 to 13cm
- LANDSCAPE With cuts to Left Hand Side, score as per dotted lines:
- 2.5 cm on Top Bar (LHS) Score outside sections ( i.e. 0-2cm; LIFT; 8.5 to 10.5cm)
- 5cm on Top Bar (LHS) Score outside sections ( i.e. 0-2cm; LIFT; 8.5 to 10.5cm)
- 13cm on Top Bar (LHS) Score outside sections ( i.e. 0-2cm; LIFT; 8.5 to 10.5cm)
- LANDSCAPE With cuts to Left Hand Side:
- 10.5cm on Top Bar (LHS) Score across middle section. ( i.e. 2 to 8.5cm)
- 21cm on Top Bar (LHS) Score across whole card drop ( i.e. 0 to 10.5cm)
- Fold lightly:
- Outer Sections – 2.5cm Mountain, 5cm Valley, 13cm Mountain
- Middle Section at 10.5cm – Mountain
- Whole Section at 21cm – Mountain
This then gives you the basic shape to which you can add your Designer Series Paper and stamped panels.
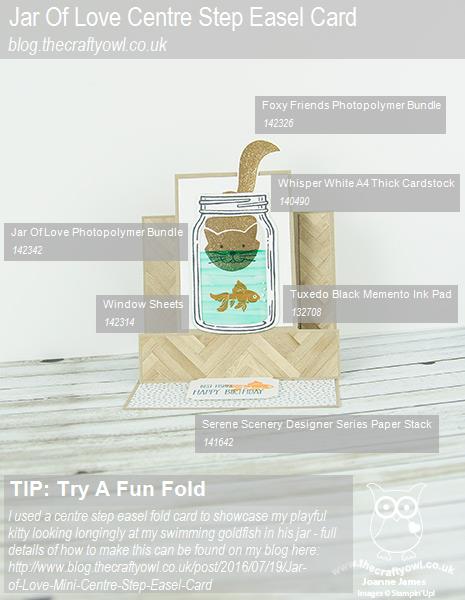
Here is the visual summary of the key products used on today's project for you to pin for easy reference:
You can see all of my 'How To' summaries on my 'How To - Tips and Techniques' Pinterest board in case you've missed any.

The Jar of Love and Everyday Jars Framelits bundle is another of those that has just has so many creative possibilities! If you haven't bought yours yet, this month would be the perfect time to do so; if you purchase the bundle at £48.50 you will earn yourself a £4.50 money-off coupon any purchases next month too - bargain! Just click on the links below to hop on over to my online store to order yours today - and don't forget to add this month's hostess code 63RNATE3 to get a little thank you in the post from me too.
I'll be back tomorrow with the second of the cards from my Jar of Love class; come back then, you won't want to miss it! Until then, happy stampin'!
Stampin' Up! Supplies Used: