CAS Dainty Delight Thank You CCS 519 Double

by Joanne James29. August 2023 12:00

It's Tuesday and time for a new challenge over at CAS Colours & Sketches. Patricia is hosting this month and as we have a fifth Tuesday in this month we have an additional double colour and sketch challenge: 


For my card today I decided to make a simple thank you card using my Dainty Delight Dies to create an arch of flowers in the challenge colours:


Here's the low-down on today's card:

I didn't have any of the old retired colours, so I substituted with Fresh Freesia, Moody Mauve and Mossy Meadow as my closest match (this is allowed within the terms of the challenge). I added a simple stamped sentiment from the co-ordinating Dainty Delight stamp set to complete my card. Check out the detail on the interwoven pieces that make up the floral arch - so pretty, right?


These dies cut delicate pieces with subtle embossed detail - beautiful in these muted purples, and just about any other colour combo too.

Here is the visual summary of the key products used on today's project for you to pin for easy reference:


You can see all of my 'How To' summaries on my 'How To - Tips and Techniques' Pinterest board in case you've missed any. 

As a reminder, for our colour challenges, you must use all of the stated challenge colours. You may also use neutral colours; however, the challenge colours should be the most noticeable ones featured on your card. We use Stampin' Up! colour names for reference, but you are welcome to use any other companies' products as long as you match the challenge colours as closely as possible.

Enjoy your day and I'll be back tomorrow with another project. Until then, happy stampin'!

Dainty Delight Clean and Simple Thank You PP654

by Joanne James20. August 2023 08:00

Today it's Sunday and time for this week's new challenge over at The Paper Players! It's the turn of the fabulous Ann to host this week and she has a fun clean and simple challenge for us to work with:


I love clean and simple week! With the theme of 'insects' I was tempted to make another bee card this week, but instead decided to make a card showcasing one of the prettiest embellishments in the current catalogue - take a look:


Here's the low-down on today's card:

Brass butterflies - did you spot them? I stamped a simple spray of flowers and thank you sentiment from the 'Dainty Delight' stamp set, coloured my flowers with a variety of Blends (I've shared those that are still current below) and added a trio of brass butterflies for my insect embellishment:

These butterfly embellishments are small but pack a punch - when the catch the light they are so pretty! A super simple card today - #simplestamping at its best!

Here is the visual summary of the key products used on today's project for you to pin for easy reference:


You can see all of my Product and 'How To' summaries on my 'How To - Tips and Techniques' Pinterest board in case you've missed any. 

I'm also linking up today's card over at Color Dare; I went across the bottom row paprika/shortbread/mocha and also used honey yellow too.

Before you reach for your ink and papers, check out what our amazing team has created to inspire you this week:

Here's a quick recap of our challenge rules:
 
1.  Create a new paper project
2.  Upload your creation to your blog with a link back to us and provide a direct link to the post featuring your challenge submission.
3.  Please link your card to no more than four challenges, TOTAL.
4.  Have FUN!

Enjoy your day; I'll be back tomorrow with another project. Until then, happy stampin'!


Stampin' Up! Supplies Used: 

Table built using Product Table Builder by The Crafty Owl - Independent Stampin' Up! Demonstrator.

Dainty Delight Sympathy Card for Colour Hues #TCH64

by Joanne James16. May 2023 12:00


We are having a two-post Tuesday today since in addition to my regular CAS Colours & Sketches post, I am guesting with the team over at The Colour Hues Challenge following my win for challenge #62 with my purple and green card - you can see that card here if you missed it.

So their new challenge is an interesting one for this time of year - take a look:


Yes, orange and slate grey - a combination I rarely consider outside of Halloween season, so I found this one a challenge in the true sense of the word! I love the slate grey, but what to do with the orange? Having had a little play, I finally came up with something that I think works - take a look:


Here's the low-down on today's card:

I decided to use the slate grey for my card base, adding some tone-on-tone splatter with a grey marker, and added a double sprig of flowers from Dainty Delight with a trio of white daisies. I used retired Pale Papaya for my stems, that I added Pumpkin pie ink to with a blending brush to bring out the orange tones, and used the true Pumpkin Pie Orange sparingly for small flower heads and daisy centres: 

A sprinkling of gems and a white embossed sentiment complete my card. So what do you think? Did I successfully manage to use the orange to add a pop of colour to my otherwise sombre sympathy card? I hope so, but I'd love to hear your thoughts!

Here is the visual summary of the key products used on today's project for you to pin for easy reference:


You can see all of my 'How To' summaries on my 'How To - Tips and Techniques' Pinterest board in case you've missed any. 

Enjoy your day and I'll be back tomorrow with another project. Until then, happy stampin'!


Stampin' Up! Supplies Used:

Table built using Product Table Builder by The Crafty Owl - Independent Stampin' Up! Demonstrator.

Hello To The New In Colours With Around The Bend Dies

by Joanne James15. May 2023 11:30

Happy Monday everyone! Today I'm sharing a card using Judy's layout over at Freshly Made Sketches that is also my card for the current Colour Inkspiration Facebook challenge:

   May be an image of boots, leather and text that says "Copper Clay #143 COLOUR k NKSPIRATION CHALLENGES In Wild 023-2 Wheat ofthe Boho Blue 3 least at Moody Mauve 100 Pebbled Path"

I thought those 5 stripes would be perfect for another card featuring the new 2023-25 In Colours, so take a look at what I came up with:


Here's the low-down on today's card:

I wanted to use one of the curvy dies from the Around The Bend Dies for my stripes, so my card ended up being more of a slimline when finished to give me enough height to fit in all of the layers (I hope Judy is OK with that!) I cut the layers in each of the in colours, then layered them so that each colour is visible through the diecut detail of the layer above. A simple 'hello' sentiment and a white card base allows the diecut detail and colours to take centre stage:


I added a single layered diecut daisy from the Dainty Delight Dies to each stripe, finishing with a single large in colour dot for a little extra shine.

So what do you think - do you have a favourite in-colour from this set yet? I do think it's tricky to use all 5 on one card, but I like how this one worked out. I think Boho Blue is m favourite - let me know yours in the comments below!

Here is the visual summary of the key products used on today's project for you to pin for easy reference:


You can see all of my 'How To' summaries on my 'How To - Tips and Techniques' Pinterest board in case you've missed any. 

Enjoy your day and I'll be back tomorrow with another project. Until then, happy stampin'!


Stampin' Up! Supplies Used:

Table built using Product Table Builder by The Crafty Owl - Independent Stampin' Up! Demonstrator.


Crumb Cake Dainty Delight for JUGS673

by Joanne James1. April 2023 05:00

Today I'm nice and early with today's post and with good reason: following my pick as Chic of the Week over at Just Us Girls with this card for challenge #664, I was delighted to be asked by the lovely Vicki to be their guest designer for the month of April. I'm taking over from the equally lovely Michele Ferguson of I Card Everyone, so big shoes to fill (if you've never visited her blog, you really should!) For the next 5 weeks I will be guesting along with these lovely ladies bright and early on a Saturday morning! Our first challenge for the month of April is a colour challenge:


I interpreted these colours ass Crumb Cake and Mossy Meadow, which is not a colour combo I would ordinarily be drawn to, yet the minute I saw this pairing I had an idea - I love it when that happens! Using the sketch layout over at Try Stamping on Tuesday I grabbed my Dainty Delight stamp set and this is what I came up with:


Here's the low-down on today's card:

I went with a clean, white base and added a panel wrapped in Crumb Cake burlap ribbon, before adding my layered Crumb Cake Panel. I stamped my florals in Mossy Meadow directly onto the Crumb Cake cardstock, and coloured the leaves in with Mossy Meadow ink and a blender pen and colouring the flowers with a white watercolour pencil. I just love the fine detail of these florals - they are so delicate:

I added a heat embossed sentiment from the same set that I stamped and heat embossed in white, then punched out using a retired punch and finished with a trio of green enamel dots from my stash. I did some additional stamping on the inside and added a co-ordinating envelope to complete my card.

I don't often stamp on a neutral other than white before colouring, but I really like the finished effect on this card. What do you think? How would you choose to play with these colours? Check out the cards by the JUGS team over on the blog and why not have a go and link yours there too?

Here is the visual summary of the key products used on today's project for you to pin for easy reference:


You can see all of my 'How To' summaries on my 'How To - Tips and Techniques' Pinterest board in case you've missed any. 

Enjoy your day; it's Saturday so I'm off to the hockey pitch. I'll be back tomorrow with another project. Until then, happy stampin'!


Stampin' Up! Supplies Used:

Table built using Product Table Builder by The Crafty Owl - Independent Stampin' Up! Demonstrator.

Dainty Delights For A White Wedding

by Joanne James31. January 2023 11:14

Today I'm squeaking in another entry for the challenge over at Time Out that was also inspired by the current AAA Cards Challenge of white on white and this week's Global Design Project #GDP379 theme of Love:


I love that Beth Pearson quote on the Time Out badge and it got me thinking about love in the context of weddings - the time when everyone should feel this way about the person they are standing in front of, right? I love the purity of white for a wedding card so couldn't resist the opportunity to create a clean and simple wedding card featuring a little of 'something old, something new' take a look:


Here's the low-down on today's card:

All About Texture - When working with white-on-white, it's good to think about layers and texture to create interest. For a clean and simple card, there's a need to create interest without overwhelm and still preserve unpatterned 'white space'. The new Dainty Delight Dies are perfect for adding a delicate touch; each of the skinny flowers and stems has a subtle embossed detail that is perfect for clean and simple cards. I created a bough of flowers and greenery, and tucked it under my diecut sentiment and allowed it to flow freely across the front of my card. 

Forever and Always - I used a sentiment from the retired 'Forever and Always' bundle, heat-embossing the words 'Forever &' in silver and then adding the large diecut 'Always' as the main focus of my card. I do love a good sentiment diecut and can honestly say I will never part with my 'Always' dies. 

A Standout Cut - I adhered my thick white cardstock to a foam adhesive sheet before cutting out the word 'Always' as I wanted to create a little height another way to add interest to an all-white, clean and simple white-on-white card:


I really love this card - all I need now is the good news that anyone I now is getting married so that I have the opportunity to send it!

Here is the visual summary of the key products used on today's project for you to pin for easy reference:


You can see all of my 'How To' summaries on my 'How To - Tips and Techniques' Pinterest board in case you've missed any. 

Enjoy your day and I'll be back tomorrow with another project. Until then, happy stampin'!


Stampin' Up! Supplies Used:

Table built using Product Table Builder by The Crafty Owl - Independent Stampin' Up! Demonstrator.

Dainty Flowers Celebrate You Panel Cards

by Joanne James13. January 2023 12:00

Today I'm sharing my design team card for our first challenge of the new year over at As you See It where it's Jane's turn to host and she has a great sketch challenge for us:
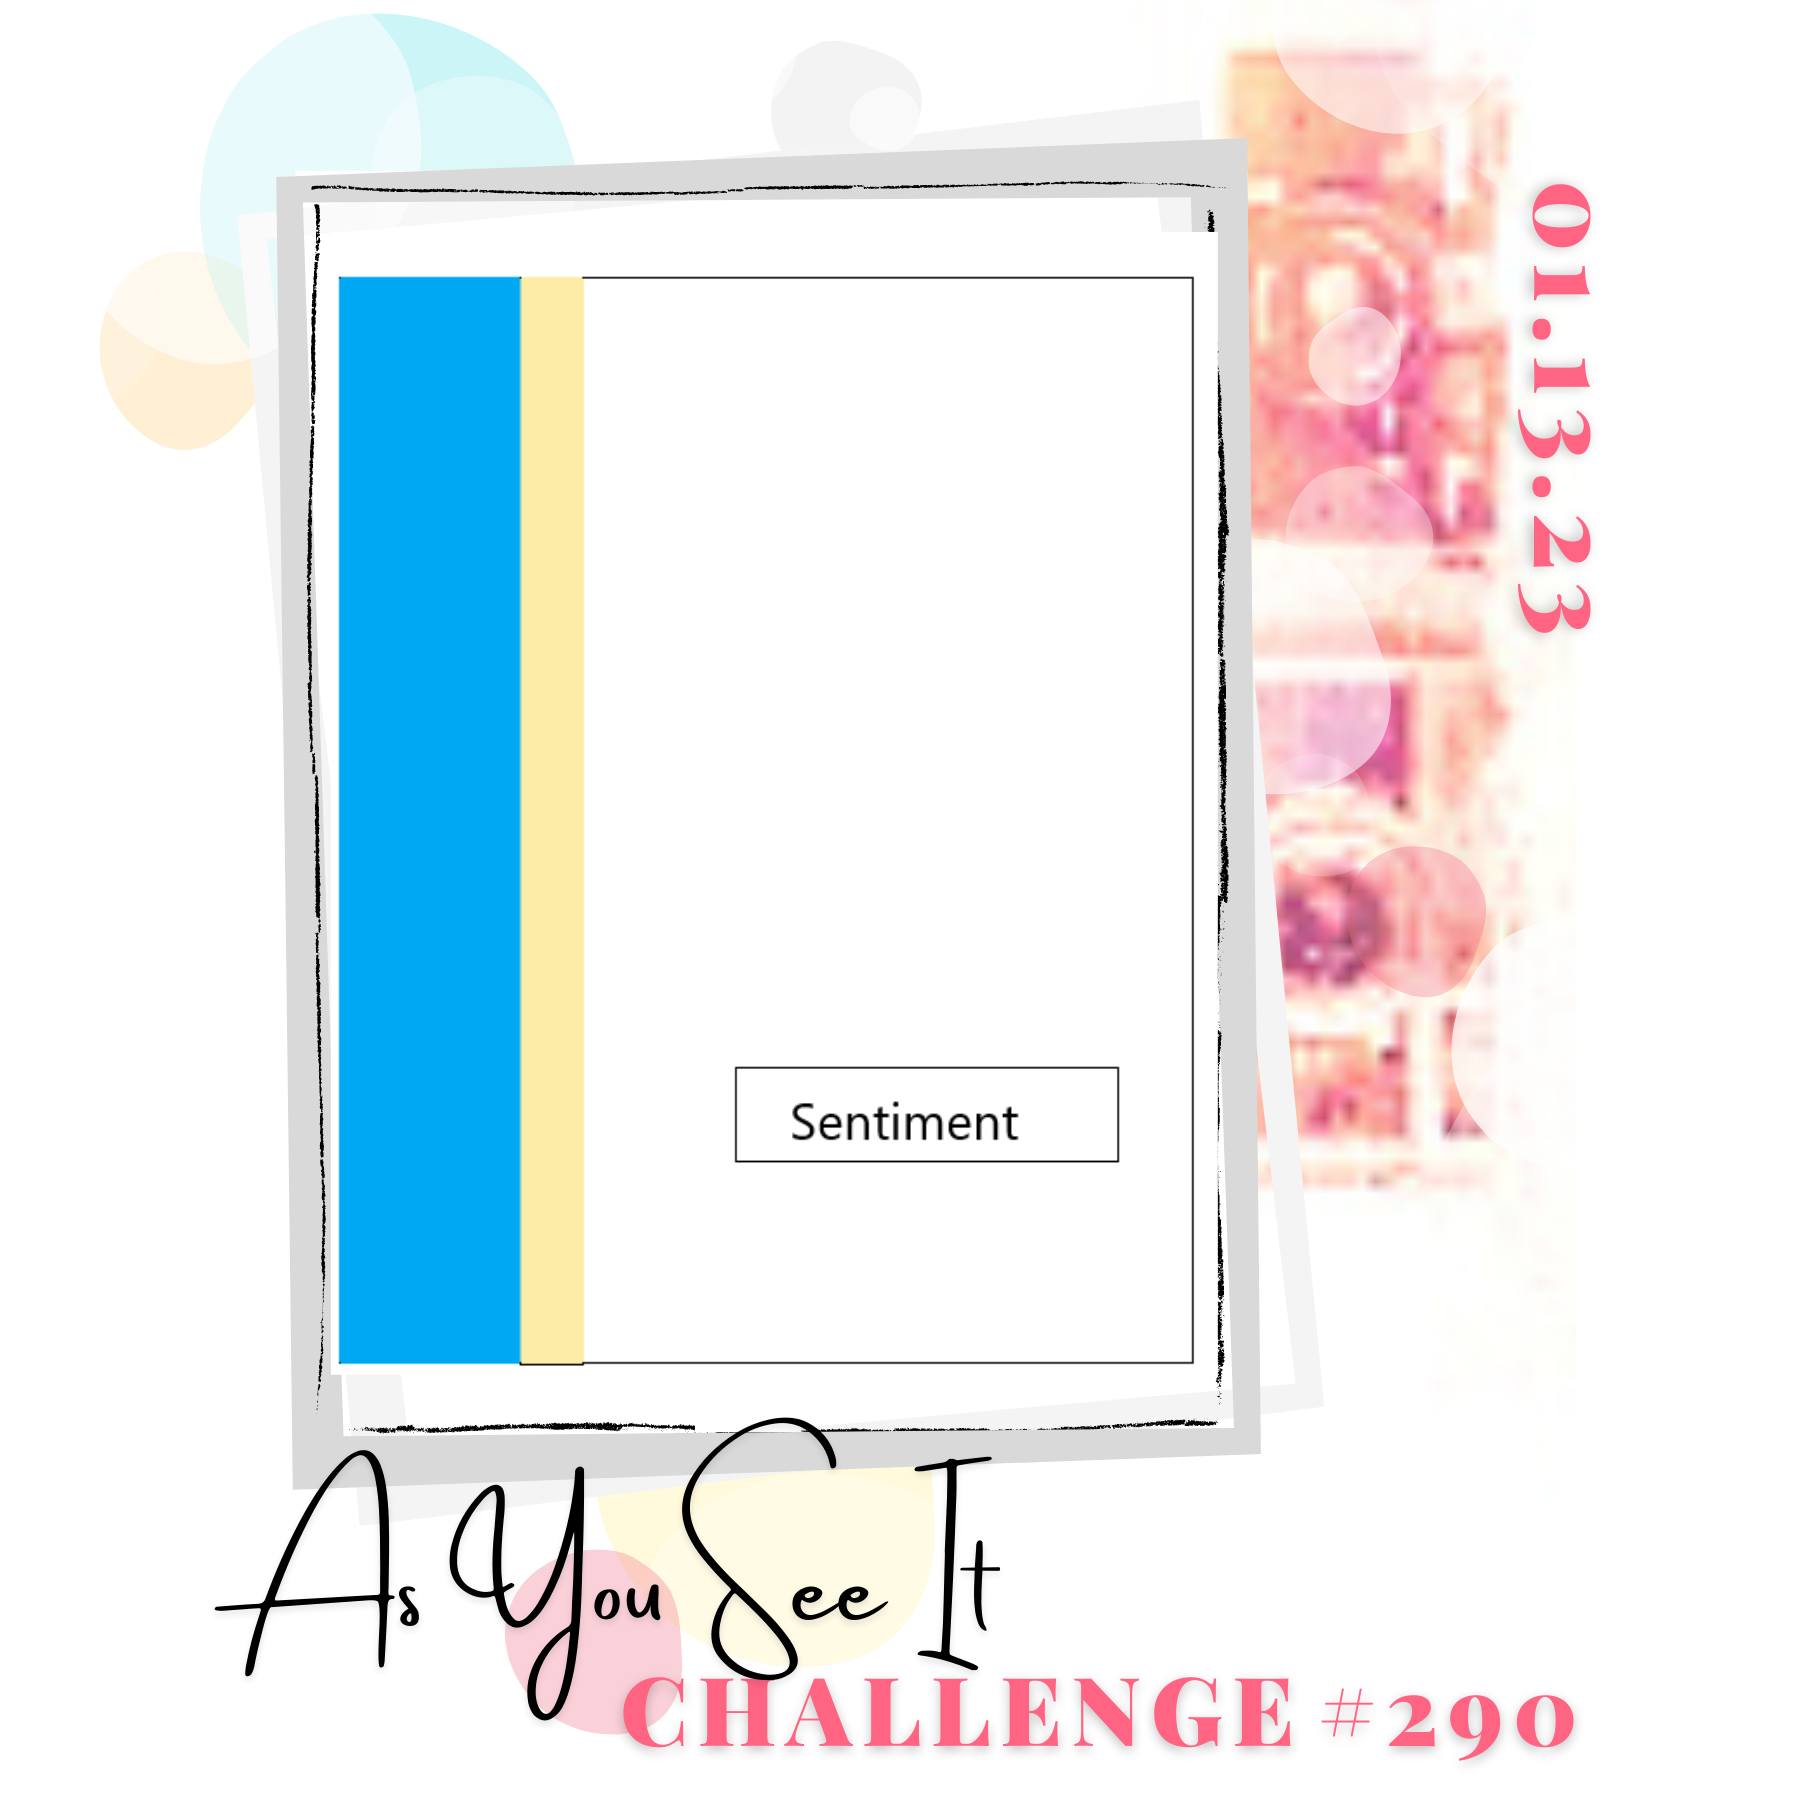
 

I thought that large panel was crying out to showcase some beautiful designer paper and obviously I have lots to choose from!! I decided to make a couple of cards, both showcasing one of the beautiful designs in the new Dainty Flowers paper pack. Here's the first one:
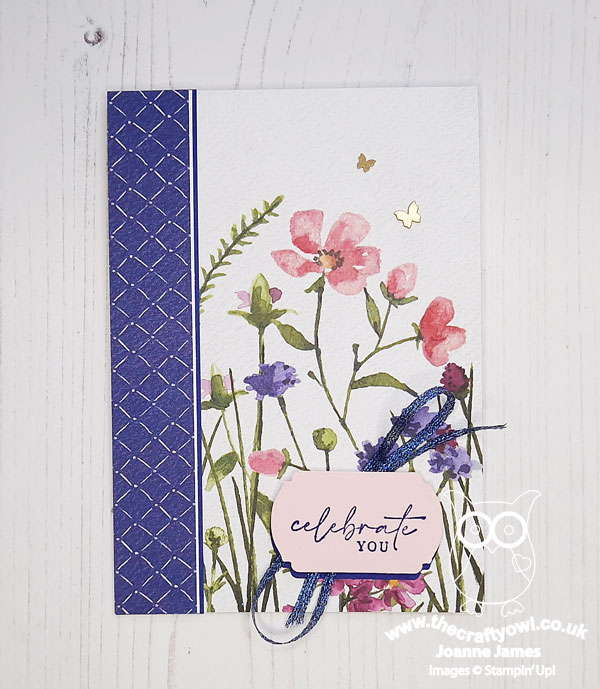
 

Here's the low-down on today's card:

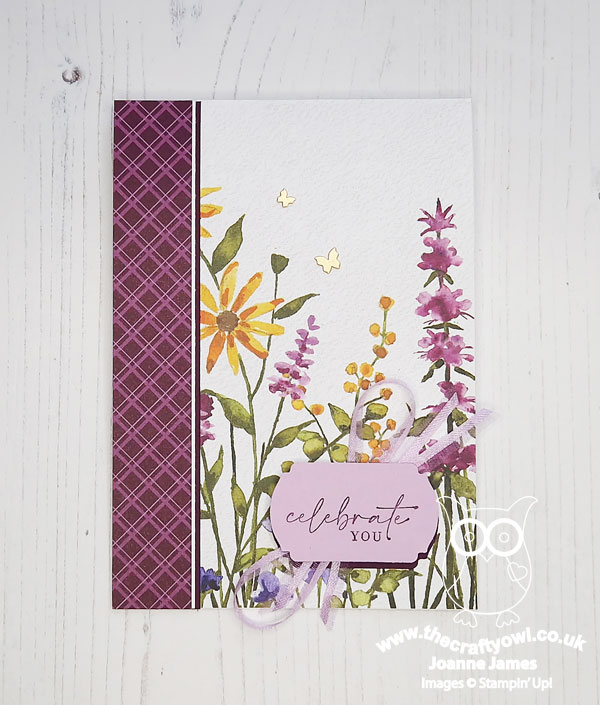
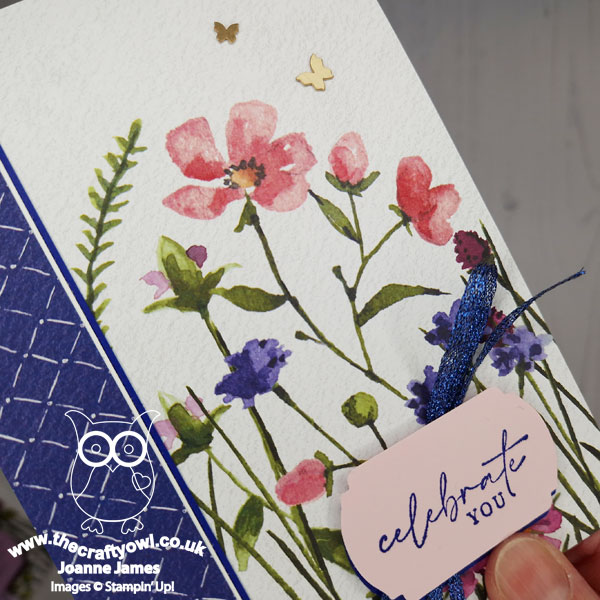
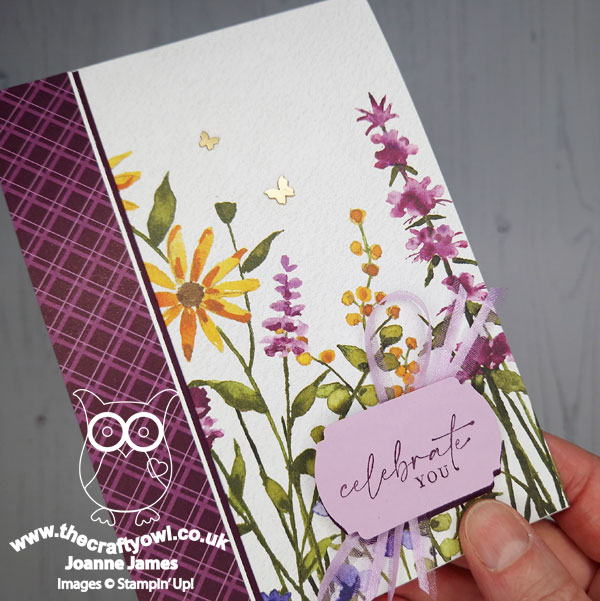
Dainty Flowers - There's a fabulous sheet of paper in the Dainty Flowers pack that has a faux-watercolour print of wildflowers along two sides, which is perfect for cutting into 6 to make multiple cards; this is hat I used for the main panel on my card. I would say it looks like I painted it, but who am I kidding?! I paired it with a contrasting strip in Starry Sky that is another of the patterns in this pack for the card above; for my second card, I picked up the purples and used a piece of Regals DSP in Blackberry Bliss for the border edge:
 

This paper is beautiful and all the better for being FREE during Sale-A-Bration with any £45 purchase. Gotta love a freebie!

Dainty Delight - The sentiment on both cards is from the Dainty Delight stamp set, part of the Dainty Delight bundle that the paper coordinates with - you can find it on page 55 of the mini catalogue.  

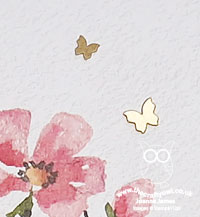
Label Me Fancy - I added my sentiment to a simple punched label courtesy of the Label Me Fancy punch. A simple twist of ribbon and a couple of brushed brass butterflies complete each card. In the photos below you can see the faux texture of the watercolour paper - so realistic:
 

And here's the purple version:
 

Here's a photo of both cards together - which one do you prefer? 
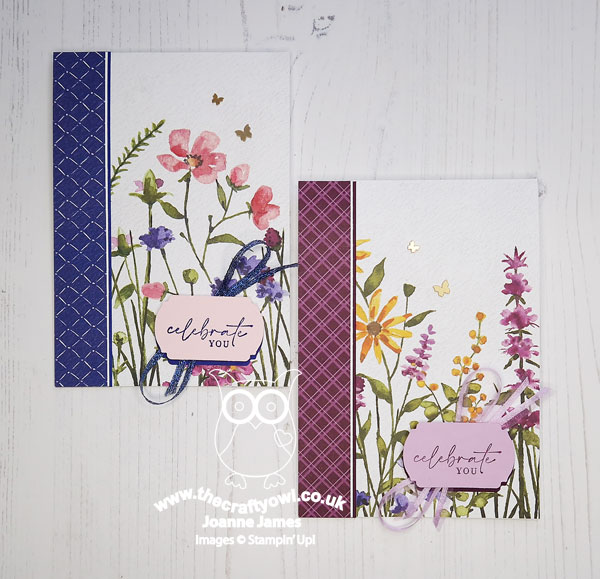
 

Do leave me a comment below - I'd love to know what you think. I honestly love them both - this paper is so pretty! Very little stamping on today's cards - the paper definitely does all the heavy lifting.

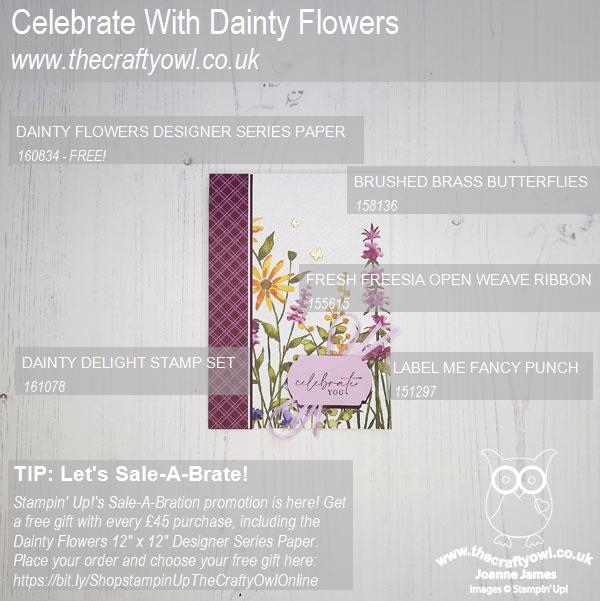
Here is the visual summary of the key products used on today's project for you to pin for easy reference:
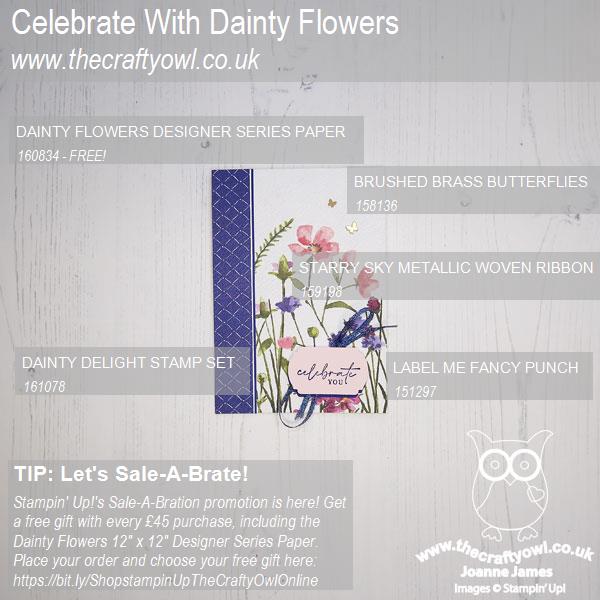


You can see all of my 'How To' summaries on my 'How To - Tips and Techniques' Pinterest board in case you've missed any. 

Here's a summary of our challenge rules:

  • Create any card, scrapbooking page, 3D project or packaging project that fits the challenge.
  • Please include the challenge graphic and link back to the challenge in your blog post. Turn off word verification so we can leave you lots of lovely comments. Make sure you link the post not the whole blog to the Linky. Use #AYSIXXX when uploading to a public gallery.
  • If you’re unsure about ‘the rules’, check the details under the Challenge Guidelines tab on the As You See It Challenge homepage.
  • In a sketch challenge, you are welcome to rotate or flip a sketch. You can replace shapes used such as substituting a circle panel for a square panel. However, we must be able to still see the basis of the original sketch in your finished product.
We look forward to seeing your creations in the AYSI gallery.

Enjoy your day; I'm looking forward to hosting an informal open house this morning to share some of my favourite things from Sale-A-Bration and the new mini catalogue - you can be sure today's cards will feature! I'll be back tomorrow with another project. Until then, happy stampin'!


Stampin' Up! Supplies Used:
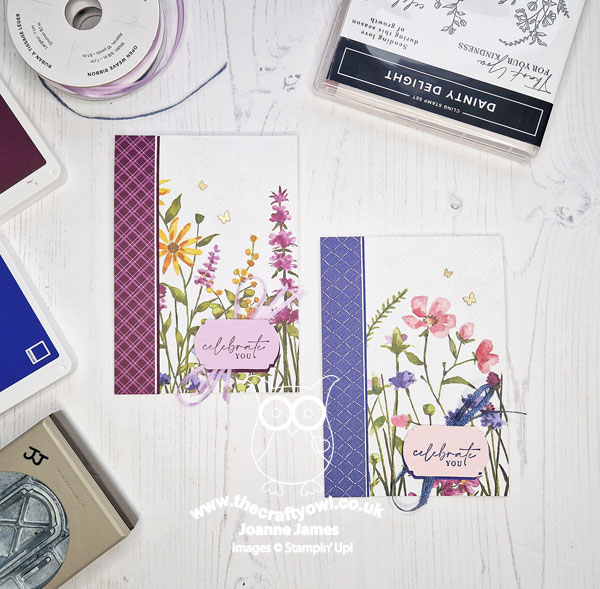
Table built using Product Table Builder by The Crafty Owl - Independent Stampin' Up! Demonstrator.

Current Promotions

Stampin Cut and Emboss

Save up to 30% off on all your favourite kits from 1 to 31 October! 

Click here to see the current kits available and order yours online today.

Join My Team

It's always a great time to join Stampin’ Up! During October you can get even more in your starter kit! New team members can get £160 worth of products for only £99 + free business supplies + free shipping + all the fun being a part of Stampin’ Up! Stampin' Up! has something for everyone: join my growing team and benefit from my support to enjoy Stampin' Up! however you choose.

If you're interested, call me for a chat to understand how I can help you realise your goals. Alternatively, if you have already decided to sign up and you just can't wait, please click here for the link to the online form where you can sign up and order your starter kit right away! 

Shop Online

Access my online shop 24 x 7, 365 days of the year:

Current October hostess code:

4XPEYCB9

Shop Online

Scrapbooking

Stampin' Up! has introduced a new range of 12x12" scrapbooking product and kit - the full range is now available to purchase online. To download a copy of the new digital Scrapbooking Catalogue click here.

Mini Catalogue

BROWSE THE CATALOGUE

'Tis The Season - the new Stampin' Up! Mini Catalogue is here! For more details and to download your copy click here

2024-25 Annual Catalogue

BROWSE THE CATALOGUE

Click on the image to download your copy of the 2024-25 annual catalogue. For a full list of current SU! supplies, go to my online store. If you would like any help or advice, please drop me a line at joanne@thecraftyowl.co.uk or give me a call on 07773 421446 - I'd be happy to help.

Latest Kits!

Stampin Cut and Emboss

The Christmas Ornaments Kit and Card Keeper Kit are the latest kits in the online store - get yours here!

New Online Exclusives

There are new products available exclusively in the online store from 5 November - check them out here.

About Me

Hi I'm Joanne and live in Northampton and when I'm not looking after my husband and two beautiful children, am an avid crafter with a passion for all things Stampin' Up!

I must confess that I have never been a big rubber stamper - until I discovered Stampin' Up! that is. I love the fact that I can get such great results with co-ordinating stamps, inks, papers and punches - the possibilities are endless! Join me on my stamping journey as I share the things I love and be inspired to create amazing things yourself!

Follow Me

Monthly Newsletter

Box Builder

Click the button above to use Box Buster to create your custom box design using the Envelope Punch Board!

Kits Collection Now Available!

Stampin Cut and Emboss

The new Kits Collection from Stampin' Up! is now available!

Click here to see the current kits available and order yours online today.

I Design For


Stampin' Up Stuff

This is my personal blog and is not endorsed by Stampin’ Up! I hope you find it a plentiful source of ideas and personal inspiration but please don't copy my designs for contest submission or use for classes, publication or sale without express permission.