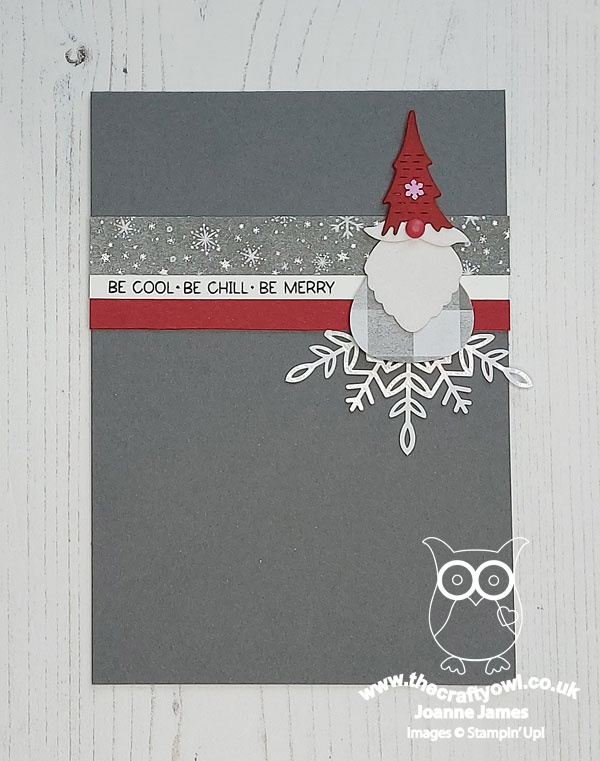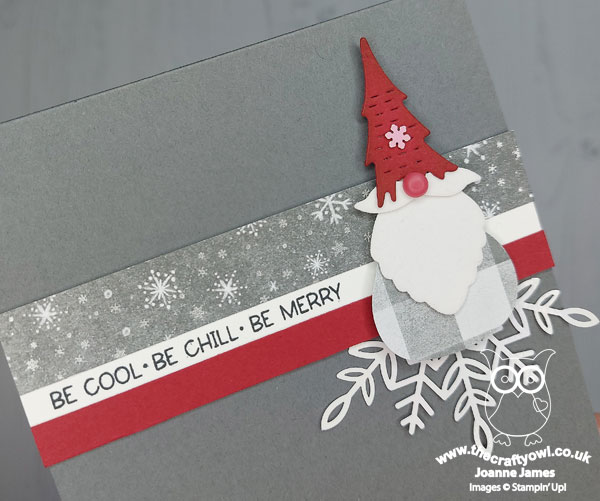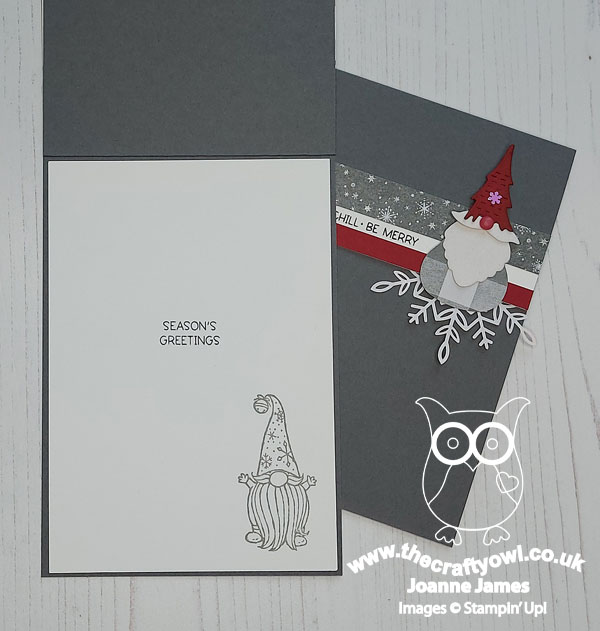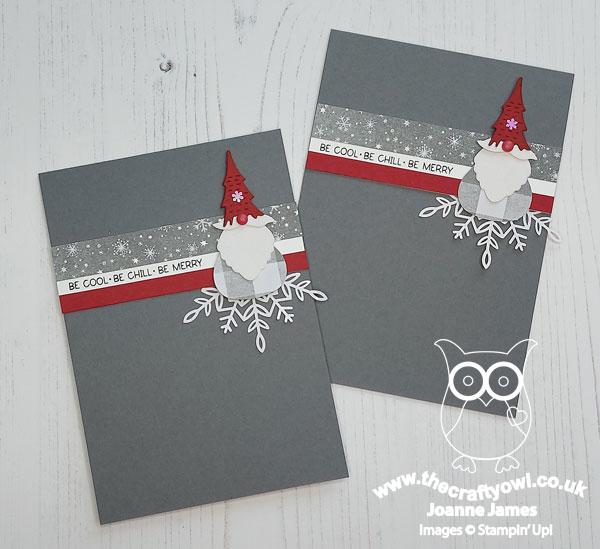
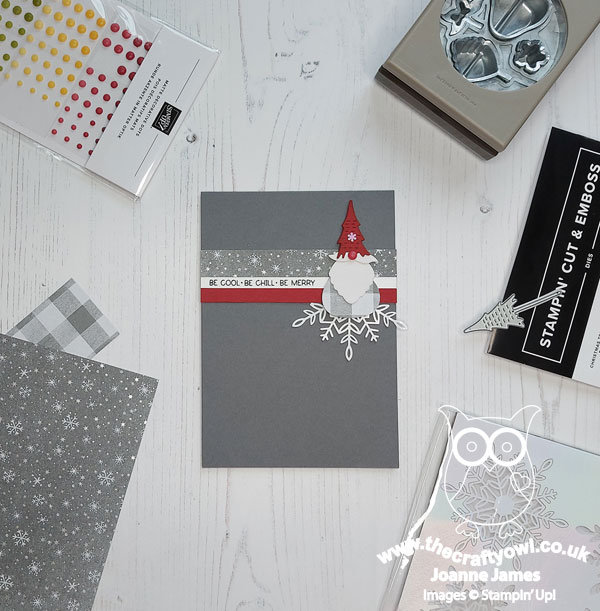
Delicate Baubles Red and Grey Christmas Snowflake

by Joanne James22. October 2021 09:00

Today I'm sharing a clean and simple Christmas card for the current challenge over at CAS Christmas:

I knew I had some red and grey plaid in my retired paper collection so thought I would use this as the basis of my card featuring another of those Delicate Baubles dies - this time the snowflake:


The paper features more muted tones of red and grey (Cherry Cobbler and Grey Granite) than I remembered, but I actually quite like the effect. A simple 'Noel' greeting that I fussy cut from the 'Tidings and Trimmings' stamp set and a single rhinestone complete my card:

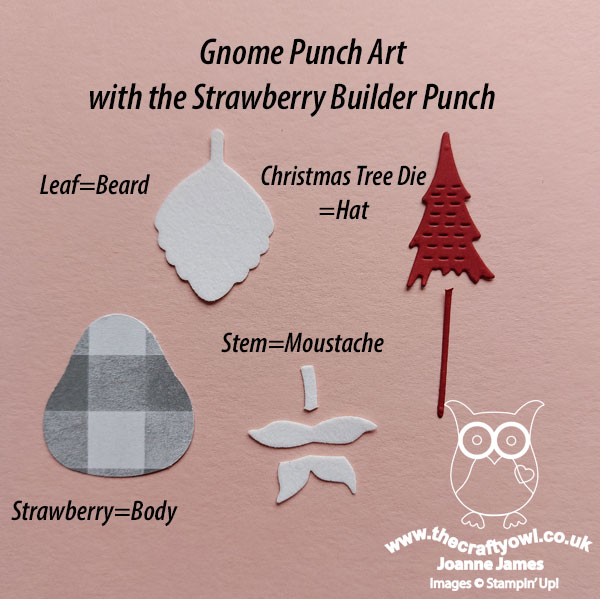
Here is the visual summary of the key products used on today's project for you to pin for easy reference:


You can see all of my 'How To' summaries on my 'How To - Tips and Techniques' Pinterest board in case you've missed any. 

Enjoy your day and I'll be back tomorrow with another project. Until then, happy stampin'!


Stampin' Up! Supplies Used:

Table built using Product Table Builder by The Crafty Owl - Independent Stampin' Up! Demonstrator.

Giving Gifts Autumn Leaves Thank You Card TTT134

by Joanne James7. October 2021 18:00

It's Thursday and time for a new challenge over at TicTacToe! It's the turn of Team X to host this week and I am the featured designer this week. This is the fun board that we are playing along with: 


I decided to go across the middle of the grid with leaves/thanks/shades of brown for a clean and simple card. I used the layout and layering idea from the CASE The Designer challenge over at Global Design Project and the colours over at Color Throwdown that are perfect for Autumn. I will also be linking up over at Addicted to CAS, having finally managed to create something suitably clean and simple befitting their Autumn codeword - take a look:


Here's the low-down on today's card:

Beauty Of Tomorrow - I love the large sentiment in the 'Beauty of Tomorrow' stamp set which sums up the changing seasons and advent of autumn beautifully I think so I had to feature this on the front of my card. Since this doesn't directly have anything to do with my middle square of 'thanks', I added one of my favourite stamps from the 'Well Defined' set to the inside of my card:


I love the idea of sending a card to someone thanking them for being part of my world, rather than as a show of gratitude for something someone did and this sentiment is so perfect for that.

Giving Gifts Autumn Leaves - I created a cascade of falling autumn leaves that I diecut from a piece of cardstock onto which I blended a selection of oranges and browns (see below) using the leaf die in the Giving Gifts Dies set. One of my blogging friends, the lovely Kim Singdahlsen of Joyful Creations with Kim, has made some fabulous cards with the dies in this set and was a total enabler when it cam to me puchasing these dies - I could resist no longer!  I particularly love the diecut detail on each leaf; I glued each of them on one half only, so that they could be gently folded upwards to add to the sensation of falling leaves - slightly easier to see on the angled photo below:

A Surprise Find - Finally, to add a little extra autumn-inspired detail to my card, I added some Grey Granite ink using a blending brush and an old stencil I found in my stash with a large knit pattern and faded it out from opposing corners. I am seeing some wonderful stencilling in the blogosphere lately, none more so than from my fellow Paper Player designer and CAS supremo the lovely Jaydee of Stampin! With Jaydee. She has a beautiful fine-knit stencil from The Greetery that she has been using lots lately and when I found this in my stash I thought it would be a good stencil to create a similar look and feel. This was also a good way to incorporate the soft, warm grey tones of the Color Throwdown palette. 

Here is the visual summary of the key products used on today's project for you to pin for easy reference:


You can see all of my Product and 'How To' summaries on my 'How To - Tips and Techniques' Pinterest board in case you've missed any. 

This is one of those cards that for all its simplicity seemed to take forever; it took a truck load of inspiration to get me there, but I must say I love the result and ended up making a few of these to send out to friends.

A tictactoe board offers so many creative possibilities - how does this week's board inspire you? Why not have a go? We would love to see you in the gallery and who knows - you might be selected for Designer's Choice and be eligible to be a guest designer on a future challenge. 

Enjoy your day; I do not know where this week has disappeared! I am still busy harvesting produce and I made another batch of raspberry jam yesterday. Today is oddly warm for this time of year, but still rather grey and it certainly doesn't feel like the return of summer that the weather forecasters promised! I'll be back soon with another project. Until then, happy stampin'!


Stampin' Up! Supplies Used: 

Table built using Product Table Builder by The Crafty Owl - Independent Stampin' Up! Demonstrator.

Seasons of Fun CAS Fall Hello Card PP559

by Joanne James19. September 2021 08:00

Today it's Sunday and time for this week's new challenge over at The Paper Players! It's the turn of the fabulous Claire to host this week and she has a timely Clean and Simple challenge for you to work with:
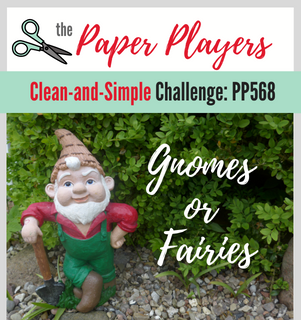
 

I love our challenge badge this week and decided to embrace the fun of our challenge photo and go with a card that is all about playing with leaves - take a look:


Here's the low-down on today's card:

I stamped this super-cute image of this little chap playing in a big pile of leaves with his kitty from the 'Seasons of Fun' current seasonal hostess set onto a panel cut with the Whimsy Dies (the swirly border reminded me of a breeze!) and coloured with my Stampin' Blends markers: 

That's all there is to it - super clean and really simple to achieve!

Here is the visual summary of the key products used on today's project for you to pin for easy reference:


You can see all of my Product and 'How To' summaries on my 'How To - Tips and Techniques' Pinterest board in case you've missed any. 

I'm linking today's card up for another entry over at The Alphabet Challenge where they are on 'L is for Leaves' and over at SUO Challenges where the current theme is 'people'. 

Before you reach for your ink and papers, check out what our amazing team has created to inspire you this week:

Here's a quick recap of our challenge rules:
 
1.  Create a new paper project
2.  Upload your creation to your blog with a link back to us and provide a direct link to the post featuring your challenge submission.
3.  Please link your card to no more than four challenges, TOTAL.
4.  Have FUN!

You can see all of my 'How To' summaries on my 'How To - Tips and Techniques' Pinterest board in case you've missed any. 

Enjoy your day; I'll be back tomorrow with another project. Until then, happy stampin'!

Stampin' Up! Supplies Used: 

Table built using Product Table Builder by The Crafty Owl - Independent Stampin' Up! Demonstrator.

Blackberry Beauty Clean And Simple

by Joanne James6. September 2021 12:00

Happy Monday everyone! Today I'm sharing a super clean and simple card for the following challenges:


The sketch over at InspireCreate was perfect for a clean and simple (CAS) card so I decided to grab a quick 10 minutes to create a card also inspired by the Addicted to CAS challenge of 'Nature' inspired by autumn colour and foliage - take a look:


Here's the low-down on today's card:

Now I know here in the UK we are enjoying the second day of what looks to be a 4 day mini heatwave, but I couldn't resist the rich blackberry tones of the Blackberry Beauty designer paper on my card today. I just love the jewelled tones of this paper and I paired it with one of my current favourite generic sentiments from the 'Beauty of Tomorrow' stamp set, which finishes on the inside of my card:

Isn't that just the nicest sentiment? I debated whether to reverse the paper and 'white space' on my card, but decided that the strip on the sketch was perfect for really highlighting the beauty of the paper and its gold foil detail - just look at those pretty acorns and oak leaves: 


This is a great standby design if your pressed for time and a good way to use up those leftover strips of paper we all have in our craft room too.

Here is the visual summary of the key products used on today's project for you to pin for easy reference:


You can see all of my 'How To' summaries on my 'How To - Tips and Techniques' Pinterest board in case you've missed any. 

Enjoy your day; mine's been a busy one, with pre-season football training this morning and a trip to buy new hiking boots in readiness for the next Duke of Edinburgh expedition amongst other things! At the rate at which teenage boys grow (or is it just mine?!) these have to be left until a few weeks before the hike; enough time to break them in, but not enough time to grow out of them!! I'll be back tomorrow with another project. Until then, happy stampin'!


Stampin' Up! Supplies Used:

Table built using Product Table Builder by The Crafty Owl - Independent Stampin' Up! Demonstrator.

Whale-y Well Done Congratulations Card CCS 430

by Joanne James27. July 2021 12:00

It's Tuesday and time for a new challenge over at CAS Colours & Sketches. Holly is hosting this month and our final challenge this month is a sketch challenge featuring stripes: 


Feel free to flip or rotate the sketch when making your card.

For my card today I was also inspired by the photo inspiration over at Just Us Girls and the similar nautical theme over at Festive Friday (I chose blue, red and twine) to create another clean and simple congratulations card using my whale builder punch - take a look:


Here's the low-down on today's card:

I flipped the colours in the bottom-right JUGS inspiration photo and added a simple navy blue punched whale to a set of red and white cardstock stripes. with a sentiment from the 'Whale Done' stamp set and this time adding a cute mortar board to my whale since once again exam congratulations are in order. To create my mortar board, I handcut a diamond shape from black cardstock and added it to a small rectangle then threaded some basic black twine through it and secured at the back before unravelling it to create my tassel

The tassel was the fussiest part of today's card, which otherwise is super clean and simple. Great for a masculine congratulations card I'm thinking - nothing too fussy!

Here is the visual summary of the key products used on today's project for you to pin for easy reference:


You can see all of my 'How To' summaries on my 'How To - Tips and Techniques' Pinterest board in case you've missed any. 

As a reminder, for our colour challenges, you must use all of the stated challenge colours. You may also use neutral colours; however, the challenge colours should be the most noticeable ones featured on your card. We use Stampin' Up! color names for reference, but you are welcome to use any other companies' products as long as you match the challenge colours as closely as possible.

Enjoy your day; I'll be dodging the thunderstorms! I'll be back tomorrow with another project. Until then, happy stampin'!


Stampin' Up! Supplies Used:

Table built using Product Table Builder by The Crafty Owl - Independent Stampin' Up! Demonstrator.

All Squared Away Miss You Card

by Joanne James24. July 2021 21:10

Yay, it's the weekend! So a quick post from me with a card I put together this afternoon for the following challenges:


I love the Global Design Project colour palette this week and wanted to finally make a card with my All Squared Away bundle which I've had for far too long without inking up, so the challenge over at AAA Cards gave me the perfect excuse since they are featuring 'twinchies' - take a look:


I didn't go with the optional twist of Christmas In July, instead stamping a background for my 'twinchie' in Coastal cabana, then adding the diecuts in the other two colours and finishing with a single pearl and a simple 'miss you' sentiment from the Art Gallery stamp set. 


Here is the visual summary of the key products used on today's project for you to pin for easy reference:


You can see all of my 'How To' summaries on my 'How To - Tips and Techniques' Pinterest board in case you've missed any. 

So simple but I just love it, unconventional florals and all!

Enjoy your evening and I'll be back tomorrow with another project for this week's new challenge over at the Paper Players. Until then, happy stampin'!


Stampin' Up! Supplies Used:

Table built using Product Table Builder by The Crafty Owl - Independent Stampin' Up! Demonstrator.


Thinking Thanks And Peace CAS Christmas in July Sneak Peek

by Joanne James22. July 2021 20:45

We might be in the middle of a summer heatwave here in the UK, but there's a pre-order in the house and lots of Christmas in July challenges out there currently, so I finally managed a clean and simple card for a couple of them:


Both Less Is More and SUO Challenges have a Christmas In July theme, so I decided to play with a new set from my mini catalogue pre-order called Thinking Thanks and Peace  - take a look:


This set features a selection of large sentiments for a variety of occasions. I heat embossed the Christmas one in gold onto Night of Navy, then cut out a panel with a rectangle stitched die, added a gold border and adhered to a navy card base. I paper-pieced a gold-on-white embossed dove, having first coloured with a white pencil but I couldn't get the bright white effect that I was after and I like this much better:


In fact, I love this card so much, I actually made two! This sentiment set is great for quick, clean and simple cards - I think I'll be using it a lot in the run up to the festive season.


Here is the visual summary of the key products used on today's project for you to pin for easy reference: 


You can see all of my 'How To' summaries on my 'How To - Tips and Techniques' Pinterest board in case you've missed any. 

Enjoy your evening and I'll be back tomorrow with another project. Until then, happy stampin'!


Stampin' Up! Supplies Used:

Table built using Product Table Builder by The Crafty Owl - Independent Stampin' Up! Demonstrator.

Clean and Simple Sweet Strawberry Card PP546

by Joanne James20. June 2021 08:00

Today it's Sunday and time for this week's new challenge over at The Paper Players! It's my turn to host this week and I have a clean and simple challenge for you to work with:


Fruit and berries - you can use either, or both, on your card this week but remember to keep it clean and simple! I decided to go with strawberries for my fruit today and paired them with this week's Color Throwdown colours and the CAS(E) The Designer challenge over at Global Design Project #GDP296 this week - take a look:


Here's the low-down on today's card:

I was intrigued by the idea of CASEing the lovely Emma Goddard's card and decided to use the strawberry blossom stamp and single strawberry from the 'Sweet Strawberry' stamp set in stamped-off Gray Granite to create the soft stamped panel that forms the basis of my card front. I added a panel of block stripes using the CTD colours which are perfect for strawberries along the left-hand side. I added a white-on-black heat-embossed sentiment onto a stitched label from the Tasteful Labels Dies and mounted it on some (retired) Poppy Parade ribbon. A trio of clear sequins complete my clean and simple card:

I haven't made a card like this before but I really like the effect. I think it could be quite addictive - I can think of lots of sets that would work in this way. 

Here is the visual summary of the key products used on today's project for you to pin for easy reference:
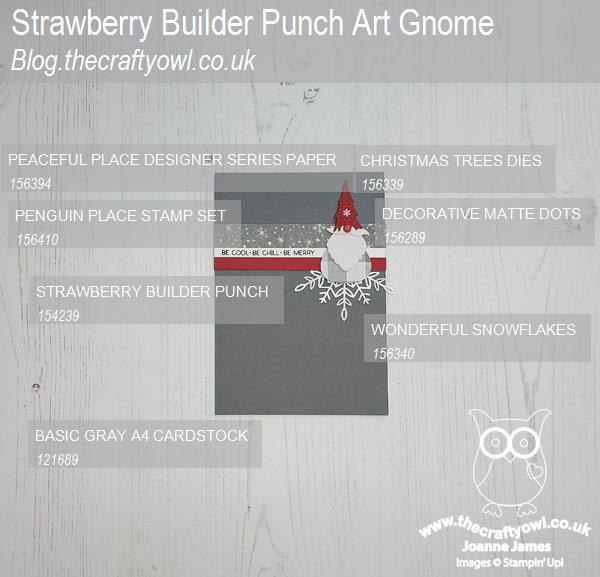
 

You can see all of my Product and 'How To' summaries on my 'How To - Tips and Techniques' Pinterest board in case you've missed any. 

Before you reach for your ink and papers, check out what our amazing team has created to inspire you this week:

Here's a quick recap of our challenge rules:
 
1.  Create a new paper project
2.  Upload your creation to your blog with a link back to us and provide a direct link to the post featuring your challenge submission.
3.  Please link your card to no more than four challenges, TOTAL.
4.  Have FUN!

You can see all of my 'How To' summaries on my 'How To - Tips and Techniques' Pinterest board in case you've missed any. 

Enjoy your day; as it's Father's Day that will be the focus here today. I'm not sure that it will be dry enough for a BBQ - the last few days have been quite a bit cooler, but either I'm sure there will be fun in store! I'll be back tomorrow with another project. Until then, happy stampin'!
Stampin' Up! Supplies Used:

Table built using Product Table Builder by The Crafty Owl - Independent Stampin' Up! Demonstrator.

Under My Umbrella Rainbow Scraps Card CCS417

by Joanne James27. April 2021 13:00

It's Tuesday and time for a new challenge over at CAS Colours & Sketches. This week's challenge is a sketch challenge and Wei has asked that we get creative with diagonals this week:


Feel free to flip or rotate the sketch when making your card - which I did this week! I looked at those diagonals and thought that if I rotated the base through 180 degrees, they would make a rainbow! Take a look to see what I mean:


Here's the low-down on today's card:

I used a selection of 5mm wide offcuts from my scrapbox in a selection of rainbow colours (see below) and glue them across the diagonal of my Balmy Blue card base. I extended the Highland Heather piece across the card front, then took a piece of Basic White and cut an angled border with my clouds die from the retiring Happy Dies set for my top panel:

A simple sentiment from the also retiring 'Under My Umbrella' stamp set in Pacific Point finished my card - and not an umbrella in sight!

Our lovely DT member Vicky is also the hostess over at Addicted to CAS this week where she has chosen the code word 'sky' so I'm linking up there too - with sky, rainbow and clouds, my card today doesn't have anything else!!

Here is the visual summary of the key products used on today's project for you to pin for easy reference:


You can see all of my 'How To' summaries on my 'How To - Tips and Techniques' Pinterest board in case you've missed any. 

As a reminder, for our colour challenges, you must use all of the stated challenge colours. You may also use neutral colours; however, the challenge colours should be the most noticeable ones featured on your card. We use Stampin' Up! color names for reference, but you are welcome to use any other companies' products as long as you match the challenge colours as closely as possible.

Enjoy your day and I'll be back tomorrow with another project. Until then, happy stampin'!


Stampin' Up! Supplies Used:

Table built using Product Table Builder by The Crafty Owl - Independent Stampin' Up! Demonstrator.

Under My Umbrella Hello Sunshine and Green Wellies

by Joanne James26. April 2021 19:17

It's Monday and the start of a new week! Today was class day for me so I'm a little later with my blog post. Today's card is totally inspired by the inspiration photo over at Just Us Girls this week and also uses the Paper Craft Crew sketch:


I couldn't resist those green wellies and spring flowers! So I combined with some clouds and sunny yellow cardstock to create a cheery card using the retiring stamp set 'Under My Umbrella' that will be leaving us next week - take a look:


Here's the low-down on today's card:

I went with a rather abstract interpretation using some of the elements in the photo, paper-piecing some dotty green wellies onto a stitched circle and filling them with some fussy cut, colourful spring blooms. I sponged some clouds onto my Whisper White card base using my trusty Happy Dies cloud stencil and some Balmy Blue ink and a blending brush, then added a layer of Daffodil Delight, which I bordered using one of the Curvy Dies (also retiring in June) and stamped my sentiment directly onto this layer, next to my popped-up circle - 'Hello Sunshine' seemed like the most appropriate sentiment from this set for today's card! Are those wellies not just so much fun? Who wouldn'y love to go romping in the great outdoors in those?!


Here is the visual summary of the key products used on today's project for you to pin for easy reference:


You can see all of my 'How To' summaries on my 'How To - Tips and Techniques' Pinterest board in case you've missed any. 

I seem to be having a run of clouds on my cards, having featured them on Saturday's card and they pop up on tomorrow's card too - as does the 'Under My Umbrella stamp set!

Do come back tomorrow to see what I created. Until then, happy stampin'!


Stampin' Up! Supplies Used:

Table built using Product Table Builder by The Crafty Owl - Independent Stampin' Up! Demonstrator.

New Online Exclusives

There are new products available exclusively in the online store from 5 November - check them out here.

Latest Kits!

Stampin Cut and Emboss

The Perpetual Beauty Calendar Kit and Cherry Blossoms Treat Boxes Kit are the latest kits in the online store - get yours here!

Shop Online

Access my online shop 24 x 7, 365 days of the year:

Current December hostess code:

9NKXDTTR

Shop Online

Mini Catalogue

BROWSE THE CATALOGUE

'Tis The Season - the new Stampin' Up! Mini Catalogue is here! For more details and to download your copy click here

Scrapbooking

Stampin' Up! has introduced a new range of 12x12" scrapbooking product and kit - the full range is now available to purchase online. To download a copy of the new digital Scrapbooking Catalogue click here.

2024-25 Annual Catalogue

BROWSE THE CATALOGUE

Click on the image to download your copy of the 2024-25 annual catalogue. For a full list of current SU! supplies, go to my online store. If you would like any help or advice, please drop me a line at joanne@thecraftyowl.co.uk or give me a call on 07773 421446 - I'd be happy to help.

Join My Team

It's always a great time to join Stampin’ Up! New team members can get £130 worth of products for only £99 + free business supplies + free shipping + all the fun being a part of Stampin’ Up! Stampin' Up! has something for everyone: join my growing team and benefit from my support to enjoy Stampin' Up! however you choose.

If you're interested, call me for a chat to understand how I can help you realise your goals. Alternatively, if you have already decided to sign up and you just can't wait, please click here for the link to the online form where you can sign up and order your starter kit right away! 

About Me

Hi I'm Joanne and live in Northampton and when I'm not looking after my husband and two beautiful children, am an avid crafter with a passion for all things Stampin' Up!

I must confess that I have never been a big rubber stamper - until I discovered Stampin' Up! that is. I love the fact that I can get such great results with co-ordinating stamps, inks, papers and punches - the possibilities are endless! Join me on my stamping journey as I share the things I love and be inspired to create amazing things yourself!

Follow Me

Monthly Newsletter

Box Builder

Click the button above to use Box Buster to create your custom box design using the Envelope Punch Board!

Kits Collection Now Available!

Stampin Cut and Emboss

The new Kits Collection from Stampin' Up! is now available!

Click here to see the current kits available and order yours online today.

I Design For


Stampin' Up Stuff

This is my personal blog and is not endorsed by Stampin’ Up! I hope you find it a plentiful source of ideas and personal inspiration but please don't copy my designs for contest submission or use for classes, publication or sale without express permission.

DSP Special Release

Check out 3 popular designer series paper designs in fresh new colourways! Available exclusively in the online store from 3 December - check them out here

Last Chance Products

Last Chance Products will now be updated every other month - check them out here.