Let's Set Sail Adventure Awaits CCS469

by Joanne James10. May 2022 13:00

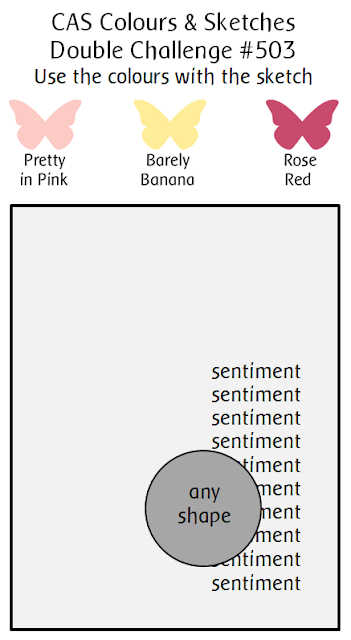
It's Tuesday and time for a new challenge over at CAS Colours & Sketches. This week's challenge is a sketch challenge and Shannon has asked that we layer some shapes along a vertical panel. Feel free to flip or rotate the sketch when making your card.


For my card today I did just that - I turned the sketch through 90 degrees and went with a very fluid interpretation of Shannon's sketch using the Let's Set Sail bundle:


Here's the low-down on today's card:

Let's Set Sail - The Let's Set Sail bundle is perfect for clean and simple cards and it works for everything from (masculine) birthdays and encouragement to baby cards. I added the sea directly to my white cardbase, along with my sentiment and some birds, then added my punched sailboat with dimensionals for a little extra lift. I love the sketchy appearance of the stamps in this set: 


Tuesday Tip - The Tuesday Tip that I'm sharing over in my Crafty Owl Creatives Facebook Group today is around the Sailboat Builder Punch - some clever stamping enables you to stamp and punch it out in one go:


This is such a time-saver and econimcal use of cardstock too. You can get the detail, see other Tuesday Tips and more by joining my Facebook Group here

Here is the visual summary of the key products used on today's project for you to pin for easy reference:
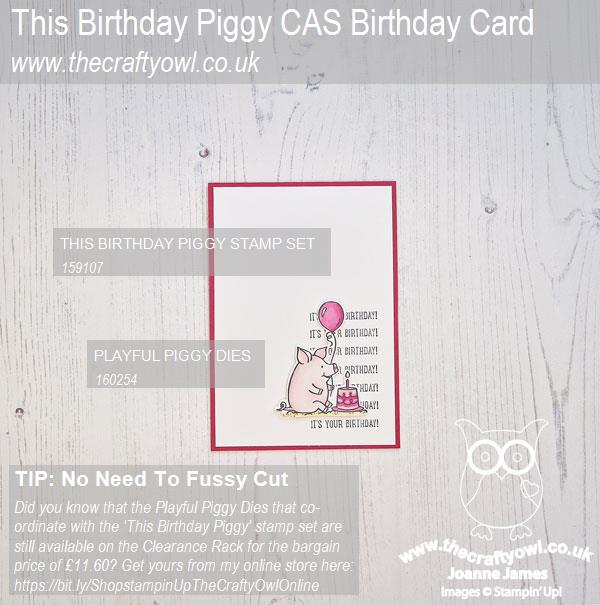
 

You can see all of my 'How To' summaries on my 'How To - Tips and Techniques' Pinterest board in case you've missed any. 

Today's card was also inspired by a couple of other challenges: the team over at Color Hues are asking us to create cards using the colours blue and tan and over at Time Out where the theme is 'vacation':


As a keen scuba diver, I am more like to be found beneath the waves rather than in a sailboat, but each to their own (and I don't have a stamp featuring a scuba diver ;-) )

Enjoy your day and I'll be back tomorrow with another project. Until then, happy stampin'!


Stampin' Up! Supplies Used:

Table built using Product Table Builder by The Crafty Owl - Independent Stampin' Up! Demonstrator.

A Clean and Simple Cup Of Tea With A Friend CCS468

by Joanne James3. May 2022 13:00

It's Tuesday and time for a new challenge over at CAS Colours & Sketches.  We are into May and so a new month means a new hostess! This month it's the turn of Shannon and our first challenge is a colour challenge: 


I also used the sketch layout over at Just Add Ink for my layout. Today's card is all about the new - well it is the Stampin' Up! annual catalogue launch day, after all! I used two new stamp sets and two new dies - take a look:


Here's the low-down on today's card:

A stitched circle courtesy of the Stylish Shapes Dies in Pale Papaya forms the backdrop for my sweet heat-embossed teacup brimming with flowers, courtesy of the new Cup of Tea bundle. A fussy cut sentiment from the 'Happiness Abounds' stamp set (I just love that script/font!) and a few in-colour gems complete my clean and simple card:

And that's all there is to it! Here is the visual summary of the key products used on today's project for you to pin for easy reference:


You can see all of my 'How To' summaries on my 'How To - Tips and Techniques' Pinterest board in case you've missed any. 

As a reminder, for our colour challenges, you must use all of the stated challenge colours. You may also use neutral colours; however, the challenge colours should be the most noticeable ones featured on your card. We use Stampin' Up! color names for reference, but you are welcome to use any other companies' products as long as you match the challenge colours as closely as possible.

Enjoy your day and I'll be back tomorrow with another project. Until then, happy stampin'!


Stampin' Up! Supplies Used:

Table built using Product Table Builder by The Crafty Owl - Independent Stampin' Up! Demonstrator.

Playful Alphabet Brilliant Rainbow and Sequins CAS Shaker Cards CCS 467

by Joanne James26. April 2022 13:00

00It's Tuesday and time for a new challenge over at CAS Colours & Sketches. This week it's our final challenge for the month of April and Bhavya has asked that we create something with three distinct sentiment elements for her final sketch challenge:


Feel free to flip or rotate the sketch when making your card. For my card today I ended up creating not one, not two but three cards! I'm sharing my favourite one first - a clean and simple shaker card - take a look:


Here's the low-down on today's card:

Farewell Playful Alphabet Dies - Time to say goodbye to a craftroom staple - the Playful Alphabet Dies! Yes, they are retiring with current annual catalogue next week and newsflash - there are NO alphabet die sets in the new annual catalogue, so not only will I be hanging on to my set, if you don't have them you have just one week to nab a set! I can't recommend them highly enough: they are so useful for personalising cards, but also to create bespoke messages or greetings. Use them flat or on dimensionals, or as I've done here to create a bespoke message that I then backed with window sheet to create a fun clean and simple shaker card! How cool is this?


Rainbows or Candles? - My initial shaker was inspired by the inspiration challenge of 'make a wish - rainbows' over at TGIF Challenges this week and I paired my simple message with a paper-pieced rainbow made using my Beautiful Rainbow Dies and some scraps of cardstock in Poppy Parade, Daffodil Delight, Coastal Cabana and Fresh Freesia to co-ordinate with the (retired) Ice Cream Shaker Sprinkles that I used inside my shaker. I used my rainbow offcuts to add a decorative border to the inside of my card, along with a sentiment from the retiring 'Sweet Ice Cream' stamp set:


I liked this card so much, I made another one, this time using the retiring white, gold and silver Sequins For Everything (currently half price) for my shaker and a trio of (retired) gold Candle Embellishments I found on my shelf:


Check out the sparkles - how fun!


Here are both shakers together - which one do you prefer?


I honestly can't decide - I love this design so much I think I'm going to make a whole bunch more!!

A CAS Thankyou Trio - Finally I have one extra 'bonus' card for you, that was the one I made before my shakers - a super simple repeating 'thanks' sentiment using a trio of dies cut with the Amazing Thanks Dies, with each one backed by the fresh colours of the current Color Dare challenge:


By using the colour for the base layer of the diecut and making the top layer white, it allows for a white base and preserves the clean and simple feel with all that 'white space'. This is a great way to use up scraps and whilst I love the fresh colour combo I used on today's card - Flirty Flamingo, Mango Melody, Daffodil Delight - this simple layout would work with whatever colours you have available.

Here are the visual summaries of the key products used on today's projects for you to pin for easy reference:


You can see all of my 'How To' summaries on my 'How To - Tips and Techniques' Pinterest board in case you've missed any. 

I actually made four cards for today's challenge; the first one was mediocre at best; I had an idea that just didn't look right when I made it - so much so, I'm not even going to share it with you!  So I left it and when I went back to desk 24 hours later, I started fresh and came up with my thankyou trio, quickly followed by my fun shaker cards - suddenly I was on a creative roll! Does that ever happen to you when your creating? How do you combat that feeling you get when you've made something but are just not 'feeling' it? Do leave me a comment below - I'd love to hear from you!

Enjoy your day; the James Juniors are both back to school today following the Easter break so I will be aiming to get more work done this week. This is a super-busy term, with everything from cricket fixtures to the school musical production, internal exams, speech days, university open days and lots more besides! I really do need to get organised!! On that note, I'll be back tomorrow with another project. Until then, there's work to do - happy stampin'!


Stampin' Up! Supplies Used:

Table built using Product Table Builder by The Crafty Owl - Independent Stampin' Up! Demonstrator.


Measure of Love Clean and Simple CCS 466

by Joanne James19. April 2022 12:00

It's Tuesday and time for a new challenge over at CAS Colours & Sketches. Bhavya is hosting for the month of April and it's time for our second colour challenge of the month: 


I thought these colours would be perfect for a bowl of cherries for a sweet friend - so I grabbed the retiring 'Measure of Love' stamp set and set to work - take a look:


Here's the low-down on today's card:

 A simple bowl of cherries, backed with some Pattern Party black and white gingham and with an added Cherry Cobbler scalloped border detail to finish:


A super clean and simple card!

Here is the visual summary of the key products used on today's project for you to pin for easy reference:


You can see all of my 'How To' summaries on my 'How To - Tips and Techniques' Pinterest board in case you've missed any. 

As a reminder, for our colour challenges, you must use all of the stated challenge colours. You may also use neutral colours; however, the challenge colours should be the most noticeable ones featured on your card. We use Stampin' Up! color names for reference, but you are welcome to use any other companies' products as long as you match the challenge colours as closely as possible.

Enjoy your day and I'll be back tomorrow with another project. Until then, happy stampin'!


Stampin' Up! Supplies Used:

Table built using Product Table Builder by The Crafty Owl - Independent Stampin' Up! Demonstrator.

What's Cookin? CCS 465

by Joanne James12. April 2022 12:00

It's Tuesday and time for a new challenge over at CAS Colours & Sketches. Bhavya is hosting for the month of April and it's time for her first sketch challenge of the month: 


Feel free to flip or rotate the sketch when making your card. For my card today I decided to grab my retiring 'What's Cookin'' stamp set and Cookin' Dies and create a simple card for the baker or would-be chef in your life - take a look:


Here's the low-down on today's card:

I almost passed over the colours at Just Add Ink this week, when it occurred to me that they really reminded me of Cornishware pottery, with its distinctive blue or red and vanilla stripes, so I decided that a Cornishware-inspired mixing bowl, along with a little texture from my neutral chopping board and mixing spoon and a pop of red from a Cherry Cobbler sentiment and twine bow were just what I needed for today's clean and simple card. Check out the texture that the die gives the chopping board on the closeup below:


I also added a little additional decoration to the inside of my card - aren't those miniature chef hats just the cutest?!


I can't believe this set is on the retiring list this year; I had so many more plans for it and am really sad to see it leave the annual catalogue. I will definitely be holding on to mine - I love to spend time in the kitchen and I know I'll find many more uses for it. If you would like to be the proud owner of the What's Cookin' stamp set and co-ordinating Cookin' Dies, they will only be around for another couple of weeks, and even then only whilst stocks last, so do get your order in sooner rather than later! I'm also sharing today's card over at Less Is More where the theme this week is 'occupations'  - this set is perfect for chefs, bakers and kitchen enthusiasts! 

Here is the visual summary of the key products used on today's project for you to pin for easy reference:


You can see all of my 'How To' summaries on my 'How To - Tips and Techniques' Pinterest board in case you've missed any. 

I love to cook and my family suggest I'm quite good at it. Whilst out for lunch at the weekend, my son was tucking into his lasagne and when asked if everything was ok with his meal, he announced "It's good - but not as good as my Mum's!" I'm not sure there's anything you can reply to that; if only all problems could be solved with a homemade lasagne!

Enjoy your day and I'll be back tomorrow with another project. Until then, happy stampin'!


Stampin' Up! Supplies Used:

Table built using Product Table Builder by The Crafty Owl - Independent Stampin' Up! Demonstrator.

Goodbye To Turtle Friends CCS 464

by Joanne James5. April 2022 13:00

It's Tuesday and time for a new challenge over at CAS Colours & Sketches. Bhavya is hosting for the month of April and our first challenge is a colour challenge: 


For my card today I decided to have one last outing with my retiring Turtle Friends bundle for a fun bleated birthday card - I used the current Inspire.Create sketch for my layout:


Here's the low-down on today's card:

I did add a few layers to today's card, including a strip of Pansy patch gingham, but otherwise was very careful to preserve my 'white space' and keep my design simple. A punched turtle, complete with party hat, was simply stamped and some highlights added with tone-on-tone Blends markers, along with a touch of chalk marker to highlight his eye:

It's always good to have a belated birthday card on hand - for a card maker, I seem to need all too many of these! I love the 'Turtle Friends' set and will be sorry to see it go; the turtle punch is already sold out, but the stamp set is still available as part of the Last Chance Products Promotion; as is the retiring Pansy Patch paper and the chalk marker - a super-useful crafting staple. 

Here is the visual summary of the key products used on today's project for you to pin for easy reference:


You can see all of my 'How To' summaries on my 'How To - Tips and Techniques' Pinterest board in case you've missed any. 

As a reminder, for our colour challenges, you must use all of the stated challenge colours. You may also use neutral colours; however, the challenge colours should be the most noticeable ones featured on your card. We use Stampin' Up! colour names for reference, but you are welcome to use any other companies' products as long as you match the challenge colours as closely as possible.

I do have a bonus card for you using today's colours too; I was playing around with the colours and originally made this card, using this week's Paper Craft Crew Sketch and the retired 'Flowering Cactus' bundle:


It is a little more clean and simple than my turtle card to be fair, but I didn't like it as much so moved it to second place - but I thought I'd share it with you anyway! And here's the PPC sketch:


Enjoy your day; I have a mountain of ironing to get through - wish me luck! I'll be back tomorrow with another project. Until then, happy stampin'!


Stampin' Up! Supplies Used:

Table built using Product Table Builder by The Crafty Owl - Independent Stampin' Up! Demonstrator.

Retro In Symmetry CCS463 Double

by Joanne James29. March 2022 12:00

It's Tuesday and time for a new challenge over at CAS Colours & Sketches. There are 5 Tuesdays in March so we are ending the month with the double: one of our previous sketches and a retired colour combination. For Jeanne's final challenge as hostess she chose the following:  


For my card today I went with a super simple single stemmed flower from the 'In Symmetry' stamp set - take a look:


Here's the low-down on today's card:

I thought the rather retro design of the 'In Symmetry' stamp set suited this bright, rather retro colour palette! I stamped my flower in Watermelon Wonder and Just Jade (my closest substitute to 'Taken With Teal' which is way before my time!) onto a white stitched rectangle and added a Pineapple Punch enamel dot before adding to my Pineapple Punch cardbase:

A sentiment heat embossed in white onto a piece of Watermelon Wonder cardstock completes the front of my card. I added another flower, coloured with my sponge daubers, to decorate the inside of my card:

And that's my card - done! The 'In Symmetry' stamp set is great for bright and colourful floral cards and I will miss having it in my collection when it retires. If you don't have it and it's still on your wishlist, why not hop over to my online store via the link below and pick it up at a 40% discount as part of the Last Chance Products Promotion whilst supplies last - a proper bargain!

Here is the visual summary of the key products used on today's project for you to pin for easy reference:


You can see all of my 'How To' summaries on my 'How To - Tips and Techniques' Pinterest board in case you've missed any. 

As a reminder, for our colour challenges, you must use all of the stated challenge colours. You may also use neutral colours; however, the challenge colours should be the most noticeable ones featured on your card. We use Stampin' Up! color names for reference, but you are welcome to use any other companies' products as long as you match the challenge colours as closely as possible.

Enjoy your day and I'll be back tomorrow with another project. Until then, happy stampin'!


Stampin' Up! Supplies Used:

Table built using Product Table Builder by The Crafty Owl - Independent Stampin' Up! Demonstrator.

Artfully Layered CAS Slimline Birthday Card CCS462

by Joanne James22. March 2022 12:00

It's Tuesday and time for a new challenge over at CAS Colours & Sketches. This week's challenge is a sketch challenge and Jeanne has asked that we create a slimline card with the following layout: 


Feel free to flip or rotate the sketch when making your card. I chose to use this week's colours over at Just Us Girls for my card - I love the soft green and pink combination, with the added warmth of vanilla. You might have thought this would draw me to florals, but no - today's card is all about the leaves - take a look:


I decided to have my first outing with the beautiful 'Artfully Layered' stamp set and create a cluster of leaves on the corner of my slimline card. The leaves are quite large, so I went with a standard sized slimline (9.5cm x 21cm). I stamped two leaves in Soft Succulent directly onto my card base, one of these going off the edge and for this one I created a stencil and added some some soft Blushing Bride pink ink over the top. To finish I added a layered diecut leaf and a simple birthday sentiment from the same set, along with a trio of three pink enamel dots.

I love the variation in detail of all three leaves:

I also used a few of the other stamps in the set to add a little extra detail to the inside of my card:

And of course the new Slimline Envelopes in the mini catalogue also come in Soft Succulent,  so I had the perfect ready-made envelope all set to go too - bonus!

The Artfully Layered bundle is a new acquisition for me, having been persuaded by all of the wonderful cards I've seen with it, especially those created by my wonderful friend Jan Clothier - you can check out here blog here if you would like to see some of the amazing creations she has made with this set.

Here is the visual summary of the key products used on today's project for you to pin for easy reference:


You can see all of my 'How To' summaries on my 'How To - Tips and Techniques' Pinterest board in case you've missed any. 

Enjoy your day; It's only Tuesday and I am playing catch up already this week, having had my class day yesterday which is always busy. Add in an unscheduled hockey match today and the usual to-do list, piano lessons and the rest it is turning into a busy one! The sun is shining though and spirits are high, so I must get on. I'll be back tomorrow with another project. Until then, happy stampin'!


Stampin' Up! Supplies Used:

Table built using Product Table Builder by The Crafty Owl - Independent Stampin' Up! Demonstrator.

Sports Event Congratulations Pennant Card CCS461

by Joanne James15. March 2022 12:00

It's Tuesday and time for a new challenge over at CAS Colours & Sketches. Jeanne is hosting this month and this week it's a colour challenge: 


I don't know why but these colours really threw me for a loop this week! I spent an age working out how best to use them together on a clean and simple card. In the end I decided to grab some new and as yet unused dies from my shelf and this is what I came up with: 


Here's the low-down on today's card:

Today's card features the new Sporting Event Dies. I actually bought these because there are some great ticket dies in the set, although as I was looking at them I thought I could layer them to make a simple pennant. I added some stars (another useful die in this set) and a diecut #1 button that I popped up on dimensionals:

I added a fun sentiment from 'Happy & Heartfelt' and paired that with another one on the inside, along with a reverse button using the leftover pieces from the front of my card:


This will come in useful when the youngest of the James Juniors (hopefully!) passes his next piano exam. I'm hoping that it might encourage continued practice and playing too, but I won't hold my breath on that front!  Despite the challenge of these colours, I've decided I quite like this colour combo. The rest of the team have made some fabulous cards with it so be sure to check them out! 

Here is the visual summary of the key products used on today's project for you to pin for easy reference:


You can see all of my 'How To' summaries on my 'How To - Tips and Techniques' Pinterest board in case you've missed any. 

As a reminder, for our colour challenges, you must use all of the stated challenge colours. You may also use neutral colours; however, the challenge colours should be the most noticeable ones featured on your card. We use Stampin' Up! color names for reference, but you are welcome to use any other companies' products as long as you match the challenge colours as closely as possible.

Enjoy your day and I'll be back tomorrow with another project. Until then, happy stampin'!


Stampin' Up! Supplies Used:

Table built using Product Table Builder by The Crafty Owl - Independent Stampin' Up! Demonstrator.

Cards For Ukraine Clean and Simple Tulips CCS460

by Joanne James8. March 2022 13:00

It's Tuesday and time for a new challenge over at CAS Colours & Sketches. This week's challenge is a sketch challenge and Jeanne has asked that we use a curve and non-geometrical shape in our designs.


Feel free to flip or rotate the sketch when making your card. i did just that today and rotated the sketch through 90 degrees to create a landscape card. If you are a card maker you will undoubtedly have seen the flood of blue and yellow cards in support of #cardsforukraine. The lovely peeps over at Color Hues are having a double challenge in honour of this and are also featuring the colours of the Ukranian national flag in a bonus colour combo for this challenge, so I decided it was time for me to show my support and play along. The sunflower is the national flower of Ukraine and whilst I have one of those cards in the pipeline to share with you in another post, for today's challenge I decided to use the row of tulips in the Tulips Dies set for that wiggly line - take a look:


Here's the low-down on today's card:

This card really is super simple to execute - the effort here was in the planning! A Pacific Point card base, then overlaid a panel of Daffodil Delight for the diecut tulips. I chose to feature a stamped windmill as my non-geometrical shape and stamped it in Pacific Point onto Daffodil Delight, stamping the sentiment from the Flowering Tulips set below it - the words seemed appropriate in the circumstances as the people of Ukraine are most definitely in our thoughts. 


This card is all about the bold blocks of just two colours; it is unusual for there to be no white at all on this card, but having tried a few different things the blue-on-yellow windmill was definitely the way to go - the windmill is much more a part of the landscape and it emulates the horizontal lines of the Ukrainian flag. The only white was for my stamped panel on the inside of my card:


Do you ever use blocks of colour in this way in your crafting? Bold blocks of colour can have a big impact and by avoiding clutter that clean-and-simple feel and 'white space' is preserved. 

Here is the visual summary of the key products used on today's project for you to pin for easy reference:


You can see all of my 'How To' summaries on my 'How To - Tips and Techniques' Pinterest board in case you've missed any. 

As a reminder, for our colour challenges, you must use all of the stated challenge colours. You may also use neutral colours; however, the challenge colours should be the most noticeable ones featured on your card. We use Stampin' Up! color names for reference, but you are welcome to use any other companies' products as long as you match the challenge colours as closely as possible.

Enjoy your day and I'll be back tomorrow with another project. Until then, happy stampin'!


Stampin' Up! Supplies Used:

Table built using Product Table Builder by The Crafty Owl - Independent Stampin' Up! Demonstrator.

Mini Catalogue

BROWSE THE CATALOGUE

The mini catalogue is now live! Read and download your copy here.

Shop Online

Access my online shop 24 x 7, 365 days of the year:

Current March hostess code:

S9F2XJJW

Shop Online

Join My Team

It's always a great time to join Stampin’ Up! New team members can get £130 worth of products for only £99 + free business supplies + free shipping + all the fun being a part of Stampin’ Up! Stampin' Up! has something for everyone: join my growing team and benefit from my support to enjoy Stampin' Up! however you choose.

If you're interested, call me for a chat to understand how I can help you realise your goals. Alternatively, if you have already decided to sign up and you just can't wait, please click here for the link to the online form where you can sign up and order your starter kit right away! 

Latest Kit!

Stampin Cut and Emboss

The Rock Legend Kit has all you need to make 8 cards with coordinating envelopes. Along with the new Panda Friends Kit, both are available from January 4th for just £14 each - get yours here!

2023-24 Annual Catalogue

BROWSE THE CATALOGUE

Click on the catalogue for a full list of current SU! supplies - if you would like to order any of the items featured, please drop me a line at [email protected] or give me a call on 07773 421446 - I'd be happy to help.

New Online Exclusives

There will be new products available exclusively in the online store from 5 March - check them out here.

About Me

Hi I'm Joanne and live in Northampton and when I'm not looking after my husband and two beautiful children, am an avid crafter with a passion for all things Stampin' Up!

I must confess that I have never been a big rubber stamper - until I discovered Stampin' Up! that is. I love the fact that I can get such great results with co-ordinating stamps, inks, papers and punches - the possibilities are endless! Join me on my stamping journey as I share the things I love and be inspired to create amazing things yourself!

Follow Me

Monthly Newsletter

Box Builder

Click the button above to use Box Buster to create your custom box design using the Envelope Punch Board!

Kits Collection Now Available!

Stampin Cut and Emboss

The new Kits Collection from Stampin' Up! is now available!

Click here to see the current kits available and order yours online today.

I Design For


Stampin' Up Stuff

This is my personal blog and is not endorsed by Stampin’ Up! I hope you find it a plentiful source of ideas and personal inspiration but please don't copy my designs for contest submission or use for classes, publication or sale without express permission.