Bee My Valentine Bee Mine FMS628

by Joanne James25. March 2024 16:33

Today I've a quick post to squeak in a card I made for this week's Freshly Made Sketches challenge with a great layout chosen by Narelle:


I loved the way DT member Amy used the Stitched With Whimsy Dies to frame the aperture on her card this week and it inspired me to use them in the same way, but as a 'trail' for my buzzy bee - take a look:


A well-chosen pattern from the Be My Valentine designer series papers and the perfectly-sized sentiment complete my simple card.


Here is the visual summary of the key products used on today's project for you to pin for easy reference:


You can see all of my 'How To' summaries on my 'How To - Tips and Techniques' Pinterest board in case you've missed any. 

Enjoy your day and I'll be back tomorrow with another project. Until then, happy stampin'!


Stampin' Up! Supplies Used:

Table built using Product Table Builder by The Crafty Owl - Independent Stampin' Up! Demonstrator.

Bee Mine Sweet As Honey CCS 533

by Joanne James19. March 2024 13:00

It's Tuesday and time for a new challenge over at CAS Colours & Sketches. I am hosting this month and this week's challenge is a sketch challenge:


The sketch features six elements and an overlapping sentiment. The six elements don't need to be circles, they can be any shape, and they don't all have to be identical, however there should be a common theme to your chosen images. Feel free to flip or rotate the sketch when creating your card. Most of all, have fun! 

For my card today I got out my paper snips once more and spent some time fussy cutting a variety of honey pots from the Bee Mine designer series paper - take a look:


Here's the low-down on today's card:

There's so much value to be had in a pack of designer paper - especially if you have the patience to get your scissors out and start snipping! I arranged my pots across the centre of my card and then stamped my sentiment from the 'Bee My Valentine' stamp set in Tuxedo black ink, highlighting the word 'sweet' by inking it with my Sweet Sorbet in-colour marker, and after fussy cutting that too, popped it up on dimensionals and laid it over my honey pots::


Another clean and simple card - I'm sure Winnie the Pooh would approve!

Here is the visual summary of the key products used on today's project for you to pin for easy reference:


You can see all of my 'How To' summaries on my 'How To - Tips and Techniques' Pinterest board in case you've missed any. 

Enjoy your day; it's raining here (again!) so I will be spending the day indoors, trying to distract myself from doing the housework by poring over the new Stampin' Up! annual catalogue that I received yesterday! I'll be back tomorrow with another project. Until then, happy stampin'!


Stampin' Up! Supplies Used:

Table built using Product Table Builder by The Crafty Owl - Independent Stampin' Up! Demonstrator.

Bee Mine Valentines Card PP675

by Joanne James4. February 2024 08:00

Today it's Sunday and time for this week's new challenge over at The Paper Players! It's my turn to host this week and I have a timely theme challenge for us to work with:
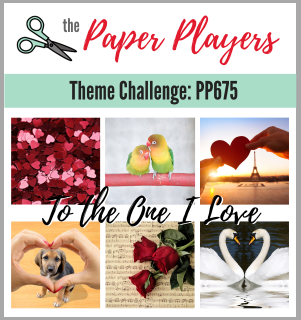
       

This week it's theme week and since February is here and Valentine's Day is around the corner, I chose the theme of 'Love'. Your card doesn't have to be a Valentine's card - it could be for a wedding anniversary or simply to say 'I love you', but should be made with a loved one in mind. I almost went with a pink and red heart-filled creation, but more of that later in the week! For today I wanted to make a bright and colourful Valentine's card featuring those cheerful bees and the Bee Mine suite - I just can't get enough of them! I used the sketch over at Try A Sketch On Tuesday for my layout and this is what I came up with:
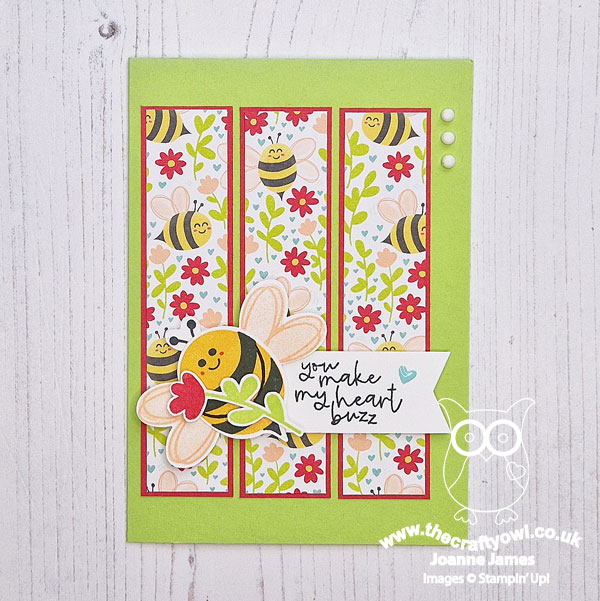
 

Here's the low-down on today's card:

Bee Mine - I cut three panels of Bee Mine designer series paper and mounted them onto Sweet Sorbet cardstock before adding to my Lemon Lime Twist cardbase. In hindsight I should have made them shorter and positioned them higher to be more faithful to the TSOT sketch, but I was so keen to show off as much of the pattern as possible I overlooked that detail when I adhered them to my card and positioned them more centrally. Hopefully the ladies over there will forgive me ;-)

Bee My Valentine - I anchored my sentiment from the 'Bee My Valentine' stamp set with a bee, stamped from the same set and punched out with the Bee Builder Punch. This punch really is so versatile; it will punch the bee's body and wings, but also has a small heart that can be used as a heart or to punch out the bee's antennae. The wings double-up as larger heart too and the bee body could also work as a speech bubble - so many creative possibilities! I love a punch that has multiple uses!

Armed With A Tip - I made my bee in the likeness of one of the ones in the designer series paper pattern. I added a couple of dots of red to her cheeks and a pair of arms, to hold her fussy cut flower. And so to my tip! If you are not confident adding your arms freehand, you can use the negative space of the punched bee body as a stencil: simply place the rounded 'head' of the stencil onto the body and draw in the arms with a Stampin' Write marker. You're welcome! 
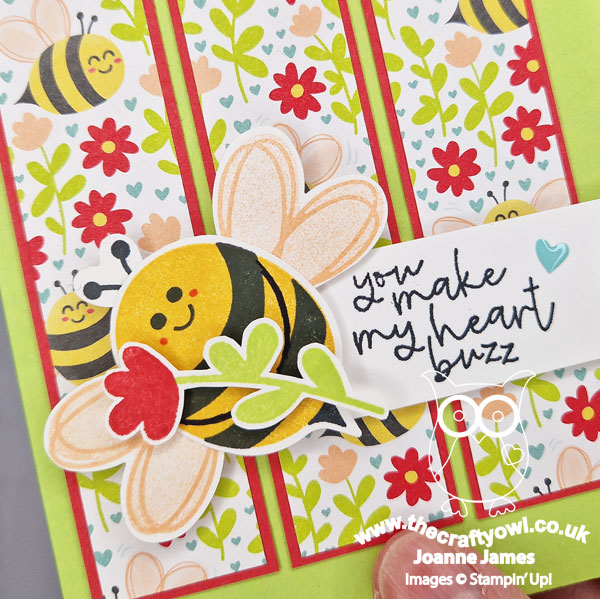
I'm also linking today's card up with my friends over at SUO Challenges where the theme is 'Valentine's Day'. This card is going to be my Valentine's card for the youngest of the James Juniors; not too girly, blue hearts and a punny sentiment - I think it might just be considered acceptable for a discerning teenager!

Here is the visual summary of the key products used on today's project for you to pin for easy reference:
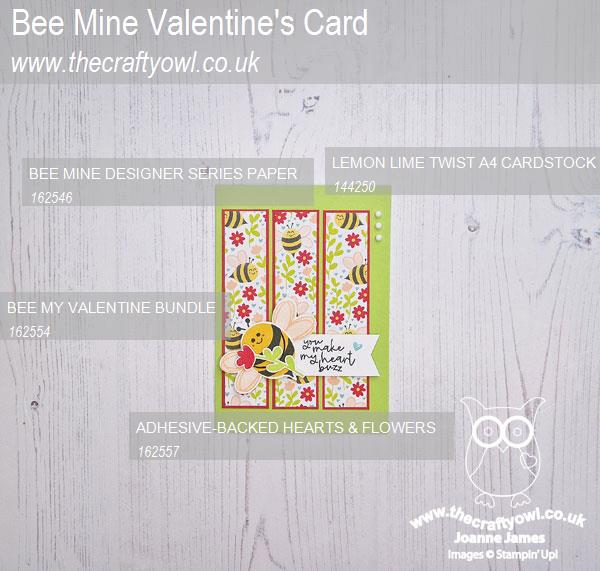
 

You can see all of my Product and 'How To' summaries on my 'How To - Tips and Techniques' Pinterest board in case you've missed any. 

Before you reach for your ink and papers, check out what our amazing team has created to inspire you this week:

Here's a quick recap of our challenge rules:
 
1.  Create a new paper project
2.  Upload your creation to your blog with a link back to us and provide a direct link to the post featuring your challenge submission.
3.  Please link your card to no more than four challenges, TOTAL.
4.  Have FUN!

Enjoy your day; I'll be back tomorrow with another project. Until then, happy stampin'!


Stampin' Up! Supplies Used: 
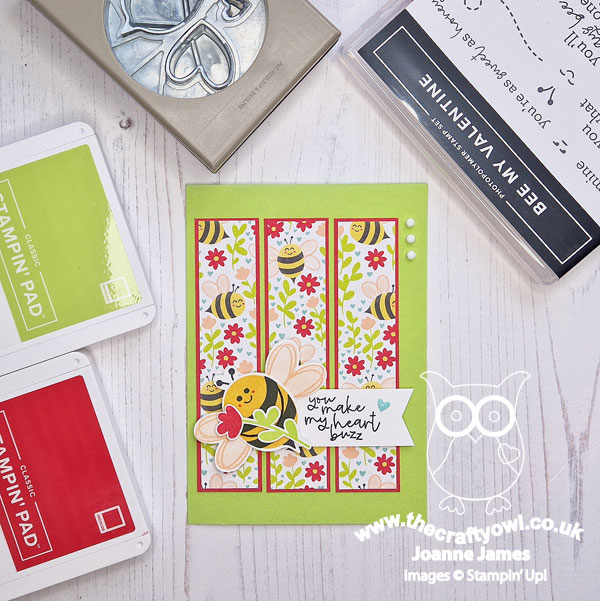
Table built using Product Table Builder by The Crafty Owl - Independent Stampin' Up! Demonstrator.

Bee Mine I Love You No Matter What AYSI314

by Joanne James5. January 2024 12:00

Happy New Year everyone - the cardmaking has officially begun! Today I'm sharing my design team card for our new challenge over at As you See It where our first challenge for the new year is my favourite, a sketch challenge, designed by our wonderful challenge leader and chief organiser, Heather C:


I love Heather's cascade of hearts - I thought it would be perfect for a cascade of buzzy bees and a showcase of some of the lovely new papers in the new January-April Mini Catalogue - take a look:


 Here's the low-down on today's card:

Bee Mine - Today's card is all about the paper - no surprise there then! The Bee Mine designer series paper has so many beautiful bee-inspired patterns. I chose a rather busy one for my background and added a simple diecut panel that I stamped with some 'bee lines' using one of the stamps in the 'Bee My Valentine' stamp set to create a little space to showcase my cascade of bees.


Snip, Snip - For my bee cascade, i used my paper snips scissors to fussy cut four different bees from another of the sheets in the pack, each with a different expression - they really are so comical! - and popped these up on dimensionals on top of my card base, having already added my sentiment banner too. Here's a close up for you:


Stampin' Up!'s Paper Snips Scissors really do make light work of fussy cutting shapes from paper in this way - the super sharp and pointed tips make it easy to get into even the smallest nooks and crannies. If you don't own a pair, I would highly recommend you invest in some - you won't regret it.

No Matter What - The sentiment from the 'Bee My Valentine' stamp set does have love as its theme, but like many of the greetings in this set they have a much broader use than for Valentine's Day alone. This one is heading to one of the James Juniors - I think it is a great reminder of a parent's unconditional love. 

Here is the visual summary of the key products used on today's project for you to pin for easy reference:


You can see all of my 'How To' summaries on my 'How To - Tips and Techniques' Pinterest board in case you've missed any. 

Here's a summary of our challenge rules:

  • Create any card, scrapbooking page, 3D project or packaging project that fits the challenge.
  • Please include the challenge graphic and link back to the challenge in your blog post. Turn off word verification so we can leave you lots of lovely comments. Make sure you link the post not the whole blog to the Linky. Use #AYSIXXX when uploading to a public gallery.
  • If you’re unsure about ‘the rules’, check the details under the Challenge Guidelines tab on the As You See It Challenge homepage.
  • In a sketch challenge, you are welcome to rotate or flip a sketch. You can replace shapes used such as substituting a circle panel for a square panel. However, we must be able to still see the basis of the original sketch in your finished product.
We look forward to seeing your creations in the AYSI gallery.

Enjoy your day and I'll be back tomorrow with another project. Until then, happy stampin'!


Stampin' Up! Supplies Used:

Table built using Product Table Builder by The Crafty Owl - Independent Stampin' Up! Demonstrator.

Bee Mine Sneak Peek TTT236

by Joanne James23. November 2023 18:00

It's Thursday and time for a new challenge over at TicTacToe! It's the turn of Team X to host this week and the lovely Elizabeth is our featured designer this week. This is the fun board that we are playing along with: 


I have a break from Christmas cards for you today! I decided to go from the top left corner on the diagonal with critters/free/patterned paper and using the layout over at Sunday Stamps I have a sneak peek of some product from the new Stampin' Up! mini catalogue that launches 4th January  - take a look:


Here's the low-down on today's card:

I don't usually share sneak peeks this early, but the new Bee Mine Suite is just SO cute! Whilst the stamp set is called 'Bee My Valentine' and does have some Valentine sentiments, it also has generic ones too and this is the perfect set to tell someone how much they mean to you. The stamp set has a coordinating bee punch that stamps out the body and wings and also includes a tiny heart. Today's card includes both a sentiment and stamped and punched bee, along with two of the Bee Mine designer series papers layered for my background:

It's difficult to see but I added some clear Wink of Stella to my bee wings for a little extra sparkle - adorable, even if I say so myself! Unless you're a demonstrator you have to wait until 4th January to order this fun suite; if you're not on my mailing list and would like to receive a copy of the new mini catalogue, do get in touch and I can make sure you receive a copy.

Here is the visual summary of the key products used on today's project for you to pin for easy reference:


You can see all of my Product and 'How To' summaries on my 'How To - Tips and Techniques' Pinterest board in case you've missed any. 

A tictactoe board offers so many creative possibilities - how does this week's board inspire you? Why not have a go? We would love to see you in the gallery and who knows - you might be selected for Designer's Choice and be eligible to be a guest designer on a future challenge. 

Enjoy your day; I'll be back tomorrow with another project for our new challenge over at Festive Friday and fear not - it will be another Christmas card! Until then, happy stampin'!


Stampin' Up! Supplies Used: 

Table built using Product Table Builder by The Crafty Owl - Independent Stampin' Up! Demonstrator.

Current Promotions

Stampin Cut and Emboss

Save up to 30% off on all your favourite kits from 1 to 31 October! 

Click here to see the current kits available and order yours online today.

Join My Team

It's always a great time to join Stampin’ Up! During October you can get even more in your starter kit! New team members can get £160 worth of products for only £99 + free business supplies + free shipping + all the fun being a part of Stampin’ Up! Stampin' Up! has something for everyone: join my growing team and benefit from my support to enjoy Stampin' Up! however you choose.

If you're interested, call me for a chat to understand how I can help you realise your goals. Alternatively, if you have already decided to sign up and you just can't wait, please click here for the link to the online form where you can sign up and order your starter kit right away! 

Shop Online

Access my online shop 24 x 7, 365 days of the year:

Current October hostess code:

9NKXDTTR

Shop Online

Scrapbooking

Stampin' Up! has introduced a new range of 12x12" scrapbooking product and kit - the full range is now available to purchase online. To download a copy of the new digital Scrapbooking Catalogue click here.

Mini Catalogue

BROWSE THE CATALOGUE

'Tis The Season - the new Stampin' Up! Mini Catalogue is here! For more details and to download your copy click here

2024-25 Annual Catalogue

BROWSE THE CATALOGUE

Click on the image to download your copy of the 2024-25 annual catalogue. For a full list of current SU! supplies, go to my online store. If you would like any help or advice, please drop me a line at joanne@thecraftyowl.co.uk or give me a call on 07773 421446 - I'd be happy to help.

Latest Kits!

Stampin Cut and Emboss

The Christmas Ornaments Kit and Card Keeper Kit are the latest kits in the online store - get yours here!

New Online Exclusives

There are new products available exclusively in the online store from 5 November - check them out here.

About Me

Hi I'm Joanne and live in Northampton and when I'm not looking after my husband and two beautiful children, am an avid crafter with a passion for all things Stampin' Up!

I must confess that I have never been a big rubber stamper - until I discovered Stampin' Up! that is. I love the fact that I can get such great results with co-ordinating stamps, inks, papers and punches - the possibilities are endless! Join me on my stamping journey as I share the things I love and be inspired to create amazing things yourself!

Follow Me

Monthly Newsletter

Box Builder

Click the button above to use Box Buster to create your custom box design using the Envelope Punch Board!

Kits Collection Now Available!

Stampin Cut and Emboss

The new Kits Collection from Stampin' Up! is now available!

Click here to see the current kits available and order yours online today.

I Design For


Stampin' Up Stuff

This is my personal blog and is not endorsed by Stampin’ Up! I hope you find it a plentiful source of ideas and personal inspiration but please don't copy my designs for contest submission or use for classes, publication or sale without express permission.