Smile with Daisy Lane for AYSI 224

by Joanne James24. April 2020 12:00

Today I'm sharing my design team card for our new challenge over at As you See It where it's time for a speed challenge:


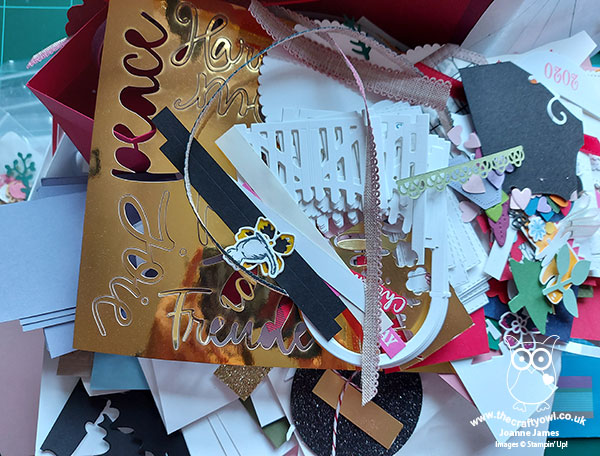
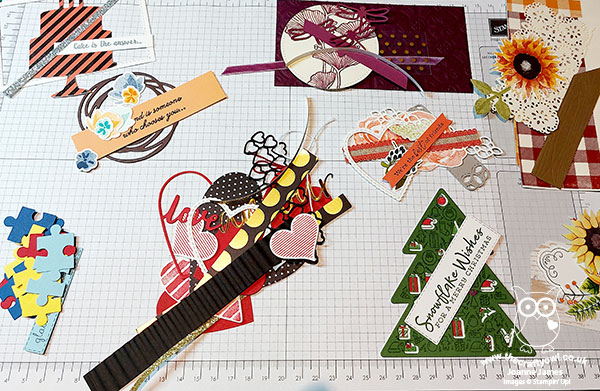
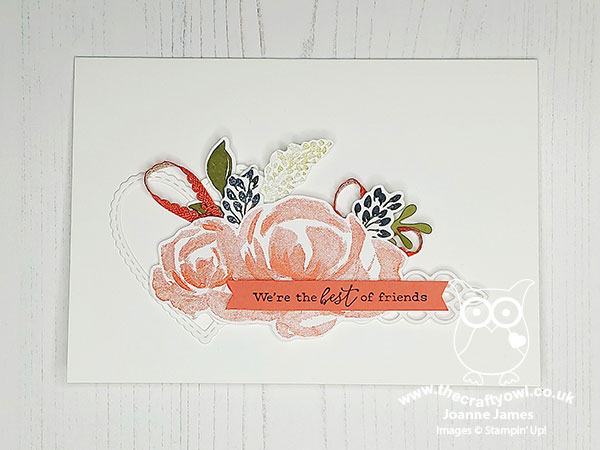
I also decided to inject a shot of bright colour with the CAS Colours and Sketches colour palette that I felt strangely drawn to this week for my speedily stamped card and pulled out an old favourite - take a look:


Here's the low-down on today's card:

Top Speed Tip: Pick A Punch - So this is really my top mass-production tip, but the reason I would always use a punch rather than die-cutting machine when mass producing is really because it saves time. Punches make light work and the Daisy Punch is a case in point. I've used it today with the Daisy Lane stamp set and I can confirm that both of these items are carrying over to the new Stampin' Up! annual catalogue in June; the other stamp that co-ordinates with the Daisy Punch, Daisy Delight, is not - so if you want to add this to your collection, do it now before it's gone forever. 

Always Be Prepared - Of course, if you want to create a card in under 10 minutes, the main thing is to be prepared! I had a clear idea of what I was going to create and made sure I had all of the items I needed to hand before I started the process. It's also worth keeping the design simple; this doesn't necessarily mean it needs to be one layer, but it shouldn't be overly complicated. I managed to achieve a number of different elements on my card in a short space of time: dry embossed background, heat embossed sentiment, stamped and punched flowers (x2) and a stamped and fussy cut fern, along with gemstone decoration. I was doing so well on time I decided to add a ring of rhinestones around my central clear faceted gem (I will miss these - they make such lovely daisy centres) - I just so happened to have a long strip from a retired rhinestone pack, so didn't need to place them individually which would have taken longer - I just adhered the strip in one motion. 

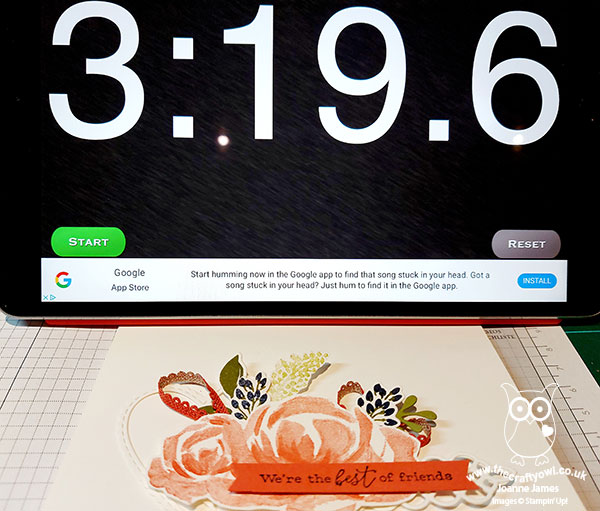
A Time Triumph - I am always pushing the time limit on a speed challenge, so imagine my surprise when I managed to finish this one in record time:

Yes, 7 minutes and 18 seconds, and that included stamping and punching a third daisy too, as I tore a petal off my first one as I curved the petals in haste with my bone folder! I was so pleased with myself I thought I would share a picture of my stopwatch!! How did I use my remaining minutes? Well, I took an aerial shot of my desk so that you can see the absolute chaos that creating in 7 minutes and 18 seconds takes:


Then I brushed the craft-a-math to one side to stamp a quick daisy on the inside panel too:


I really love this card - I think the bright blue background makes this bright daisy pop.

Here is the visual summary of the key products used on today's project for you to pin for easy reference:
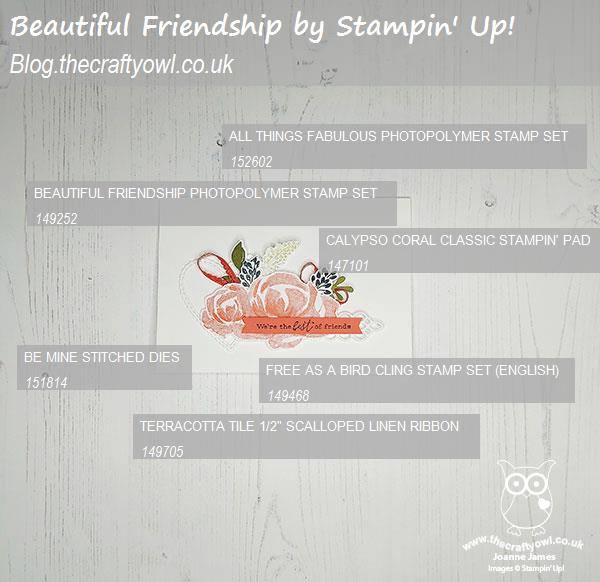
You can see all of my 'How To' summaries on my 'How To - Tips and Techniques' Pinterest board in case you've missed any. 

Before you put your creative thinking caps on, why not check out the blogs of the other As You See It team members:

Amy Jasper

Heather Cooper

Jan Clothier

Jane Knudsen

LeAnne Pugliese

Here's a summary of our challenge rules:

  • Create any card, scrapbooking page, 3D project or packaging project that fits the challenge.
  • Please include the challenge graphic and link back to the challenge in your blog post. Turn off word verification so we can leave you lots of lovely comments. Make sure you link the post not the whole blog to the Linky. Use #AYSIXXX when uploading to a public gallery.
  • If you’re unsure about ‘the rules’, check the details under the Challenge Guidelines tab on the As You See It Challenge homepage.
  • In a colour challenge, black or other neutral can be used in outlines and sentiments but no other colours should be included. Stampin’ Up colours are used for reference but colours that are a close match are welcome. 

We look forward to seeing your creations in the AYSI gallery.

Enjoy your day and I'll be back tomorrow with another project. Until then, happy stampin'!


Stampin' Up! Supplies Used:

Table built using Product Table Builder by The Crafty Owl - Independent Stampin' Up! Demonstrator.

A Rainbow of Varied Vases for AYSI 223

by Joanne James10. April 2020 12:00

Today I'm sharing my design team card for our new challenge over at As you See It where it's time for a theme challenge:


As promised, I've another rainbow card for you today! I decided that 'Varied Vases' would be the perfect way to incorporate my rainbow colours - take a look:


Here's the low-down on today's card:

I'm a big fan of the Varied Vases stamp set - I love the simple outline detailing and it has some lovely birthday sentiments too. My card is larger than usual (21cm x 11cm) which was necessary to accommodate all of my vases. I stamped a row of 14 overlapping vases in varying sizes, then added flowers to 7 of them and stamped the infills, before then stamping 7 vases in the same colours and punching them out with my Vases Builder Punch and popping them over some of the outlines on dimensionals for a little extra lift. I stamped water into the vase holding my violet flower stem and added a few pearls to finish. I stamped my shelf and sentiment and then finished this on the inside of my card with another flower vase: 

Here is the visual summary of the key products used on today's project for you to pin for easy reference:


You can see all of my 'How To' summaries on my 'How To - Tips and Techniques' Pinterest board in case you've missed any. 

Before you put your creative thinking caps on, why not check out the blogs of the other As You See It team members:

Amy Jasper

Heather Cooper

Jan Clothier

Jane Knudsen

LeAnne Pugliese

Here's a summary of our challenge rules:

  • Create any card, scrapbooking page, 3D project or packaging project that fits the challenge.
  • Please include the challenge graphic and link back to the challenge in your blog post. Turn off word verification so we can leave you lots of lovely comments. Make sure you link the post not the whole blog to the Linky. Use #AYSIXXX when uploading to a public gallery.
  • If you’re unsure about ‘the rules’, check the details under the Challenge Guidelines tab on the As You See It Challenge homepage.

We look forward to seeing your creations in the AYSI gallery.

What are your plans for this Good Friday? I will be spending some time in the garden enjoying the warm weather and planting some new raspberry canes whilst reluctantly also continuing to plough through my ironing pile. The National Theatre is one of the many companies that are streaming live performances for free whilst we are all under lockdown and this week it's the turn of 'Jane Eyre', one of my most favourite books of all time, so I might watch this at the same time for some welcome distraction! There may well be some baking too - Easter cupcakes, perhaps?!

Enjoy your day and I'll be back tomorrow with another project. Until then, happy stampin'!


Stampin' Up! Supplies Used:

Table built using Product Table Builder by The Crafty Owl - Independent Stampin' Up! Demonstrator.

Flowering Foils Metallics Birthday Card for AYSI 222

by Joanne James27. March 2020 12:00

Today I'm sharing my design team card for our new challenge over at As you See It where for this fortnight we have a fun recipe challenge for you:


I often struggle with this kind of recipe challenge, but must confess that along with Julee's Mojo Monday sketch for my layout (sketch 3) today's card came together quite easily - take a look:


Here's the low-down on today's card:

Flowering Foils - I decided to use the Flowering Foils Specialty Designer Series Paper as the basis for today's card. This is one of the second-release items that can be yours FREE with a purchase of £45 or more during the current Sale-A-Bration promotion and has been super popular with my customers, so I was keen to show them how they could use it. I used a rose-gold hatch patterned piece along with a piece of silver foil cut using my Stitched Rectangle Framelits for two of my layers, then fussy cut one of the flowers from another sheet to form the centrepiece of my card. I backed my flower with a stitched vellum circle to preserve the shape of the sketch but not detract from the detail of the bloom itself. These papers are so, so pretty and the photographs in today's post really don't do them justice - it is so difficult to photograph foil!  

Sparkle, Sparkle - To compliment the foiled papers, I decided to add lots of sparkle and shine. I used some white ribbon with a silver metallic edge for my bow, along with some silver twine behind my flower and a sprinkling of champagne rhinestone jewels and clear epoxy droplets for extra sparkle. I even added a silver (retired) tassle - then had to stop myself before I went really overboard!! 

Label Me Bold - Whilst this card would make a lovely wedding card, I have no need for one so decided instead that it would work equally well as a special birthday card. I inked up my 'Label Me Bold' stamp set for the first time to add a simple silver heat-embossed sentiment to my card. You can see that better on the photo below:


This sentiment stamp set was one of the first I bought from the new seasonal catalogue as I've been wanting a set like this for ages, but this is the first time I've inked it up. I love the clean, block font which is perfect to cut through the detail on a card like this.

So what do you think? Do you love these Flowering Foils as much as me?

Here is the visual summary of the key products used on today's project for you to pin for easy reference:


You can see all of my 'How To' summaries on my 'How To - Tips and Techniques' Pinterest board in case you've missed any. 

Before you put your creative thinking caps on, why not check out the blogs of the other As You See It team members:

Amy Jasper

Heather Cooper

Jan Clothier

Jane Knudsen

LeAnne Pugliese

Here's a summary of our challenge rules:

  • Create any card, scrapbooking page, 3D project or packaging project that fits the challenge.
  • Please include the challenge graphic and link back to the challenge in your blog post. Turn off word verification so we can leave you lots of lovely comments. Make sure you link the post not the whole blog to the Linky. Use #AYSIXXX when uploading to a public gallery.
  • If you’re unsure about ‘the rules’, check the details under the Challenge Guidelines tab on the As You See It Challenge homepage.

We look forward to seeing your creations in the AYSI gallery.

Enjoy your day and I'll be back tomorrow with another project. Until then, happy stampin'!


Stampin' Up! Supplies Used:

Table built using Product Table Builder by The Crafty Owl - Independent Stampin' Up! Demonstrator.

Happy Birthday To You Card and Gift Voucher Set AYSI221

by Joanne James13. March 2020 12:00

Today I'm sharing my design team card for our new challenge over at As you See It where it's time for a 'fill in the blank' challenge designed by me:


As a cardmaker I like to send all kinds of cards but my favourite type of card to send is a birthday card - I love to let people know I'm thinking of them on their special day. Here's one I made recently for a sweet friend of mine:


Here's the low-down on today's card:

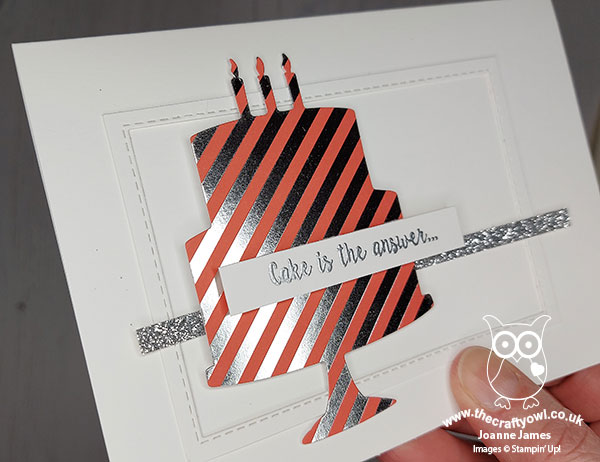
Celebrate with Sale-A-Bration - I used a single stamp set on today's card - the 'Happy Birthday To You' stamp set is one of the sets that can be yours free with a £45 purchase during Sale-A-Bration and is perfect for celebratory cards, including birthdays. It includes this gorgeous floral cake and a few sentiments and makes a great one-layer card - perfect for #SimpleStamping. I heat embossed my cake and sentiment in silver and coloured with my Blends markers in So Saffron and Seaside Spray - a little fussy cutting and some mats and layers in my feature colours, along with a few rhinestones for extra sparkle add a touch of glamour to this #SimpleStamping card and help to make it a real standout, yet it really is just stamps, ink and paper. 

Not Into Fussy Cutting? - I fussy cut the flowers and sentiment on my card today and it really was quite straight forward, but if fussy cutting isn't your thing, there is a set of co-ordinating Birthday Dies available as part of the Co-ordination Product Release (you can read more about that in my earlier post here)  that are useful for cutting out the cake and flowers. The dies would be especially useful if you wanted to make a batch in one go and save yourself some valuable time. 

Stampin' Up! Gift Vouchers - The Perfect Gift - My card was actually the second thing I created to share with you today. I designed it to co-ordinate with a gift voucher wallet, which is a replica of one I made recently for one of my lovely customers who was celebrating a milestone birthday. Did you know that I provide Stampin' Up! gift vouchers (for any amount) that you can purchase for yourself or a friend or loved one - there's nothing nicer to give a stamper as a gift!! When I have a request for gift vouchers, I love to create a fancy wallet for them - after all, they are a gift in themselves. The one below is a pared-down version of the one that I designed for the lovely Jane, as hers included big silver glimmer numbers too. I liked it so much I thought I would make another one - I find myself using gift wallets more and more, especially for my growing niece and nephew who appreciate money above most other things these days and it's nice to at least be able to make it look more like a gift than to just tuck a few bank notes into a card. For my gift wallet I fussy cut the cake too, and added the whole thing to a belly band of Seaside Spray DSP covered in some (retired) silver polka dot acetate and decorated with a ribbon bow, this time putting the 'Happy Birthday' sentiment front and centre:

So pretty, even if I say so myself! Here's a photo of both the card and co-ordinating gift voucher together:


I, for one, would be thrilled to receive this little combo for my birthday - or Mother's Day ... or pretty much any day really!! I'm also linking today's card up with the peeps over at Time Out Challenges who are celebrating their 6th birthday - congratulations! - since my project is for birthdays and includes the option of fussy cutting. Here is the visual summary of the key products used on today's project for you to pin for easy reference:


You can see all of my 'How To' summaries on my 'How To - Tips and Techniques' Pinterest board in case you've missed any. 

Before you put your creative thinking caps on, why not check out the blogs of the other As You See It team members:

Amy Jasper

Heather Cooper

Jan Clothier

Jane Knudsen

LeAnne Pugliese

Here's a summary of our challenge rules:

  • Create any card, scrapbooking page, 3D project or packaging project that fits the challenge.
  • Fill in the blanks with the words that are right for you and then create your project with those words in mind. Tell us, in your blog or on your site, what words you used.
  • Please include the challenge graphic and link back to the challenge in your blog post. Turn off word verification so we can leave you lots of lovely comments. Make sure you link the post not the whole blog to the Linky. Use #AYSIXXX when uploading to a public gallery.
  • If you’re unsure about ‘the rules’, check the details under the Challenge Guidelines tab on the As You See It Challenge homepage.
  • In a Fill in the Blank challenge, complete the sentence in the Challenge Banner with the phrase that is true for you and create your project using the words you used. Tell us what you said in your blog or on your site.

We look forward to seeing your creations in the AYSI gallery.

Enjoy your day and I'll be back tomorrow with another project and an update reading last weekend's successful craft retreat now that I'm (almost!) recovered! Until then, happy stampin'!


Stampin' Up! Supplies Used:


Table built using Product Table Builder by The Crafty Owl - Independent Stampin' Up! Demonstrator.

An Easter Chick for AYSI 220

by Joanne James28. February 2020 12:00

As I type my post it's miserable and raining outside so I'm glad to have something bright and cheery to share with you! Today I'm sharing my design team card for our new challenge over at As you See It where it's time for a cheery colour challenge from the lovely LeAnne:


I used Jen B's current sketch over at Freshly Made Sketches for my layout and decided LeAnne's colours would be perfect for a sweet Easter chick - take a look:


Here's the low-down on today's card:

A Colour Confession - I feel I need to confess upfront as the eagle-eyed amongst you will have spotted I used Daffodil Delight in place of the Mango Melody that LeAnne chose on today's card. This was a genuine oversight on my part (lots on at the moment and having designed my card on the move just grabbed for the wrong supplies!) I didn't have time to remake, which is a shame as I'm sure my cute chick would look equally warm and fluffy in Mango Melody, but I'm hoping you will all forgive me. It does give me an opportunity to point out though that if you are ever put off participating in colour challenges because you don't have the 'correct' colour to hand, most of them - and certainly those for As You See It and The Paper Players which I design for - are perfectly ok for you to substitute with the nearest colour in your stash, whatever the brand. I actually used only the smallest drop of Grapefruit Grove - for my chick's beak and legs - and the same for Poppy Parade - for his comb and also to accent my banner with some gorgeous (retired) Poppy Parade mini striped ribbon. 

Welcome Easter - The star of my card today is the super-cute Easter chick. He features in the 'Welcome Easter' stamp set in the Spring mini catalogue and is perfect for some quick colouring. The set also features a sweet lamb and cute bunny (keep an eye out for him in another post over the next few days, as he will be making an appearance!) along with some Easter/baby sentiments and a few smaller stamps, a couple of which I used to add a little decoration to the inside of my card:


How cute is that?!

Gingham Gorgeousness - Lastly, I embossed my cardfront with my Subtle Embossing Folder for some light texture and interest and used a piece of gingham to make a quick banner using my Triple Banner Punch (so useful!) out of the now retired Gingham Gala DSP. This paper was a deliberate choice, as I wanted to incorporate a little more white into my card. I've linked to the Brights DSP pack below though as the gingham pattern it contains is a good match that is readily available. There is definitely something about colourful gingham that makes me feel like Spring - does it give you that feeling too?

Here is the visual summary of the key products used on today's project for you to pin for easy reference:


You can see all of my 'How To' summaries on my 'How To - Tips and Techniques' Pinterest board in case you've missed any. 

Before you put your creative thinking caps on, why not check out the blogs of the other As You See It team members:

Amy Jasper

Heather Cooper

Jan Clothier

Jane Knudsen

LeAnne Pugliese

Here's a summary of our challenge rules:

  • Create any card, scrapbooking page, 3D project or packaging project that fits the challenge.
  • Please include the challenge graphic and link back to the challenge in your blog post. Turn off word verification so we can leave you lots of lovely comments. Make sure you link the post not the whole blog to the Linky. Use #AYSIXXX when uploading to a public gallery.
  • If you’re unsure about ‘the rules’, check the details under the Challenge Guidelines tab on the As You See It Challenge homepage.
  • In a colour challenge, black or other neutral can be used in outlines and sentiments but no other colours should be included. Stampin’ Up colours are used for reference but colours that are a close match are welcome.

We look forward to seeing your creations in the AYSI gallery.

Enjoy your day and I'll be back tomorrow with another project. Until then, happy stampin'!


Stampin' Up! Supplies Used:

Table built using Product Table Builder by The Crafty Owl - Independent Stampin' Up! Demonstrator.

Honey Bee Shaker Card for AYSI 219

by Joanne James14. February 2020 12:00

Today I'm sharing my design team card for our new challenge over at As you See It where it's time for a sketch challenge:


My card today is all about the bees - take a look and you'll see what I mean:


Here's the low-down on today's card:

Shake It Up - Try as I might, I couldn't get past the fact that the shape on today's sketch looked like a beehive, so in the end I decided to roll with it and make a shaker card, because a shaker card is always fun, right? I stamped my beehive in Mango Melody then used this as the base for my beehive. I did take a little liberty with the sketch, in as much as I 'moved' my sentiment and used the one from the Honey Bee stamp set that fits around the curve of the beehive rather than place it bottom right on my card, as I wanted to use the big bee diecut and there wasn't really room for a sentiment too.  

It's In The Detail - The Detailed Bee Dies really make this card easy: I used them to cut out my beehive window, along with a couple of stamped bees and a pair of the teeny tiny hearts in this set too - well, today is Valentine's Day after all! I then cut out two of the honeycomb pieces, one in Daffodil Delight and one in Mango Melody, and cut them apart to create two honeycomb strips to mimic the banners of the sketch. I also used some retired gold flakes that are honeycomb shaped; along with the clear Wink of Stella on the bee's wings, this gives my shaker a nice sparkle. Here's a close up so that you can see it in all its glorious sparkly detail: 

A Bee Bonanza - Lastly, to my background paper. I resisted the urge to use the gorgeous Golden Honey Specialty DSP that is one of the current free Sale-A-Bration gifts and based the whole colour scheme for today's card on the bright stripes found in the Birthday Bonanza designer series paper pack. This paper is designed to co-ordinate with the 'Bonanza Buddies' birthday set featuring the cute animals, but this is a great example of how the more neutral patterns in a paper pack can be used successfully with other sets too.

Here is the visual summary of the key products used on today's project for you to pin for easy reference:


You can see all of my 'How To' summaries on my 'How To - Tips and Techniques' Pinterest board in case you've missed any. 

Before you put your creative thinking caps on, why not check out the blogs of the other As You See It team members:

Amy Jasper

Heather Cooper

Jan Clothier

Jane Knudsen

LeAnne Pugliese

Here's a summary of our challenge rules:

  • Create any card, scrapbooking page, 3D project or packaging project that fits the challenge.
  • Please include the challenge graphic and link back to the challenge in your blog post. Turn off word verification so we can leave you lots of lovely comments. Make sure you link the post not the whole blog to the Linky. Use #AYSIXXX when uploading to a public gallery.
  • If you’re unsure about ‘the rules’, check the details under the Challenge Guidelines tab on the As You See It Challenge homepage.
  • In a sketch challenge, you are welcome to rotate or flip a sketch. You can replace shapes used such as substituting a circle panel for a square panel. However, we must be able to still see the basis of the original sketch in your finished product. 

We look forward to seeing your creations in the AYSI gallery.

Enjoy your day - do you have special Valentine's Day plans? There are Valentine's themed Friday treats for the James Juniors when I collect them from school today and I'm sending cards to everyone of course; so far I am at a ratio of cards sent 3: cards received 0 - no surprise there then!! Otherwise today is much the same as any other in the James household. Do let me know if you are being wined and dined and experiencing a day filled with romance, hearts and flowers - and above all, enjoy it! I'll be back tomorrow with another project. Until then, happy stampin'!


Stampin' Up! Supplies Used:

Table built using Product Table Builder by The Crafty Owl - Independent Stampin' Up! Demonstrator.

Puppies, Paw Prints and Shades of Brown For AYSI 218

by Joanne James31. January 2020 12:00

Today I'm sharing my design team card for our new challenge over at As you See It where it's time for the often-dreaded speed challenge:


Yes - create a card in under 10 minutes, this time using shades of brown! I would usually say that brown is quite an uninspiring starting point for me, however I actually had a couple of ideas right off the bat for a change! I worked up one of those and am quite pleased with the results - take a look:


Here's the low-down on today's card:

A Kennel of Dogs - Today's card features a kennel of dogs, brown dogs to be precise, courtesy of some Crumb Cake, Soft Suede and Early Espresso cardstock and my Dog Builder Punch. As an aside, did you know that there are a number of collective nouns for dogs and in addition to the more commonly used 'pack', you can also refer to a group as a 'kennel of dogs'. I much prefer the latter when it concerns domestic pups so decided to go with that as my dogs are certainly not at all wolf-like, which is what always comes to my mind when I think of a pack! I simply punched a whole bunch of dog shapes and then positioned them somewhat randomly on my card to create a pattern, allowing some to overhang the edges before trimming to size.

Puppies and Pawprints - The sentiment and pawprints on the heart come from the 'Happy Tails' stamp set and are perfect if you need one of those tricky cards to send to someone mourning the loss of their four-legged friend. I stamped mine onto Whisper White and used a heart framelit from the retired Sweet and Sassy Framelits set to cut it out and popped it up on dimensionals; the sentiment does just about fit into the straight-edged heart punch from the new heart punch pack in the Spring Mini catalogue, but is a little more snug. Using the punch would save some time too but I knew the sentiment would fit the framelit and I had mine ready to go!

I Feel The Need For Speed - So the key to a speed stamping challenge has to be simplicity, right? My card has very little stamping, so how long did it take to complete? It actually took me 9 minutes and 8 seconds on the first attempt, because the time was taken up arranging my punched dog shapes and glueing them in place with Tombo. Once complete, I liked the card so much I decided to punch a bunch more dog shapes and used the same layout to create another two identical cards, and did both in less total time than it took me to make the first one! If I had used Snail adhesive, I probably could have saved even more time. So I challenge you - if you CASE my card, do let me know how long it takes you to complete - it is an easy one for under 10 minutes once you have the layout! I'm going to make a few more using different colours and using the Cat Punch.

Here is the visual summary of the key products used on today's project for you to pin for easy reference:


You can see all of my 'How To' summaries on my 'How To - Tips and Techniques' Pinterest board in case you've missed any. 

Before you put your creative thinking caps on, why not check out the blogs of the other As You See It team members:

Amy Jasper

Heather Cooper

Jan Clothier

Jane Knudsen

LeAnne Pugliese

Here's a summary of our challenge rules:

  • Create any card, scrapbooking page, 3D project or packaging project that fits the challenge.
  • Please include the challenge graphic and link back to the challenge in your blog post. Turn off word verification so we can leave you lots of lovely comments. Make sure you link the post not the whole blog to the Linky. Use #AYSI218 when uploading to a public gallery.
  • If you’re unsure about ‘the rules’, check the details under the Challenge Guidelines tab on the As You See It Challenge homepage.
  • In a colour challenge, black or other neutral can be used in outlines and sentiments but no other colours should be included. Stampin’ Up colours are used for reference but colours that are a close match are welcome.
  • Don't forget to tell us how long it took to create your speed-stamped creation!

We look forward to seeing your creations in the AYSI gallery.

Enjoy your day and I'll be back tomorrow with another project. Until then, happy stampin'!


Stampin' Up! Supplies Used:

Table built using Product Table Builder by The Crafty Owl - Independent Stampin' Up! Demonstrator.

Many Hearts to Say You Are Loved AYSI 217

by Joanne James17. January 2020 12:00

Today I'm sharing my design team card for our new challenge over at As you See It where it's time for a timely theme challenge:


I used the current Freshly Made Sketches layout for my card and despite Heather's beautiful rustic heart image on today's badge, I chose to go full on red for today's love theme - take a look:


 Here's the low-down on today's card:

A Card That Is All Heart - When I saw the new Detailed Hearts Die in the Stampin' Up! Spring-Summer mini catalogue, I knew I would have to have it! This is such a versatile die for layering and works not only for Valentine's Day but lots of other occasion cards too. It's also great for making multiple cards at a time: by running it through the die cutting machine with a few different colours of co-ordinating cardstock, you can switch out and mix up the hearts and have a few cards made with relatively little extra effort - and I'm all for saving time! Here I paired mine with some retired Real Red Glimmer paper left over from my Christmas crafting and switched out some of the hearts and left others empty for the white mat layer to show through. I like the added texture this gives whilst retaining the monochromatic look. 

A Crafty Curveball - Whilst I love the Detailed Hearts Die 'as it comes', I feel obliged to point out that I didn't use it that way on today's card! I saw Jacquie's sketch over at FMS this week and paled at that vertical curve, knowing that I didn't have any dies that would work. Whilst considering my options (one of which was sponging - check out Amy O'Neill's card on the FMS challenge page (link above) to see a great example of this) I suddenly had a brainwave! The Detailed Hearts Die has an irregular edge to it anyway, but I carefully strategically snipped away some of the hearts along the right hand side to create a more defined curve. I also stuck some of the hearts that I'd removed elsewhere to my base in some of the gaps, to further emphasise it. Clever, right? Well, I thought so ;-) You can see the actual pattern of the die in the product table link below, so be sure to check that out.

You Are Loved - I wanted my hearts to be the star of today's card, so kept my sentiment simple. I didn't want to use this card as a Valentine's card, so by using the 'You are loved' sentiment from the 'Forever Lovely' stamp set, I can use it anytime to let someone know how much they mean to me. This card will probably make it's way to Rebecca in her school bag at some point - even as a teenager, she still has a soft spot for anything with sequins, sparkle and glitter!

Here is the visual summary of the key products used on today's project for you to pin for easy reference:


You can see all of my 'How To' summaries on my 'How To - Tips and Techniques' Pinterest board in case you've missed any. 

Before you put your creative thinking caps on, why not check out the blogs of the other As You See It team members:

Amy Jasper

Heather Cooper

Jan Clothier

Jane Knudsen

LeAnne Pugliese

Here's a summary of our challenge rules:

  • Create any card, scrapbooking page, 3D project or packaging project that fits the challenge.
  • Fill in the blanks with the words that are right for you and then create your project with those words in mind. Tell us, in your blog or on your site, what words you used.
  • Please include the challenge graphic and link back to the challenge in your blog post. Turn off word verification so we can leave you lots of lovely comments. Make sure you link the post not the whole blog to the Linky. Use #AYSIXXX when uploading to a public gallery.
  • If you’re unsure about ‘the rules’, check the details under the Challenge Guidelines tab on the As You See It Challenge homepage.
  • In a colour challenge, black or other neutral can be used in outlines and sentiments but no other colours should be included. Stampin’ Up colours are used for reference but colours that are a close match are welcome.
  • In a sketch challenge, you are welcome to rotate or flip a sketch. You can replace shapes used such as substituting a circle panel for a square panel. However, we must be able to still see the basis of the original sketch in your finished product.
  • In a Fill in the Blank challenge, complete the sentence in the Challenge Banner with the phrase that is true for you and create your project using the words you used. Tell us what you said in your blog or on your site.

We look forward to seeing your creations in the AYSI gallery.

Enjoy your day; I'm still wading through paperwork, but will be taking a break to visit the hairdressers for my monthly trim - my one luxury that I look forward to each month! Not only does it keep my hair looking good, it's a great opportunity for a natter - I've known my hairdresser for 20 years and now consider her a good friend! We often joke that she could cut my hair with her eyes closed, although thankfully she's never tried it! Anyone else out there have a hairdresser who they wouldn't want to give up? If mine ever shut up shop, I'd be beside myself! I'll be back tomorrow with another project. Until then, happy stampin'!


Stampin' Up! Supplies Used:

Table built using Product Table Builder by The Crafty Owl - Independent Stampin' Up! Demonstrator.

Feels Like Frost New Year Inspiration AYSI 216

by Joanne James3. January 2020 12:00


This is my second post today - if you missed it, you can read my earlier post about Sale-A-Bration and the new Spring-Summer mini catalogue here. In this post I'm sharing my design team card for our first challenge of the new year over at As you See It where it's time for a seasonally-themed recipe challenge:


I used Amy's versatile layout over at Freshly Made Sketches for the design of my card, then grabbed my recipe ingredients and set to work. This is what I came up with:


Here's the low-down on today's card:

A Hint of Hammered Metal - Today's card uses some unusually wintery product, considering it is the launch day for the Spring-Summer mini catalogue, but whilst lots of the items used are from the Autumn-Winter seasonal catalogue, it's still all available (kind of!). Firstly the hammered metal embossing folder that I used for my silver foil background layer is a carryover product and continues to be available to purchase. You can't see much of the effect on today's card, but it does look great on a larger panel, adding lots of great texture and detail. 

Au Revoir Feels Like Frost - I decided to use a piece of foiled snowflake Feels Like Frost DSP for the main rectangle on the front of my card. Whilst we have bid farewell to this popular paper, it is for the first time an 'au revoir' rather than a goodbye forever - it is one of the favourite items that will return again with the launch of the 2020 Autumn-Winter mini catalogue - yay! So if you don't have a stash of this paper already, you've only another 7 months to wait until you can buy some more!!

New Year Inspiration - The sentiment on today's card is taken from a brand new set, called 'Beautifully Braided'. I had this set out on my desk as it features in my January technique card class and couldn't resist using these uplifting words on my card today. As the Headmaster at Ben's school often says to the children, "If you can be only one thing, be kind" - words to live by, in 2020 and beyond I think. Finally, a sprinkling of rhinestones completes my card.

Here is the visual summary of the key products used on today's project for you to pin for easy reference:


You can see all of my 'How To' summaries on my 'How To - Tips and Techniques' Pinterest board in case you've missed any. 

Before you put your creative thinking caps on, why not check out the blogs of the other As You See It team members:

Amy Jasper

Heather Cooper

Jan Clothier

Jane Knudsen

LeAnne Pugliese

Here's a summary of our challenge rules:

  • Create any card, scrapbooking page, 3D project or packaging project that fits the challenge.
  • Fill in the blanks with the words that are right for you and then create your project with those words in mind. Tell us, in your blog or on your site, what words you used.
  • Please include the challenge graphic and link back to the challenge in your blog post. Turn off word verification so we can leave you lots of lovely comments. Make sure you link the post not the whole blog to the Linky. Use #AYSIXXX when uploading to a public gallery.
  • If you’re unsure about ‘the rules’, check the details under the Challenge Guidelines tab on the As You See It Challenge homepage.

We look forward to seeing your creations in the AYSI gallery.

Enjoy your day and I'll be back tomorrow with another project. Until then, happy stampin'!


Stampin' Up! Supplies Used:

Table built using Product Table Builder by The Crafty Owl - Independent Stampin' Up! Demonstrator.


Santa and The Magic Of Christmas for AYSI 215

by Joanne James6. December 2019 12:00

Today I'm sharing my design team card for our new challenge over at As you See It where it's time for a festive 'fill in the blank' challenge:


There is so much that fills me with joy during the festive season but there can only be one way for me to complete this sentence - take a look:


Yes it's Santa and the magic of Christmas that brings me joy at this time of year. Here's the low-down on today's card:

Jolly Season Dies - I love the dies in particular that feature in the Night Before Christmas Suite; in addition to the die to cut out that large jolly Santa stamp, there are two fabulous sentiment diecuts and this delightful silhouette of Santa in his sleigh being pulled by his reindeer. This is one of those dies that make a great feature on a card and if you don't have it, you might like to know that it is discounted by 20% as part of the current year end closeouts, whilst supplies last.  

A Brayered Night Sky - I made this card with my stamp class earlier this week, which featured brayering using the sponge brayers. This was a refresher for some and a first time experience for others and the night sky gave the perfect opportunity to experiment. Having masked off the slope across the bottom using a post-it note, I then brayered from the top down in Pretty Peacock then added some Night of Navy on the upper outer edges. The sponge brayers are really easy to use and a little patience is all it takes to build up a night sky full of colour. A sprinkling of silver stars to back the flying sleigh is all that is needed to provide the perfect backdrop. 

In A Word - The word 'Believe' from the 'Holly Jolly Christmas' stamp set seemed a fitting sentiment to complete my card - after all, for those of us who believe in Santa and the magic of Christmas there is the opportunity for true holiday joy. 

Here is the visual summary of the key products used on today's project for you to pin for easy reference:


You can see all of my 'How To' summaries on my 'How To - Tips and Techniques' Pinterest board in case you've missed any. 

So I really love this card, however as I was writing up my post it occurred to me that maybe the first reindeer, aka Rudolf, should perhaps have been given a shiny red nose to light the way. What do you think - would this make a fun addition? Do leave me a comment below, I'd love to know your thoughts.

Enjoy your day and I'll be back tomorrow with another project. Until then, happy stampin'!


Stampin' Up! Supplies Used:

Table built using Product Table Builder by The Crafty Owl - Independent Stampin' Up! Demonstrator.

Promotions

BROWSE THE CATALOGUE

Bonus Days are here! Shop between 3-31 July and spend £45 and earn a £4.50 coupon to be redeemed during August! Shop online with me here.

Shop Online

Access my online shop 24 x 7, 365 days of the year:

Current July hostess code:

3NR3FB9W

Shop Online

2024-25 Annual Catalogue

BROWSE THE CATALOGUE

Click on the image to download your copy of the 2024-25 annual catalogue. For a full list of current SU! supplies, go to my online store. If you would like any help or advice, please drop me a line at [email protected] or give me a call on 07773 421446 - I'd be happy to help.

Join My Team

t's always a great time to join Stampin’ Up! New team members can get £130 worth of products for only £99 + free business supplies + free shipping + all the fun being a part of Stampin’ Up! Stampin' Up! has something for everyone: join my growing team and benefit from my support to enjoy Stampin' Up! however you choose.

If you're interested, call me for a chat to understand how I can help you realise your goals. Alternatively, if you have already decided to sign up and you just can't wait, please click here for the link to the online form where you can sign up and order your starter kit right away! 

Latest Kits!

Stampin Cut and Emboss

The fabulous Scenic Route Travel Journal Kit is perfect for summer and costs £21; the new Garden of Thanks kit costs £22 for 9 cards and both are available now - get yours here!

New Online Exclusives

There are new products available exclusively in the online store from 3 July - check them out here.

About Me

Hi I'm Joanne and live in Northampton and when I'm not looking after my husband and two beautiful children, am an avid crafter with a passion for all things Stampin' Up!

I must confess that I have never been a big rubber stamper - until I discovered Stampin' Up! that is. I love the fact that I can get such great results with co-ordinating stamps, inks, papers and punches - the possibilities are endless! Join me on my stamping journey as I share the things I love and be inspired to create amazing things yourself!

Follow Me

Monthly Newsletter

Box Builder

Click the button above to use Box Buster to create your custom box design using the Envelope Punch Board!

Kits Collection Now Available!

Stampin Cut and Emboss

The new Kits Collection from Stampin' Up! is now available!

Click here to see the current kits available and order yours online today.

I Design For


Stampin' Up Stuff

This is my personal blog and is not endorsed by Stampin’ Up! I hope you find it a plentiful source of ideas and personal inspiration but please don't copy my designs for contest submission or use for classes, publication or sale without express permission.