More Details About The Stampin' Up! Colour Revamp

by Joanne James10. April 2018 19:30


I hope you are all enjoying the retiring lists - I'm sure, like me, you will be sad to see some of the items on them go, but on the bright side - I can assure you there is plenty more good coming our way as the new annual catalogue is AWESOME (yes, it is worthy of capital letters!)

As promised today, I have some more news for you on the colour revamp. There is lots of information floating around the internet on this already and not all of it accurate, so here are the main things you need to know right now:

Stampin' Up! has announced that there will be a change to many of the core colours as part of a colour revamp, as opposed to a colour refresh (impacting fewer colours), in the 2018-2019 annual catalogue. No changes have been made to the core colour offering since 2013 and it remains part of Stampin' Up!'s plan to update colours every three to five years. 

In terms of numbers, the overall changes can be summarised as follows:

In a nutshell:

  • We are keeping 27 of the existing core colours
  • 13 core colours are going away (in addition to the 2016-18 in-colours, although Flirty Flamingo is leaving as an in-colour and returning as a core colour)
  • We are adding 10 new core colours
  • We are adding 6 returning In Colours that will now be core colours (colours offered in the past that will now be available again)

At this stage, the main colours you need to be concerned about are the departing in-colours that I highlighted in yesterday's post and in addition those 13 core colours that are going away. They are shown below for your reference:

If any of these colours are favourites of yours, then now is the time to stock up on ink pads, cardstock, reinkers or co-ordinating accessories before they are gone forever. Availability of individual ink pads and re-inkers for the 13 Classic colours that are retiring ONLY will be guaranteed until May 7th. After that, ink pads and re-inkers will join cardstock, ink pad collections and accessories which will already be available only while stocks last until 31st May. 

To make it easier for you, I have included a table below that links directly to the online store listing each of the products in the retiring Classic colours that are currently still available at time of posting - the pictures are quite small as there is a lot to fit in!

Table built using Product Table Builder by The Crafty Owl - Independent Stampin' Up! Demonstrator.

If you need the links for the retiring in-colours, you can find those in yesterday's post here.

I will be sharing the details of the new in-colours and the new colours joining our core collections in a future post; meanwhile, I am going to include here the 6 previous in-colours that are returning to join those core colour collections - I know this will cause lots of people to whoop with joy to see old favourites returning on a permanent basis:

Who else is as excited as me to see the return of Blackberry Bliss?! I think that's more than enough information for one post - I will post separately about the changes to ink pad design as I know this is something that you also are keen to know more about, based on the enquiries I've been fielding today, but didn't want to overload you with information - there really is a lot to take in.

Back soon with a creative post - meanwhile, get those retiring colour orders in before it's too late! Happy shopping!


Going Going Gone - The List of Retiring Products Has Been Announced!

by Joanne James9. April 2018 20:00


It's here - the list of products that will be retiring from this year's annual and Spring-Summer seasonal catalogues has been announced!

04.18_TH_OC_FLYER_RETIRING_LIST_EU


You can see and download the full list of items retiring from the current Spring-Summer catalogue by CLICKING HERE.

04.18_TH_AC_FLYER_RETIRING_LIST_EU

You can see and download the full list of items retiring from the current Annual catalogue by CLICKING HERE.

Retiring products are only available WHILE STOCKS LAST, so if you've still items on your wish list from this year's annual or spring-summer seasonal catalogues, you need to check the retiring lists and if they're on it put an order in pronto! Don't forget to add this month's online hostess code: YDNWGUGS

Some of the things I will miss most that feature on this list include:

Table built using Product Table Builder by The Crafty Owl - Independent Stampin' Up! Demonstrator.


I will do a further review tomorrow, however if you want to stock up on any of the retiring in-colour items and you haven't already done so, especially re-inkers, I would urge you to do that sooner rather than later as they are always the first things to sell out.

Click on the links below to take you directly to my online shop to purchase any of the 2016-18 in-colour items that are retiring:

Table built using Product Table Builder by The Crafty Owl - Independent Stampin' Up! Demonstrator.


You will notice there are also a number of colour products from other colour families that are included on the list; this is because Stampin' Up! has announced a colour revamp that will involve a complete overhaul of our colours, that includes movement between colour families, additional retiring colours and also some old favourites that will be returning - yay! - along with a redesign of the ink pad casing itself. I will have more news on that for you in the next few days.

I'll be back tomorrow with a creative post and an update on the retiring list; until then, happy shopping!

A Purple Floral Sentiment for PP388

by Joanne James8. April 2018 09:00


I've been away at Stampin' Up!'s UK Onstage event for the last couple of days, having a ball with some of my team and lots of my fellow Stampin' Up! demonstrators. Today it's Sunday though, I'm back and it's time for this week's new challenge over at The Paper Players! It's the turn of my awesome friend LeAnne to host this week and she has a fun colour challenge for you to work with:


I love purples although was a little short on time to prepare my card for this week so I decided to go for a large focal sentiment to help me along the way this week. It was a good opportunity to open my as yet un-inked Floral Sentiments stamp set  - take a look:


Here's the low-down on today's card:

Floral Statements - I chose the feature the large 'Thanks' sentiment from the Floral Statements stampset and coloured it with a mix of markers: my 3 retired Wisteria Wonder Blandabilities for the petals and my Tranquil Tide Stampin' Write marker for the leaves. This stamp set is great as it really does much of the work for you - it doesn't leave room for much else! 

Layered Leaves - I backed my stamped panel with an offset panel of Elegant Eggplant that I embossed with my layered leaves Dynamic Textured Impressions Embossing Folder; I know you can't see much of it, yet the peeks of texture add a welcome added detail.

Drops of Glitter - I added a few of the Glitter and Clear epoxy dots, along with some clear Wink of Stella on the flower petals and a sliver of doily, to complete my card.

This card really was quick to put together with some built in de-stress as a result of the time it took to colour it in too - bonus! In hindsight, I wish I'd heat embossed the stamp in black for a little more shine and contrast; something to try next time.

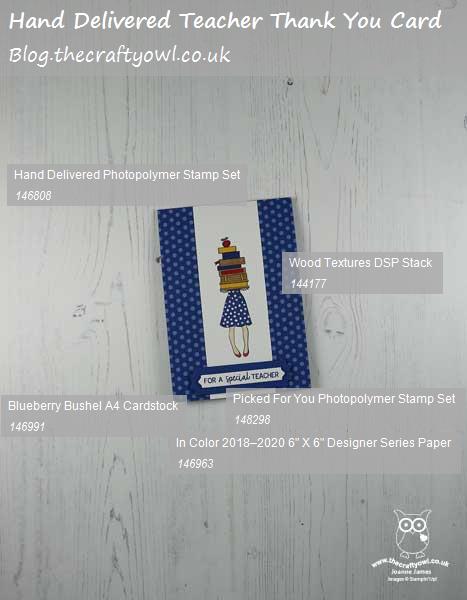
Here is the visual summary of the key products used on today's project for you to pin for easy reference:
 

You can see all of my Product and 'How To' summaries on my 'How To - Tips and Techniques' Pinterest board in case you've missed any. 

Before you reach for your ink and papers, check out what our amazing team has created to inspire you this week:

Here's a quick recap of our challenge rules:
 
1.  Create a new paper project
2.  Upload your creation to your blog with a link back to us and provide a direct link to the post featuring your challenge submission.
3.  Please link your card to no more than four challenges, TOTAL.
4.  Have FUN!

I can't wait to see what you create with this week's colours and look forward to visiting your blogs this week! Enjoy the rest of your weekend; my day will hopefully be a quiet one as I relax with my new catalogue for the umpteenth time to drool over the new stamp sets and product coming our way. Do come  back tomorrow as I will have lots of important announcements with regard to this month's retirement list; until then, happy stampin'!


Stampin' Up! Supplies Used: 

Table built using Product Table Builder by The Crafty Owl - Independent Stampin' Up! Demonstrator.

Picnic With You Basket of Flowers Exploding Box Card

by Joanne James1. April 2018 18:00

No, it's no April Fools - it's another two-post day today! I have spent a relaxing day being treated to Sunday lunch, along with my fair share of chocolate eggs following this morning's obligatory Easter egg hunt and I wanted to share an exploding box card that I made recently that is just perfect for this week's challenge over at Stamps Ink Paper before it closes this evening:

My card looks rather inconspicuous from the outside, just like a simple lidded box. Yet when the lid is removed, my unassuming card 'explodes' and opens up to reveal a 3 dimensional basket of flowers - take a look at this top-down view, showing all of the flaps and pockets - you can also see the layering within my basket:


And here you can see properly what the flower basket centrepiece looks like:

A sweet basket of flowers, complete with butterfly, on a base edged with grass. Isn't that fun?! Here's the low-down on today's card:

Picnic With You - I used the stamps and framelits from the Picnic With You bundle to create my basket, cutting four basket pieces scoring and glueing at the corners to create a 3 dimensional basket to hold my flowers. I love the embossed basket weave detail that is added with the speciality piece in the Picnic Basket Builder Framelit set - it adds great detail and interest.  

In-Colour Colour Combo - My card features Berry Burst flowers and makes a real feature of the In Color designer series paper in Tranquil Tide. Whilst my main box is made out of Whisper White, the lid is made from Tranquil Tide DSP and I've carried this through for the pockets and mats for the inside of my card. I added a little Pool Party butterfly for an unexpected pop of contrasting colour. I love this deep, yet fresh colour combo - feel free to save it if you would like to use it for your future project inspiration:


Pockets and Tabs - I added a generic message from the Picnic With you stamp set on one of the inner flaps of my card, and another on the right hand side after I took this photo that displayed a 'Happy Mother's Day' message (this card was for my Mother-In-Law for Mother's Day - I knew she would appreciate something a little different and it I could deliver by hand, another bonus!) In addition, the pockets contained two simple slide out cards, with simple tabs courtesy of the Circle Tab Punch (such a useful punch!) - we wrote messages on ours but they would also be a great place to add some photos or even some Memories & More cards perhaps.

Here's another photo showing the centre of my card in detail: 

Here is the visual summary of the key products used on today's project for you to pin for easy reference:


You can see all of my 'How To' summaries on my 'How To - Tips and Techniques' Pinterest board in case you've missed any. 

I hope you have all enjoyed your day and I'll be back on Tuesday with another project. Until then, happy stampin'!


Stampin' Up! Supplies Used:

Table built using Product Table Builder by The Crafty Owl - Independent Stampin' Up! Demonstrator.

Epic Celebration - You Rock for The Paper Players PP387

by Joanne James1. April 2018 09:00

Happy Easter Sunday wishes everyone! It's time for this week's new challenge over at The Paper Players! It's the turn of the amazingly talented Laurie to host this week and she has a fun theme challenge for you to work with:


I don't have much in the way of music-themed supplies in my collection and usually end up resorting to my e-cutter to create music-themed cards and gifts (you can see some of my previous examples here and here), so I was thrilled to see the Epic Celebrations set in this year's Sale-A-Bration promotion. As the wife of a guitarist and the other mother of two almost-teens, one of whom is in a band and both of whom are into either listening to or playing music in a big way, this set was a must-have for me. So whilst Sale-A-Bration has now ended, this set is a keeper and I just had to use it on today's card. I also used this week's sketch at Freshly Made Sketches for my layout - take a look:


Here's the low-down on today's card:

Epic Tone on Tone - I decided to use a simple tone-on-tone stamped background in Real Red using the guitar stamp to create some detail and to highlight my main focal image, which I stamped and heat embossed in black on watercolour paper, then coloured with my aqua painter. I added this to a collection of stars and bits and pieces to add a touch of 'glam rock' to my card. 

A LittleSheet Music - The border panel is a section of the background stamp 'Sheet Music', which I simply stamped onto Whisper White and cut out a section for added interest in keeping with the theme.

A Punny Sentiment - My punny sentiment is courtesy of the now-retired 'Crazy About You' set, which was perfect for this card. I also used the 'You're Awesome' sentiment from the Epic Celebrations set on the inside of my card:


Here is the visual summary of the key products used on today's project for you to pin for easy reference:


You can see all of my Product and 'How To' summaries on my 'How To - Tips and Techniques' Pinterest board in case you've missed any. 

This card is headed to my pile as a thank you for one of Rebecca's teachers; she will be performing the role of Brigitte in her whole school production of Rogers & Hammerstein's 'The Sound of Music' next term and there are an army of staff involved in making this happen, including her Maths teacher, who also plays electric guitar. The girls at school think he is super cool, so this card will be perfect for him!

Before you reach for your ink and papers, check out what our amazing team has created to inspire you this week:

Here's a quick recap of our challenge rules:
 
1.  Create a new paper project
2.  Upload your creation to your blog with a link back to us and provide a direct link to the post featuring your challenge submission.
3.  Please link your card to no more than four challenges, TOTAL.
4.  Have FUN!

I can't wait to see how you interpret this week's theme and look forward to visiting your blogs this week! Enjoy the rest of your weekend - enjoy your Easter egg hunts and eat as much chocolate as you can safely consume! I'll be back tomorrow with another project; until then, happy stampin'!


Stampin' Up! Supplies Used: 

Table built using Product Table Builder by The Crafty Owl - Independent Stampin' Up! Demonstrator.

Ready For Christmas?!

by Joanne James31. March 2018 20:00

I'm back for a second post today! I had a little time for a spot of crafting this morning - I feel like I haven't been in my craft room to make something 'just because' in such a long time! So somewhat ironically, given that it's Easter weekend, I made a Christmas card! Yes - I couldn't resist making a card to join in with the challenge over at Merry Monday this week: 


I decided to use the cute little sausage dog from the Ready For Christmas stamp set, still available on carryover from the last Autumn-Winter seasonal catalogue, along with some retired Christmas Around The World tartan designer series paper:


I had a little fun with this card, and paper pieced both the occasional table and the dog using two different patterns from the Wood Textures DSP stack - don't you just love the honey-colour of that naughty-but-cute dachshund?! And a simple sentiment on the inside from the same set completes my card:


Here is the visual summary of the key products used on today's project for you to pin for easy reference:


You can see all of my 'How To' summaries on my 'How To - Tips and Techniques' Pinterest board in case you've missed any. 

Back soon with another project. Until then, happy stampin'!


Stampin' Up! Supplies Used:

Table built using Product Table Builder by The Crafty Owl - Independent Stampin' Up! Demonstrator.

Bubble Over Large Letters Party Banner Decoration

by Joanne James31. March 2018 08:00


Today it's the last day to snap up a Sale-A-Bration freebie, whether that's free stamps with your starter kit when you join my team, extra hostess rewards when you place an order of £200 or more or a free gift with a purchase of £45 or more. You only have until 10.50pm this evening though, so don't leave it too late!


I'm sharing the last of my Sale-A-Bration makes with you today, a party banner featuring the Bubble Over stamp set and Bottles & Bubbles Framelits Dies, and the FREE Bubbles & Fizz Designer Series Paper - take a look:


My banner letters are courtesy of the Letters For You stamp set and co-ordinating Large Letters framelits, on some layered circles before adding to the pennants featuring all of the designer paper designs. Here's a picture of it hanging properly at last November's Onstage event:


This is a great set for making part banners for a birthday or summer BBQ celebration (if it stops raining for long enough here in the UK to light one, of course!) and the Bubbles and Fizz designer papers add great colour and pattern with a fun party vibe.

Here is the visual summary of the key products used on today's project for you to pin for easy reference:


You can see all of my 'How To' summaries on my 'How To - Tips and Techniques' Pinterest board in case you've missed any. 

I'll be back tomorrow with this week's project for our new challenge over at The Paper Players. Until then, happy stampin'!


Stampin' Up! Supplies Used:

Table built using Product Table Builder by The Crafty Owl - Independent Stampin' Up! Demonstrator.

Memories And More Sweet Soiree Mini Album

by Joanne James30. March 2018 19:00

I hope you are all enjoying the start of a long bank holiday weekend. We have already enjoyed a morning of fresh air, followed by an afternoon of chocolate and a movie to avoid the return of the rain here in the UK. I am so done with winter now!

Today I thought I would share with you the first of the projects that I made with the ladies that attended my recent luxury craft weekend earlier this month. I won't be sharing any instructions on how they were made - these are reserved for those that attended - however I am sharing lots of photos of the projects that I designed as it is a great way for my readers to get a flavour of what a residential crafting retreat with me is like and the kinds of projects included. With 4 classes spread over 2 days, it's a great opportunity to tackle a variety of projects and also some that are a little more time-consuming than can be completed in a class that is of a shorter duration.

Today I'm sharing one of my favourite projects: a mini album I made featuring the Sweet Soiree Memories and More cards that are one of the current Sale-A-Bration gifts that can be yours free with a purchase of £45 or more, for just over another 24 hours:


Berry Burst cardstock forms the base of this expandable album and in addition to the Sweet Soiree Memories and More card pack, the Sweet Soiree Embellishment Kit has been used to decorate the cover and inside. 

This is what album looks when you first open it:


Fully extended, the album is four panels wide:


Each side then expands further to include additional flaps and pockets on both sides:


The album includes lots of areas to add photographs and capture memories, including this neat waterfall feature:


This album was certainly the most challenging of the projects we tackled during the retreat and was not for the fainthearted! The feedback was really positive though and everyone was so pleased with their creations; some ladies reported feeling truly amazed and thrilled to have tackled something like this, which they would not have ever contemplated on their own. I was personally thrilled with how positively this was received, as I've never led a class quite like this before. I'm already taking the learns from this project to create another version that is equally 'wow' yet a little easier to recreate.

If you would like to make projects like this one at a future retreat, please sign up to my newsletter by clicking on the icon in the right-hand column to ensure you receive the information for future retreats as soon as it is released or click here for more information - details for my next retreat will be announced in the coming weeks!

Here is the visual summary of the key products used on today's project for you to pin for easy reference:


You can see all of my 'How To' summaries on my 'How To - Tips and Techniques' Pinterest board in case you've missed any. 

Enjoy your evening and I'll be back tomorrow with one last project featuring Sale-A-Bration item. Until then, happy stampin'!


Stampin' Up! Supplies Used:

Table built using Product Table Builder by The Crafty Owl - Independent Stampin' Up! Demonstrator.

Coloured Heartfelt Blooms Card

by Joanne James29. March 2018 20:00


I've a quick post for you this evening to share a card I made a couple of months ago in my Sale-A-Bration class using one of the Sale-A-Bration sets that has been hugely popular with my customers - take a look:


Here's the low-down on today's card:

Heartfelt Blooms - Heartfelt Blooms is one of Stampin' Up!'s new Distinktive stamps: they lay down ink at different opacities, giving the finished image more depth. When you look at the stamp itself, you almost wonder if it will stamp anything, yet lightly inking the stamp results in a perfect photographic finish. The set also has three useful, beautifully scripted sentiments too - I particularly like the wording of the one I used on this card.

A Touch Of Colour -  The Heartfelt Blooms image can either be stamped in a single colour to create a simple monochromatic card, or stamped in a neutral base that allows colour to be added. Today's card is based on one that appeared in our quarterly demonstrator magazine where the image is stamped in Archival Black on Shimmery White cardstock, then colour is subtly added over the image using inks and an aquapainter. 

Petal Passion Stripes - I paired the image with an angled panel of Petal Passion striped designer series paper; the brushstroke-style stripes compliment the image perfectly.

If you would like to add this set to your stamp collection, you only have another couple of days to do so before the end of this year's Sale-A-Bration promotion, after which it will be gone forever!

Here is the visual summary of the key products used on today's project for you to pin for easy reference:


You can see all of my 'How To' summaries on my 'How To - Tips and Techniques' Pinterest board in case you've missed any. 

I'll be back tomorrow with another project. Until then, happy stampin'!


Stampin' Up! Supplies Used:

Table built using Product Table Builder by The Crafty Owl - Independent Stampin' Up! Demonstrator.

Envelope Punch Board Daisy Easter Basket

by Joanne James28. March 2018 17:30

It's the week before Easter already and so today I'm sharing a couple of really simple 3D projects that I made with a group of wonderful ladies last month that are perfect for holding Easter treats and also fit with the challenge over at Global Design Project this week:

The first one is an super easy Easter basket made with one of my most favourite tools EVER, the Envelope Punch Board  - take a look:


I love the Envelope Punch Board - my Envelope Expert and Box Buster tools are testament to that! - but it's great for lots more fun projects besides. Here I made my basket out of one of the Delightful Daisy DSP papers, decorated with some stamped and punched daisies and some faceted gems - a rather grown-up Easter basket, if you will, given the absence of bunnies! These little baskets are so easy to make and will hold a small full size egg or a collection of smaller ones. Here are the instructions in case you would like to make one too: 

  • Take a sheet of paper measuring 6” x 6”
  • Punch and score using your Envelope Punch Board at 1 ½” on all four sides
  • Turn over the sheet and repeat the step above on the reverse
  • Cut the flaps on each side to the first score line
  • Fold flaps either inside or outside to create your side panel and decorate with daisies or your chosen embellishment
  • Trim centre ends if desired (as I've done here) or adhere to the outside of the basket
  • Cut handle 15cm x 1.5cm and attach to sides

You can see more of these baskets in lots of other colours over on my Facebook page here, including some pictures of the ladies crafting 'in action'.

We also made some of the smaller egg carrier baskets, again using a piece of 6" x 6" paper and the Envelope Punch Board, this time using some of the Petal Garden DSP and some of the lovely free Sale-A-Bration Calypso Coral Shimmer Ribbon (only 4 more days to get your hands on this!) and a sweet Easter tag:


Instructions for this basket are as follows:

  • Take a sheet of paper measuring 6” x 6”
  • Punch and score using your Envelope Punch Board at 1¾” and 4” on the first side then use the score lines and guide to punch and score the remaining sides
  • Use a 3/4" circle punch to create the handles on the inner pieces and bring these up on the inside, adhering your flaps on the outside of these 

I'm mindful the instructions are not the easiest to follow without a video - watch this space and I'll see if I can make a quick one later! 

I had such a fun evening with my hostess Jane and her family and friends making these projects, and, having placed their orders, enabling Jane to earn rewards and free product, further boosted by the current Sale-A-Bration promotion. Whilst Sale-A-Bration is coming to an end in 4 days time, I am still taking party bookings into April, May and beyond, so if you would like a fun evening in with friends, crafting fun projects and earning some free Stampin' Up! product into the bargain, do get in touch.

Here are the visual summaries of the key products used on today's projects for you to pin for easy reference:

You can see all of my 'How To' summaries on my 'How To - Tips and Techniques' Pinterest board in case you've missed any. 

Enjoy the rest of your day and I'll be back tomorrow with another project. Until then, happy stampin'!


Stampin' Up! Supplies Used:

Table built using Product Table Builder by The Crafty Owl - Independent Stampin' Up! Demonstrator.
 
 
Table built using Product Table Builder by The Crafty Owl - Independent Stampin' Up! Demonstrator.

Tags: , , , , , , ,

3D Projects | Boxes | Envelope Punch Board

New Online Exclusives

There are new products available exclusively in the online store from 5 November - check them out here.

Latest Kits!

Stampin Cut and Emboss

The Layered Landscapes Kit and Nature's Paintings Kit are the latest kits in the online store - get yours here!

Shop Online

Access my online shop 24 x 7, 365 days of the year:

Current November hostess code:

9NKXDTTR

Shop Online

Mini Catalogue

BROWSE THE CATALOGUE

'Tis The Season - the new Stampin' Up! Mini Catalogue is here! For more details and to download your copy click here

Scrapbooking

Stampin' Up! has introduced a new range of 12x12" scrapbooking product and kit - the full range is now available to purchase online. To download a copy of the new digital Scrapbooking Catalogue click here.

2024-25 Annual Catalogue

BROWSE THE CATALOGUE

Click on the image to download your copy of the 2024-25 annual catalogue. For a full list of current SU! supplies, go to my online store. If you would like any help or advice, please drop me a line at joanne@thecraftyowl.co.uk or give me a call on 07773 421446 - I'd be happy to help.

Join My Team

It's always a great time to join Stampin’ Up! New team members can get £130 worth of products for only £99 + free business supplies + free shipping + all the fun being a part of Stampin’ Up! Stampin' Up! has something for everyone: join my growing team and benefit from my support to enjoy Stampin' Up! however you choose.

If you're interested, call me for a chat to understand how I can help you realise your goals. Alternatively, if you have already decided to sign up and you just can't wait, please click here for the link to the online form where you can sign up and order your starter kit right away! 

About Me

Hi I'm Joanne and live in Northampton and when I'm not looking after my husband and two beautiful children, am an avid crafter with a passion for all things Stampin' Up!

I must confess that I have never been a big rubber stamper - until I discovered Stampin' Up! that is. I love the fact that I can get such great results with co-ordinating stamps, inks, papers and punches - the possibilities are endless! Join me on my stamping journey as I share the things I love and be inspired to create amazing things yourself!

Follow Me

Monthly Newsletter

Box Builder

Click the button above to use Box Buster to create your custom box design using the Envelope Punch Board!

Kits Collection Now Available!

Stampin Cut and Emboss

The new Kits Collection from Stampin' Up! is now available!

Click here to see the current kits available and order yours online today.

I Design For


Stampin' Up Stuff

This is my personal blog and is not endorsed by Stampin’ Up! I hope you find it a plentiful source of ideas and personal inspiration but please don't copy my designs for contest submission or use for classes, publication or sale without express permission.