by Joanne James28. October 2014 22:51I'm very late posting today - eek! - having had a fun day with the James juniors, amongst other things shopping for the contents for our annual Samaritan's Purse Shoeboxes. This is something we really enjoy and is a great way to encourage the children to think of others less fortunate than themselves as we are about to embark on one of the most commercial seasons of the year and to be grateful for all they have.
With gratefulness in mind, I thought I would share a little pumpkin that I made using the Curvy Keepsake Thinlit Die - this would make a perfect Thanksgiving table favour for my American readers and equally with an alternative tag would be suitable for Halloween too. There are tons of variations on pumpkins made with the thinlit die out there in blogland, but this is my version:
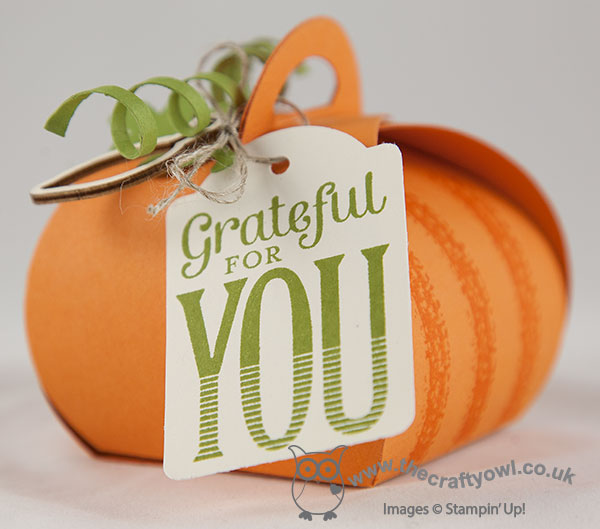
So simple to make: just cut two pieces of Pumpkin Pie cardstock with the thinlit, stamp the inner sections of the box with one of the stamps from the Work of Art set, then finish with some Old Olive leaves cut using the Fun Fall Framelits, some twisted tendrils, a couple of my favourite Autumn Wooden Embellishments and a tag from the Merry Everything set, all tied on with linen thread. I love this die and have made so many gorgeous boxes with it; I am hoping to be able to share some of them with you later this week.
Meanwhile, today I'm going to leave you with a fun photo that is destined for this year's Halloween Project Life page for sure - whilst out shopping today, we treated ourselves to some Halloween 'trick or treat' donuts at Krispy Kreme; sure enough, we had one of each filling:
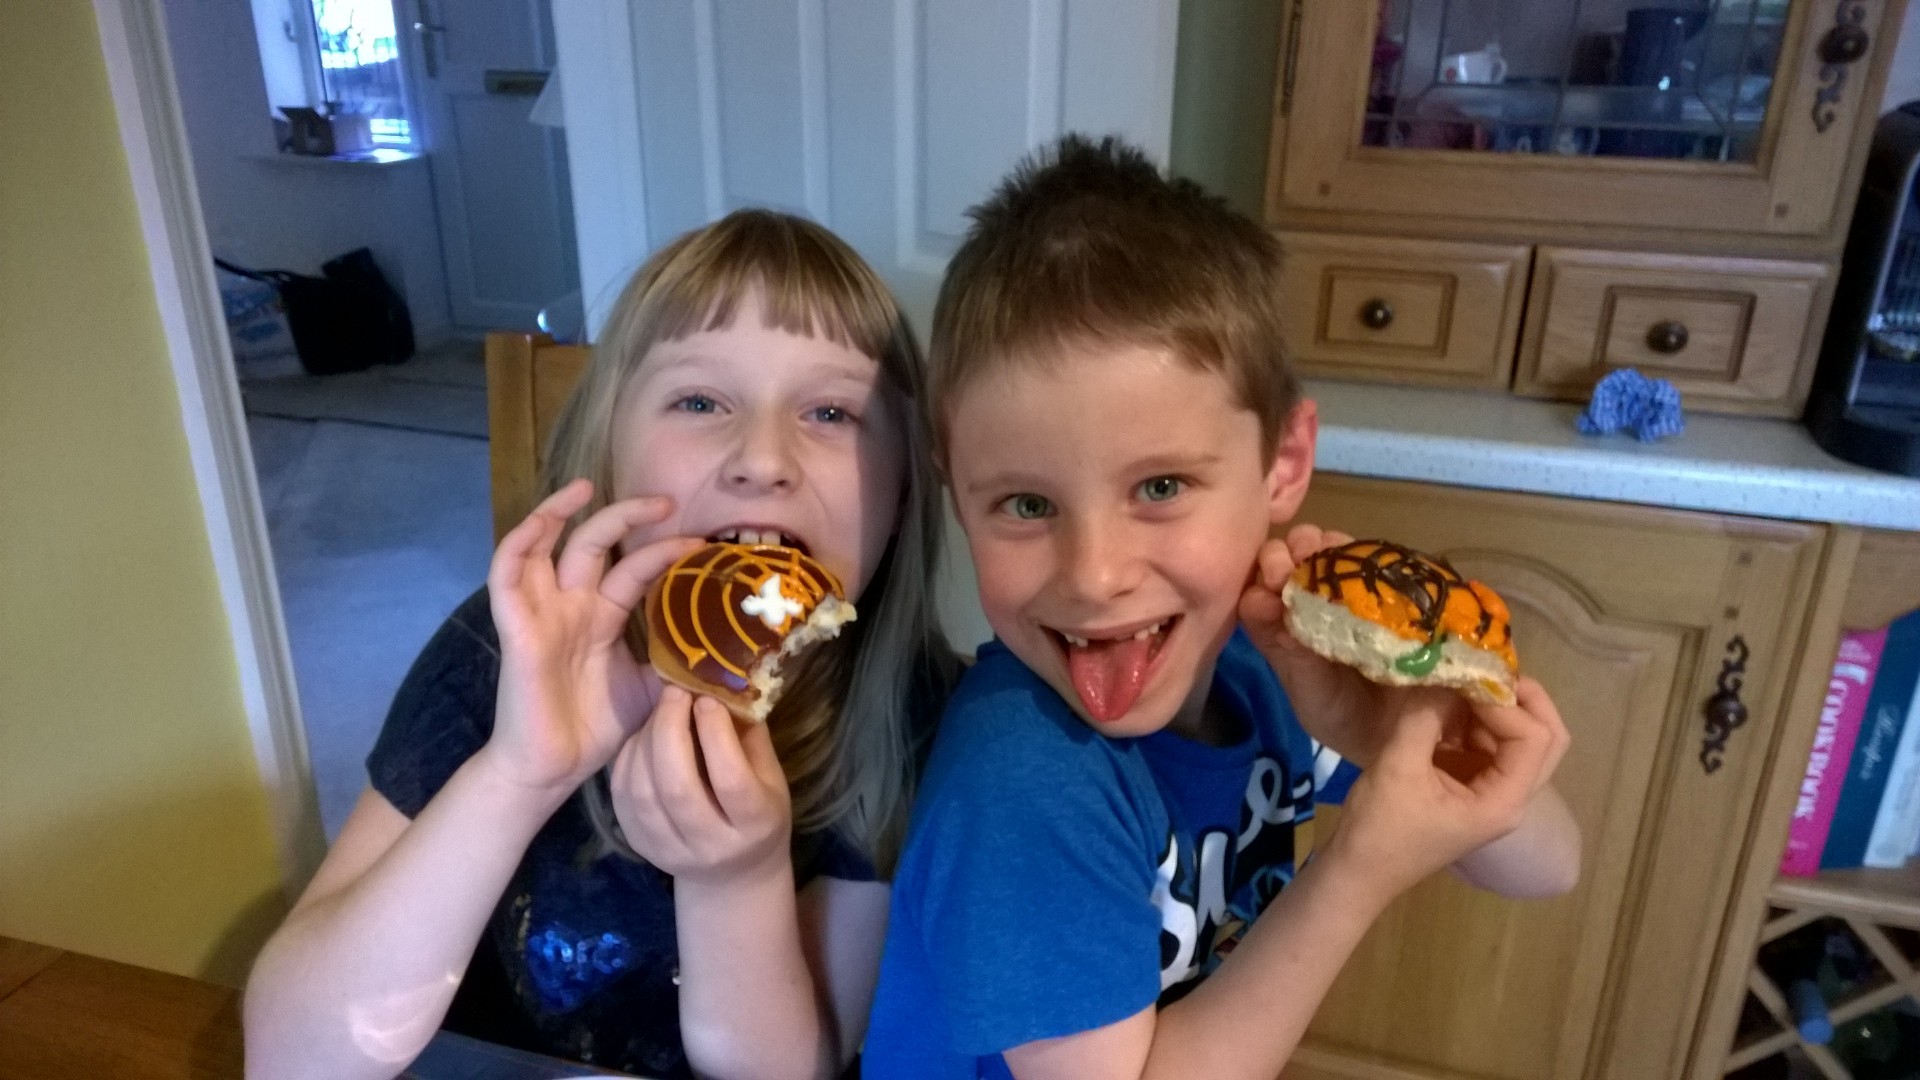
The oozing green filling was actually quite nice, but the appearance was definitely a surprise!
Back tomorrow with this week's Wednesday Deals and my Design Team post for Colour Me...! Until then, happy stampin'!
Stampin' Up! Supplies Used:
05eacde4-7ef0-4381-a983-557c58f6acab|0|.0|96d5b379-7e1d-4dac-a6ba-1e50db561b04
Tags: Merry Everything, Note Tag Punch, Curvy Keepsake Box Thinlits Die, Autumn, Autumn Wooden Elements, Big Shot, Fall, Fun Fall Framelits, Halloween, Shop online, Stampin' Up, Stampin' Up Card ideas, Stampin' Up Supplies, 3D Projects, boxes
3D Projects | Stamping
by Joanne James5. August 2014 19:54Well, it's been a little colder here in the UK today and we've had a fair amount of rain, which has kept us largely indoors for most of the day, but we made the most of it with some early morning baking (chocolate chip muffins - yum!), an indoor picnic and a pleasant few hours catching up with friends so all in all not a bad Tuesday.
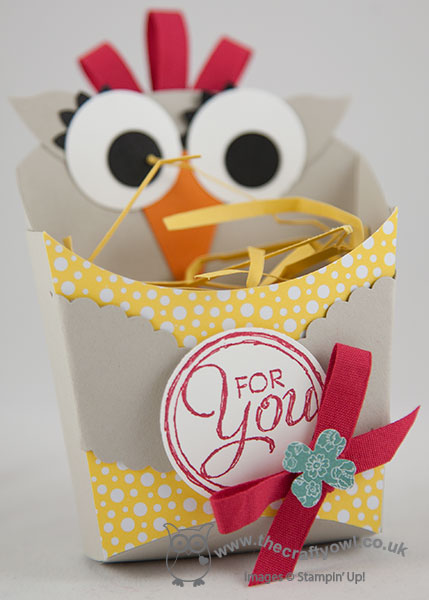
Today I thought I would share another 3D project with you - a cute little owl gift box made using the Fry Box Bigz L Die that we made at our last team training session. Check out this cute little fella:
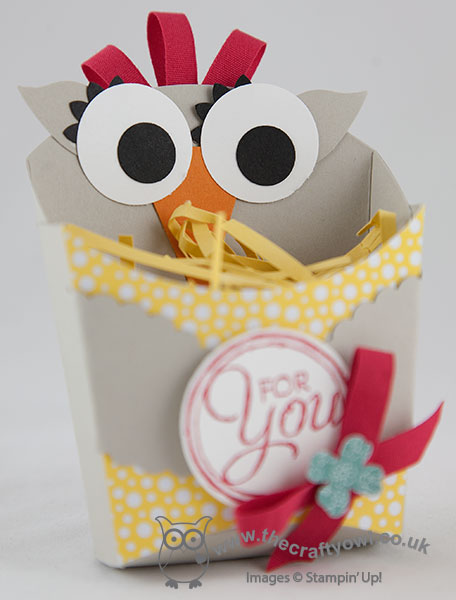
As 'The Crafty Owl', I was always going to like this cheeky chap, but the die itself has so many dress-up possibilities! The owl was so easy to make: the front of the box was covered with a piece of All Abloom DSP, then some black and white circles punched with the 1/2" and 1" circle punches, black eyelashes using the largest flower from the Boho Blossoms punch, ears from the Bird Builder punch and a Pumpkin Pie triangle nose from the Petite Pennants Builder punch then some Sahara Sand Scallop Ovals for wings. Some 1/4" red cotton ribbon was used to create a little plume of feathers and to tie a bow to adorn the 'For You' stamped greeting from the Chalk Talk stamp set, which was finally finished with a punched flower. Some filling was cut from yellow cardstock using the fringe scissors to support the box contents.
These fry boxes are the perfect size for a little gift or a few chocolates - look out for lots more variations on this in future posts.
Back tomorrow with the new weekly deals and my Design Team card for this week's challenge over at Colour Me...!
Until then, happy stampin'!
Stampin' Up! Supplies Used:
20e4e93b-5cc9-4ed2-824e-6c82962164c9|0|.0|96d5b379-7e1d-4dac-a6ba-1e50db561b04
Tags: 3D Projects, boxes, Fry Box Bigz L Die, Chalk Talk, circle punch, Itty Bitty Accents Punch Pack, Scallop Oval Punch, Boho Blossoms, bird builder punch, Petite Pennants Builder, All Abloom, Fringe Scissors, Shop online, Stampin' Up, Stampin' Up Supplies
3D Projects | Boxes
by Joanne James3. August 2014 08:00It's time for this week's challenge over at The Paper Players and Sandy has a theme challenge for us this week that's all about buttons:
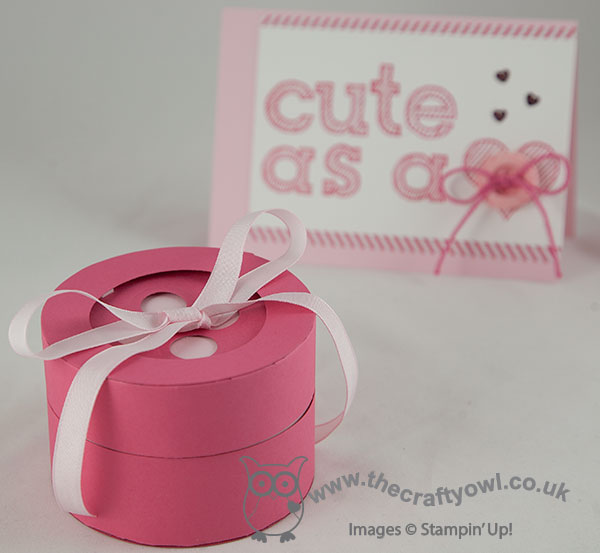
You can use any kind of buttons - real, embossed, paper - so for my card I decided to take Sandy's theme quite literally and create a 'Cute as a button' card suitable for a baby girl and featuring a clay button made with Simply Pressed Clay in one of Stampin' Up!'s silicone moulds - here is my card:
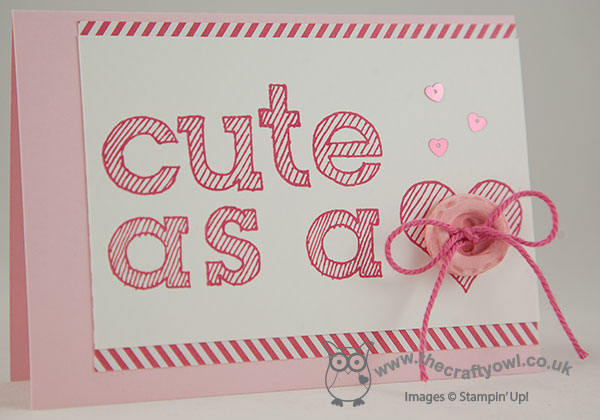
I used a Pink Pirouette card base and matted my Whisper White panel with a piece of Strawberry Slush DSP from the In-Colour stack in the chevron design, although with just enough showing so that it looks like a simple diagonal to echo the lines of the text. On my white panel, I stamped 'cute as a <3' using the new Epic Alphabet set. This set is photopolymer, which makes aligning the letters accurately so easy - with no stamp-a-ma-jig required! I moulded my clay button in the Simply Pressed Clay Mould and allowed it to dry before colouring it with my Pink Pirouette Stampin' Write marker - you can colour your clay before you mould it with reinker or afterwards with ink/markers, it's really up to you. The colour differs slightly depending on the method; personally I like to mould my buttons and embellishments in uncoloured clay a few at a time, then keep the dried pieces in a box to be coloured as required depending on the project. Here's a close up of my button:
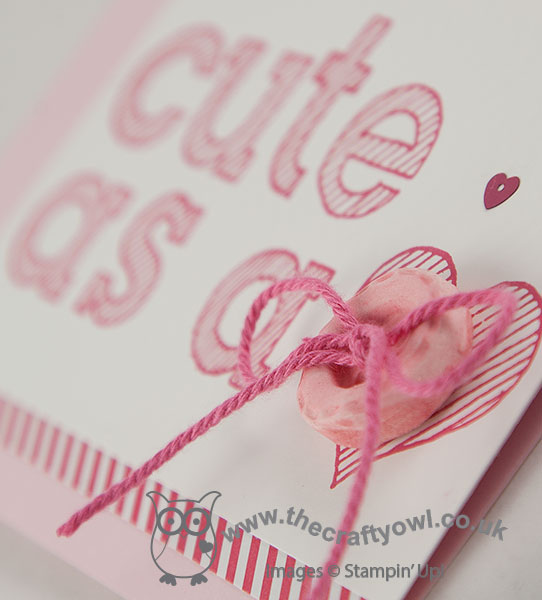
To finish, I pierced two holes in the button with my paper piercer and threaded some Strawberry Slush baker's twine through the holes and tied in a bow and added a scattering of In-Colour heart sequins.
I really love how my card turned out - but I couldn't stop there! I thought it would be fun to create a button gift box to go with it, using my Big Shot and Circles Framelits - here it is:
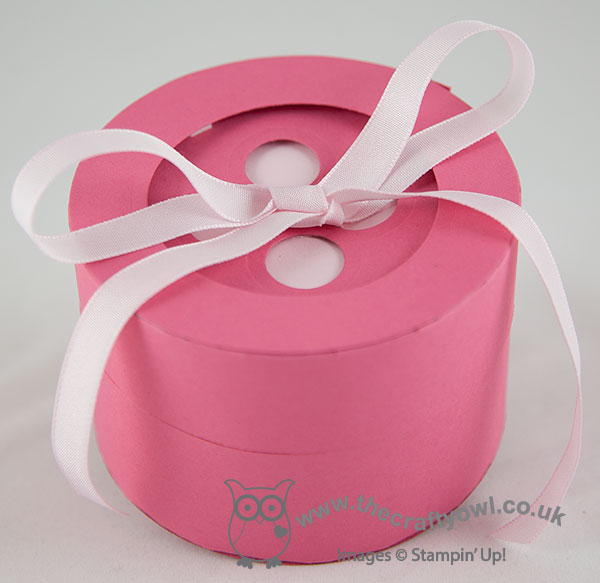
I used Strawberry Slush cardstock and the second largest of the circle framelits for my box, which measure 9.3cm in diameter and 7cm tall. I lined my box with Pink Pirouette cardstock for rigidity and to allow for an edge-to-edge closure. This box is just big enough to fit in a cute onesie, some bibs or a pair of booties - here's a photo of the inside:

Lastly, I threaded some retired Pink Pirouette ribbon through the button holes and tied in a bow. So there you go - two cute as a button projects, I hope you'll agree! Do pop over to The Paper Players and see what the other talented designers have for you today and I very much hope you'll join us in creating something for this week's challenge.
Back tomorrow with another project; until then, happy stampin'!
Stampin' Up! Supplies Used:
by Joanne James18. July 2014 15:53Apologies for my blog absence yesterday - I spent most of the day icing biscuits for teacher thank you gifts as today is the last day of the academic year for my James Juniors. I promise my self I'll start earlier every year, but what always seems to happen is I squeeze in a few more commissions and then also a few extra names get surrepticiously added to the list of thank yous by the children which means even more baking and icing!
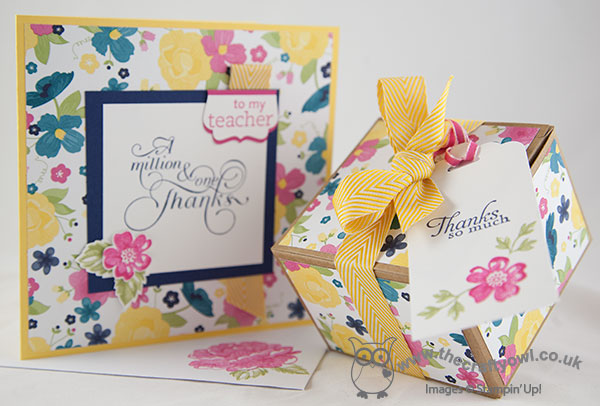
I've shared my teachers gifts on my blog previously - you can check them out here if you would like to be reminded - so today I thought I would share a matching card and gift box commission that I made for someone else to give to their teacher. So here is my card:
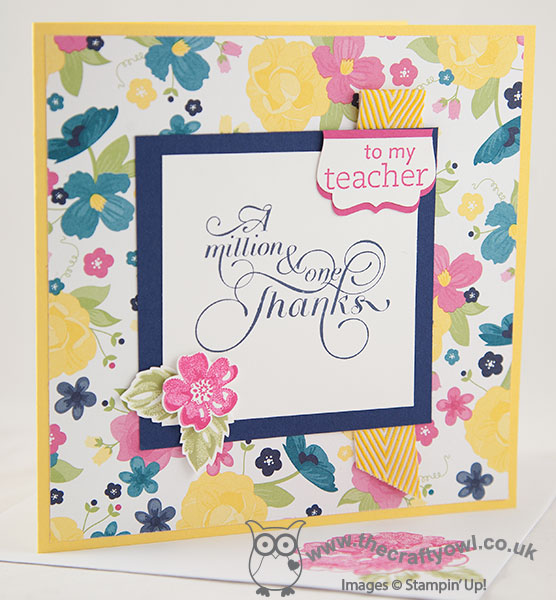
For my card I used the retired Gingham Garden DSP (this was requested - lucky I still have a pack!) however most of the other product is current and you could easily create this set in an alternative paper without the teacher tag as a thank you gift for someone special. The star of the show is definitely the 'Million and One' sentiment stamp - perfect to show your appreciation of someone special.
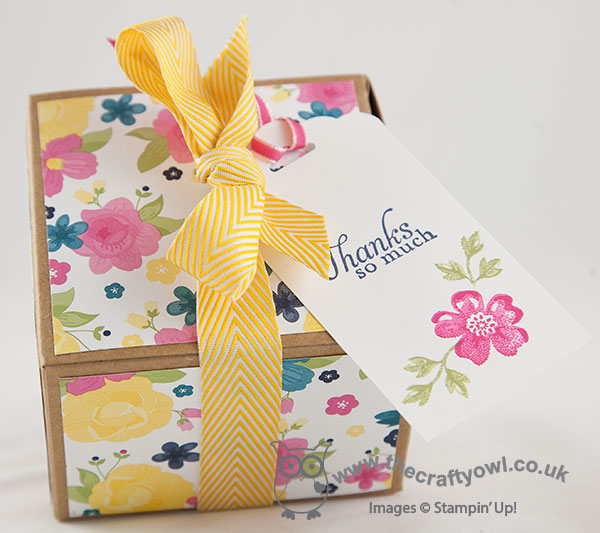
Here is the matching gift box - I love these kraft boxes, they are so useful and very sturdy, and at £2.75 for 4 represent great value. I'm doubly pleased that the Extra-Large Gift Boxes have returned and made it into the annual catalogue as a stock item - these are great for larger gifts.
Right, I've a few more jobs to do before I go and pack a picnic - we're off to see an outdoor theatre production of Peter Pan and The Lost Boys this evening. I've seen this theatre company perform the Railway Children previously, so I'm expecting great things - I'll report back tomorrow! Until then, happy stampin'!
Stampin' Up! Supplies Used:
b2c764e4-ee3d-4662-a516-9667d67d1b95|1|5.0|96d5b379-7e1d-4dac-a6ba-1e50db561b04
Tags: boxes, Gingham Garden, Million & One, Kraft Gift Boxes, Decorative Label Punch, For My Family, Scalloped Tag Topper Punch, Shop online, Stampin' Up, Stampin' Up Card, Stampin' Up Card ideas, Stampin' Up Supplies, Stamp-a-ma-jig, Stippled Blossoms
Boxes | Cards | Stamping
by Joanne James6. June 2014 09:00Today marks the 70th anniversary of the Normandy Landings in World War Two, with the start of the invasion on the 6th June known as D-Day. There are commemorations taking place both at home and abroad today to remember those Allied personnel who lost their lives on this day and to recognise the bravery, commitment and sacrifices of those service personnel who fought during the war to free Europe from Nazi occupation.
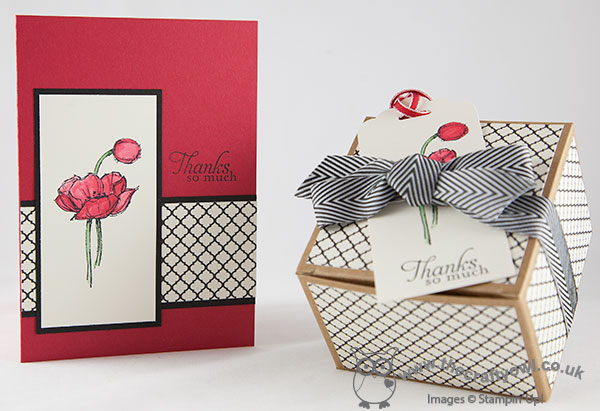
So it seemed a fitting day to share with you a recent commission. I was asked to create some cards and gift boxes as thank you gifts for some teachers who had led a school trip to the World War Two battlefields recently. A red poppy, the traditional form of remembrance, is the star of this card:
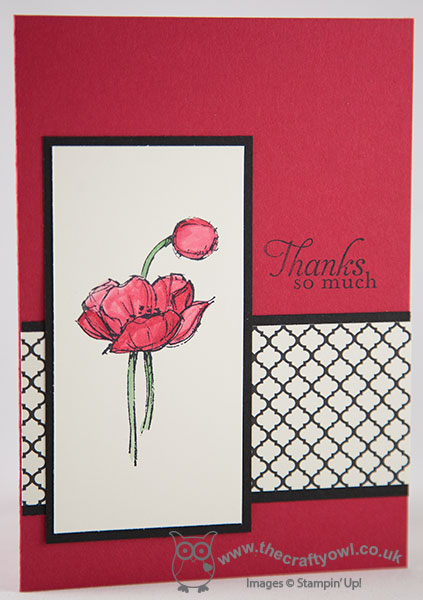
I chose a simple Real Red background and created a layered border using Modern Medley DSP. I stamped the poppy from the 'Simply Sketched' hostess set in Black stazon onto Very Vanilla, then coloured using Real Red ink and my aquapainter, with a touch of Garden Green for the stem. I added the sentiment directly to the card base, and honestly didn't feel this card needed anything else. I also made a co-ordinating gift box using one of the kraft gift boxes available in the annual catalogue:
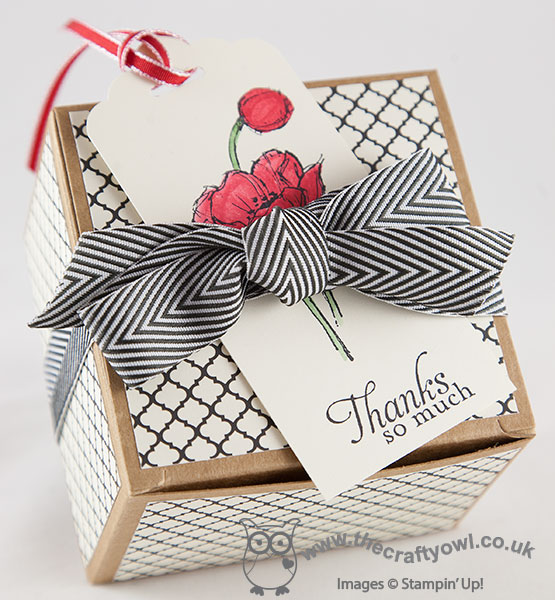
I covered in co-ordinating paper and made a tag with the same sentiment and poppy image on Very Vanilla and punched with my Scalloped Tag Topper punch, finishing with a 3/4" Chevron ribbon bow.
A lovely set to show appreciation and appropriate to share it on a day when we should all take time to remember the courage, bravery and sacrifice of our armed forces, of yesterday and today, who give of themselves in order that we may live relatively safe and secure lives. I for one, am thankful for that.
Back tomorrow with another project; until then, hapy stampin'!
Stampin' Up! Supplies Used:
72e562c8-d7a2-4069-b77a-e93e150acc7a|0|.0|96d5b379-7e1d-4dac-a6ba-1e50db561b04
Tags: boxes, Kraft Gift Boxes, Simply Sketched, Modern Medley, Scalloped Tag Topper Punch, Shop online, Stamp-a-ma-jig, Stampin' Up, Stampin' Up Card, Stampin' Up Card ideas, Stampin' Up Supplies
Boxes | Cards | Stamping
by Joanne James8. May 2014 14:54Hello everyone - my second video in a week! I'm cheating slightly, as I actually shot this video weeks ago but haven't got around to editing it until now. I made a lovely concertina fold Mother's Day card a while ago using the Scalloped Tag Topper Punch - you can see my original card here - which was based on a similar card made by Julie Kettlewell (you can see Julie's original card here). Having just gone to update my original post with the link to today's video, I realise I didn't mention her in my original post, which was very remiss of me and a complete oversight on my part, as I even mentioned her in today's video. Needless to say, I have now updated the original post!
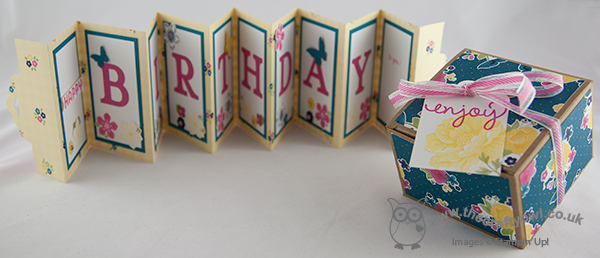
I love this concertina fold card style - it's great if you need a card that's just a little different. I made another card based on my original one, this time adapting it to a birthday card for a friend of mine who always puts so much thought into cards for others, I thought she deserved something special for her birthday too; here's my latest scalloped tag topper punch concertina fold card:
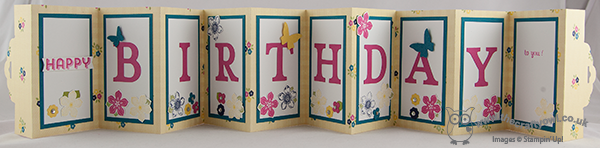
The dimensions are exactly the same as my original card - there is still enough space to stamp 'happy' on one panel, with 'birthday' spelled out on the subsequent panels leaving the last panel blank for your message (I also stamped a little 'to you!' on this panel, just to complete my message). I also decorated one of the Stampin' Up! Kraft gift boxes with some co-ordinating Gingham Garden DSP to make some pretty packaging for my accompanying gift - finished with a tag made with the Scalloped Tag Topper Punch - well, what else?! Here's a picture of both pieces together:
So, if you would like to make a Scalloped Tag Topper Concertina Fold Card - either for the forthcoming international Mother's Day or a birthday card, here's my video tutorial showing you everything you need to know:
If you would like to purchase any of the Stampin' Up! supplies featured in today's project, just contact me or click on the links in the table below to go straight to my online store.
Back tomorrow with another project; until then, happy stampin'!
Stampin' Up! Supplies Used:
83ecd8a3-a7da-4843-9788-9cf4d23e90f5|0|.0|96d5b379-7e1d-4dac-a6ba-1e50db561b04
Tags: 3D Projects, boxes, Kraft Gift Boxes, Gingham Garden, Typeset Alphabet, video tutorial, Stampin' Up, Stampin' Up Card, Stampin' Up Card ideas, Stampin' Up Supplies, Shop online, Scalloped Tag Topper Punch, Simply Celebrate, Stippled Blossoms, Petite Petals, Petite Petals Punch, Itty Bitty Punches, Fabulous Phrases, See Ya Later
3D Projects | Boxes | Cards | Stamping | Video Tutorials
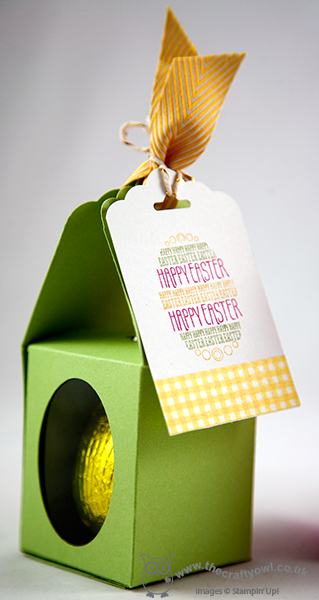
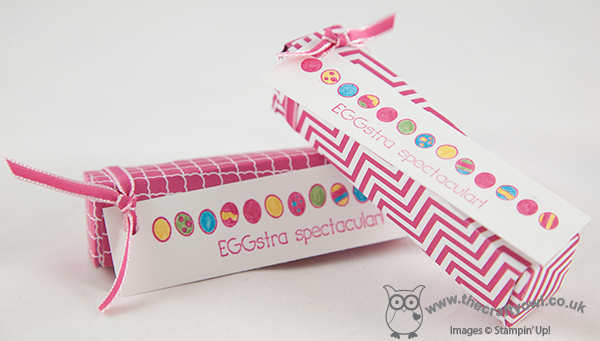
by Joanne James3. April 2014 21:03Evening everyone! I promised you a special project today and here it is! Several months ago Stampin' Up! asked me if I would create an Easter box for a magazine commission and that magazine hits the shelves of the newsagents today! The box I created for Stampin' Up! is featured in the April 2014 issue of Prima Baby and Parenting and is part of an extended feature on Easter Family Fun - great things to make and do with your family this Easter. There are cute cakes and biscuits to bake and this fabulous Easter egg box to make:
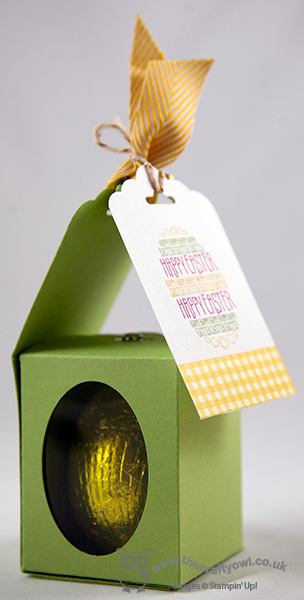
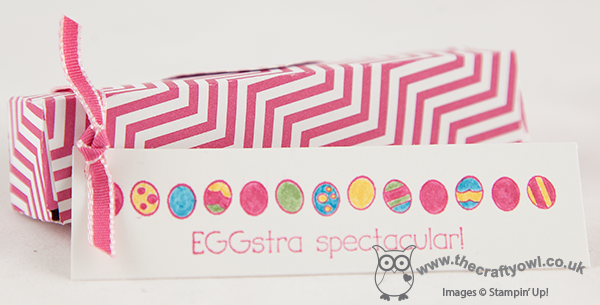
Here's another shot from a different angle showing a close up of the tag, stamped with the egg from the 'Eggstra Spectacular' stamp set:
Lastly the trio of boxes that the magazine used for the title page of the two-page spread:
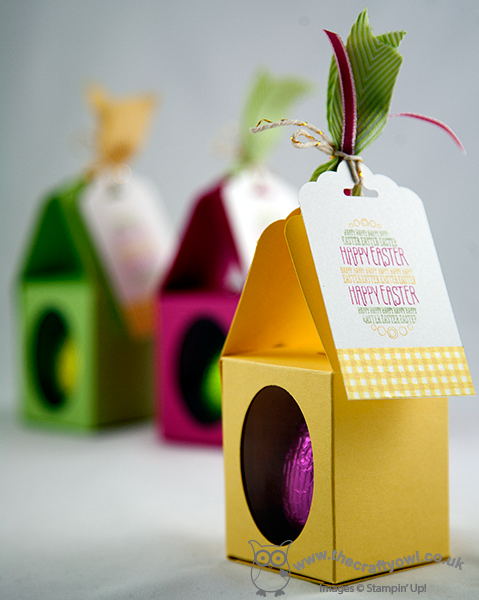
Here is my photograph of the title page in the magazine itself - the facing page contains a step-by-step 'how to' tutorial showing how to make it:
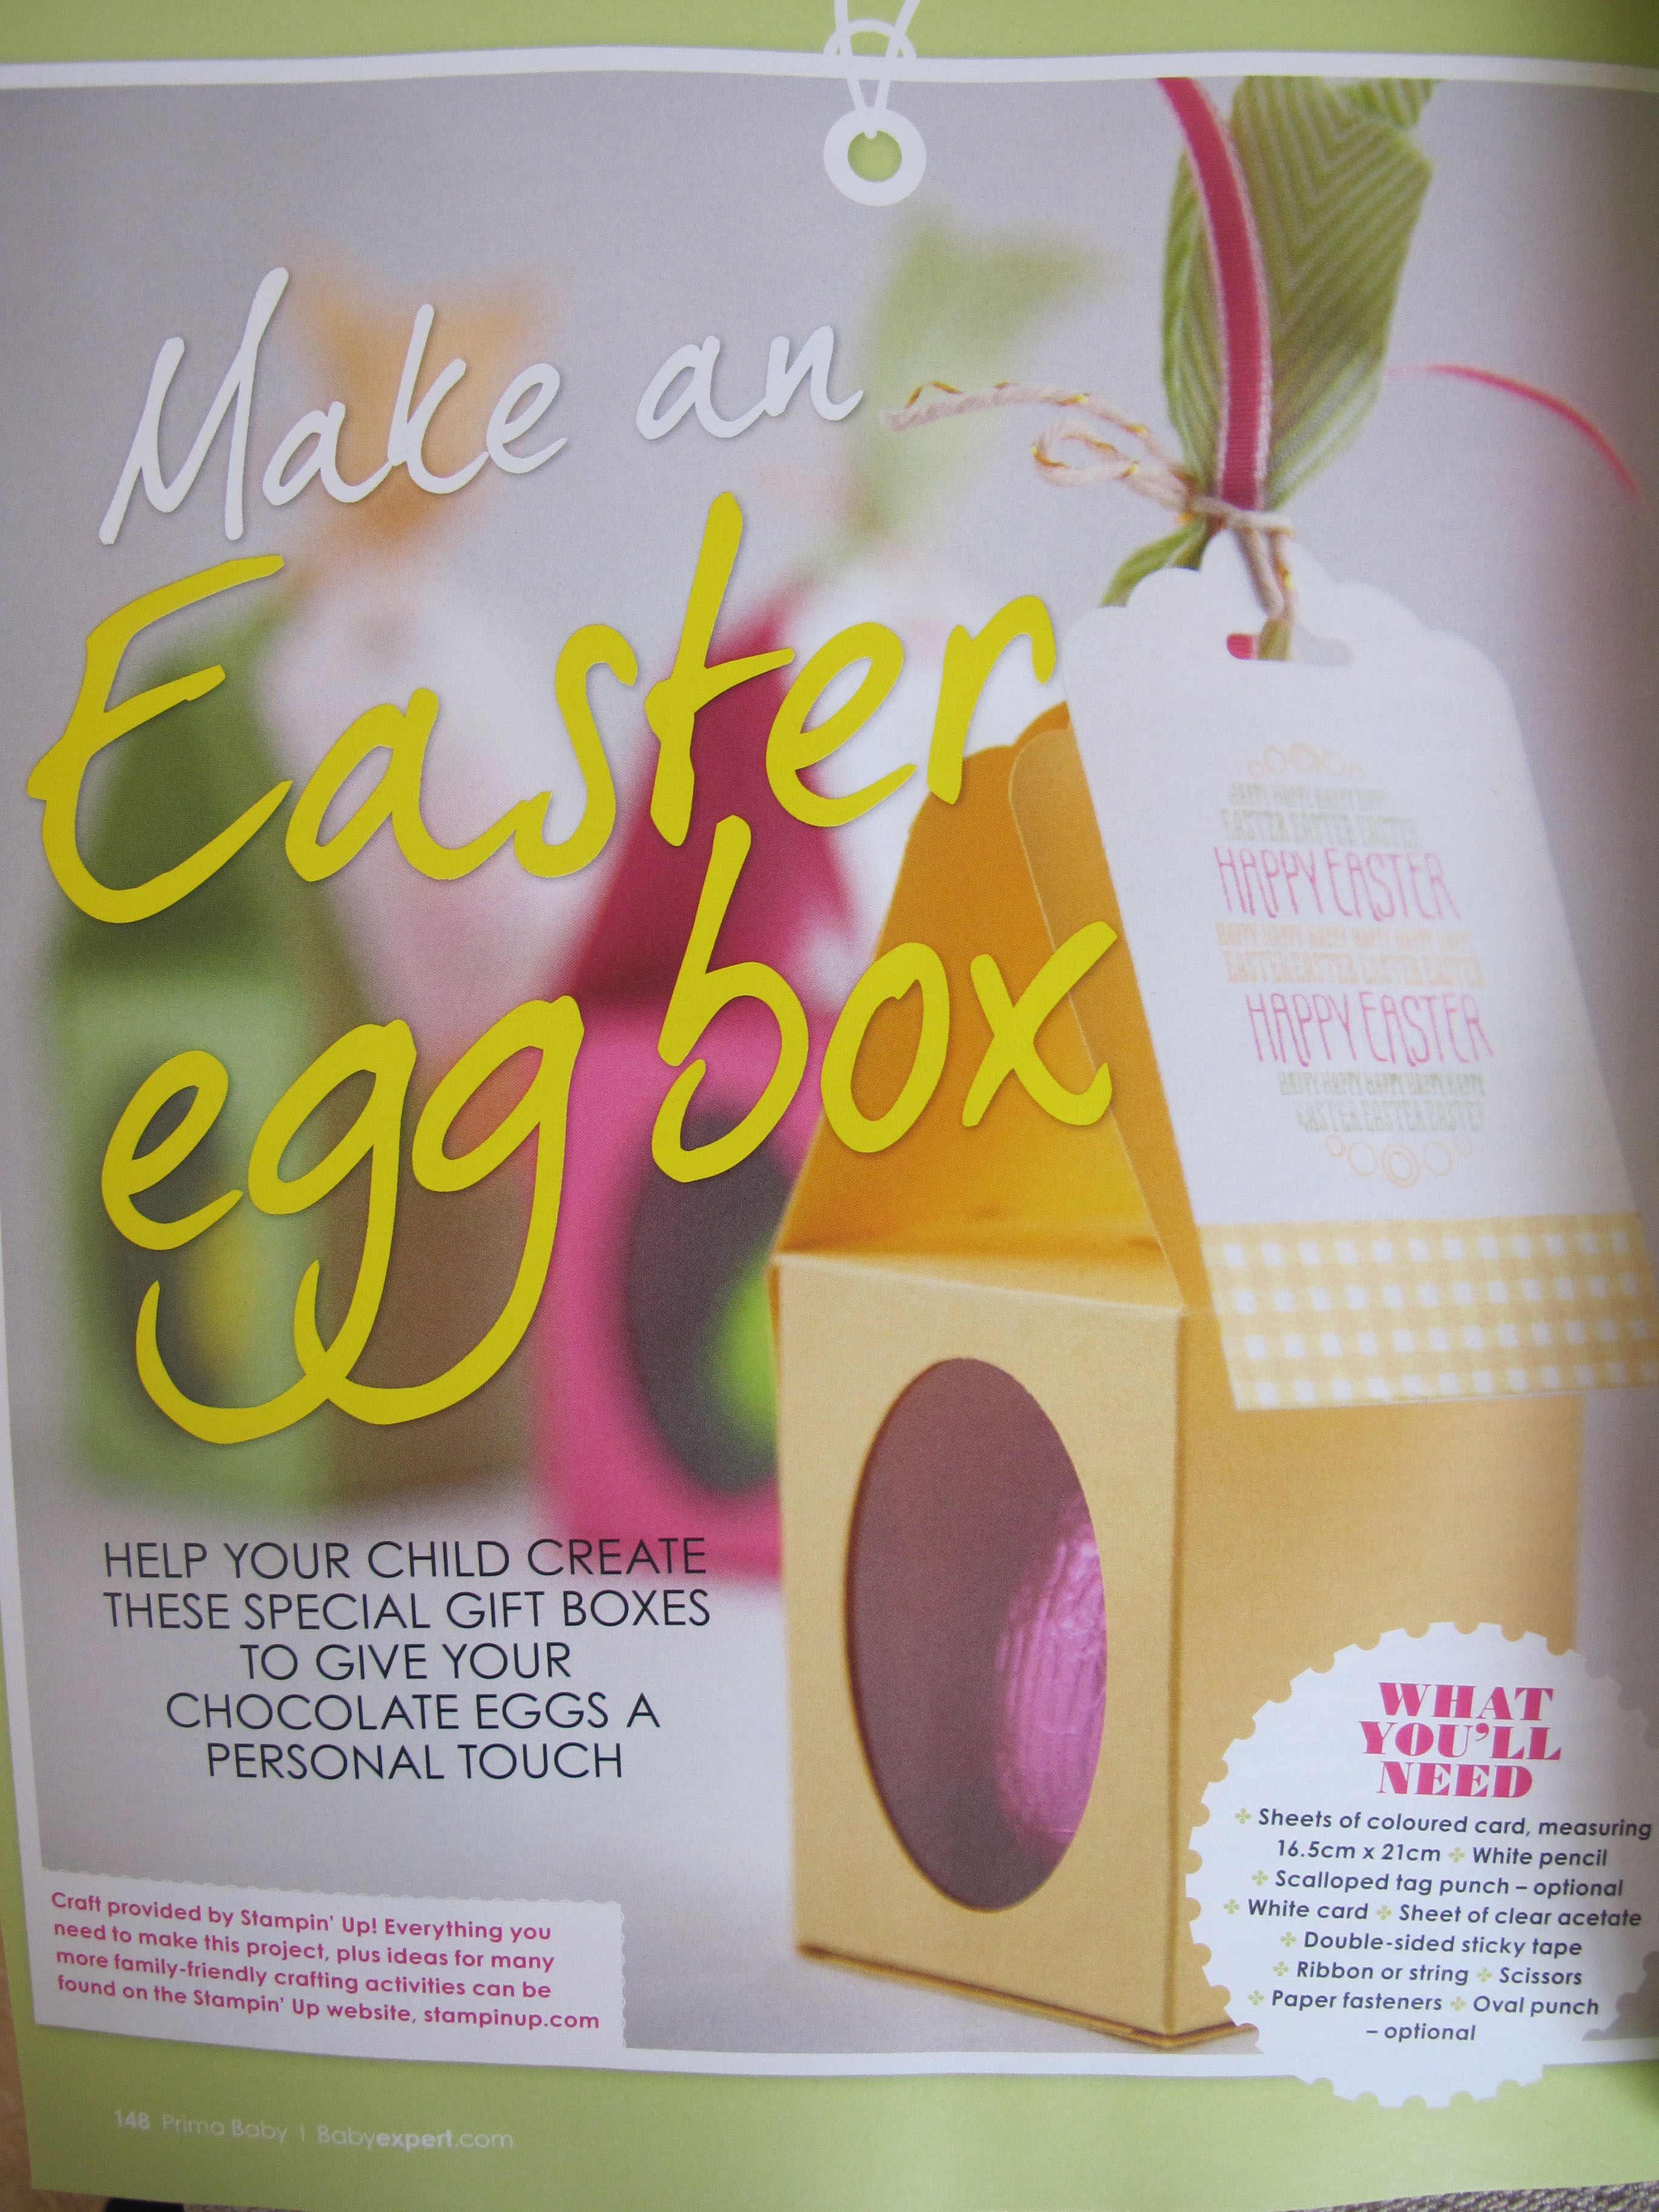
The sides of the body of the finished box measures 2" x 2 1/2" which is perfect for a small Easter egg (I used the ones you can buy in packs for Easter egg hunts) but this box could be used for anything small and attractive where you want to give a glimpse of the contents. If you would like a copy of the tutorial you can see it in this month's Prima Baby magazine - if you live in Northampton, you'd better get to the shops quick though before I buy all the copies :-) I also made a short video tutorial showing you how I made this box - click the link below to watch it:
That's all from me today; back tomorrow with another project; happy stampin'!
Stampin' Up! Supplies Used:
5a410a65-8882-46df-b9d9-50c6b2560efa|0|.0|96d5b379-7e1d-4dac-a6ba-1e50db561b04
Tags: 3D Projects, boxes, Candy Dot Brads, Easter, Eggstra Spectacular, Scalloped Tag Topper Punch, Shop online, Stampin' Up, Stampin' Up Card, Stampin' Up Card ideas, Stampin' Up Supplies, video tutorial
3D Projects | Boxes | Stamping
by Joanne James29. March 2014 22:13A quick (and late!) post from me today - I have one of the busiest weekends ever today and tomorrow. I've been putting the final touches to my class preparation for next week today and have spent the evening at the swimming pool with Rebecca as she was participating in a swimming gala. We are having a real 'girls versus boys' weekend; we each went to our separate swimming pools today (and Granny came along to watch Rebecca for the first time today too) and tomorrow Rebecca and I are travelling to London so that she can take part in an inter-school music festival with the rest of her school choir, whilst the boys have a fun day doing their own thing at home.
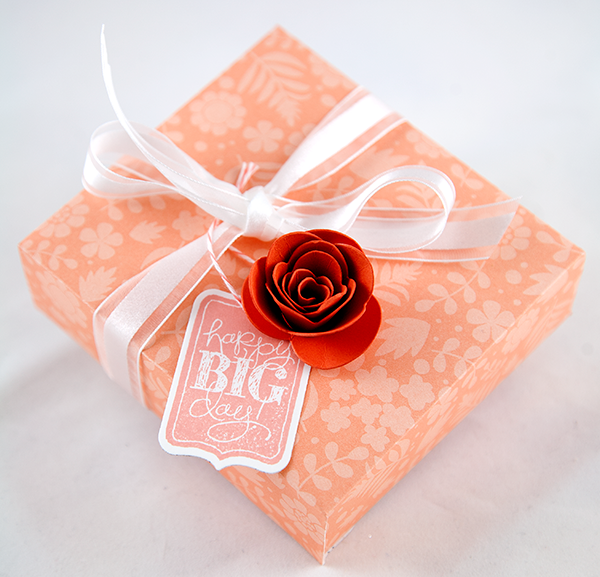
Anyway, with all that in mind there will be a couple of quick posts from me over the next couple of days. Today I'm sharing a gift I made for one of my customers who celebrated her birthday recently. If you follow me on Facebook, you will have see this photograph I posted yesterday of a lovely box I made using the Sweet Sorbet papers (yours free with a £45 spend during Sale-A-Bration - only 2 more days to go to plae a Sale-A-Bration order!)and my Box Buster tool and Envelope Punch Board:
Today I thought I would share what was inside - a sweet little box frame:
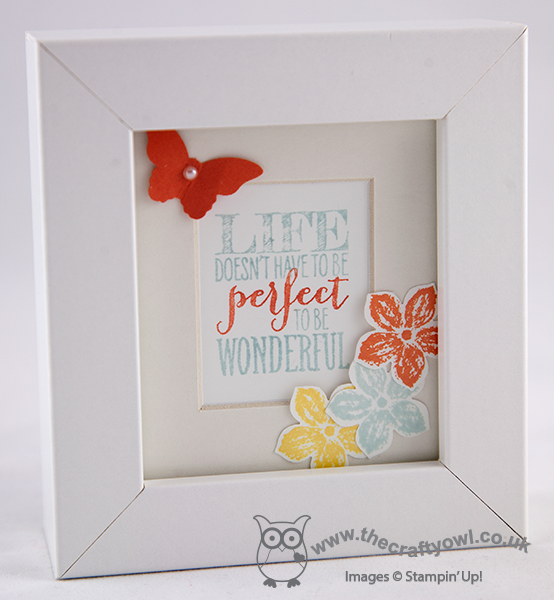
Just a simple stamped sentiment, decorated with a punched butterfly and a few flowers stamped and punched using the Petite Petals stamp set and co-ordinating punch. A decorated frame makes a lovely gift.
Back tomorrow with a card (or two!); until then, happy stampin'!
Stampin' Up! Supplies Used:
65600cd8-bb9b-4ae6-86f9-55f983360d71|0|.0|96d5b379-7e1d-4dac-a6ba-1e50db561b04
Tags: 3D Projects, Box Buster, boxes, Envelope Punch Board, Bitty Butterfly Punch, Petite Petals, Petite Petals Punch, Perfect Pennants, Shop online, Sale-a-bration 2014, Sweet Sorbet, Stamp-a-ma-jig, Stampin' Up, Stampin' Up Card, Stampin' Up Card ideas, Stampin' Up Supplies
3D Projects | Envelope Punch Board | Sale-a-bration | Stamping
by Joanne James11. March 2014 15:13Firstly, thank you to everyone who has left comments on my blog, Facebook page, youTube channel or emailed me in person with comments and praise for my new Box Buster tool - I am genuinely touched that you have gone out of your way to share with me what a great tool you think this is and I'm delighted to be able to share it with you. Today I'm back with another video tutorial showing you a different box that you can make using your Envelope Punch Board - an open topped Easter bunny treat box - made using paper from the lovely Fresh Prints Designer Series Paper stack:
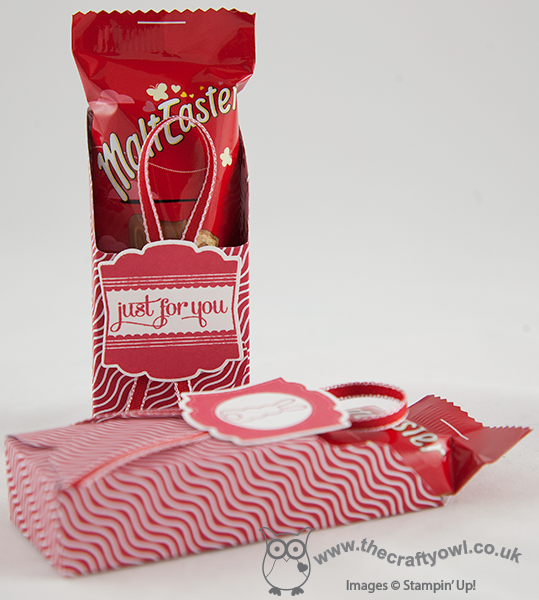
Sometimes you want to be able to see the contents of your box and today's box is just perfect for that. It also means that when you're making your box out of such lovely double-sided designer paper, you get a lovely glimpse of the reverse side too:
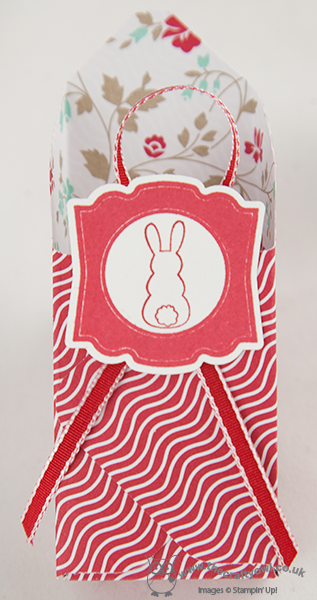
I love the Fresh Prints DSP stack - these paper stacks are great for small boxes and perfect if you're a card maker; I always get through several of these each season! Today's boxes were made to fit the Malteser Easter bunnies that are currently on sale in store right now, but as always with the aid of my Box Buster tool you could adapt the same style box to fit any size contents, just by measuring them; Box Buster from The Crafty Owl will do all the hard work for you and tell you what size paper you need and where you should make your punch marks. So, without further ado, here's what you've all been waiting for - the link to today's video:
)
I hope you found the tutorial useful - there's lots more still to come! Don't forget - you can access the Box Buster tool via the button on the right hand side of my blog home page or simply by clicking here.
Back tomorrow with another project; until then, happy box making!
Stampin' Up! Supplies Used:
c5d11fe0-3556-4a4f-8586-67c08127827c|0|.0|96d5b379-7e1d-4dac-a6ba-1e50db561b04
Tags: Box Buster, boxes, Artisan Label Punch, Eggstra Spectacular, Easter, Envelope Punch Board, Fresh Prints DSP Stack, Label Love, Shop online, Stamp-a-ma-jig, Stampin' Up, Stampin' Up Card ideas, Stampin' Up Supplies, video tutorial
Box Buster | Boxes | Envelope Punch Board | Video Tutorials
by Joanne James7. March 2014 19:25Hello everyone! From the home of 'cool time-saving tools' (if you're reading this and you're an SU! demonstrator you should also check out my Product Table Builder application) today I have the third of this week's video tutorials showing you how to make a super cute Easter mini-egg treat box using your Envelope Punch Board and my new Box Buster tool. You can use your Envelope Punch Board to make boxes of all shapes and sizes - including some rather dinky small ones. Check out this box that I made to hold 5 foil-wrapped mini eggs ready for Easter:
It measures just 20mm x 20mm x 85mm and it was so easy to work out the paper dimensions and punch points with the help of the Box Buster tool. Here's the video that shows you how I did it, along with a 'top tip' when creating narrow boxes like this:
This size box would also make a great wedding favour - it's the perfect size for sugared almonds if you're looking for something traditional. I hope you found today's video useful; why not use the Box Buster tool to create your own small or narrow boxes? You can use either millimetres or inches (to 1/8 of an inch) and create the box size of your choice?
Back tomorrow with another project; until then, happy stampin'!
Stampin' Up! Supplies Used: