Ornate Layers Meets All Things Fabulous AYSI272

by Joanne James8. April 2022 12:00

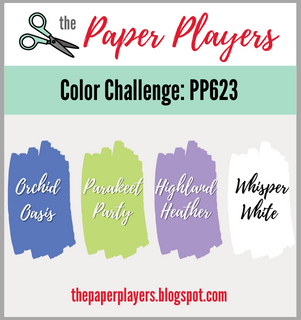
Happy Friday everyone - the end of the week is here! This also means I'm sharing my design team card for our new challenge over at As you See It where it's time for a fun sketch challenge:


I paired our sketch full of horizontals with this week's Color Throwdown colours and set to work. Initially this sketch had me stumped; my 'go to' would normally be designer series paper but I just wasn't inspired (check out what some of my teamies did with DSP though - amazing!) I perused my catalogue and then happened upon a retiring die that I thought would make a pretty repeating design - take a look at what I came up with:


Here's the low-down on today's card:

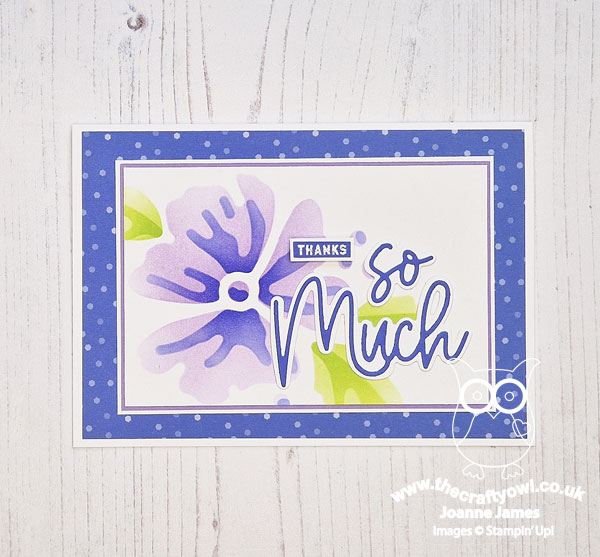
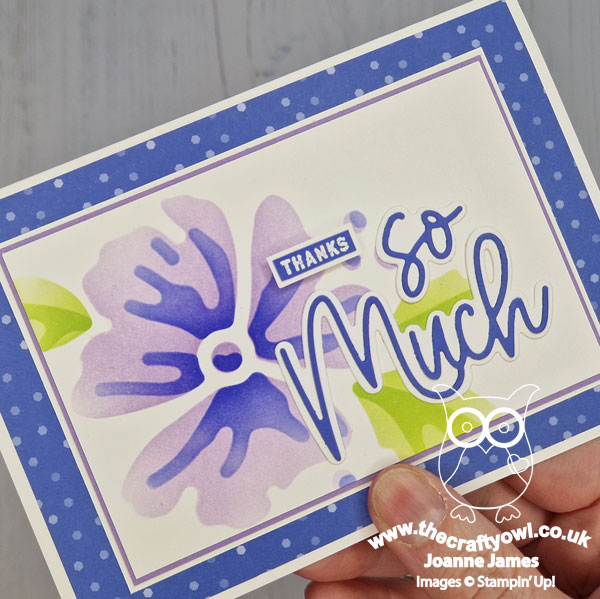
Do you recognise this die? Or actually dies, as it uses two? Both the stitched rectangle and the floral line are from the retiring Ornate Layers Dies. In addition to the fancy frames in this set, there are two pretty floral diecut elements too and this is one of them. What this card lacks in supplies - you need literally just a handful of items to recreate it - it more than makes up for in time: all of the tiny floral elements have been paper-pieced into the negative of the white rectangles and yes it took a while! It's so worth it though; I considered leaving the panels white with the negative space unfilled and also considered cutting the panels from coloured cardstock, but they just didn't look as good. Instead I cut five rectangles with the negative die inset, then diecut the floral band an additional five times each in Coastal Cabana and Soft Sea Foam and using some Press 'n' Seal and the putty end of my Take Your Pick Tool, paper-pieced the pieces into each white panel (having first adhered it to a piece of cardstock using an adhesive sheet. 

For the gold elements, instead of using gold foil I rubbed the remaining areas with gold gilded leafing; this stuff gets everywhere, but I love the bright shine and slightly textured effect that it gives - you can see it more closely below:

I finished with a sentiment from the retiring 'All Things Fabulous' which has sadly already sold out here in the UK (love this set!) So what do you think? This card took a while but was so worth it - I love it! I'm also linking today's card up over at The Flower Challenge where they want us to add a heart to our floral cards; is it me, or are those not 'hidden' gold hearts on their sides either side of the central flower? For all you Walt Disney World fans out there, think of it like a hunt for 'hidden Mickey's' - you see them, right?!

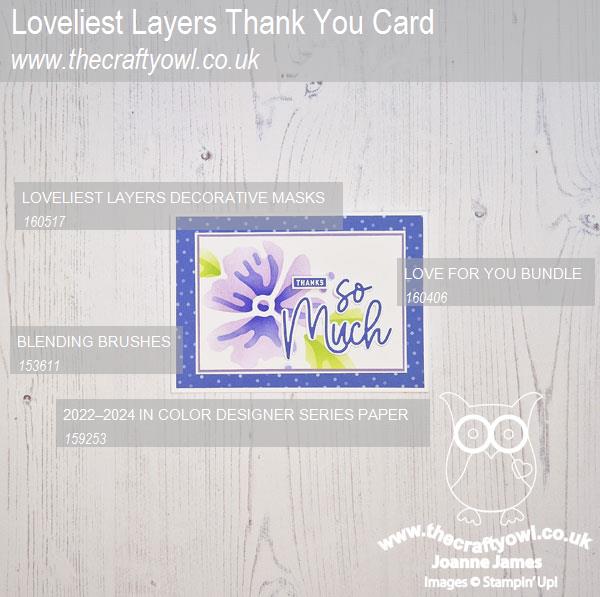
Here is the visual summary of the key products used on today's project for you to pin for easy reference:
 

You can see all of my 'How To' summaries on my 'How To - Tips and Techniques' Pinterest board in case you've missed any. 

Here's a summary of our challenge rules:

  • Create any card, scrapbooking page, 3D project or packaging project that fits the challenge.
  • Please include the challenge graphic and link back to the challenge in your blog post. Turn off word verification so we can leave you lots of lovely comments. Make sure you link the post not the whole blog to the Linky. Use #AYSIXXX when uploading to a public gallery.
  • If you’re unsure about ‘the rules’, check the details under the Challenge Guidelines tab on the As You See It Challenge homepage.
  • In a sketch challenge, you are welcome to rotate or flip a sketch. You can replace shapes used such as substituting a circle panel for a square panel. However, we must be able to still see the basis of the original sketch in your finished product.
We look forward to seeing your creations in the AYSI gallery.

Enjoy your day; I have my usual list of Friday chores to complete today, including amongst other things trying to line-dry my washing in between the April showers (so far this week the score is 'Weather 2 - Joanne 0'!) but I'm hoping since I have a helper or two I met get done quicker and be able to squeeze in a little crafty time too. I'll be back tomorrow with another project. Until then, happy stampin'!


Stampin' Up! Supplies Used:
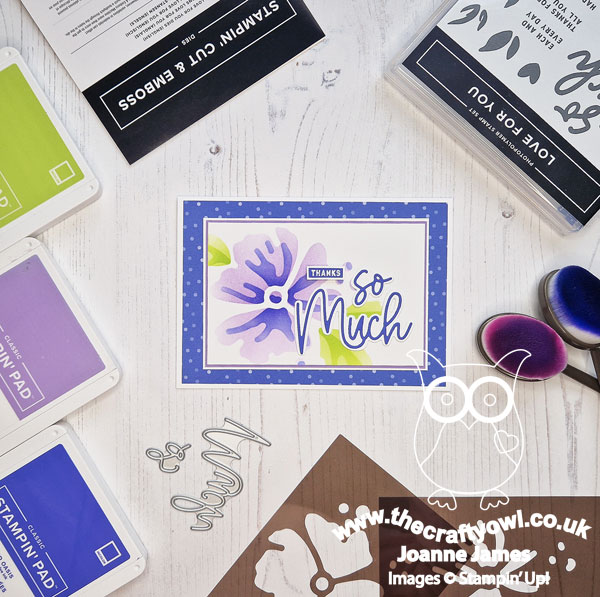
Table built using Product Table Builder by The Crafty Owl - Independent Stampin' Up! Demonstrator.
 

Pierced Blooms For The Happiest of Birthdays

by Joanne James7. April 2022 15:00

It's Thursday and today's card is for a couple of challenges: 


I used the colour palette over at TGIF Challenges (love those colours!) and the new sketch over at Atlantic Hearts Sketch Challenge for a birthday card to pay homage to a favourite retiring stamp set and some of my most favourite ever dies - take a look:


Here's the low-down on today's card:

Happiest of Birthdays - I used the big sentiment from 'Happiest of Birthdays' front and centre - the size of this greeting really makes a card, with nothing more than some decoration required.

Farewell Pierced Blooms - For said decoration, I used my Pierced Blooms Dies to cut some flowers and leaves and layered them to decorate both the outside and the inside of my card, where I also used another of the sentiments in the set:

Finishing Touches - A strip of contrasting Brights designer paper, some 'retired) sparkly enamel dots and a pair of tiny brushed brass butterflies add some final finishing touches:

Some of my favourite retiring products today though, both of which will be 'keepers' for me; it's not all sad though - I'm sure there will be some great new ones arriving soon!

Here is the visual summary of the key products used on today's project for you to pin for easy reference:


You can see all of my Product and 'How To' summaries on my 'How To - Tips and Techniques' Pinterest board in case you've missed any. 

Enjoy your day; I'll be back tomorrow with another project. Until then, happy stampin'!


Stampin' Up! Supplies Used: 

Table built using Product Table Builder by The Crafty Owl - Independent Stampin' Up! Demonstrator.

Goodbye To Turtle Friends CCS 464

by Joanne James5. April 2022 13:00

It's Tuesday and time for a new challenge over at CAS Colours & Sketches. Bhavya is hosting for the month of April and our first challenge is a colour challenge: 


For my card today I decided to have one last outing with my retiring Turtle Friends bundle for a fun bleated birthday card - I used the current Inspire.Create sketch for my layout:


Here's the low-down on today's card:

I did add a few layers to today's card, including a strip of Pansy patch gingham, but otherwise was very careful to preserve my 'white space' and keep my design simple. A punched turtle, complete with party hat, was simply stamped and some highlights added with tone-on-tone Blends markers, along with a touch of chalk marker to highlight his eye:

It's always good to have a belated birthday card on hand - for a card maker, I seem to need all too many of these! I love the 'Turtle Friends' set and will be sorry to see it go; the turtle punch is already sold out, but the stamp set is still available as part of the Last Chance Products Promotion; as is the retiring Pansy Patch paper and the chalk marker - a super-useful crafting staple. 

Here is the visual summary of the key products used on today's project for you to pin for easy reference:


You can see all of my 'How To' summaries on my 'How To - Tips and Techniques' Pinterest board in case you've missed any. 

As a reminder, for our colour challenges, you must use all of the stated challenge colours. You may also use neutral colours; however, the challenge colours should be the most noticeable ones featured on your card. We use Stampin' Up! colour names for reference, but you are welcome to use any other companies' products as long as you match the challenge colours as closely as possible.

I do have a bonus card for you using today's colours too; I was playing around with the colours and originally made this card, using this week's Paper Craft Crew Sketch and the retired 'Flowering Cactus' bundle:


It is a little more clean and simple than my turtle card to be fair, but I didn't like it as much so moved it to second place - but I thought I'd share it with you anyway! And here's the PPC sketch:


Enjoy your day; I have a mountain of ironing to get through - wish me luck! I'll be back tomorrow with another project. Until then, happy stampin'!


Stampin' Up! Supplies Used:

Table built using Product Table Builder by The Crafty Owl - Independent Stampin' Up! Demonstrator.

Hey Birthday Chick Dancing Spring Chicken PP585

by Joanne James3. April 2022 09:00

Today it's Sunday and time for this week's new challenge over at The Paper Players! It's the turn of the fabulous Ann to host this week and she has a fun theme challenge for you to work with:


Laughter is the best medicine - so true! I had a rummage amongst my stamps for something funny and using Jen T's sketch over at Freshly Made Sketches this week (it's a keeper!) for my layout I set to work. This is what I came up with:


Here's the low-down on today's card:

I actually don't have that many stamps that are out-and-out funny, but plenty that can raise a smile and 'Hey Birthday Chick' is definitely one of them! I love that sentiment 'you're still a spring chicken' so I decided to pair it with the chicken in this set that always looks to me like she's dancing! I added some rainbow glimmer bunting and some stamped confetti, and having coloured my chicken decided to add a ribbon ruffle skirt by running a stitch through a piece of Polished Pink ribbon - doesn't it look as if she's doing the can-can?!

Very 'oo la la'!! What do you think - comical enough to raise a smile? It made me chuckle anyway :-) I added another chicken along with another sentiment from this set to decorate the inside of my card to finish:

'Hey Birthday Chick' and the co-ordinating Birthday Chick Dies are on the retired list, so if they tickle your funny bone and you'd like to add them to your collection, they are currently both available at 50% off - a real bargain! Rainbow glimmer paper is also on the retired list - I am so sad to see this go! Here's hoping there is more glimmer paper on the way in the new annual catalogue ... 

Here is the visual summary of the key products used on today's project for you to pin for easy reference:


You can see all of my Product and 'How To' summaries on my 'How To - Tips and Techniques' Pinterest board in case you've missed any. 

Before you reach for your ink and papers, check out what our amazing team has created to inspire you this week:

Here's a quick recap of our challenge rules:
 
1.  Create a new paper project
2.  Upload your creation to your blog with a link back to us and provide a direct link to the post featuring your challenge submission.
3.  Please link your card to no more than four challenges, TOTAL.
4.  Have FUN!

Enjoy your day; I am mid-way through a 'Mum and son' weekend with the youngest of the James Juniors: we spent yesterday watching Manchester United play at home in Old Trafford, stayed overnight and today we are doing the stadium tour - so we are all about the football, for sure! A lovely way to start the Easter school break though. I'll be back tomorrow with another project. Until then, happy stampin'!


Stampin' Up! Supplies Used: 

Table built using Product Table Builder by The Crafty Owl - Independent Stampin' Up! Demonstrator.

Painter's Palette For World Art Day F106

by Joanne James1. April 2022 09:00

Yay - the end of the week! Today I have my card for the new challenge over at Festive Friday:


The challenge that we are celebrating this week is 'World Art Day' which is on April 15th. Remember the fun thing is that at Festive Friday you do not need to actually celebrate the occasion; your goal is to simply use three or more items from the inspiration list on your project. This week I decided to go all-out with the theme of our challenge and used paint splats, easel, primary colours and a little masking and this is what I came up with:


Here's the low-down on today's card:

I delved into my collection of retired stamps for today's card - the retired 'Painter's Palette' set from a few years ago had everything I needed! I stamped a bunch of paint splats onto my white card base in primary colours (along with a little green for good measure) along with an easel, then stamped the easel along with a birthday sentiment and decorated with a few more paint splats (this is where the masking came in so that the dots stayed within the frame) and added this to my card base with dimensionals: 


A few retired enamel dots, along with some additional paint splats both inside my card and on the envelope completed my card - perfect for the budding artists amongst us!

How does our board inspire you? I can’t wait to see what YOU create! For more inspiration, be sure to visit the rest of the  Festive Friday Challenge Design team:

Ann Schach
Beth McCullough
Sharon Hashimoto Burkert
Melanie Hungerford
Helen Jennings
Stephanie Lanzalotto
Melva Peters
Jaydee
Diane Evans
Joanne James - that's me!

Enjoy your day and I'll be back tomorrow with another project. Until then, happy stampin'!


Stampin' Up! Supplies Used:

Table built using Product Table Builder by The Crafty Owl - Independent Stampin' Up! Demonstrator.

Every Chapter of Our Friendship is Peachy

by Joanne James30. March 2022 10:04

Today I'm sharing a card that uses blue, orange/peach and green from the current Color Dare challenge ( I used my closest matches) and the sketch over at Atlantic Hearts Sketch Challenge:


I had my as yet uninked 'Every Chapter' stamp set out on my desk as I was considering using it for last week's Fusion challenge but didn't get around to making a second card, so decided to pair it with some of the retiring 'You're A Peach' designer series paper and this is what I came up with:


Here's the low-down on today's card:

Every Chapter - The 'Every Chapter' stamp appealed to me straight away because it's a single image stamp that's great for colouring - pair with some white cardstock, black ink and a colouring medium such as pencils or Stampin' Blends and there's your card - done! 

Step It Up - Today's card is a stepped-up version of that simple concept though; I added a touch of flowered 'You're A Peach' paper (now discounted in the Last Chance product sale - grab it while you can!) and coloured my image with various colours of co-ordinating Blends, then fussy cut it and added it to my card with dimensionals, having scored between each book and used my bone folder to curve them slightly for added effect. I also added some ribbons in coordinating colours to edge my paper, along with a few enamel dots.

Finishing Touch - For a final flourish, I added a couple of tiny punched leaves and a Flowering Flourish in Pale Papaya in place of the stamped flower on one of the books; I think this adds a fun extra detail:


So what do you think? This is the perfect card to share with a book-loving friend - I think I might pop a note inside and put inside the next paperback that I recycle to one of mine! The image would also be great to decorate bookmarks with, or perfect to share with members of a book club. So many ideas - I will definitely be using again!

Here is the visual summary of the key products used on today's project for you to pin for easy reference:


You can see all of my 'How To' summaries on my 'How To - Tips and Techniques' Pinterest board in case you've missed any. 

Enjoy your day and I'll be back tomorrow with another project. Until then, happy stampin'!


Stampin' Up! Supplies Used:

Table built using Product Table Builder by The Crafty Owl - Independent Stampin' Up! Demonstrator.

Retro In Symmetry CCS463 Double

by Joanne James29. March 2022 12:00

It's Tuesday and time for a new challenge over at CAS Colours & Sketches. There are 5 Tuesdays in March so we are ending the month with the double: one of our previous sketches and a retired colour combination. For Jeanne's final challenge as hostess she chose the following:  


For my card today I went with a super simple single stemmed flower from the 'In Symmetry' stamp set - take a look:


Here's the low-down on today's card:

I thought the rather retro design of the 'In Symmetry' stamp set suited this bright, rather retro colour palette! I stamped my flower in Watermelon Wonder and Just Jade (my closest substitute to 'Taken With Teal' which is way before my time!) onto a white stitched rectangle and added a Pineapple Punch enamel dot before adding to my Pineapple Punch cardbase:

A sentiment heat embossed in white onto a piece of Watermelon Wonder cardstock completes the front of my card. I added another flower, coloured with my sponge daubers, to decorate the inside of my card:

And that's my card - done! The 'In Symmetry' stamp set is great for bright and colourful floral cards and I will miss having it in my collection when it retires. If you don't have it and it's still on your wishlist, why not hop over to my online store via the link below and pick it up at a 40% discount as part of the Last Chance Products Promotion whilst supplies last - a proper bargain!

Here is the visual summary of the key products used on today's project for you to pin for easy reference:


You can see all of my 'How To' summaries on my 'How To - Tips and Techniques' Pinterest board in case you've missed any. 

As a reminder, for our colour challenges, you must use all of the stated challenge colours. You may also use neutral colours; however, the challenge colours should be the most noticeable ones featured on your card. We use Stampin' Up! color names for reference, but you are welcome to use any other companies' products as long as you match the challenge colours as closely as possible.

Enjoy your day and I'll be back tomorrow with another project. Until then, happy stampin'!


Stampin' Up! Supplies Used:

Table built using Product Table Builder by The Crafty Owl - Independent Stampin' Up! Demonstrator.

Sweet Symmetry In Triplicate PP584

by Joanne James27. March 2022 08:00

Today it's Sunday and time for this week's new challenge over at The Paper Players! It's the turn of the fabulous LeAnne to host this week and she has my favourite, a sketch challenge, for you to work with:


LeAnne's sketch is so perfect for a showcase of patterned paper. I decided to go with one of my favourite bright and colourful paper packs, Sweet Symmetry, and used not one but two patterned papers on my card - take a look:


Here's the low-down on today's card:

I don't often pair patterned papers on my cards, but I loved the combination of the pattern with the shades of blue for the background, with a pop of bright colour from the paper I used for my three panels; the navy stems help tie the two patterns together. I used my Stitched Rectangle Dies to crop both my three vertical panels and my horizontal sentiment. I almost left my card there, but decided to upset the symmetry that I had worked so hard to create elsewhere with the near-perfect pattern alignment by fussy cutting a trio of flowers and using them to accent my sentiment, using colours lifted from the paper pattern:

I can't tell you how much I agonised over that trio of flowers, but I decided I liked the addition so left them in. What do you think - were they a good addition? Do leave me a comment below - I'd love to hear your thoughts! 

I love the colours and bright patterns of the products in the Sweet Symmetry suite and will be sad to see them retire. The good news though is that both the 'In Symmetry' stamp set and Sweet Symmetry designer series paper are currently on the Last Chance Products List, each with 40% off. If you don't have either now is the time to pick them up and grab yourself a bargain before they're gone! Follow the links at the bottom of this post to go straight to the Stampin' Up! store to order yours.

Here is the visual summary of the key products used on today's project for you to pin for easy reference:


You can see all of my Product and 'How To' summaries on my 'How To - Tips and Techniques' Pinterest board in case you've missed any. 

Before you reach for your ink and papers, check out what our amazing team has created to inspire you this week:

Here's a quick recap of our challenge rules:
 
1.  Create a new paper project
2.  Upload your creation to your blog with a link back to us and provide a direct link to the post featuring your challenge submission.
3.  Please link your card to no more than four challenges, TOTAL.
4.  Have FUN!

Enjoy your day; it's Mother's Day here in the UK today so I am looking forward to being spoiled and waited on all day long - here's hoping! I'll be back tomorrow with another project. Until then, happy stampin'!


Stampin' Up! Supplies Used: 

Table built using Product Table Builder by The Crafty Owl - Independent Stampin' Up! Demonstrator.

Make Way Clouds - Beautiful Rainbow Coming Through!

by Joanne James26. March 2022 12:12

Today I'm sharing a card using the sketch over at Fusion (rotated through 180 degrees):


No bookshelves though - as promised, I've another rainbow card for you - take a look:


Here's the low-down on today's card:

I thought the sketch really lent itself to a rainbow peeking through the clouds, so I added some Pool party patterned 'Sunshine and Rainbows' Sale-A-Bration patterned paper to my card base, then added a split panel with diecut stitched cloud edges cut with the Basic Border Dies. A diecut rainbow coming through the clouds bridges the gap:


A gold heat embossed sentiment and a few enamel raindrops complete my card.

Here is the visual summary of the key products used on today's project for you to pin for easy reference:


You can see all of my 'How To' summaries on my 'How To - Tips and Techniques' Pinterest board in case you've missed any. 

I made this card when I made my Thursday make - here's a photo of both cards together:


I hope you've been enjoying my rainbows in their various guises this week! 

Enjoy your day; I'm off to hockey this afternoon. I'll be back tomorrow with another project. Until then, happy stampin'!


Stampin' Up! Supplies Used:

Table built using Product Table Builder by The Crafty Owl - Independent Stampin' Up! Demonstrator.

In The Moment And A Quick Rainbow For AYSI271

by Joanne James25. March 2022 12:00

Today I'm sharing my design team card for our new challenge over at As you See It where the lovely Heather H had a speed stamping challenge for us:


Heather's theme initially had me scratching my head this week, as I have no current stamps that are wellington boots or umbrellas; then I suddenly realised 'staying dry' can be as simple as taking the outside in! That thought led to another and I was away - take a look at what I came up with:


Here's the low-down on today's card:

Yes, another rainbow for you today! I still had the 'In The Moment' stamp set out on my desk having prepped for my class using this set earlier this week. In my class, we looked not only at how to colour with Stampin' Blends, along with pencils, Stampin' Write markers and blending tips for each medium, but also different ways in which you can use line drawn images, including ways of colouring beyond the obvious. This card is a 'bonus' for the ladies that attended my class as it looks at another way to colour an image that might not be immediately obvious: here I've focused less on the inside and more on the outside - what can be seen beyond the scene, which in this case is the stormy grey sky and a beautiful rainbow through the window itself.

I used all 10 minutes of my allotted time for this week's speed challenge, first cutting my card base, mat and white pieces and stamping the image and sentiment in Memento Black, using my Stamparatus to get a nice solid image, then I used the remainder of the time to colour my image. I went with a traditional rainbow and coloured it with my Blends, simply drawing in the arch of colour and blending between each to get a smooth-ish finish. I added some clear Wink of Stella to give my rainbow some sparkle and a few clear enamel raindrops to add to the effect:

In the interests of time, I coloured the rest of my sky in Smoky Slate and added a few grey highlights to the image of lady, but that was all. I really like the effect - the lack of colour on the main image really draws the eye to the rainbow outside and the pop of colour it adds. 

Here is the visual summary of the key products used on today's project for you to pin for easy reference:


You can see all of my 'How To' summaries on my 'How To - Tips and Techniques' Pinterest board in case you've missed any. 

This is my second entry over at The Paper Craft Crew's rainbow colour challenge this week - traditional rainbow colours this time - and another entry for the rain/rainbow challenge over at Global Design Project #GDP335.


Here's a summary of our challenge rules:

  • Create any card, scrapbooking page, 3D project or packaging project that fits the challenge.
  • Please include the challenge graphic and link back to the challenge in your blog post. Turn off word verification so we can leave you lots of lovely comments. Make sure you link the post not the whole blog to the Linky. Use #AYSIXXX when uploading to a public gallery.
  • If you’re unsure about ‘the rules’, check the details under the Challenge Guidelines tab on the As You See It Challenge homepage.
  • In a speed stamping challenge, please time yourself and say in your post how long your card took to complete. 
We look forward to seeing your creations in the AYSI gallery.

I hope you're enjoying my rainbows in all of their various guises this week because - spoiler alert! - I have another rainbow card for you tomorrow! Enjoy your day and I'll be back tomorrow with another project. Until then, happy stampin'!


Stampin' Up! Supplies Used:

Table built using Product Table Builder by The Crafty Owl - Independent Stampin' Up! Demonstrator.

New Online Exclusives

There are new products available exclusively in the online store from 5 November - check them out here.

Latest Kits!

Stampin Cut and Emboss

The Layered Landscapes Kit and Nature's Paintings Kit are the latest kits in the online store - get yours here!

Shop Online

Access my online shop 24 x 7, 365 days of the year:

Current November hostess code:

9NKXDTTR

Shop Online

Mini Catalogue

BROWSE THE CATALOGUE

'Tis The Season - the new Stampin' Up! Mini Catalogue is here! For more details and to download your copy click here

Scrapbooking

Stampin' Up! has introduced a new range of 12x12" scrapbooking product and kit - the full range is now available to purchase online. To download a copy of the new digital Scrapbooking Catalogue click here.

2024-25 Annual Catalogue

BROWSE THE CATALOGUE

Click on the image to download your copy of the 2024-25 annual catalogue. For a full list of current SU! supplies, go to my online store. If you would like any help or advice, please drop me a line at joanne@thecraftyowl.co.uk or give me a call on 07773 421446 - I'd be happy to help.

Join My Team

It's always a great time to join Stampin’ Up! New team members can get £130 worth of products for only £99 + free business supplies + free shipping + all the fun being a part of Stampin’ Up! Stampin' Up! has something for everyone: join my growing team and benefit from my support to enjoy Stampin' Up! however you choose.

If you're interested, call me for a chat to understand how I can help you realise your goals. Alternatively, if you have already decided to sign up and you just can't wait, please click here for the link to the online form where you can sign up and order your starter kit right away! 

About Me

Hi I'm Joanne and live in Northampton and when I'm not looking after my husband and two beautiful children, am an avid crafter with a passion for all things Stampin' Up!

I must confess that I have never been a big rubber stamper - until I discovered Stampin' Up! that is. I love the fact that I can get such great results with co-ordinating stamps, inks, papers and punches - the possibilities are endless! Join me on my stamping journey as I share the things I love and be inspired to create amazing things yourself!

Follow Me

Monthly Newsletter

Box Builder

Click the button above to use Box Buster to create your custom box design using the Envelope Punch Board!

Kits Collection Now Available!

Stampin Cut and Emboss

The new Kits Collection from Stampin' Up! is now available!

Click here to see the current kits available and order yours online today.

I Design For


Stampin' Up Stuff

This is my personal blog and is not endorsed by Stampin’ Up! I hope you find it a plentiful source of ideas and personal inspiration but please don't copy my designs for contest submission or use for classes, publication or sale without express permission.