A Purple Floral Sentiment for PP388

by Joanne James8. April 2018 09:00


I've been away at Stampin' Up!'s UK Onstage event for the last couple of days, having a ball with some of my team and lots of my fellow Stampin' Up! demonstrators. Today it's Sunday though, I'm back and it's time for this week's new challenge over at The Paper Players! It's the turn of my awesome friend LeAnne to host this week and she has a fun colour challenge for you to work with:


I love purples although was a little short on time to prepare my card for this week so I decided to go for a large focal sentiment to help me along the way this week. It was a good opportunity to open my as yet un-inked Floral Sentiments stamp set  - take a look:


Here's the low-down on today's card:

Floral Statements - I chose the feature the large 'Thanks' sentiment from the Floral Statements stampset and coloured it with a mix of markers: my 3 retired Wisteria Wonder Blandabilities for the petals and my Tranquil Tide Stampin' Write marker for the leaves. This stamp set is great as it really does much of the work for you - it doesn't leave room for much else! 

Layered Leaves - I backed my stamped panel with an offset panel of Elegant Eggplant that I embossed with my layered leaves Dynamic Textured Impressions Embossing Folder; I know you can't see much of it, yet the peeks of texture add a welcome added detail.

Drops of Glitter - I added a few of the Glitter and Clear epoxy dots, along with some clear Wink of Stella on the flower petals and a sliver of doily, to complete my card.

This card really was quick to put together with some built in de-stress as a result of the time it took to colour it in too - bonus! In hindsight, I wish I'd heat embossed the stamp in black for a little more shine and contrast; something to try next time.

Here is the visual summary of the key products used on today's project for you to pin for easy reference:


You can see all of my Product and 'How To' summaries on my 'How To - Tips and Techniques' Pinterest board in case you've missed any. 

Before you reach for your ink and papers, check out what our amazing team has created to inspire you this week:

Here's a quick recap of our challenge rules:
 
1.  Create a new paper project
2.  Upload your creation to your blog with a link back to us and provide a direct link to the post featuring your challenge submission.
3.  Please link your card to no more than four challenges, TOTAL.
4.  Have FUN!

I can't wait to see what you create with this week's colours and look forward to visiting your blogs this week! Enjoy the rest of your weekend; my day will hopefully be a quiet one as I relax with my new catalogue for the umpteenth time to drool over the new stamp sets and product coming our way. Do come  back tomorrow as I will have lots of important announcements with regard to this month's retirement list; until then, happy stampin'!


Stampin' Up! Supplies Used: 

Table built using Product Table Builder by The Crafty Owl - Independent Stampin' Up! Demonstrator.

Picnic With You Basket of Flowers Exploding Box Card

by Joanne James1. April 2018 18:00

No, it's no April Fools - it's another two-post day today! I have spent a relaxing day being treated to Sunday lunch, along with my fair share of chocolate eggs following this morning's obligatory Easter egg hunt and I wanted to share an exploding box card that I made recently that is just perfect for this week's challenge over at Stamps Ink Paper before it closes this evening:

My card looks rather inconspicuous from the outside, just like a simple lidded box. Yet when the lid is removed, my unassuming card 'explodes' and opens up to reveal a 3 dimensional basket of flowers - take a look at this top-down view, showing all of the flaps and pockets - you can also see the layering within my basket:


And here you can see properly what the flower basket centrepiece looks like:

A sweet basket of flowers, complete with butterfly, on a base edged with grass. Isn't that fun?! Here's the low-down on today's card:

Picnic With You - I used the stamps and framelits from the Picnic With You bundle to create my basket, cutting four basket pieces scoring and glueing at the corners to create a 3 dimensional basket to hold my flowers. I love the embossed basket weave detail that is added with the speciality piece in the Picnic Basket Builder Framelit set - it adds great detail and interest.  

In-Colour Colour Combo - My card features Berry Burst flowers and makes a real feature of the In Color designer series paper in Tranquil Tide. Whilst my main box is made out of Whisper White, the lid is made from Tranquil Tide DSP and I've carried this through for the pockets and mats for the inside of my card. I added a little Pool Party butterfly for an unexpected pop of contrasting colour. I love this deep, yet fresh colour combo - feel free to save it if you would like to use it for your future project inspiration:


Pockets and Tabs - I added a generic message from the Picnic With you stamp set on one of the inner flaps of my card, and another on the right hand side after I took this photo that displayed a 'Happy Mother's Day' message (this card was for my Mother-In-Law for Mother's Day - I knew she would appreciate something a little different and it I could deliver by hand, another bonus!) In addition, the pockets contained two simple slide out cards, with simple tabs courtesy of the Circle Tab Punch (such a useful punch!) - we wrote messages on ours but they would also be a great place to add some photos or even some Memories & More cards perhaps.

Here's another photo showing the centre of my card in detail: 

Here is the visual summary of the key products used on today's project for you to pin for easy reference:


You can see all of my 'How To' summaries on my 'How To - Tips and Techniques' Pinterest board in case you've missed any. 

I hope you have all enjoyed your day and I'll be back on Tuesday with another project. Until then, happy stampin'!


Stampin' Up! Supplies Used:

Table built using Product Table Builder by The Crafty Owl - Independent Stampin' Up! Demonstrator.

Epic Celebration - You Rock for The Paper Players PP387

by Joanne James1. April 2018 09:00

Happy Easter Sunday wishes everyone! It's time for this week's new challenge over at The Paper Players! It's the turn of the amazingly talented Laurie to host this week and she has a fun theme challenge for you to work with:
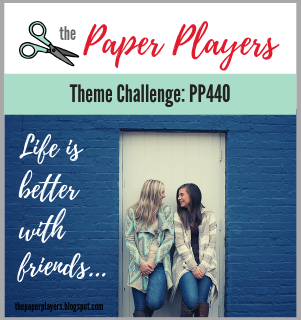
    

I don't have much in the way of music-themed supplies in my collection and usually end up resorting to my e-cutter to create music-themed cards and gifts (you can see some of my previous examples here and here), so I was thrilled to see the Epic Celebrations set in this year's Sale-A-Bration promotion. As the wife of a guitarist and the other mother of two almost-teens, one of whom is in a band and both of whom are into either listening to or playing music in a big way, this set was a must-have for me. So whilst Sale-A-Bration has now ended, this set is a keeper and I just had to use it on today's card. I also used this week's sketch at Freshly Made Sketches for my layout - take a look:


Here's the low-down on today's card:

Epic Tone on Tone - I decided to use a simple tone-on-tone stamped background in Real Red using the guitar stamp to create some detail and to highlight my main focal image, which I stamped and heat embossed in black on watercolour paper, then coloured with my aqua painter. I added this to a collection of stars and bits and pieces to add a touch of 'glam rock' to my card. 

A LittleSheet Music - The border panel is a section of the background stamp 'Sheet Music', which I simply stamped onto Whisper White and cut out a section for added interest in keeping with the theme.

A Punny Sentiment - My punny sentiment is courtesy of the now-retired 'Crazy About You' set, which was perfect for this card. I also used the 'You're Awesome' sentiment from the Epic Celebrations set on the inside of my card:


Here is the visual summary of the key products used on today's project for you to pin for easy reference:
 

You can see all of my Product and 'How To' summaries on my 'How To - Tips and Techniques' Pinterest board in case you've missed any. 

This card is headed to my pile as a thank you for one of Rebecca's teachers; she will be performing the role of Brigitte in her whole school production of Rogers & Hammerstein's 'The Sound of Music' next term and there are an army of staff involved in making this happen, including her Maths teacher, who also plays electric guitar. The girls at school think he is super cool, so this card will be perfect for him!

Before you reach for your ink and papers, check out what our amazing team has created to inspire you this week:

Here's a quick recap of our challenge rules:
 
1.  Create a new paper project
2.  Upload your creation to your blog with a link back to us and provide a direct link to the post featuring your challenge submission.
3.  Please link your card to no more than four challenges, TOTAL.
4.  Have FUN!

I can't wait to see how you interpret this week's theme and look forward to visiting your blogs this week! Enjoy the rest of your weekend - enjoy your Easter egg hunts and eat as much chocolate as you can safely consume! I'll be back tomorrow with another project; until then, happy stampin'!


Stampin' Up! Supplies Used: 

Table built using Product Table Builder by The Crafty Owl - Independent Stampin' Up! Demonstrator.

Ready For Christmas?!

by Joanne James31. March 2018 20:00

I'm back for a second post today! I had a little time for a spot of crafting this morning - I feel like I haven't been in my craft room to make something 'just because' in such a long time! So somewhat ironically, given that it's Easter weekend, I made a Christmas card! Yes - I couldn't resist making a card to join in with the challenge over at Merry Monday this week: 


I decided to use the cute little sausage dog from the Ready For Christmas stamp set, still available on carryover from the last Autumn-Winter seasonal catalogue, along with some retired Christmas Around The World tartan designer series paper:


I had a little fun with this card, and paper pieced both the occasional table and the dog using two different patterns from the Wood Textures DSP stack - don't you just love the honey-colour of that naughty-but-cute dachshund?! And a simple sentiment on the inside from the same set completes my card:


Here is the visual summary of the key products used on today's project for you to pin for easy reference:


You can see all of my 'How To' summaries on my 'How To - Tips and Techniques' Pinterest board in case you've missed any. 

Back soon with another project. Until then, happy stampin'!


Stampin' Up! Supplies Used:

Table built using Product Table Builder by The Crafty Owl - Independent Stampin' Up! Demonstrator.

Memories And More Sweet Soiree Mini Album

by Joanne James30. March 2018 19:00

I hope you are all enjoying the start of a long bank holiday weekend. We have already enjoyed a morning of fresh air, followed by an afternoon of chocolate and a movie to avoid the return of the rain here in the UK. I am so done with winter now!

Today I thought I would share with you the first of the projects that I made with the ladies that attended my recent luxury craft weekend earlier this month. I won't be sharing any instructions on how they were made - these are reserved for those that attended - however I am sharing lots of photos of the projects that I designed as it is a great way for my readers to get a flavour of what a residential crafting retreat with me is like and the kinds of projects included. With 4 classes spread over 2 days, it's a great opportunity to tackle a variety of projects and also some that are a little more time-consuming than can be completed in a class that is of a shorter duration.

Today I'm sharing one of my favourite projects: a mini album I made featuring the Sweet Soiree Memories and More cards that are one of the current Sale-A-Bration gifts that can be yours free with a purchase of £45 or more, for just over another 24 hours:


Berry Burst cardstock forms the base of this expandable album and in addition to the Sweet Soiree Memories and More card pack, the Sweet Soiree Embellishment Kit has been used to decorate the cover and inside. 

This is what album looks when you first open it:


Fully extended, the album is four panels wide:


Each side then expands further to include additional flaps and pockets on both sides:


The album includes lots of areas to add photographs and capture memories, including this neat waterfall feature:


This album was certainly the most challenging of the projects we tackled during the retreat and was not for the fainthearted! The feedback was really positive though and everyone was so pleased with their creations; some ladies reported feeling truly amazed and thrilled to have tackled something like this, which they would not have ever contemplated on their own. I was personally thrilled with how positively this was received, as I've never led a class quite like this before. I'm already taking the learns from this project to create another version that is equally 'wow' yet a little easier to recreate.

If you would like to make projects like this one at a future retreat, please sign up to my newsletter by clicking on the icon in the right-hand column to ensure you receive the information for future retreats as soon as it is released or click here for more information - details for my next retreat will be announced in the coming weeks!

Here is the visual summary of the key products used on today's project for you to pin for easy reference:


You can see all of my 'How To' summaries on my 'How To - Tips and Techniques' Pinterest board in case you've missed any. 

Enjoy your evening and I'll be back tomorrow with one last project featuring Sale-A-Bration item. Until then, happy stampin'!


Stampin' Up! Supplies Used:

Table built using Product Table Builder by The Crafty Owl - Independent Stampin' Up! Demonstrator.

Coloured Heartfelt Blooms Card

by Joanne James29. March 2018 20:00


I've a quick post for you this evening to share a card I made a couple of months ago in my Sale-A-Bration class using one of the Sale-A-Bration sets that has been hugely popular with my customers - take a look:


Here's the low-down on today's card:

Heartfelt Blooms - Heartfelt Blooms is one of Stampin' Up!'s new Distinktive stamps: they lay down ink at different opacities, giving the finished image more depth. When you look at the stamp itself, you almost wonder if it will stamp anything, yet lightly inking the stamp results in a perfect photographic finish. The set also has three useful, beautifully scripted sentiments too - I particularly like the wording of the one I used on this card.

A Touch Of Colour -  The Heartfelt Blooms image can either be stamped in a single colour to create a simple monochromatic card, or stamped in a neutral base that allows colour to be added. Today's card is based on one that appeared in our quarterly demonstrator magazine where the image is stamped in Archival Black on Shimmery White cardstock, then colour is subtly added over the image using inks and an aquapainter. 

Petal Passion Stripes - I paired the image with an angled panel of Petal Passion striped designer series paper; the brushstroke-style stripes compliment the image perfectly.

If you would like to add this set to your stamp collection, you only have another couple of days to do so before the end of this year's Sale-A-Bration promotion, after which it will be gone forever!

Here is the visual summary of the key products used on today's project for you to pin for easy reference:


You can see all of my 'How To' summaries on my 'How To - Tips and Techniques' Pinterest board in case you've missed any. 

I'll be back tomorrow with another project. Until then, happy stampin'!


Stampin' Up! Supplies Used:

Table built using Product Table Builder by The Crafty Owl - Independent Stampin' Up! Demonstrator.

Truly Tailored Dapper Day Masculine Card

by Joanne James26. March 2018 21:00

Happy Monday everyone! Yes it's a late post following a busy day as always, but as promised I have another card using yesterday's sketch over at The Paper Players that is also perfect for this week's TGIF Challenge:


I loved this sketch and in addition to yesterday's party-themed cards (you can see those here if you missed them) also used it to make a fun masculine card - I didn't post it yesterday as my PP teamie, the lovely Jan Clothier, had the same idea and used the same set, so I saved mine until today. It also demonstrates one of my favourite ways to use my Stampin' Write markers - take a look:


Here's the low-down on today's card:

True Gentleman - Classic patterns and elongated hexagons make the True Gentleman Suite tasteful, tailored and irresistible; this is how the catalogue describes this suite and whilst this isn't a set that sits at the top of my list, I do love the DSP patterns and colours (surprise, surprise!) and the clean, block style of the fonts in the Truly Tailored stamp set. And whilst I haven't used it here, the Tailored Tag Punch is a lovely modern, angular label that can be used with many other sets too. There are traditional masculine browns in this suite, but I chose to feature the brighter blues and greens on my card today, picking out the Crushed Curry yellow from the plaid background pattern with my baker's twine bow for an additional pop of colour.

Direct To Stamp - I used my Stampin' Write markers in one of my favourite ways on today's card; by colouring the sentiment directly with my markers, I was able to use both Tranquil Tide and Night of Navy on one stamp. I was also able to highlight certain areas of the stamp in order to alter the layout: if you compare my stamped image to that of the original stamp in the table below, you will see I omitted the moustache altogether and split the top line of the sentiment and stamped it on the upper portion of my circle, with the remainder on the bottom leaving a space in between.

Build A Bowtie - I decided to put that space between my custom-coloured sentiment to good use and add a bowtie - not a stamped one though, rather one punched with the Bow Builder Punch - dapper indeed! I finished the centre of my bow with a little of the textured corduroy ribbon that I used to edge my panel too as a fun finishing touch.

I also used two different colour markers on one stamp on the inside of my card too - although can't seem to find the photo of that, so will have to retake and add it to my post later.

Here is the visual summary of the key products used on today's project for you to pin for easy reference:


You can see all of my Product and 'How To' summaries on my 'How To - Tips and Techniques' Pinterest board in case you've missed any. 

I'll be back tomorrow with a couple of fun and simple Easter projects. Until then, happy stampin'!


Stampin' Up! Supplies Used: 

Table built using Product Table Builder by The Crafty Owl - Independent Stampin' Up! Demonstrator.

A Picture Perfect Party Birthday Celebration PP386

by Joanne James25. March 2018 09:00

It's Sunday and time for this week's new challenge over at The Paper Players! It's the turn of my amazing friend Claire to host this week and she has my favourite, a sketch challenge, for you to work with:


I could have gone so many ways with this sketch! I have not one, but two cards, to share with you today - both with a fun party theme. Here's the first one - take a look:


Here's the low-down on today's card:

Picture Perfect Party - Both of my cards today feature papers with the bold, photographic images featured in the Picture Perfect Party DSP Stack. In bright, celebratory colours, these papers are perfect for a large expanse of background and work really well as the background for my fun, party-themed cards. I used the offcut from my card panel to continue the decoration through to my envelope to with a colourful envelope liner.

Picture Perfect Birthday - I used the co-ordinating Picture Perfect Birthday stamp set to decorate the sentiment circles on the front of my card. I was lucky to receive this set free when I attended Onstage last November, which really was fortunate for me as I think this is a set I might otherwise have overlooked. It contains some great, scripted fonts that work for birthdays and more general celebrations and has some fun confetti, candle, tooter and ribbon bow images too. In addition to using it to decorate the outside of my card, I added a little colour to the inside too:


Finishing Touches - To finish my cards, I added some gold tinsel trim and a strip of fringed cardstock to the one above and some silver baker's twine and mini silver sequin trim with a strip of fringed cardstock to the card below:


And here's the inside of this card too:

Two cards using the same layout and supplies, each with a different pattern and sentiment. The Picture Perfect Party Suite is perfect for creating batches of birthday cards with a minimum of supplies. Here is the visual summary of the key products used on today's project for you to pin for easy reference:


You can see all of my Product and 'How To' summaries on my 'How To - Tips and Techniques' Pinterest board in case you've missed any. 

Before you reach for your ink and papers, check out what our amazing team has created to inspire you this week:

Here's a quick recap of our challenge rules:
 
1.  Create a new paper project
2.  Upload your creation to your blog with a link back to us and provide a direct link to the post featuring your challenge submission.
3.  Please link your card to no more than four challenges, TOTAL.
4.  Have FUN!

I can't wait to see what you create with this week's sketch and look forward to visiting your blogs this week! Enjoy the rest of your weekend as it will be over all too quickly. We are minus one James Junior who is away on a short hockey tour for a few days, so will be spending the day researching hurricanes with James Junior number 2 for a geography project in between a little crafting too I hope!

I'll be back tomorrow with another project that also uses this same sketch but has a totally different feel, so do come back and take a look at that card; until then, happy stampin'!


Stampin' Up! Supplies Used: 

Table built using Product Table Builder by The Crafty Owl - Independent Stampin' Up! Demonstrator.

New Sale-A-Bration Items Added And Color Me Happy Card Kit

by Joanne James21. March 2018 12:00

I am a little behind in sharing this one (life seems to be getting in the way of blogging lately!) but I wanted to make sure that you were all aware that new products have been added to the Sale-A-Bration gift list for the final two weeks of this fabulous promotion. You all know that this year's Sale-A-Bration promotion will end on 31st March and in addition to hosting and joining benefits (you can read about those here) you also earn a free product for every £45/90 spend - you can see the existing items here and here.

Good news: from now until the 31st March, you will also be able to choose from the catalogue items below (you must use the special code as detailed as opposed to the usual item code to get one of these items free with a £45/90 spend):


To make things easier for you, I've created a table linking each of the products directly to the promotional item in my online store - just click on the links below:

Table built using Product Table Builder by The Crafty Owl - Independent Stampin' Up! Demonstrator.

Remember, if you aren't placing your order via the above links, you need to use the special Sale-A-Bration item code for each product - these are different to the standard product codes for these items, which are still available to purchase in the annual catalogue.

One of the new products available free with a £45 spend is the Color Me Happy Project Kit - designed to be used with the Color Me Happy stamp set and launched to celebrate the release of our new Stampin' Blends alcohol markers and as it isn't a set that you can see in either of the current catalogues, I though this would be a good day to share mine here with you so that you can get a closer look. As with so many of Stampin' Up!'s kits, the kit is choc-full of embellishments and high-quality pre-printed card bases, along with foiled envelopes, so that you can stamp and colour to complete 16 gorgeous cards, 4 each of 4 designs - take a look:

Here's the first one, along with its co-ordinating envelope:

Here's the second one - a fun little card to brighten someone's day:

The third design:


And finally the fourth design - some of my customers will be receiving this card this month as a token of my appreciation:


And finally here's a shot of all four card designs together:


Whether you use in conjunction with the Color Me Happy stamp set or substitute with other stamps from your collection, the kit is definitely worth getting your hands on - especially if you pick it up for FREE!

Both the stamp set and card kit are still available to purchase too, at a 10% discount if you buy together as a bundle, whilst stocks last - the links for these are included below. Better still, why not purchase the stamp set and markers that you need and pick up the kit as a Sale-A-Bration item for free? This would also make for a fun crafty evening with friends - please get in touch if you'd like to talk to me about hosting one of these in either April or May - my diary is booking up fast!

If you have your eye on any of the other Sale-A-Bration items, do bear in mind that they will only be available whilst stocks last - it is possible that they could run out before the end of the promotion, so don't leave it to late to place your order. 

I'll be back soon with another project. Until then, happy stampin'!


Stampin' Up! Supplies Used:


Table built using Product Table Builder by The Crafty Owl - Independent Stampin' Up! Demonstrator.

Sunshine and Rainbows For The Paper Players PP385

by Joanne James18. March 2018 09:00

It's Sunday and time for this week's new challenge over at The Paper Players! It's Nance's turn to host this week and she has a clean and simple challenge for you to work with:


I decided to take Nance's challenge literally and have a clean-and-simple rainbow card to share with you this week - take a look:


Here's the low-down on today's card:

Build A Rainbow The Easy Way - Today's card features a fun rainbow made using the Rainbow Builder Framelits Dies - these really do make building a rainbow super quick and easy. I ran all 7 pieces through the Big Shot at the same time and held them together with some washi tape across the back.

Myths and Magic - I don't usually use designer paper on a clean and simple card, but I couldn't resist a background of clouds and sky courtesy of this fun pattern fro the Myths and Magic Specialty DSP Pack. It makes the perfect backdrop for my bright rainbow and layered clouds.

Sunshine and Rainbows -  My card is mostly made up of diecuts and has very little stamping - just the sunshine and the sentiment. I decided to continue the rainbow theme into my sentiment stamp and coloured it with the colours of my rainbow using sponge daubers for a fun variegated effect.

Whilst my card is a little more layered than I usually go with for clean and simple, this card is really straightforward and super quick to put together and I love the pop of bright colour that the rainbow gives. Here is the visual summary of the key products used on today's project for you to pin for easy reference:


You can see all of my Product and 'How To' summaries on my 'How To - Tips and Techniques' Pinterest board in case you've missed any. 

Before you reach for your ink and papers, check out what our amazing team has created to inspire you this week:

Here's a quick recap of our challenge rules:
 
1.  Create a new paper project
2.  Upload your creation to your blog with a link back to us and provide a direct link to the post featuring your challenge submission.
3.  Please link your card to no more than four challenges, TOTAL.
4.  Have FUN!

Don't forget the theme is clean and simple this week - so minimal layers and embellishments and lots of white space. I can't wait to see what you create and look forward to visiting your blogs this week! Enjoy the rest of your weekend as it will be over all too quickly. I'm meeting an old school friend today and we are going on a course to brush up on our Copperplate Calligraphy skills, assuming the snow we are expecting here in the UK (again!) doesn't scupper our plans.

I'll be back tomorrow with another project; until then, happy stampin'!


Stampin' Up! Supplies Used: 

Table built using Product Table Builder by The Crafty Owl - Independent Stampin' Up! Demonstrator.

New Online Exclusives

There are new products available exclusively in the online store from 5 November - check them out here.

Latest Kits!

Stampin Cut and Emboss

The Layered Landscapes Kit and Nature's Paintings Kit are the latest kits in the online store - get yours here!

Shop Online

Access my online shop 24 x 7, 365 days of the year:

Current November hostess code:

9NKXDTTR

Shop Online

Mini Catalogue

BROWSE THE CATALOGUE

'Tis The Season - the new Stampin' Up! Mini Catalogue is here! For more details and to download your copy click here

Scrapbooking

Stampin' Up! has introduced a new range of 12x12" scrapbooking product and kit - the full range is now available to purchase online. To download a copy of the new digital Scrapbooking Catalogue click here.

2024-25 Annual Catalogue

BROWSE THE CATALOGUE

Click on the image to download your copy of the 2024-25 annual catalogue. For a full list of current SU! supplies, go to my online store. If you would like any help or advice, please drop me a line at joanne@thecraftyowl.co.uk or give me a call on 07773 421446 - I'd be happy to help.

Join My Team

It's always a great time to join Stampin’ Up! New team members can get £130 worth of products for only £99 + free business supplies + free shipping + all the fun being a part of Stampin’ Up! Stampin' Up! has something for everyone: join my growing team and benefit from my support to enjoy Stampin' Up! however you choose.

If you're interested, call me for a chat to understand how I can help you realise your goals. Alternatively, if you have already decided to sign up and you just can't wait, please click here for the link to the online form where you can sign up and order your starter kit right away! 

About Me

Hi I'm Joanne and live in Northampton and when I'm not looking after my husband and two beautiful children, am an avid crafter with a passion for all things Stampin' Up!

I must confess that I have never been a big rubber stamper - until I discovered Stampin' Up! that is. I love the fact that I can get such great results with co-ordinating stamps, inks, papers and punches - the possibilities are endless! Join me on my stamping journey as I share the things I love and be inspired to create amazing things yourself!

Follow Me

Monthly Newsletter

Box Builder

Click the button above to use Box Buster to create your custom box design using the Envelope Punch Board!

Kits Collection Now Available!

Stampin Cut and Emboss

The new Kits Collection from Stampin' Up! is now available!

Click here to see the current kits available and order yours online today.

I Design For


Stampin' Up Stuff

This is my personal blog and is not endorsed by Stampin’ Up! I hope you find it a plentiful source of ideas and personal inspiration but please don't copy my designs for contest submission or use for classes, publication or sale without express permission.