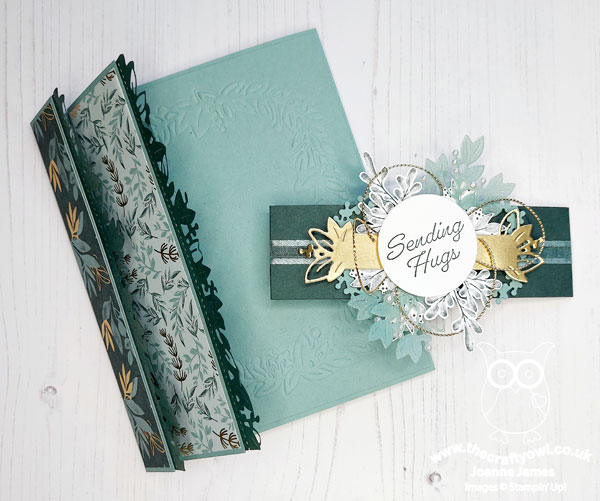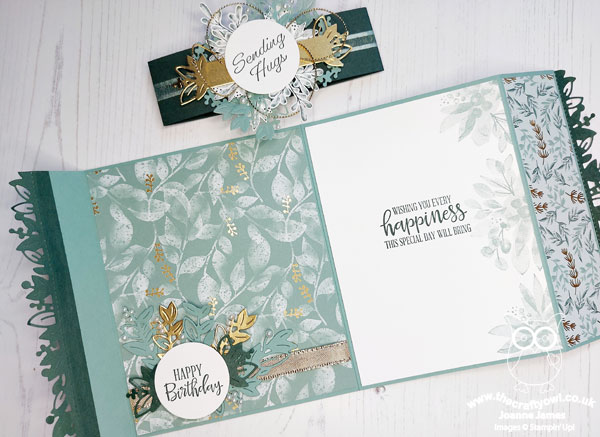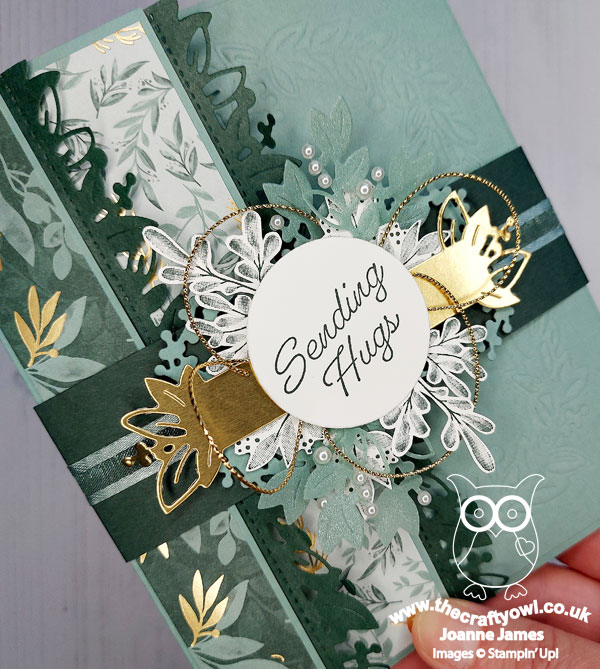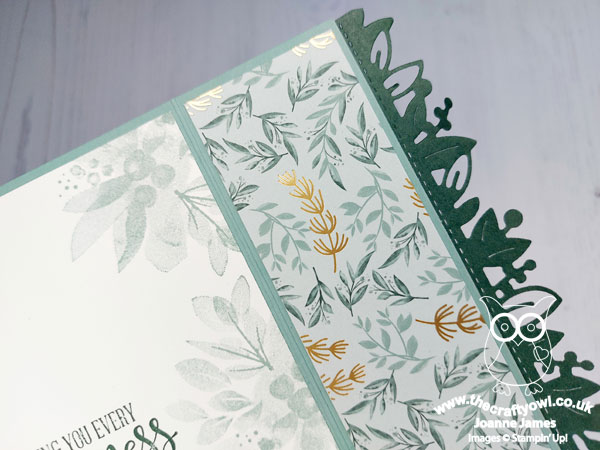
HB2U Hey Birthday Chicks Card

by Joanne James3. March 2021 22:16

Today was one of those days that did not go to plan - do you ever have days like that?! So I'm late squeezing in a quick post for this week's Inspired By Challenge and another entry for the birthday celebrations over at Time Out:


I used both the sketch layout and number inspiration over at Inspired By for my fun birthday card today - take a look:


Here's the low-down on today's card:

I created a custom sentiment using my Playful Alphabet Dies, flanked by some happy-go-lucky party chicks from the Hey Birthday Chicks bundle. I used some of the Ice Cream Corner designer paper for my background base and carried through the colours of the stripes for the other elements of my card:


Some quick stamping to the inside completes my card:


Here is the visual summary of the key products used on today's project for you to pin for easy reference:
 

You can see all of my 'How To' summaries on my 'How To - Tips and Techniques' Pinterest board in case you've missed any. 

Enjoy your evening and I'll be back tomorrow with another project. Until then, happy stampin'!
 

Stampin' Up! Supplies Used:

Table built using Product Table Builder by The Crafty Owl - Independent Stampin' Up! Demonstrator.

#SimpleStamping Art Gallery One Layer Floral Birthday Card CCS409

by Joanne James2. March 2021 13:00

It's Tuesday and time for a new challenge over at CAS Colours & Sketches. YoonYoung is hosting this month and our first challenge of March is a colour challenge: 


Feel free to flip or rotate the sketch when making your card. For my card today I thought I would take the opportunity to use these colours for an oh-so-simple CAS card and embrace this week's Less Is More ongoing celebrations too with a one layer floral - take a look:


Here's the low-down on today's card:

Today's card uses just 5 items: the Art Gallery stamp set, 3 ink pads and some Basic White thick cardstock - #SimpleStamping at its best. The Art Gallery stamp set is perfect for beginners and experienced crafters alike; the double-layered florals are very forgiving in terms of needing to be stamped accurately and the two-step stamping adds interest and the illusion of texture.  Having recently re-inked my Calypso Coral ink pad, it was stamping quite dark but you can see the contrast between it and the Terracotta Tile overlay more clearly below:


Whilst I was making this card, I also experimented with adding in some gold leaf; I stamped an identical card and added some gold leaf detail to the Terracotta Tile layer and I added a trio of gold gilded gems:


I discounted it as my main card today as it obscured too much of the Teracotta Tile colour, even though I tried to add a little more in with some stamens:


I thought I would share it with you as it shows a quick way to step up my original card. Here are both cards together:


Which one do you prefer? After much playing around, I think actaully 'less is more' and the most basic card is my favourite. 

Here is the visual summary of the key products used on today's project for you to pin for easy reference:


You can see all of my 'How To' summaries on my 'How To - Tips and Techniques' Pinterest board in case you've missed any. 

As a reminder, for our colour challenges, you must use all of the stated challenge colours. You may also use neutral colours; however, the challenge colours should be the most noticeable ones featured on your card. We use Stampin' Up! color names for reference, but you are welcome to use any other companies' products as long as you match the challenge colours as closely as possible.

Enjoy your day and I'll be back tomorrow with another project. Until then, happy stampin'!


Stampin' Up! Supplies Used:

Table built using Product Table Builder by The Crafty Owl - Independent Stampin' Up! Demonstrator.


Hey Birthday Chick Meets So Much Happy

by Joanne James1. March 2021 18:47

Today I'm squeezing a card for the current challenge over at Freshly Made Sketches and Color Dare (bottom row):


I procrastinated somewhat with Judy's sketch this week (too many ideas!) In the end I took a couple of liberties and went with a floating birthday chicken - take a look:


Here's the low-down on today's card:

Hey Birthday Chick - I  kept the basic layout of Judy's sketch but used a landscape rather than portrait orientiation, in order that I could accommodate my 'happy' diecut into the horizontal stripe. I thought the floating chicken was the perfect shape to cross the horizontal element - and so easy to cut out with my Birthday Chick Dies too.

 So Much Happy - I used my 'Happy' die to create the horizontal element of the sketch and paired it with one of the stamped sentiments from the bundled 'So Much Happy' stamp set (my second sketch liberty, as I need to position it below rather than above the horizontal strip). I used another sentiment from this set on the inside of my card, along with another chicken to decorate:


Blended Clouds - I decided to make my floating chicken part of a simple scene, so used the cloud-shaped die from the Happy Dies set to create a stencil and with my blending brush, created a simple pattern with some Pool Party ink so that it looked as if my chicken was floating up, up and away:

I so love these new blending brushes! My skyscape was so easy to create and the ink blends so beautifully and evenly with them.

Here is the visual summary of the key products used on today's project for you to pin for easy reference:


You can see all of my 'How To' summaries on my 'How To - Tips and Techniques' Pinterest board in case you've missed any. 

I've had a busy day, with a few errands and online Parents' Evening earlier, hence me being later than I hoped with this post. Enjoy your evening and I'll be back tomorrow with another project. Until then, happy stampin'!


Stampin' Up! Supplies Used:

Table built using Product Table Builder by The Crafty Owl - Independent Stampin' Up! Demonstrator.
 

Who Is A Foxy Lady?

by Joanne James28. February 2021 21:32

Today I'm here with an extra card that I made yesterday just for fun for a few challenges:


The challenge over at CASology closes tomorrow but I had been musing over an idea that I wanted to try for a few days, so paired it with the Color Throwdown colours which had a lovely rust colour included, perfect for a fox, and made the following card:


I used a whole host of retired product on this one, most notably my Foxy Friends stamp set and Fox Builder Punch, to create a Foxy face in lieu of the 'o' in my 'FOXY' word created using the Playful Alphabet Dies and paired it with the word 'Lady' from part of a sentiment in the retired 'Little LadyBug' stamp set to create my custom wording. I used the Color Throwdown colours in a quartet of stripes for my diecut letters and carried them across my card base to unify my layers. I added an additional stamped fox to the inside of my card:


Lastly, no foxy lady is complete without a sassy magenta flower in her fur, right?! So I added a punched flower for an added touch of femininity: 


I love this clean and simple card - it turned out just as I imagined. The big question is, who would you send a card like this to? I'd be really interested in your thoughts!

I'm also linking today's card up over at Addicted to CAS where the code word for the next fortnight is 'animal'.

Here is the visual summary of the key products used on today's project for you to pin for easy reference:


You can see all of my 'How To' summaries on my 'How To - Tips and Techniques' Pinterest board in case you've missed any. 

Enjoy your evening and I'll be back tomorrow with another project and news of an early prrelease from teh forthcoming annual catalogue. Until then, happy stampin'!


Stampin' Up! Supplies Used (current supplies only):

Table built using Product Table Builder by The Crafty Owl - Independent Stampin' Up! Demonstrator.

Friends Are Like Seashells PP530

by Joanne James28. February 2021 09:00

Today it's Sunday and time for this week's new challenge over at The Paper Players! It's the turn of the fabulous Ann to host this week and she has my favourite, a sketch challenge for you to work with:


So many options for today's sketch! The weather is slowly warming up as Spring approaches and whilst we may not be experiencing beach vacations for some time to come still, I decided to break out my Sand and Sea Suite and recreate that feeling with a card or two instead. So this is the first card I came up with:


Here's the low-down on today's card:

Sand and Sea - So much to love about the Sand & Sea Suite! One of the most unique aspects is the way that the dies contain a whole joined sheet of shells and sea fronds that can be both stamped and embossed then either used as a single piece or the individual pieces can be cut away as I've done on my card. I stamped, embossed and diecut the panel in both pink, yellow and pearlescent cardstock and mixed the various elements on my card, with that large, pink circular shell as the centrepiece. I gave it a pearlescent finish by sponging with frost white shimmer paint before adding to my card - just check out the amazing texture and detail:


I added some pearls and braided trim to finish. This stamp really does have the most lovely sentiments too; one the front of my card I used the one that forms the basis of the name for this stamp set - here's a peek at the inside of my card with the second part of my greeting:


This card is headed to one of my oldest and most dear friends for her birthday - I know she will love it! I'm also linking it up with the team over at Time Out Challenges, who are also celebrating their 7th birthday this week and challenging us to make birthday cards too - way to go Time Out!

A Pearlescent Alternative - I had another piece of the Sand & Sea DSP left after making the above card, so I decided to flip it and make another card using the reverse pattern, with the same layout but changing out some of the elements and colours and going for a slightly softer look:


I actually had something of a happy accident with this pearlescent shell. I had intended to simply emboss it, but having embossed the pink shell on the card above first, I hadn't realised that some of the pink ink had rubbed off onto the embossing folder so when I removed my pearly shell from the embossing folder, it had traces of pink ink on the indents. I wiped some of it away but then decided to go with it and instead rubbed the raised areas with Blushing Bride ink to accentuate them. I decided I actually quite liked the detail so no harm done - what do you think?


So which of these cards do you prefer? This one: 


Or this one:


Do leave me a comment below - I'd love to hear your thoughts. I am using this suite for my next monthly online stamp class and am looking forward to creating more fabulous cards with it - get in touch if you'd like more information.

Here is the visual summary of the key products used on today's main project for you to pin for easy reference:


You can see all of my Product and 'How To' summaries on my 'How To - Tips and Techniques' Pinterest board in case you've missed any. 

Before you reach for your ink and papers, check out what our amazing team has created to inspire you this week:

Here's a quick recap of our challenge rules:
 
1.  Create a new paper project
2.  Upload your creation to your blog with a link back to us and provide a direct link to the post featuring your challenge submission.
3.  Please link your card to no more than four challenges, TOTAL.
4.  Have FUN!

You can see all of my 'How To' summaries on my 'How To - Tips and Techniques' Pinterest board in case you've missed any. 

Enjoy your day; the weather has been unseasonally mild here this week, so I will be spending some time in the garden today and probably heading out on my bike for a long cycle ride with the other members of the James household to take advantage of the warmer temparatures in case winter decides to make a return! I will also be placing my last Sale-A-Bration order as the current Sale-A-Bration promotion ends today - last call for orders if you would like to earn one of the amazing free gifts that are available as part of the promotion. I'll be back tomorrow with another project. Until then, happy stampin'!


Stampin' Up! Supplies Used: 

Table built using Product Table Builder by The Crafty Owl - Independent Stampin' Up! Demonstrator.

Flower and Field Happy Thoughts TTT 102

by Joanne James25. February 2021 15:00

It's Thursday and time for a new challenge over at TicTacToe! It's the turn of Team X to host this week and the lovely Betty is our featured designer this week. This is the fun board that we are playing along with: 


I went down the first column with thinking of you/stitching/flowers for my card today, that also makes the most of one of the Sale-A-Bration freebies that can still be yours for a few more days so is perfect to play along with the team over at TGIF Challenges too - take a look:


Here's the low-down on today's card:

Flower and Field - Although I didn't eventually choose it, I was considering 'shades of green' as one of my board options and I immediately thought of this paper in the Flower and Field Sale-A-Bration DSP pack as it makes such a beautiful use of Just Jade as its background colour. I decided to use this paper anyway as it's so pretty and the green, pink and yellow combo give me three colours to play with the peeps over at Paper Craft Crew this week too! It's also a great reminder that there are just 3 days to go until the end of the current Sale-A-Bration promotion. If you are a regular Stampin' Up! customer, don't be caught out - the current promotion ends a whole month earlier than it has in previous years. That's no bad thing, as it means we will get a second Sale-A-Bration promotion later in the year, but if you still have things on your current SAB wishlist, you need to earn them whilst you still can!

Thinking of You - The sentiment I chose for my card today comes from the 'Happy Thoughts' stamp set, inspired by the Million Sales Achiever Jackie Bolhuis. This is a sentiment-only set, designed with beginner crafters in mind. It has great basic sentiments for every occasion, along with some longer ones that work perfectly as a feature or on the insdie of a card. What's more, this set was designed to co-ordinate with a number of our basic punches, so is really versatile and a great way to build on a beginner's collection of basic items. 

Pierced Blooms - I added a few Pierced Blooms to decorate my card - another long-awaited addition to my collection - although as I went to finishe my card with some black enamel dots on those itty bitty pink flowers I realised ... yes, I've run out! So use your imagination as I go off to order more of these craft room staples!

Here is the visual summary of the key products used on today's project for you to pin for easy reference:


You can see all of my Product and 'How To' summaries on my 'How To - Tips and Techniques' Pinterest board in case you've missed any. 

A tictactoe board offers so many creative possibilities - how does this week's board inspire you? Why not have a go? We would love to see you in the gallery and who knows - you might be selected for Designer's Choice and be eligible to be a guest designer on a future challenge. 

Enjoy your day; I'll be back tomorrow with another project. Until then, happy stampin'!


Stampin' Up! Supplies Used: 

Table built using Product Table Builder by The Crafty Owl - Independent Stampin' Up! Demonstrator.

Hey Rainbow Birthday Chick CCS 408

by Joanne James23. February 2021 13:00

It's Tuesday and time for a new challenge over at CAS Colours & Sketches. This week's challenge is a sketch challenge and Julie has asked that we use the following layout:


Feel free to flip or rotate the sketch when making your card. For my card today I am excited to use a new stamp set that I've been waiting for an age to arrive - take a look:


Here's the low-down on today's card:

Hey Birthday Chick - Remember the 'Hey Chick' stamp set that was a Sale-A-Bration stamp set in 2017? Well, you may have noticed a set in the current mini catalogue called 'Hey Birthday Chick' featuring the same group of feathered friends, this time all ready to celebrate a birthday, complete with cake, balloon and party hat! I used that crazy chicken with the mad hair on my card today, featuring both the old one from the 'Hey Chick' set and the one with the birthday cake from the 'Hey Birthday Chick' set. 

Chick and Birthday Chick Dies Exclusive - Not only are there the two chick stamps available, they are also available as part of exclusive bundles that will be available until 30 June. In addition to some great standalone dies, such as a fence, hen house, eggs, corn and a trellis, to name but a few, there are also dies to make cutting out any of the chicken shapes with ease. I used them to cut out one of my chickens to add a little dimension to my pair:


I am doing very well at meeting the CAS brief this week even if I say so myself, although I did take a small liberty with the sketch since my shapes are not identical. They would have been, but the temptation of the cupcake proved too much for chicken number one!!

Playing With Patterns - The colours for the rainbow colouring on my card today comes from the Playing With Patterns designer paper (Blends colours detailed below). Those subtle stripes were just enough to add interest to the base of my card. 

My rainbow stripes and funky rainbow-feathered chicks are perfect for the colour theme of 'rainbow colours' over at Just Us Girls this week and I'm also playing along with my gal pals over at TicTacToe where Team O are in charge this week and I went down the first column of Jeanne's board with Cute Critter/Celebrate/Coloured. 

Here is the visual summary of the key products used on today's project for you to pin for easy reference:


You can see all of my 'How To' summaries on my 'How To - Tips and Techniques' Pinterest board in case you've missed any. 

Enjoy your day; the sun is shining here so since one of the James Juniors is officially on a Games lesson this afternoon, it looks like I am going to have company for a nice long walk. Following yesterday's announcement, we are officially on a two-week countdown to a return to school, so I think I need to make the most of it! I'll be back tomorrow with another project. Until then, happy stampin'!


Stampin' Up! Supplies Used:

Table built using Product Table Builder by The Crafty Owl - Independent Stampin' Up! Demonstrator.

If In Doubt Be A Rainbow Unicorn

by Joanne James22. February 2021 13:30

Happy Monday everyone! Today I'm sharing a card inspired by that fabulous photo over at Fusion and using this week's Freshly Made Sketches sketch by Amy:


I adore that rainbow unicorn outfit in the inspiration photo - what would be princess wouldn't like to dress up in that?! I had been contemplating Amy's panelled sketch and decided that I could combine the two to create the sparkly card of my dreams. If you're not a fan of the the glimmer and glitter, then you should look away now, as this card has it in spades! Ok, you have been warned!! This is what I came up with - take a look:


Here's the low-down on today's card:

When Is A Hippo Not A Hippo? - When is a hippo not a hippo? Well, when it's a unicorn of course! My unicorn comes from the Hippo Happiness bundle, which in addition to the hippo, a butterfly, a sheep and a horse, there is of course a unicorn! I stamped mine in Smoky Slate with the second step stamp heat embosssed in silver, and gave her a gold sparkly unicorn horn. I think one of the things I love most about this stamp set is the sentiment I used on today's card - words to live by, right?! You can see the detail on my unicorn a little better below: 

Rainbow Glimmer - Having decided on a silver unicorn, I went all out to create my background panel from a complete piece of rainbow glimmer paper, spreading in colour from deep purple, through to pink, orange and yellow. I haven't used this for a while and was having definite withdrawal symptoms! I decided to leave my central clouds as one piece across the centre of my card; I tried it split with the rectangle, but preferred it as one piece. This also worked better for my sentiment, which sits nicely on the cloud.

Stitched Stars - Not satisfied with my rainbow glimmer alone, I decided to add a swirl of (retired) silver glimmer stars from the Stitched Stars die to the edge of my cloud to back my unicorn. I love this die and it's probably my most used in this set.

So what do you think - too much glimmer? I have to say I love it and I know a certain Miss James Junior who will love it too, teenager or not!! I spent the morning with a lovely bunch of my customers having our first proper online class of the year featuring florals and the Art Gallery bundle - a world away from all of this sparkle, although we did have a little play with gilded leafing - an altogether messier affair, albeit with very pretty results!

Here is the visual summary of the key products used on today's project for you to pin for easy reference:


You can see all of my 'How To' summaries on my 'How To - Tips and Techniques' Pinterest board in case you've missed any. 

Enjoy the rest of your day and I'll be back tomorrow with another project for this week's new sketch challenge over at CAS Colours & Sketches. Until then, happy stampin'!


Stampin' Up! Supplies Used:

Table built using Product Table Builder by The Crafty Owl - Independent Stampin' Up! Demonstrator.

Playful Pets Clean and Simple Birthday Feline For PP529

by Joanne James21. February 2021 09:00

Today it's Sunday and time for this week's new challenge over at The Paper Players! It's the turn of the fabulous LeAnne to host this week and she has a fun clean-and-simple challenge for you to work with:


Fabulous felines - what a fun challenge this week! I used the sketch over at Fusion (come back tomorrow if you'd like to see a card that uses the Fusion photo inspiration too) to make a clean and simple birthday card - take a look:


Here's the low-down on today's card:

Today's card is super simple! I've been wanting to make a card using this cat that features on the Playful Pets designer series paper for ages - I just love her quirky expression! - and our challenge this week was the perfect opportunity. I cut a strip of (retired) Brights DSP in a two-tone stripe that picks up the pink of the cat's neck bow, and a suitably tongue-in-cheek sentiment from Itty-Bitty Birthdays that seemed to reflect just what my fussy-cut kitty was thinking, and placed the various pieces onto my card. A quick check to our clean and simple guidelines:

  • minimal layers
  • little/no embellishments
  • lots of clean white space (no pattern)
Done!  

I finished my sentiment on the inside of my card and added a mouse that I fussy cut from my DSP sheet too:


Since this is a birthday card, I'll be linking up over at The Spot today too where they have a birthday theme.

Here is the visual summary of the key products used on today's project for you to pin for easy reference:


You can see all of my Product and 'How To' summaries on my 'How To - Tips and Techniques' Pinterest board in case you've missed any. 

Before you reach for your ink and papers, check out what our amazing team has created to inspire you this week:

Here's a quick recap of our challenge rules:
 
1.  Create a new paper project
2.  Upload your creation to your blog with a link back to us and provide a direct link to the post featuring your challenge submission.
3.  Please link your card to no more than four challenges, TOTAL.
4.  Have FUN!

You can see all of my 'How To' summaries on my 'How To - Tips and Techniques' Pinterest board in case you've missed any. 

Enjoy your day; I'll be back tomorrow with another project. Until then, happy stampin'!


Stampin' Up! Supplies Used: 

to follow

Hello From The Snail Mail Postman Slimline Card

by Joanne James20. February 2021 21:59

I managed to squeeze in a little craft time this afternoon and made a card that's been buzzing around in my head for a while - love it when that happens and I finally get the opportunity to get my thoughts into paper! It is for the following challenges: 


I used Julee's Mojo Monday sketch and some of my Snail Mail designer series papers featuring the colours over at Hand Stamped Sentiments and made a colourful slimline card - take a look:


This card really is all about the designer paper; in addition to the base layers, I fussy cut one of the postman snails from the DSP to feature on my postage stamp diecut square - isn't he just the cutest?!


A speech bubble and heart embellishment, along with a stitedch scallop border and twine bow were all that was needed to complete my card. I also added a little decoration to my envelope' using another of the stamps in the 'Snailed It' stamp set:


I'm also linking today's card over at Global Design Project #GDP279 where they have an animal theme this week.

Here is the visual summary of the key products used on today's project for you to pin for easy reference:


You can see all of my 'How To' summaries on my 'How To - Tips and Techniques' Pinterest board in case you've missed any. 

Enjoy your evening and I'll be back tomorrow with another project for our new theme challenge over at The Paper Players. Until then, happy stampin'!


Stampin' Up! Supplies Used:

to follow

New Online Exclusives

There are new products available exclusively in the online store from 5 November - check them out here.

Latest Kits!

Stampin Cut and Emboss

The Layered Landscapes Kit and Nature's Paintings Kit are the latest kits in the online store - get yours here!

Shop Online

Access my online shop 24 x 7, 365 days of the year:

Current November hostess code:

9NKXDTTR

Shop Online

Mini Catalogue

BROWSE THE CATALOGUE

'Tis The Season - the new Stampin' Up! Mini Catalogue is here! For more details and to download your copy click here

Scrapbooking

Stampin' Up! has introduced a new range of 12x12" scrapbooking product and kit - the full range is now available to purchase online. To download a copy of the new digital Scrapbooking Catalogue click here.

2024-25 Annual Catalogue

BROWSE THE CATALOGUE

Click on the image to download your copy of the 2024-25 annual catalogue. For a full list of current SU! supplies, go to my online store. If you would like any help or advice, please drop me a line at joanne@thecraftyowl.co.uk or give me a call on 07773 421446 - I'd be happy to help.

Join My Team

It's always a great time to join Stampin’ Up! New team members can get £130 worth of products for only £99 + free business supplies + free shipping + all the fun being a part of Stampin’ Up! Stampin' Up! has something for everyone: join my growing team and benefit from my support to enjoy Stampin' Up! however you choose.

If you're interested, call me for a chat to understand how I can help you realise your goals. Alternatively, if you have already decided to sign up and you just can't wait, please click here for the link to the online form where you can sign up and order your starter kit right away! 

About Me

Hi I'm Joanne and live in Northampton and when I'm not looking after my husband and two beautiful children, am an avid crafter with a passion for all things Stampin' Up!

I must confess that I have never been a big rubber stamper - until I discovered Stampin' Up! that is. I love the fact that I can get such great results with co-ordinating stamps, inks, papers and punches - the possibilities are endless! Join me on my stamping journey as I share the things I love and be inspired to create amazing things yourself!

Follow Me

Monthly Newsletter

Box Builder

Click the button above to use Box Buster to create your custom box design using the Envelope Punch Board!

Kits Collection Now Available!

Stampin Cut and Emboss

The new Kits Collection from Stampin' Up! is now available!

Click here to see the current kits available and order yours online today.

I Design For


Stampin' Up Stuff

This is my personal blog and is not endorsed by Stampin’ Up! I hope you find it a plentiful source of ideas and personal inspiration but please don't copy my designs for contest submission or use for classes, publication or sale without express permission.