
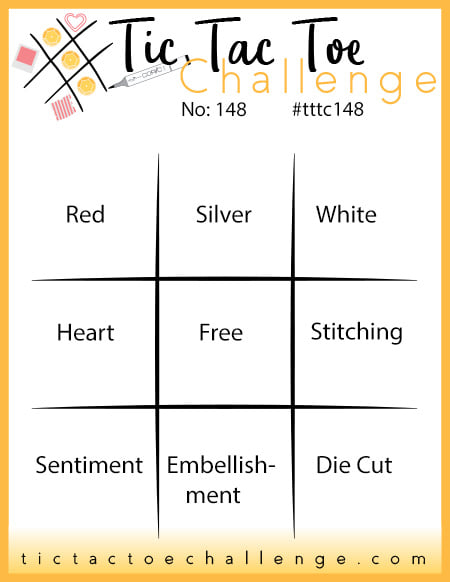
It's Thursday and time for a new challenge over at TicTacToe! It's the turn of Team X to host this week and the lovely Felicita is our featured designer this week. This is the fun board that we are playing along with:

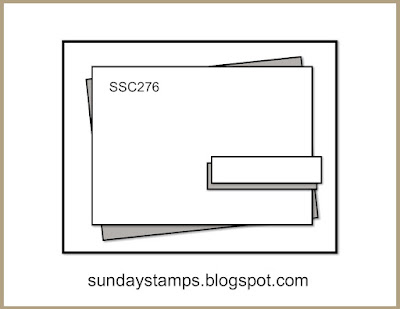
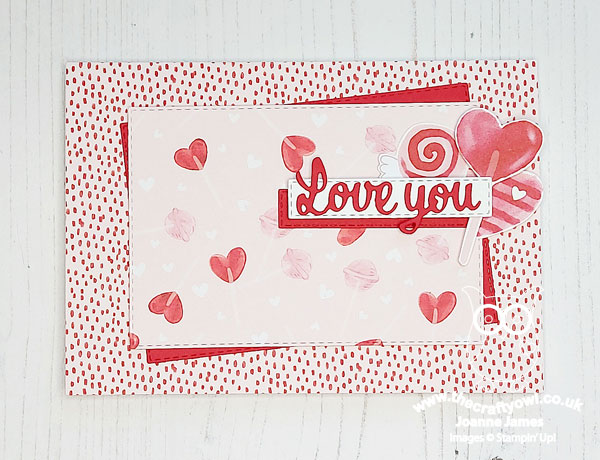
I went down the first column with red/heart/sentiment (my card also works for the middle row of heart/free/stitching) and I used the lovely red and pink hearts inspo over at Double D and the fabulous sketch over at Sunday Stamps (this one is a keeper ladies!) for the layout for my sweet-on-you card today - take a look:
Here's the low-down on today's card:
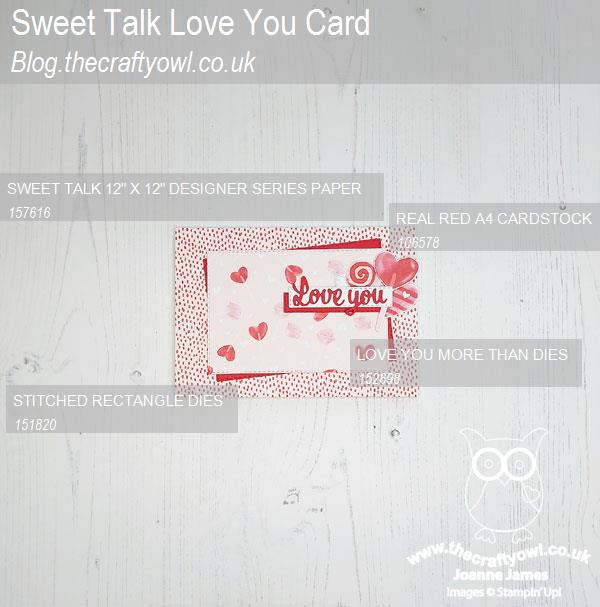
Sweet Talk - The Sunday Stamps sketch was crying out for a showcase of some lovely patterned paper (check out the DT cards on the link above - they are amazing!) so I decided to go all-out pink and red hearts and use another two contrasting patterns from the Sweet Talk paper pack that I used for yesterday's card. I used one for my card base, then with a layer of Real Red in between, added a panel decorated with pink and red lollipops and hearts - so sweet!
All About The Angles - Today card is all about the angles, or more specifically, rectangles! I used two large ones for the central tilted panels, then two smaller ones for the sentiment detail. The Stitched Rectangle Dies are such a great way to frame a piece of paper or scene and add subtle detail, without detracting from the main event.
All About Love - The die cut 'love you' sentiment on the front of my card is actually part of the larger diecut sentiment in the 'Love You More Than' Dies set, where I just used the first two words. I love to look at diecut word sets to see how they can be repurposed or reused with other sets to expand their range of use:
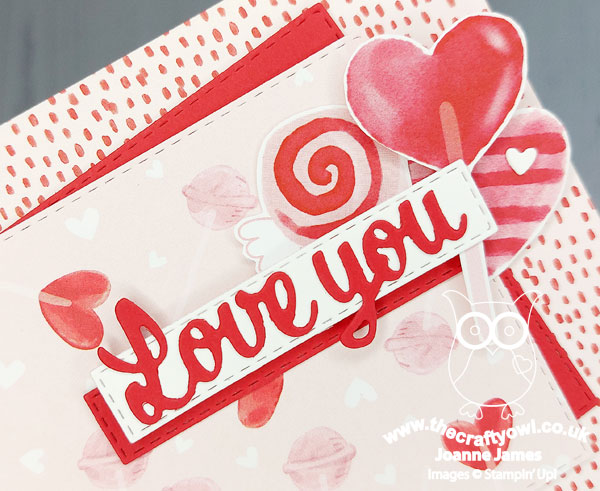
I fussy cut some lollipops and sweets from another of the sheets of Sweet Talk patterned paper and tucked these in just beneath my sentiment for an extra fun touch.
I added a sentiment from 'A Wish For Everything' to the inside of my card - this is one of my favourite sentiment sets:
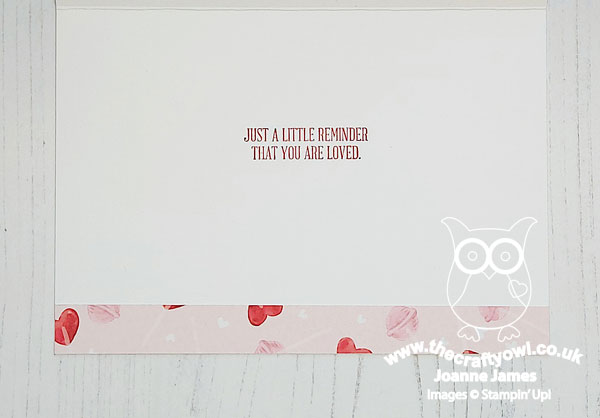
My card can be used at any time to remind the recipient that they are loved - after all, to love is for always, not just for Valentine's!
Here is the visual summary of the key products used on today's project for you to pin for easy reference:
You can see all of my Product and 'How To' summaries on my 'How To - Tips and Techniques' Pinterest board in case you've missed any.
A tictactoe board offers so many creative possibilities - how does this week's board inspire you? Why not have a go? We would love to see you in the gallery and who knows - you might be selected for Designer's Choice and be eligible to be a guest designer on a future challenge.
Enjoy your evening; I am out this evening attending a music recital that includes a performance of a piece of music that Rebecca wrote for her GCSE Music exam earlier this year. When I asked if she'd like to come with me, she said 'Why would I want to do that? I wrote it, so I know what it sounds like - I'm off to hockey training!' And that was the end of that - you can't fault teenage logic!
I'll be back tomorrow with another project. Until then, happy stampin'!
Stampin' Up! Supplies Used: