Relax At The Oceanfront FF101

by Joanne James21. January 2022 09:00

Happy Friday everyone - the weekend will soon be here! Today I have my card for the new challenge over at Festive Friday. The challenge that we are celebrating this week is 'International Wetland Day' which is on 2nd February and here's our inspiration board:


Remember the fun thing is that at Festive Friday you do not need to actually celebrate the occasion; your goal is to simply use three or more items from the inspiration list on your project. This week I used grasses, green, brown, water and blue from the inspo list along with this week's sketch layout over at Inspire.Create - but my card is more coastal than wetlands, with a distinctly Caribbean influence - take a look: 


Here's the low-down on today's card:

An Ocean Scene - I decided to break open my new 'Oceanfront' stamp set and create a tranquil coastal scene for my card. This set is so fun with endless creative possibilities! I inked my stamps then brushed additional colour onto them with a blending brush to even the tones and stamped straight onto my panel of white cardstock, beginning with the sky and working downwards until my scene was complete.  

Relax On The Horizon - Oceanfront is a sentiment-free set, so I made my banner sentiments from the 'On The Horizon' stamp set, stamping the 'Relax enjoy your day!' wording twice, once in Early Espresso for the bottom banner and once in Granny Apple Green, so that I could fussy-cut the word detail, which I then backed with a scrap of green and white gingham check from my bits box:


I played around with the banner lengths in relation to the sketch to make them work for my design and added some linen twine and a simple bow to add to the beachy feel of my card.

Another stamp from within the same set was used to finish the inside, with some added grasses:

Pick A Pebble - Finally, I added a trio of shiny brown enamel pebbles to the base of my scene for added interest - these make a great added detail for the seaside theme.

Here is the visual summary of the key products used on today's project for you to pin for easy reference:


You can see all of my 'How To' summaries on my 'How To - Tips and Techniques' Pinterest board in case you've missed any. 

I just love this card; it reminds me of many vacations in the Caribbean where I used to enjoy deserted beaches, warm waters and sunshine and escape the worst of the British winter each February 'BC' (before children, that is!)

How does our board inspire you? I can’t wait to see what YOU create! For more inspiration, be sure to visit the rest of the  Festive Friday Challenge Design team:

Ann Schach
Beth McCullough
Sharon Hashimoto Burkert
Melanie Hungerford
Helen Jennings
Stephanie Lanzalotto
Melva Peters
Jaydee
Diane Evans
Joanne James

Enjoy your day and I'll be back soon with another project. Until then, happy stampin'!


Stampin' Up! Supplies Used:

Table built using Product Table Builder by The Crafty Owl - Independent Stampin' Up! Demonstrator.

Natural Layering Hugs For AYSI263

by Joanne James12. November 2021 12:00

Today with my second post I'm sharing my design team card for our new challenge over at As you See It where it's time for a recipe challenge:


I used Linda's fabulous sketch over at Freshly Made Sketches this week for my card layout and went for a really clean design for my card today - take a look:


Here's the low-down on today's card:

Layering Hugs - The Layering Hugs Dies are perfect for the central one word sentiment on the front of my card today. I cut the background floral diecut in white and then added the individual letters of the word HUGS in Crumb Cake in the same colour as the base. Neutrals? Check. Diecut? Check. One Word Sentiment? Check.

A Subtle Texture - I used the Tasteful Texture Embossing Folder to add texture to my card base layer; the detail is subtle but with the focus on neutrals, it adds an element of interest to this otherwise very clean and uncluttered card. You can see the detail slightly better on the photo below:


Embossing folder? Check.

Finishing Touches - The last element I needed to incorporate into today's design was ribbon or twine. I debated adding a bow, but eventually decided that I would add a simple trio of linen thread and white baker's twine across the centre of my card instead. It emphasises the horizontal sentiment, which is more faithful to Linda's sketch since I stretched my sentiment focal point beyond the skinny visual. I hope she likes it! Ribbon or Twine? Check. That's my recipe complete!

Here is the visual summary of the key products used on today's project for you to pin for easy reference:


You can see all of my 'How To' summaries on my 'How To - Tips and Techniques' Pinterest board in case you've missed any. 

Here's a summary of our challenge rules:

  • Create any card, scrapbooking page, 3D project or packaging project that fits the challenge.
  • Please include the challenge graphic and link back to the challenge in your blog post. Turn off word verification so we can leave you lots of lovely comments. Make sure you link the post not the whole blog to the Linky. Use #AYSIXXX when uploading to a public gallery.
  • If you’re unsure about ‘the rules’, check the details under the Challenge Guidelines tab on the As You See It Challenge homepage.
We look forward to seeing your creations in the AYSI gallery.

Enjoy your day and I'll be back tomorrow with another project. Until then, happy stampin'!


Stampin' Up! Supplies Used:

Table built using Product Table Builder by The Crafty Owl - Independent Stampin' Up! Demonstrator.

Harvest Meadow Sending Thanks AYSI 257

by Joanne James20. August 2021 12:00

Hello everyone! A few blog-free days as I've been busy enjoying time with the James Juniors, cycling and activities with friends as we continue to enjoy the summer vacation. Today I'm back though and I'm sharing my design team card for our new challenge over at As you See It where it's time for a recipe challenge:


Heather came up with today's recipe and I really like it, although I did struggle with one element of it! Here's my card - can you tell which ingredient had me stumped?


Here's the low-down on today's card:

I dry embossed my background panel with the Tasteful Textile 3D Embossing Folder (tick) and then added a collection of strips of Harvest Meadow designer paper in Crumb Cake (tick) and Misty Moonlight, both of which feature wheat (tick) as does my sentiment from the 'Thinking Thanks and Peace' stamp set. I threaded my diamond weave ribbon with some linen twine (tick) and tied in a bow. Which just leaves gingham! I did struggle a little with this one, as I didn't have any gingham patterns that I could make work with the other recipe elements, so I resorted to some Crumb Cake monochrome plaid as my closest substitute and used it to back my sentiment, so there is just a thin border of it showing - it could pass for gingham, right?!


I really like the colour combo that I ended up using today; this background of strips is also great for using up those leftover scraps and offcuts and would work with lots of other patterned papers too.

Here is the visual summary of the key products used on today's project for you to pin for easy reference:


You can see all of my 'How To' summaries on my 'How To - Tips and Techniques' Pinterest board in case you've missed any. 

Here's a summary of our challenge rules:

  • Create any card, scrapbooking page, 3D project or packaging project that fits the challenge.
  • Please include the challenge graphic and link back to the challenge in your blog post. Turn off word verification so we can leave you lots of lovely comments. Make sure you link the post not the whole blog to the Linky. Use #AYSIXXX when uploading to a public gallery.
  • If you’re unsure about ‘the rules’, check the details under the Challenge Guidelines tab on the As You See It Challenge homepage.
We look forward to seeing your creations in the AYSI gallery.

Enjoy your day and I'll be back tomorrow with another project. Until then, happy stampin'!


Stampin' Up! Supplies Used:

Table built using Product Table Builder by The Crafty Owl - Independent Stampin' Up! Demonstrator.
 
 
Challenges: I used this week's sketch over at The Paper Craft Crew for my layout today.

Delicate Dahlias You Inspire Me Card

by Joanne James16. August 2021 21:00

I'm late with my post today as I held my monthly card class this morning, but I did manage to squeeze in a little crafty time afterwards so today I'm sharing a card that takes it's inspiration from the challenge prompt photo over at Just Add Ink this week:

So much to love about that photo! The colours, flowers and textures ... I decided to pair those with some free Sale-A-Bration product for my card today - take a look at what I came up with:


Here's the low-down on today's card:

Delicate Dahlias - The focal point flower on my card is the outline flower from 'Delicate Dahlias' - a stamp set that can be yours with a purchase of £90 or more during the current Sale-A-Bration promotion. I heat embossed the flower in gold onto some Cajun Craze cardstock, then added tone-on-tone colour with my Stampin' Blends markers. The sentiment on today's card is also from this set.

Blended Colour - Having used Cajun Craze for my flower and (retired) Pretty Peacock for my card base, I brought both colours together by blending them from the outside in on a piece of Very Vanilla cardstock at the centre of my design.


Texture, Texture - I tried to incorporated lots of textural elements from the inspiration photo on my card: the texture from the vase is similar to my dry embossed card base, and the texture from the cushion is on the gold metallic specialty paper beneath my sentiment. I also added other golden elements through my heat embossing, ribbon and gems.

So what do you think? Can you see how the photo inspired my card today? I would love to know what you use to inspire your crafting - do leave me a comment below.

Here is the visual summary of the key products used on today's project for you to pin for easy reference:

 to follow

You can see all of my 'How To' summaries on my 'How To - Tips and Techniques' Pinterest board in case you've missed any. 

Enjoy your evening and I'll be back tomorrow with another project. Until then, happy stampin'!


Stampin' Up! Supplies Used:

Table built using Product Table Builder by The Crafty Owl - Independent Stampin' Up! Demonstrator.
 
This card was the Winner over at Just Add Ink this week!

Colour Block Celebrate Sunflowers Thank You Card Trio CASC&S 427

by Joanne James6. July 2021 12:00

It's Tuesday and time for a new challenge over at CAS Colours & Sketches. It's a new month and Holly is hosting and our first challenge is a colour challenge: 
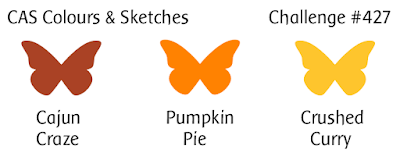
      

These colours made me think of autumn so for my card today I pulled out an old favourite and set to work - take a look:
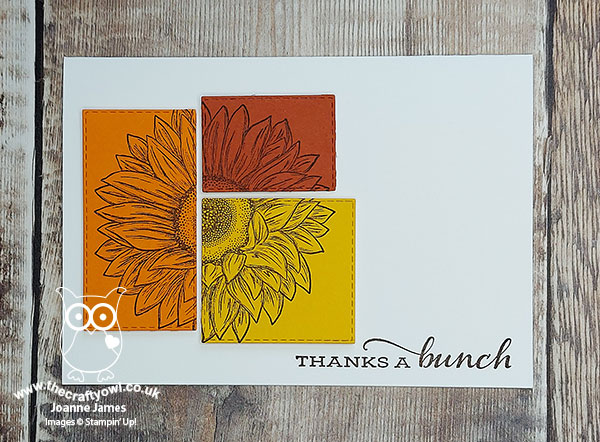
 

Here's the low-down on today's card:

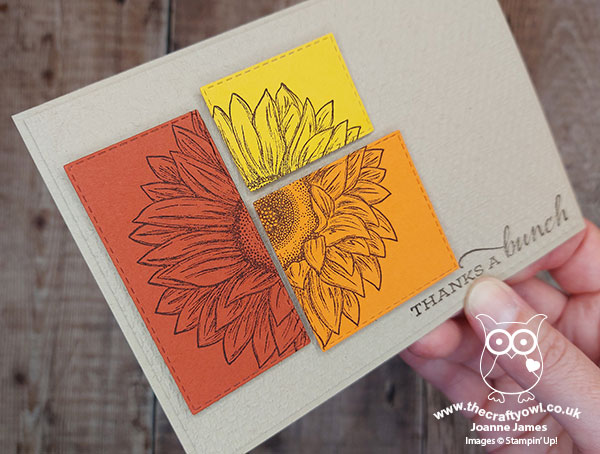
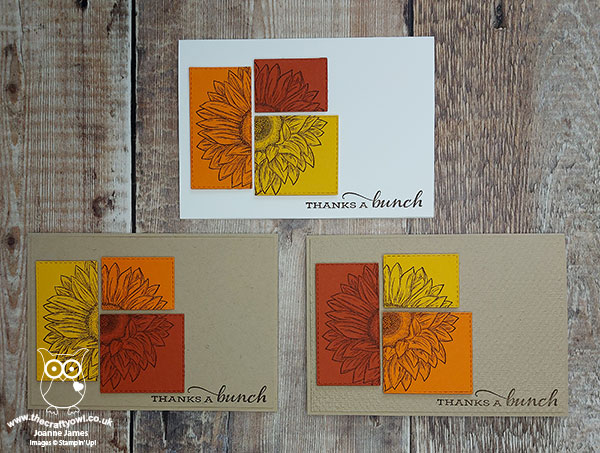
Celebrate Sunflowers - These colours really reminded me of sunflowers so I pulled my 'Celebrate Sunflowers' set from the shelf and set to work. I didn't want to have any leaves on my flower, so I decided to focus on the large image and stamp it in a neutral Early Espresso. I couldn't decide whether to go with white or a more natural Crumb Cake for my base, so I made one of each.  I love the detail on this large bloom and also added a partial stamp in Crushed Curry to decorate the inside of my card too: 
 

Colour Blocking - I used a technique called 'colour blocking' on my card today. I stamped the sunflower once onto cardstock in each of the three challenge colours, then using my rectangle stitched framelits I cut each image into three identical rectangles and then mixed the pieces to create three, pieced images using one piece of each of the three blocks of colour, hence the name. This is a great technique for clean and simple cards. 

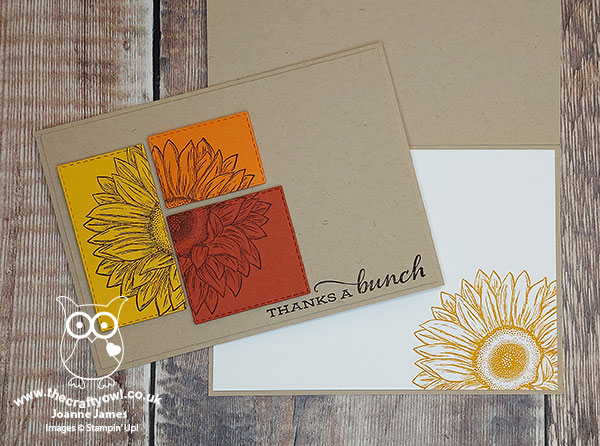
Added Texture - Since I had three more pieces, I created a third card, this time using a Crumb Cake base and this time I added some dry embossing using my Tasteful Textile embossing folder to the base of my card - you can hopefully see the subtle added detail below:
 

Here's a photo of all three versions together - which one is your favourite?
I'm also linking my cards up over at Inspire.Create today where they are looking for thank you cards. I will be sending these cards out in the post to my Stampin' Up! customers - so if you'd like to receive one, head on over to my Stampin' Up! store by clicking on the links below!

Here is the visual summary of the key products used on today's project for you to pin for easy reference:
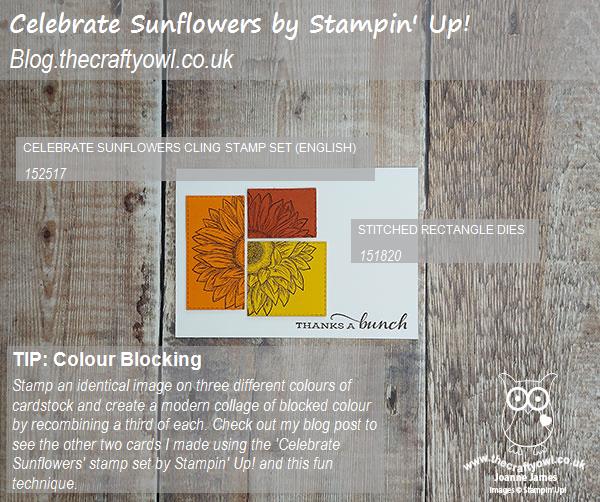
 

You can see all of my 'How To' summaries on my 'How To - Tips and Techniques' Pinterest board in case you've missed any. 

As a reminder, for our colour challenges, you must use all of the stated challenge colours. You may also use neutral colours; however, the challenge colours should be the most noticeable ones featured on your card. We use Stampin' Up! color names for reference, but you are welcome to use any other companies' products as long as you match the challenge colours as closely as possible.

Enjoy your day and I'll be back tomorrow with another project. Until then, happy stampin'!
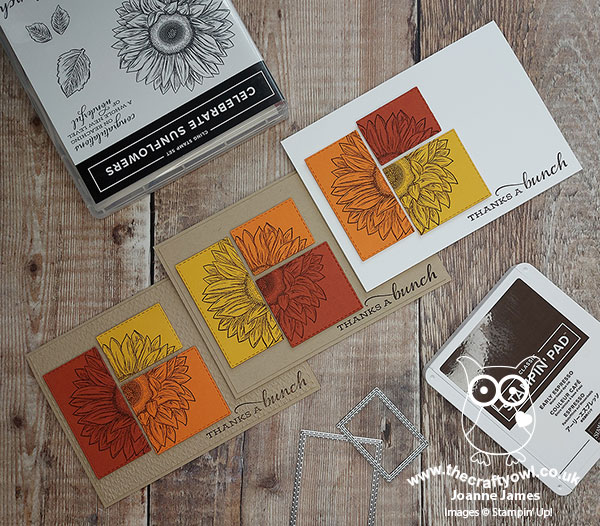
Stampin' Up! Supplies Used:

Table built using Product Table Builder by The Crafty Owl - Independent Stampin' Up! Demonstrator.

Grandad's Treasures of Life AYSI 245

by Joanne James5. March 2021 13:00

Today I'm sharing my design team card for our new challenge over at As you See It where it's time for a recipe challenge:


The often-dreaded masculine card! I decided to go with one of my current favourites from the January-June mini catalogue as I wanted to give this set another outing and create something a little different to my previous card with this set (you can see that card here if you missed it). Here's my card for today:


 Here's the low-down on today's card:

Treasures of Life - I decided to use the Grandad and Grandson image from the 'Treasures of Life' stamp set as the main feature of my masculine card today. This is such a beautiful set to celebrate the joys of being a grandparent. I stamped my image in Early Espresso and gave it a rough watercolou in earthy tones, picking out some of the details of the little boy in Night of Navy. I stamped my image on some retired Naturals White card for added texture and added another sentiment to the inside of my card from the set:


I left it otherwise fairly blank as I haven't yet decided what occasion I'm going to use this card for and I may add a birthday greeting too in due course.

All About Texture - I used lots of textural elements on today's card: a piece of Early Espresso embossed with the Tasteful Textile 3D embossing folder, a piece of the In Good Taste designer series paper. along with the texture added by the navy twine and my naturals white cardstock. I think the combination of elements along with the earthy brown tones give my card a homely, cosy feel. What do you think?


Tasteful Labels and an Old Faithful - The final element to complete this week's recipe challenge was to use a diecut: I used one of the Tasteful Labels dies for my sentiment, along with one of my old faithful Stitched Rectangle Dies to frame my watercoloured image.

Here is the visual summary of the key products used on today's project for you to pin for easy reference:


You can see all of my 'How To' summaries on my 'How To - Tips and Techniques' Pinterest board in case you've missed any. 

So how will you use this week's recipe?

Here's a summary of our challenge rules:

  • Create any card, scrapbooking page, 3D project or packaging project that fits the challenge.
  • Please include the challenge graphic and link back to the challenge in your blog post. Turn off word verification so we can leave you lots of lovely comments. Make sure you link the post not the whole blog to the Linky. Use #AYSIXXX when uploading to a public gallery.
  • If you’re unsure about ‘the rules’, check the details under the Challenge Guidelines tab on the As You See It Challenge homepage.
We look forward to seeing your creations in the AYSI gallery.

Enjoy your day and I'll be back tomorrow with another project. Until then, happy stampin'!


Stampin' Up! Supplies Used:

Table built using Product Table Builder by The Crafty Owl - Independent Stampin' Up! Demonstrator.

Walk In The Woods Get Well Soon Card

by Joanne James11. January 2021 15:14

Today I'm sharing a card that I made yesterday using the current colours over at Color Throwdown and this week's Freshly Made Sketches sketch:


I love the palette of browns and rust over at Color Throwdown and though they would be the perfect colours to try out a stamp set that I've had on the shelf for a while but not yet inked up. Using the long and skinny layout of Jen M's sketch (albeit with a few liberties in terms of layering my images) this is what I came up with:


Here's the low-down on today's card:

Walk In The Woods - I love the woodland images in the 'Walk In The Woods' set and I was tempted to try some no-line watercolouring with them, but decided instead to colour them with my Stampin' Blends markers. I fussy cut my hedgehog and popped him up on dimensionals in front of the toadstools. 

Tasteful Textile - Once I'd coloured my images, I added some texture to my stamped layer by running it through my Tasteful Textile embossing folder, which adds a lovely look and feel. Because I was making a longer slimline card, this required two passes through my diecuttting machine, one from each end of the cardstock, but the random embossing pattern meant this was easy enough to do as I didn't need the embossing to line up in any way. Hopefully you can see the subtle texture a little better below:

Everything Will Be Okay - I used this sentiment from the same stamp set as I needed a 'get well soon' card, but it would be useful for other occasions too - even just to cheer someone up on a dreary winter day - and we have plenty of those at the moment, right?!

Here is the visual summary of the key products used on today's project for you to pin for easy reference:


You can see all of my 'How To' summaries on my 'How To - Tips and Techniques' Pinterest board in case you've missed any. 

School's out for the day so we are going for a quick walk to blow off the cobwebs before it get's too dark. Enjoy your evening and I'll be back tomorrow with another project. Until then, happy stampin'!


Stampin' Up! Supplies Used:

Table built using Product Table Builder by The Crafty Owl - Independent Stampin' Up! Demonstrator.

Christmas Gleaming Ornaments in Silver and Gold PP521

by Joanne James13. December 2020 09:00

Today it's Sunday and time for this week's new challenge over at The Paper Players! It's our last challenge of 2020 and the turn of the amazing Claire to host this week. She has a colour challenge for you to work with:


I've been super busy this week so have not been a frequent blogger I'm afraid. To make amends, I have two cards for you today! I'm still making Christmas cards and wanted to play along with challenge over at The Card Concept because I loved the textures in the inspiration photo so I decided to make two cards, both using the Fab Friday sketch layout: a silver, black and white one for my Paper Players card and then a gold, black and white version for The Card Concept. So first up - here's my Paper Players card:


Here's the low-down on today's cards:

Both cards feature a pair of ornaments from the Christmas Gleaming set, one heat embossed on Whisper White card and the other onto Basic Black, along with piece of foil embossed with the Parisian Flourish 3D embossing folder and wiped with black ink for a slightly more aged look, black and silver/gold glimmer paper, tassels, gem embellishments and mesh ribbon and twine bows. Just check out the texture and detail:


I switched out the background embossing folder and one or two other small details to recreate a gold, black and white version:


I'm going for a 'classy and elegant' look with my cards today: the polished, shiny finish, layered textures and sparkly embellishments are a definite change from my normal 'clean and layered' style, but I quite like them. I think the sparkle and shine balances all the black and the textures are just lovely:


Here is the visual summary of the key products used on today's projects for you to pin for easy reference:


You can see all of my Product and 'How To' summaries on my 'How To - Tips and Techniques' Pinterest board in case you've missed any. 

Before you reach for your ink and papers, check out what our amazing team has created to inspire you this week:

Here's a quick recap of our challenge rules:
 
1.  Create a new paper project
2.  Upload your creation to your blog with a link back to us and provide a direct link to the post featuring your challenge submission.
3.  Please link your card to no more than four challenges, TOTAL.
4.  Have FUN!

This is our last challenge of the year before we take a short break over Christmas. It is time to say thank you and goodbye to Stef, Allisa and Mary, our fabulous guest designers this year. They have all been fabulous and we will miss them lots! 

Enjoy your day; I am going to try and finish writing my Christmas cards today, whilst also squeezing in some festive baking and maybe just a little crafting too. I'll be back tomorrow with another project. Until then, happy stampin'!


Stampin' Up! Supplies Used: 

Table built using Product Table Builder by The Crafty Owl - Independent Stampin' Up! Demonstrator.
 
 
Table built using Product Table Builder by The Crafty Owl - Independent Stampin' Up! Demonstrator.

Ombre Watercolour Christmas Tree Trio

by Joanne James25. November 2020 09:00

A quick post from me today! Today I'm sharing a card that was inspired by the current challenge over at Inspired By:


I love those colourful bottle brush trees and decided I would do a spot of watercolouring to create my own ombre trio - take a look:


Here's the low-down on today's card:

I diecut the trees from watercolour paper using the Majestic Mountain dies, watercoloured them and popped the middle one up on a foam adhesive sheet. I paired it with a heat-embossed sentiment from 'Itty Bitty Christmas' and embossed my white background panel with the Tasteful Texture embossing folder for some added texture.

Finally I added a sprinkling of clear and irridescent sequins to finish:


Here is the visual summary of the key products used on today's project for you to pin for easy reference:


You can see all of my 'How To' summaries on my 'How To - Tips and Techniques' Pinterest board in case you've missed any. 

Enjoy your evening and I'll be back tomorrow with another project. Until then, happy stampin'!


Stampin' Up! Supplies Used:

Table built using Product Table Builder by The Crafty Owl - Independent Stampin' Up! Demonstrator.

Brightly Gleaming Dove of Hope PP510

by Joanne James27. September 2020 09:00

Today it's Sunday and time for this week's new challenge over at The Paper Players! It's my turn to host this week and I have my favourite, a sketch challenge for you to work with:


I love clean and layered cards and decided to incorporate lots of layers into this week's sketch. Lots of ways to interpret it - I decided to go with something new and a returning favourite and create another Christmas card for my stash:


Here's the low-down on today's card:

Dove of Hope - There are lots of elements to today's card but my focal point is one of the doves and sentiment from the new Dove of Hope bundle. There are two stamped doves and an additional diecut dove in the Detailed Dove Die set, and I used the only left-facing one on my card. The stamp set has a number of sentiments, including this one that is perfect for decorating the inside of your card:

Brightly Gleaming - I paired my dove with some of the Brightly Gleaming designer series paper and used this to inspire my Pretty Peacock and Very Vanilla colour scheme. The Brightly Gleaming Specialty Designer Series Paper is a returning favourite from last year; it's great to be able to use if again!

Brushed Metallics - I decided to add in some Brushed Metallic Cardstock in gold to tie in with my metallic edge ribbon and add an additional touch of luxury and elegance to my card. I carried this through to my card too, where on a whim I added a strip of sparkly gold washi tape to the edge of my envelope flap, but have to say I quite like it!

I really like the Dove of Hope Bundle and think it has lots of creative possibilities. It is going to be the focus bundle for my November online card class so if you like this set too, I'd love you to join me. Message me to book your place.

Here is the visual summary of the key products used on today's project for you to pin for easy reference:


You can see all of my Product and 'How To' summaries on my 'How To - Tips and Techniques' Pinterest board in case you've missed any. 

Before you reach for your ink and papers, check out what our amazing team has created to inspire you this week:

Here's a quick recap of our challenge rules:
 
1.  Create a new paper project
2.  Upload your creation to your blog with a link back to us and provide a direct link to the post featuring your challenge submission.
3.  Please link your card to no more than four challenges, TOTAL.
4.  Have FUN!

You can see all of my 'How To' summaries on my 'How To - Tips and Techniques' Pinterest board in case you've missed any. 

Enjoy your day; following a busy day yesterday we are having a day at home with all hands on deck as I complete the final preparations for my bi-annual retreat which is next weekend. There will be lots of diecutting from everyone! I'll be back tomorrow with another project. Until then, happy stampin'!


Stampin' Up! Supplies Used: 

Table built using Product Table Builder by The Crafty Owl - Independent Stampin' Up! Demonstrator.

Current Promotions

Stampin Cut and Emboss

Save up to 30% off on all your favourite kits from 1 to 31 October! 

Click here to see the current kits available and order yours online today.

Join My Team

It's always a great time to join Stampin’ Up! During October you can get even more in your starter kit! New team members can get £160 worth of products for only £99 + free business supplies + free shipping + all the fun being a part of Stampin’ Up! Stampin' Up! has something for everyone: join my growing team and benefit from my support to enjoy Stampin' Up! however you choose.

If you're interested, call me for a chat to understand how I can help you realise your goals. Alternatively, if you have already decided to sign up and you just can't wait, please click here for the link to the online form where you can sign up and order your starter kit right away! 

Shop Online

Access my online shop 24 x 7, 365 days of the year:

Current October hostess code:

4XPEYCB9

Shop Online

Scrapbooking

Stampin' Up! has introduced a new range of 12x12" scrapbooking product and kit - the full range is now available to purchase online. To download a copy of the new digital Scrapbooking Catalogue click here.

Mini Catalogue

BROWSE THE CATALOGUE

'Tis The Season - the new Stampin' Up! Mini Catalogue is here! For more details and to download your copy click here

2024-25 Annual Catalogue

BROWSE THE CATALOGUE

Click on the image to download your copy of the 2024-25 annual catalogue. For a full list of current SU! supplies, go to my online store. If you would like any help or advice, please drop me a line at joanne@thecraftyowl.co.uk or give me a call on 07773 421446 - I'd be happy to help.

Latest Kits!

Stampin Cut and Emboss

The Christmas Ornaments Kit and Card Keeper Kit are the latest kits in the online store - get yours here!

New Online Exclusives

There are new products available exclusively in the online store from 5 November - check them out here.

About Me

Hi I'm Joanne and live in Northampton and when I'm not looking after my husband and two beautiful children, am an avid crafter with a passion for all things Stampin' Up!

I must confess that I have never been a big rubber stamper - until I discovered Stampin' Up! that is. I love the fact that I can get such great results with co-ordinating stamps, inks, papers and punches - the possibilities are endless! Join me on my stamping journey as I share the things I love and be inspired to create amazing things yourself!

Follow Me

Monthly Newsletter

Box Builder

Click the button above to use Box Buster to create your custom box design using the Envelope Punch Board!

Kits Collection Now Available!

Stampin Cut and Emboss

The new Kits Collection from Stampin' Up! is now available!

Click here to see the current kits available and order yours online today.

I Design For


Stampin' Up Stuff

This is my personal blog and is not endorsed by Stampin’ Up! I hope you find it a plentiful source of ideas and personal inspiration but please don't copy my designs for contest submission or use for classes, publication or sale without express permission.