A Candy Cane Christmas TTT 186

by Joanne James3. November 2022 16:00

It's Thursday and time for a new challenge over at TicTacToe! It's the turn of Team X to host this week and the lovely Elizabeth is our featured designer this week. This is the fun board that we are playing along with: 


I went along the diagonal with Candy Cane-Sparkle-Large Sentiment and using the sketch over at Sketch Saturday for my layout this is what I came up with - take a look:


Here's the low-down on today's card:

Today's card is all about the festive red! I paired a couple of candy canes that I diecut from the Sweetest Christmas designer series paper and paired them with a large circle of red glimmer paper and an over-the-top banner sentiment from the 'Christmas Banners' stamp set - check out that sparkle:

I added a few sprigs of foliage and a sprinkling of white adhesive sequins with a little extra stamping on the inside to complete today's card:

Here is the visual summary of the key products used on today's project for you to pin for easy reference:


You can see all of my Product and 'How To' summaries on my 'How To - Tips and Techniques' Pinterest board in case you've missed any. 

A tictactoe board offers so many creative possibilities - how does this week's board inspire you? Why not have a go? We would love to see you in the gallery and who knows - you might be selected for Designer's Choice and be eligible to be a guest designer on a future challenge. 

Enjoy your day; I'll be back tomorrow with another project. Until then, happy stampin'!


Stampin' Up! Supplies Used: 

Table built using Product Table Builder by The Crafty Owl - Independent Stampin' Up! Demonstrator.

Cottage Wreaths Spooky Spider Card AYSI 286

by Joanne James21. October 2022 12:00

Today I'm sharing my design team card for our new challenge over at As you See It where it's time for a seasonal 'fill in the blank' challenge:


I used Jacqui's sketch over at Freshly Made Sketches for my layout this week - can you guess how I filled in the blank? Here's my card:


 Here's the low-down on today's card:

For Me The Spookiest Thing on Halloween Is Always - .. the fact that there are even more spiders than usual! I'm all for appreciating all creatures great and small, but I draw the line at spiders and wasps! I've been stung by a wasp on three separate occasions - each of them memorable and none of them pleasant and as for spiders, well they just give me the heebie-jeebies, especially furry ones or ones with the long, spindly legs!! So today's card had to feature spiders! It actually started with the stamped one, which comes from the Cottage Wreaths stamp set. Ironically, one of the reasons I bought this set was for the spider and the 'boo' greeting, as it allowed for versatility given that I didn't want to buy lots of Halloween sets but I honestly haven't been able to bring myself to create a Halloween wreath featuring this particular arachnid - every time I go to visit another blog to leave a comment and I see this spider featured on a card, it literally makes my skin creep!

I decided to pair both the spider and greeting with some (retired - Happy Hauntings) designer paper squares, also featuring a similar spider, and create a simple feature where this one looks like he's escaping the paper via his 'web' line of pierced dots courtesy of my Take Your Pick Tool. I also added an embossed spider's web to the black mat layer, although this is difficult to see in the photos and I embossed the envelope flap too for additional spooky effect. Against my better judgement, here's a close-up of the escapee:


Whilst I actually like the finished card, I have absolutely no idea who to send it too - does anyone out there actually like spiders?! Answers below please - I will happily send this card your way! I am also going to share the loveliness of today's Halloween creation with the ladies over at SUO Challenges where they are all about Halloween for a second entry.

Here is the visual summary of the key products used on today's project for you to pin for easy reference:


You can see all of my 'How To' summaries on my 'How To - Tips and Techniques' Pinterest board in case you've missed any. 

Here's a summary of our challenge rules:

  • Create any card, scrapbooking page, 3D project or packaging project that fits the challenge.
  • Please include the challenge graphic and link back to the challenge in your blog post. Turn off word verification so we can leave you lots of lovely comments. Make sure you link the post not the whole blog to the Linky. Use #AYSIXXX when uploading to a public gallery.
  • If you’re unsure about ‘the rules’, check the details under the Challenge Guidelines tab on the As You See It Challenge homepage.
  • In a Fill in the Blank challenge, complete the sentence in the Challenge Banner with the phrase that is true for you and create your project using the words you used. Tell us what you said in your blog or on your site.
We look forward to seeing your creations in the AYSI gallery.

Enjoy your day - it's Friday so my cleaning day and the housework beckons - off to do battle with the real-life spiders and their cobwebs, which are always more prevalent at this time of year as they come indoors to escape the chillier autumn weather. Wish me luck! I'll be back tomorrow with another project. Until then, happy stampin'!


Stampin' Up! Supplies Used:

Table built using Product Table Builder by The Crafty Owl - Independent Stampin' Up! Demonstrator.

Halloween Boo To You FF120

by Joanne James14. October 2022 08:00

Today I have my card for the new challenge over at Festive Friday. 


The challenge that we are celebrating this week is 'Halloween' which is on October 31st. Remember the fun thing is that at Festive Friday you do not need to actually celebrate the occasion; your goal is to simply use three or more items from the inspiration list on your project. This week I bowed to the theme and used pumpkin, orange, stars, black and ghost and using the sketch layout over at Try Stamping on Tuesday this is what I came up with:


 Here's the low-down on today's card:

My card started out with the starry and pumpkin/ghost patterned paper from the 'Celebrate Everything' hostess designer series paper pack - these papers really are the pack that keeps on giving with a pattern for every occasion! Normally I wouldn't mix two such bold papers, but the yellow stars on the pumpkin/ghost sheet mean the two work together perfectly. I used my Pumpkin Pie Stampin' Blends markers to colour the pumpkins on the designer paper instead of leaving the whole design white - I love that you can do this! - and I added these papers to my cardbase, then used a strip of black glimmer paper and a collection of diecuts (all retired - Boo to You, Harvest Hellos, Apple Punch and Stitched Stars Dies) to create a focal point that picked out the detail of the papers:


Cute, right?! I really wanted to stamp 'trick or treat' on the orange banner, but could I find a retired stamp anywhere in my collection with those words? Nope. I'm sure there's one here somewhere ... I just have to find it!

I am also linking this card up with the lovely ladies over at SUO Challenges where their theme is 'Halloween' currently too. 

Here is the visual summary of the key products used on today's project for you to pin for easy reference:


You can see all of my 'How To' summaries on my 'How To - Tips and Techniques' Pinterest board in case you've missed any. 

How does our board inspire you? I can’t wait to see what YOU create! For more inspiration, be sure to visit the rest of the Festive Friday Challenge Design team:

Ann Schach
Beth McCullough
Sharon Hashimoto Burkert - off this week
Melanie Hungerford
Helen Jennings
Melva Peters
Jaydee
Diane Evans
Joanne James

Enjoy your day and I'll be back tomorrow with another project. Until then, happy stampin'!


Stampin' Up! Supplies Used:

Table built using Product Table Builder by The Crafty Owl - Independent Stampin' Up! Demonstrator.


Natures Harvest Echinacea and Meadow Dies Watercolour Print for PP612

by Joanne James9. October 2022 08:00

Today it's Sunday and time for this week's new challenge over at The Paper Players! It's the turn of the fabulous Laurie to host this week and she has an interesting colour challenge for us to work with:


I say interesting because Laurie's colours immediately made me think of Halloween, but since I rarely send Halloween cards and I don't have much in the way of current Halloween product, I was determined to use these colours on anything but a Halloween card! So much so, I started creating and ended up with not one but two cards to share with you today - and neither remotely anything to do with October 31st! Here's the first one using Amy's layout over at Freshly Made Sketches this week - take a look:


Here's the low-down on my first card:

Staying faithful to Amy's sketch, I added a band of Brights designer series paper to my Gorgeous Grape card base and decided to create a nature-inspired watercolour as my focal point. I stamped the echinacea from the 'Nature's Harvest' stamp set in Stazon onto watercolour paper, then loosley watercoloured my image using the challenge colours and my aquapainters. Once I'd painted my image, I added some speckles by flicking my black Stampin' Blends marker across the image before cutting out with the largest circle in my Stylish Shapes Dies:


I added a white-on-black sentiment from 'Art Gallery' to complete my card. I liked this card so much, I thought I'd use one of the dies in the co-ordinating set to try out a watercolour print technique that I'd seen on Pinterest. My first attempt was a hot mess, but taking my learns and a different die from the Meadow Dies set I had a second attempt and like this one much better! Here's the card in question:


Have you ever tried the watercolour print technique using diecuts? It's actually quite straightforward: diecut your flower from watercolour paper and colour with Stampin' Write markers. Once coloured, place the flower onto a blank piece of watercolour paper and lightly spritz with water. The water 'spreads' the ink from the diecut one the blank piece - you can also 'stamp' this piece with the wet, coloured flower (but I didn't do that here). Allow both pieces to dry then add to your card; I cut a frame out of my spritzed piece and then added my diecut flower offset from the relief image on the frame. I added some clear faceted gems and a sentiment from the 'Charming Sentiments' stamp set that, when paired with the words 'faith over fear' stamped on the inside were the perfect words of encouragement needed for a card to send to a friend battling breast cancer right now:


What do you think? I quite like the effect and will definitely be trying this with other dies in other colours. I am also linking my second card up over at Time Out since the sentiment is perfect for their theme this week.

Here are the visual summary of the key products used on today's projects for you to pin for easy reference:
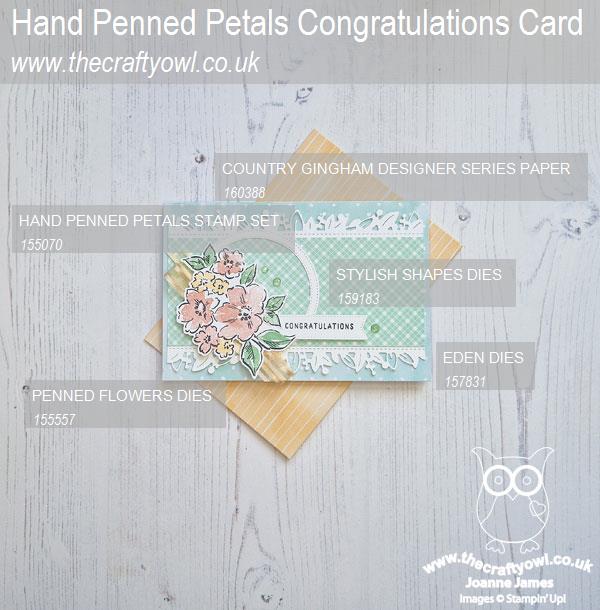


You can see all of my Product and 'How To' summaries on my 'How To - Tips and Techniques' Pinterest board in case you've missed any. 

So what do these colours say to you - Halloween, or something else completely? Before you reach for your ink and papers, check out what our amazing team has created to inspire you this week:

Here's a quick recap of our challenge rules:
 
1.  Create a new paper project
2.  Upload your creation to your blog with a link back to us and provide a direct link to the post featuring your challenge submission.
3.  Please link your card to no more than four challenges, TOTAL.
4.  Have FUN!

Enjoy your day; I'll be back on Tuesday with another project. Until then, happy stampin'!
 

Stampin' Up! Supplies Used: 

Table built using Product Table Builder by The Crafty Owl - Independent Stampin' Up! Demonstrator.

Just Saying Hello with Simply Fabulous CCS 490

by Joanne James4. October 2022 12:00

It's Tuesday and time for a new challenge over at CAS Colours & Sketches. We are starting a new month and the lovely Michal is our host for October. We are starting the month with a colour challenge: 


For my card today I decided to use the sketch design (but not the colours/inspo photo) over at Fusion for a bright and cheery card that has a distinctly summery feel - take a look:


Here's the low-down on today's card:

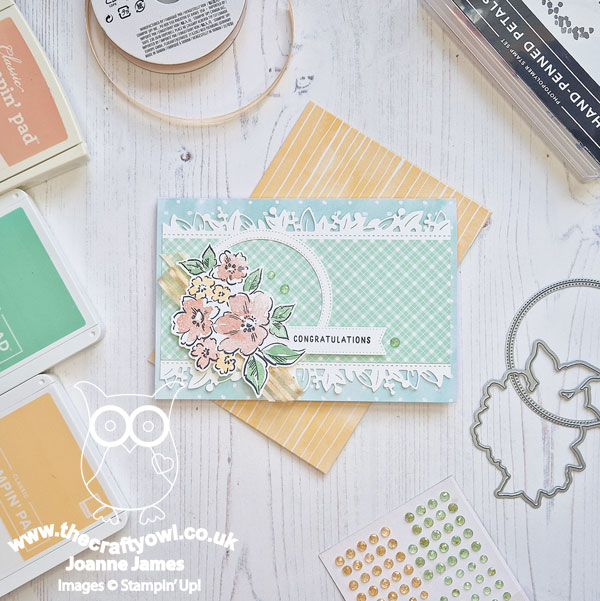
I thought Michal's colour choices were perfect for a bold flower and sentiment, courtesy of my favourite 'Simply Fabulous' stamp set. I stamped them onto a diecut circle and used a sunny Daffodil Delight card base, with a piece of 'Celebrate Everything' gingham paper across the top of the panel. I resisted the urge to add some white baker's twine and finished my flower centre with nothing more than an enamel dot embellishment:


A co-ordinating flower on my envelope and inside complete this easy card. 

Here is the visual summary of the key products used on today's project for you to pin for easy reference:


You can see all of my 'How To' summaries on my 'How To - Tips and Techniques' Pinterest board in case you've missed any. 

As a reminder, for our colour challenges, you must use all of the stated challenge colours. You may also use neutral colours; however, the challenge colours should be the most noticeable ones featured on your card. We use Stampin' Up! color names for reference, but you are welcome to use any other companies' products as long as you match the challenge colours as closely as possible.

Enjoy your day; I'm having a desk day as there is lots of Stampin' Up! news to impart so I've quite a few posts to write - and of course there's shopping to take advantage of today's free shipping offer - yay! I'll be back on Thursday with another project. Until then, happy stampin'!
 

Stampin' Up! Supplies Used:

Table built using Product Table Builder by The Crafty Owl - Independent Stampin' Up! Demonstrator.

Changing Seasons with Autumn Leaves PP611

by Joanne James2. October 2022 08:00

Today it's Sunday and time for this week's new challenge over at The Paper Players! It's my turn to host this week and I have a timely theme challenge for you to work with:


I chose Changing Seasons and the arrival of Autumn as my theme this week. With cooler temperatures and shorter days already making an appearance here in the UK, it seems appropriate. When I think of Autumn, I think of the changing colours of the leaves and that was the inspiration for my card today - take a look:


Here's the low-down on today's card:

I went with a square card for a change and inspired by a similar layout I'd seen on Pinterest, I created a series of layered circles with my changing colours below and a circle of Crumb Cake above that had a leaf shape cut out with the oak leaf in the Country Wreaths die set, so that the colour showed through the negative space:

My ninth and final circle was  where I stamped my simple sentiment, adding one of the die cut leaves, along with a twine bow and enamel dot as a final embellishment.

Here is the visual summary of the key products used on today's project for you to pin for easy reference:


You can see all of my Product and 'How To' summaries on my 'How To - Tips and Techniques' Pinterest board in case you've missed any. 

I love the range of colours, from greens through to yellows, oranges red and rust - a great showcase of Stampin' Up! cardstock too! What do you think of today's card and what does Autumn mean to you? Do leave me a comment below, as always I'd love you to share your thoughts. Or you could even play along with this week's challenge!

Before you reach for your ink and papers, check out what our amazing team has created to inspire you this week:

Here's a quick recap of our challenge rules:
 
1.  Create a new paper project
2.  Upload your creation to your blog with a link back to us and provide a direct link to the post featuring your challenge submission.
3.  Please link your card to no more than four challenges, TOTAL.
4.  Have FUN!

Enjoy your day; I'll be back tomorrow with another project. Until then, happy stampin'!


Stampin' Up! Supplies Used: 

Table built using Product Table Builder by The Crafty Owl - Independent Stampin' Up! Demonstrator.

Ringed With Nature Autumn Card

by Joanne James8. September 2022 16:00

It's Thursday and time for a new challenge over at TicTacToe! It's the turn of Team X to host this week and the lovely Felicita is our featured designer this week. This is the fun board that we are playing along with: 


I used the sketch over at Sketch Saturday for my layout and went along the centre row of the board with wood/free/fall colours and incorporated the colours, leaves and acorns of the Hand Stamped Sentiments inspiration photo for my card to welcome autumn - take a look:


Here's the low-down on today's card:

Timber Texture - I ran my card base through the Timber Embossing Folder for my wood element, then added a piece of the now retired Sale-A-Bration Rings of Love designer series paper down the centre - the pattern is perfect to evoke an autumnal feel.

Chic Leaves - I added a sentiment from a retired set to a stitched circle and embellished this with a trio of diecut oak leaves curtesy of the Chic Dies - such a great die set, with something for every season. 

An Acorn Pair - I finished my card with a pair of diecut acorns from the Tree Rings Hybrid Embossing Folder and Dies and some retired Poppy Parade thick baker's twine. Here's a closeup of that diecut detail and those lovely autumn colours:

I love the vibrancy that is added by the pop of red from the baker's twine and the additional textures that always seem to accompany my autumn-themed cards.

Here is the visual summary of the key products used on today's project for you to pin for easy reference:


You can see all of my Product and 'How To' summaries on my 'How To - Tips and Techniques' Pinterest board in case you've missed any. 

A tictactoe board offers so many creative possibilities - how does this week's board inspire you? Why not have a go? We would love to see you in the gallery and who knows - you might be selected for Designer's Choice and be eligible to be a guest designer on a future challenge. 

Enjoy your day; I'll be back tomorrow with another project for our new challenge over at As You See It. Until then, happy stampin'!


Stampin' Up! Supplies Used: 

Table built using Product Table Builder by The Crafty Owl - Independent Stampin' Up! Demonstrator.

Happiness Abounds Birthday Card AYSI281

by Joanne James12. August 2022 12:00

Today I'm sharing my design team card for our new challenge over at As you See It where it's time for a recipe challenge:


There were lots of things on this week's board that I loved - DSP, bright colours, dies and even florals - but I was slightly unnerved by the addition of watercolouring into the mix! I find watercolouring a little hit and miss (sometimes my attempts are a hot mess!) so I decided to play safe and watercolour my stamped florals and take it from there. Take a look at where I ended up:


 Here's the low-down on today's card:

I decided to use some of the brightly coloured Hues of Happiness DSP for my background and use this as the starting point for my card. I resisted the urge to use some of my florals diecut from another sheet in this pack and instead I stamped a whole bunch of flowers from the 'Happiness Abounds' stamp set onto Shimmery White cardstock and heat embossed them in black. Shimmery White cardstock is great for watercolouring as it's not too absorbent and so is very forgiving. I watercoloured my flowers in the same colours that featured on my background paper, and positioned them around a central diecut piece, also from the co-ordinating Blossoming Happiness Dies:

I heat embossed my sentiment onto a Stylish Shapes diecut banner, added a twine bow and my card is complete - all elements of the recipe included, phew!

Here is the visual summary of the key products used on today's project for you to pin for easy reference:


You can see all of my 'How To' summaries on my 'How To - Tips and Techniques' Pinterest board in case you've missed any. 

Here's a summary of our challenge rules:

  • Create any card, scrapbooking page, 3D project or packaging project that fits the challenge.
  • Please include the challenge graphic and link back to the challenge in your blog post. Turn off word verification so we can leave you lots of lovely comments. Make sure you link the post not the whole blog to the Linky. Use #AYSIXXX when uploading to a public gallery.
  • If you’re unsure about ‘the rules’, check the details under the Challenge Guidelines tab on the As You See It Challenge homepage.
We look forward to seeing your creations in the AYSI gallery.

Enjoy your day and I'll be back on Sunday with my project for The Paper Players. Until then, happy stampin'!


Stampin' Up! Supplies Used:

Table built using Product Table Builder by The Crafty Owl - Independent Stampin' Up! Demonstrator.

Wonderful World Birthday Card PP603

by Joanne James7. August 2022 08:00

Today it's Sunday and time for this week's new challenge over at The Paper Players! It's the turn of the fabulous Jaydee to host this week and she has a fun theme challenge for you to work with:


So many ways to go with Jaydee's theme this week and so many choices! I am still busy cutting up my beautiful Wonderful World designer series papers so wanted to use Judy's great layout over at Freshly Made Sketches this week to showcase one of my favourite flowers in the pack for today's challenge - take a look:


Here's the low-down on today's card:

I highlighted my fussy-cut flower on a bright yellow stitched diecut circle and some diecut leaves and paired it with another of the blue-toned patterns in this pack. I experimented with different combinations of patterns for the three panels, but decided I preferred all three cut from the same paper so went with it. A few in-colour enamel dots and a fussy-cut sentiment from the 'Simply Fabulous' stamp set, stamped in Starry Sky, completes my card:


This card has a lovely clean feel with all that white space, despite its layers - and I love the way the layout highlights that single flower. What's more, this paper can be yours FREE, along with the 'Wonderful World' stamp set, when you place an online order of £90 or more between now and 31st August - yay for FREE!!

Here is the visual summary of the key products used on today's project for you to pin for easy reference:


You can see all of my Product and 'How To' summaries on my 'How To - Tips and Techniques' Pinterest board in case you've missed any. 

Before you reach for your ink and papers, check out what our amazing team has created to inspire you this week:

Here's a quick recap of our challenge rules:
 
1.  Create a new paper project
2.  Upload your creation to your blog with a link back to us and provide a direct link to the post featuring your challenge submission.
3.  Please link your card to no more than four challenges, TOTAL.
4.  Have FUN!

Enjoy your day; I'll be back tomorrow with another project. Until then, happy stampin'!


Stampin' Up! Supplies Used: 

Table built using Product Table Builder by The Crafty Owl - Independent Stampin' Up! Demonstrator.

Abigail Rose Thank You Card PP601

by Joanne James24. July 2022 08:00

Today it's Sunday and time for this week's new challenge over at The Paper Players! It's the turn of the fabulous LeAnne to host this week and she has my favourite, a sketch challenge for us to work with:


I wasn't sure how to tackle today's sketch initially, but I thought the focal point 'any shape' might lend itself to some fussy cutting, so I decided to reach for some of my designer papers and see where the mood took me! I settled on the lovely browns and neutrals of the Abigail Rose Suite and ended up creating a 'kitchen sink' of a focal point - take a look:


Here's the low-down on today's card:

I decided to use this bold pattern of white florals on a brown scripted background for my base, then fussy cut more of the flowers and used those as the basis for the decoration for my focal point. I used a stitched circle for my base, blending some inks to create an ombre effect and then layering a selection of leafy diecuts in shades of browns, along with some (retired) wooden leaves and sprigs and my trio of fussy cut flowers for decoration. I added a touch more colour to my fussy cut flowers using my Stampin' Blends, to give them a little more definition and added some Elegant Faceted Gems for a touch of sparkle:

I just kept layering and adding in bits and pieces until I felt happy with the way the decoration framed my sentiment (taken from the 'Hand Penned' stamp set) - hence my 'kitchen sink' reference! I decided to make my vertical banner element from vellum, so that it didn't obscure too much of the pattern beneath it. I also added some layered ribbon for detail and texture and to pick up the colour scheme (the Crumb Cake ribbon I used is retired but I've included a link below to a suitable current alternative). 

Very little stamping on today's card and just like my last one another card with lots of bits and pieces, but actually easy to recreate - the paper definitely does the 'heavy lifting' and I love the way the fussy cut flowers tie in with the base below. I'm also linking my card up with the ladies over at TGIF Challenges who are crafting with their favourite things this week - anyone who knows me well can attest to my love of designer series paper - I love it all, any pattern, any size and this card is definitely a showcase of that!

Here is the visual summary of the key products used on today's project for you to pin for easy reference:


You can see all of my Product and 'How To' summaries on my 'How To - Tips and Techniques' Pinterest board in case you've missed any. 

Before you reach for your ink and papers, check out what our amazing team has created to inspire you this week:

Here's a quick recap of our challenge rules:
 
1.  Create a new paper project
2.  Upload your creation to your blog with a link back to us and provide a direct link to the post featuring your challenge submission.
3.  Please link your card to no more than four challenges, TOTAL.
4.  Have FUN!

Enjoy your day; not much going on here 'chez James' this weekend - just enjoying a relaxing weekend in the garden, hopefully with a little crafty time thrown in now things have cooled down a little. I'll be back tomorrow with another project. Until then, happy stampin'!


Stampin' Up! Supplies Used: 

Table built using Product Table Builder by The Crafty Owl - Independent Stampin' Up! Demonstrator.

Current Promotions

Stampin Cut and Emboss

Save up to 30% off on all your favourite kits from 1 to 31 October! 

Click here to see the current kits available and order yours online today.

Join My Team

It's always a great time to join Stampin’ Up! During October you can get even more in your starter kit! New team members can get £160 worth of products for only £99 + free business supplies + free shipping + all the fun being a part of Stampin’ Up! Stampin' Up! has something for everyone: join my growing team and benefit from my support to enjoy Stampin' Up! however you choose.

If you're interested, call me for a chat to understand how I can help you realise your goals. Alternatively, if you have already decided to sign up and you just can't wait, please click here for the link to the online form where you can sign up and order your starter kit right away! 

Shop Online

Access my online shop 24 x 7, 365 days of the year:

Current October hostess code:

4XPEYCB9

Shop Online

Scrapbooking

Stampin' Up! has introduced a new range of 12x12" scrapbooking product and kit - the full range is now available to purchase online. To download a copy of the new digital Scrapbooking Catalogue click here.

Mini Catalogue

BROWSE THE CATALOGUE

'Tis The Season - the new Stampin' Up! Mini Catalogue is here! For more details and to download your copy click here

2024-25 Annual Catalogue

BROWSE THE CATALOGUE

Click on the image to download your copy of the 2024-25 annual catalogue. For a full list of current SU! supplies, go to my online store. If you would like any help or advice, please drop me a line at joanne@thecraftyowl.co.uk or give me a call on 07773 421446 - I'd be happy to help.

Latest Kits!

Stampin Cut and Emboss

The Christmas Ornaments Kit and Card Keeper Kit are the latest kits in the online store - get yours here!

New Online Exclusives

There are new products available exclusively in the online store from 5 November - check them out here.

About Me

Hi I'm Joanne and live in Northampton and when I'm not looking after my husband and two beautiful children, am an avid crafter with a passion for all things Stampin' Up!

I must confess that I have never been a big rubber stamper - until I discovered Stampin' Up! that is. I love the fact that I can get such great results with co-ordinating stamps, inks, papers and punches - the possibilities are endless! Join me on my stamping journey as I share the things I love and be inspired to create amazing things yourself!

Follow Me

Monthly Newsletter

Box Builder

Click the button above to use Box Buster to create your custom box design using the Envelope Punch Board!

Kits Collection Now Available!

Stampin Cut and Emboss

The new Kits Collection from Stampin' Up! is now available!

Click here to see the current kits available and order yours online today.

I Design For


Stampin' Up Stuff

This is my personal blog and is not endorsed by Stampin’ Up! I hope you find it a plentiful source of ideas and personal inspiration but please don't copy my designs for contest submission or use for classes, publication or sale without express permission.