Happy Birthday Rolling Waves

by Administrator19. April 2026 18:00

I have a second card today; this one uses Michelle L's sketch over at Freshly Made Sketches and I'm squeaking in my entry over at Colour Inkspiration with that pretty ice-cream coloured palette:

   May be an image of text that says "COLDUR PYKSPIRATION SPIRATION LZ---ICHALENGS CHALLENGES CH LLENGES CHALLE POOL PARTY COASTAL CABANA BUBBLE BATH DAFFODIL DELIGHT -207"

I wanted to have a first play with the new Rolling Waves bundle and these colours had a definite summery feel to me! I thought Michelle's layout might work for a beach scene, so set to work. Take a look at what I came up with:


Here's the low-down on today's card:

I used a base of Basic Beige to emulate white sand, then stamped the Coastal Cabana stamp onto a piece of the same colour cardstock and used this for my sea bae, before adding Pool Party and Shimmer White sea foam. I layered a couple of beach umbrellas in the challenge colours and for the smaller third circle of the sketch I blended some Bubble Bath and Daffodil Delight inks onto some white cardstock with a blending brush and die cut a trio of shells, adding a few pink sparkly sequins for some seaside shimmer:


 A happy birthday sentiment finished on the inside with another greeting and another trio of those pretty shells complete my card:

I think I need a little more practice with the layering and I do wish the dies were a little longer (I had to get a little creative to extend my sea to cover the height of my card) but otherwise for a first try I'm quite happy with how this card turned out.

Here is the visual summary of the key products used on today's project for you to pin for easy reference:


You can see all of my 'How To' summaries on my 'How To - Tips and Techniques' Pinterest board in case you've missed any. 

Enjoy your day and I'll be back tomorrow with another project. Until then, happy stampin'!


Cutest Crew Puppies For PP782

by Joanne James19. April 2026 08:00

Today it's Sunday and time for this week's new challenge over at The Paper Players! It's the turn of the fabulous Christy to host this week and she has a fun clean and simple challenge for us to work with:


Baby animals! I knew exactly where I was going with this one, so I grabbed the sketch over at Inkspirational and the colour palette at Just Add Ink and set to work - take a look at today's card:


Here's the low-down on today's card:

Cutest Crew - I'm sure my regular readers would have guessed that the 'Cutest Crew' stamp set might make an appearance today - after all, those kitties and puppies are just too cute! I actually bought this set originally because of the dogs, but until now I've only used the birds and the cats - go figure. Today's card was the perfect opportunity to remedy that though, so puppies for the win! Instead of stamping the row intact, I stamped each puppy individually, masking off the others each time, so that I could then diecut 4 squares as per the sketch. I coloured them with my Stampin' Blends - you can see the detail more closely below:

Hydrangea Hue Blue - I made a card earlier in the week that used the Just Add Ink inspiration and I love their colour combo so much that I wanted to play again, this time featuring the browns too. I used the upcoming new in-colour, Hydrangea Hue, for my card base - I think this might be my new favourite blue! Think the retired Boho Blue, but with a slight purple hue - lovely!

Finishing Touches - As it's clean and simple week, I wanted to keep layers to a minimum, keep plenty of clean 'white' (or in my case blue) space with a few well-chosen embellishments. I used a small sentiment from the Lovely Arrangements stamp set, added some In Colour pearls and left the only other decoration to a simple stamped border inside my card: 


There you go - clean and simple and a cute crew indeed! This card is going into the pile that I keep to send to Ben when ever I'm sending care packages to him at uni. I like to send him little surprises in the post - although sometimes it's things he's forgotten too, such as cricket whites earlier this week! He certainly keeps me on my toes.

Here is the visual summary of the key products used on today's project for you to pin for easy reference:


You can see all of my Product and 'How To' summaries on my 'How To - Tips and Techniques' Pinterest board in case you've missed any. 

Which baby animals are you going to feature on your cards this week? Before you reach for your ink and papers, check out what our amazing team has created to inspire you:

The Paper Players Design Team

 
Here's a quick recap of our challenge rules:
 
1.  Create a new paper project
2.  Upload your creation to your blog with a link back to us and provide a direct link to the post featuring your challenge submission.
3.  Please link your card to no more than four challenges, TOTAL.
4.  Have FUN!

Enjoy your day; my niece and her partner recently bought their first home so Jason and I are going to visit for the grand tour today, then I am going to my sister-in-law's for afternoon tea, so I have a fun day planned! I'll be back tomorrow with another project. Until then, happy stampin'!

Life's Showers Bring Love's Flowers

by Administrator18. April 2026 20:00

I've been away for a couple of days and not been into my craft room for over a week, so having been out for a long walk around a local reservoir this morning which the hubs was paddleboard training the rescue crew for some local open water swimmers, I rewarded myself this after noon with some crafting just for fun! I took my inspiration from a number of challenges:


I was intrigued by the squared background layout over at Atlantic Hearts Challenge (you should definitely checked out the embossed card that my sweet friend LeAnne, who is on their DT, created - it's fabulous!) but I wanted to combine with the challenge over at Just Us Girls where I haven't managed to play along for a few weeks as life keeps getting in the way and this week I had found the perfect piece of paper covered in umbrellas and flowers, inspired by their photo mood board. My sentiment was chosen with the challenge over at Time Out in mind: I chose rain (umbrellas),bloom (flowers) and hope (my sentiment) - take a look at the card I created:


My card is pretty self-explanatory and I used up a bunch of retired product: Pleased As Punch designer paper, Stitched Shapes dies to cut out the squares and circle, some coordinating flowers cut using the Pierced Blooms Dies to embellish my sentiment, which is from the 'Under My Umbrella' stamp stamp set:


I added another piece of that pretty designer paper to the envelope flap for a co-ordinated finishing touch.

That's all from me; enjoy your evening and I'll be back tomorrow with another project for our new challenge over at The Paper Players. Until then, happy stampin'!

Cutest Crew Birthday Kitties For PP781

by Joanne James12. April 2026 08:00

Today it's Sunday and time for this week's new challenge over at The Paper Players! It's the turn of the fabulous Jan to host this week and she an interesting colour challenge for us to work with:


I say 'interesting' as I found this colour combo quite challenging - it kept making me think of bees! I perused my shelf and progressed from bees to animals of another kind - take a look:


Here's the low-down on today's card:

I saw the layout over at Hand Stamped Sentiments and thought it would be perfect for more of those Cute Crew kittens - and so today's card was born! I decided to use yellow for my base and add a quintet of black, white and grey kittens along with some yellow butterflies, to the central panel of my card. I stamped some pay prints onto Smoky Slate cardstock and then tore the edges to mirror the sketch, as well as adding a row of tone-on-tone butterflies stamped lightly onto the cardbase. You can see my sweet kitties in more detail below: 

A sentiment and some black baker's twine, along with a little heart charm from my stash, completes my card. I added additional rows of kitties both inside my card and on the envelope flap too for a little extra feline decoration. This will be heading to a member of my extended team who has an upcoming birthday and I know loves this set!

Here is the visual summary of the key products used on today's project for you to pin for easy reference:


You can see all of my Product and 'How To' summaries on my 'How To - Tips and Techniques' Pinterest board in case you've missed any. 

Before you reach for your ink and papers, check out what our amazing team has created to inspire you this week:

The Paper Players Design Team

 
Here's a quick recap of our challenge rules:
 
1.  Create a new paper project
2.  Upload your creation to your blog with a link back to us and provide a direct link to the post featuring your challenge submission.
3.  Please link your card to no more than four challenges, TOTAL.
4.  Have FUN!

Enjoy your day; the James Junior is back to university today to start his final term of the year tomorrow - it seems hard to believe that's his first year done! I'll be back soonwith another project. Until then, happy stampin'!


Stampin' Up! Supplies Used: 

Table built using Product Table Builder by The Crafty Owl - Independent Stampin' Up! Demonstrator.

Friendly Foliage Thank You Card

by Joanne James11. April 2026 10:00

Today I'm sharing a clean and simple card that uses Donna's layout over at Freshly Made Sketches, along with the colour combination at Color Hues of Fuschia and Navy:


I'd been considering how to use the colour combo over at Color Hues and decided that a swipe-type stamp would make a great background for one of my favourite simple die stems that I haven't used for a while - take a look:


Here's the low-down on today's card:

Yes, it's those Online Exclusives Friendly Foliage dies! I cut three each of the two short stems in white, double-stacking the diecuts for a little extra impact, adding them to alternative swooshes of Berry Burst and Night of Navy (the background stamp is from the retired 'Friends For Life' stamp set):


I added a simple thank you sentiment and a single sparkly gem to complete my card. I was looking for a 'painted swoosh' type stamp when I found the 'Love You Sew' stamp set which sent me off on another path to make yesterday's card (the painted swoosh stamp in that set was too narrow for the look I was after). I had originally thought I might use the 'painter's tape' technique that my friend Christy has been using to great effect on her cards recently - alas my first attempt was a hot mess, so in the end I went with a stamp for a more accurate design. More practice required there I think!

I'm also linking today's card up over at CAS On Friday where the current theme is 'Botanical'.

Here is the visual summary of the key products used on today's project for you to pin for easy reference:


You can see all of my 'How To' summaries on my 'How To - Tips and Techniques' Pinterest board in case you've missed any. 

Enjoy your day; mine is going to be a restful one, with a few last minute loads of laundry for the James Junior before he heads back to uni tomorrow to start his final term of the year |(where did that time go?!), some book reading and maybe a sneaky hour or two of crafting with the new box of Stampin' Up! goodies that have arrived whilst I've been typing! I'll be back tomorrow with another project for our new challenge over at The Paper Players. Until then, happy stampin'!


Stampin' Up! Supplies Used:

Table built using Product Table Builder by The Crafty Owl - Independent Stampin' Up! Demonstrator.

Pastel Peekaboo Easter Bunnies

by Joanne James9. April 2026 20:00

Today I'm sharing a card that I wanted to share at the weekend, but with the business at Easter and the fabulous weather we've been having here in the UK for the early part of this week, I've been distracted by the outdoors and away from my craft room. So that is why I have a final Easter card for you today that was made with the following challenges in mind:


The team at Inkspirational are all about the Clean and Simple this week, with the option of things beginning with E - which is also the theme over at AAA Cards - so the eggs on my Easter card should be perfect. I'm also sharing my Easter card over at Inspire.Create where the theme is Easter too. You know how much I love the Peekaboo Die from a Pocketful of Happiness, so I decided to make another card with it - take a look:


 Here's the low-down on today's card:

This one is super simple: I wanted to preserve as much white space as possible and keep things really clean and simple, so I cut out the die in white and added it to a white cardbase, then paper-pieced the eggs in the negative spaces in a trio of pastel colours (Pretty In Pink, Peach Pie and Lemon Lolly), alternating each one:


A simple sentiment from the retired 'Welcome Easter' stamp set was all I need to complete my card. 

That's all from me -  I'll be back tomorrow with another project. Until then, happy stampin'!


Playing In The Rain For PP780

by Joanne James5. April 2026 08:00

Happy Easter everyone! Today it's Sunday and time for this week's new challenge over at The Paper Players! It's the turn of the fabulous LeAnne to host this week and she has a fun and seasonal theme challenge for us to work with:


Spring showers - well April is certainly the month for those! I had to dig in to the retired box for supplies for today's card, but I knew I had just the thing. I used the layout over at Try A Sketch on Tuesday and set to work. Take a look at what I came up with:


Here's the low-down on today's card:

I focused on patterns including umbrellas from the Rain or Shine specialty designer series paper pack for my card today. I used two vertical panels of embossed umbrellas, then from a separate sheet fussy cut a dog with an umbrella and added him to a Stylish Squares diecut square, to which I added some blue ink and stamped raindrops and a couple of fussy cut rainclouds:


A simple sentiment from the retired 'Playing in The Rain' stamp set completes my card.

Here is the visual summary of the key products used on today's project for you to pin for easy reference:
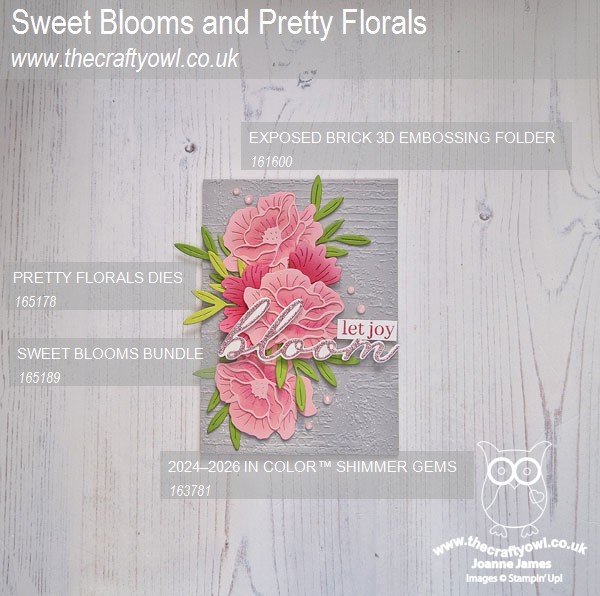
 

You can see all of my Product and 'How To' summaries on my 'How To - Tips and Techniques' Pinterest board in case you've missed any. 

Before you reach for your ink and papers, check out what our amazing team has created to inspire you this week:

The Paper Players Design Team

 
Here's a quick recap of our challenge rules:
 
1.  Create a new paper project
2.  Upload your creation to your blog with a link back to us and provide a direct link to the post featuring your challenge submission.
3.  Please link your card to no more than four challenges, TOTAL.
4.  Have FUN!

Enjoy your day; I hope you take the time to indulge in an Easter egg or two (well, it would be rude not to, right?!) I'll be back tomorrow with another project. Until then, happy stampin'!


Stampin' Up! Supplies Used: 
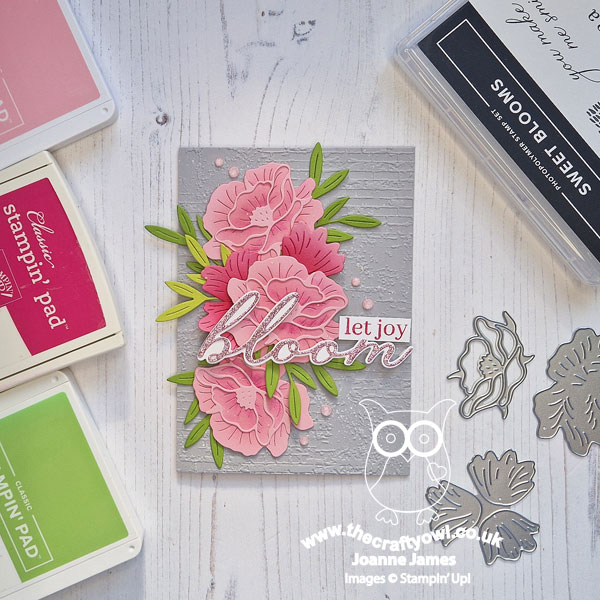
Table built using Product Table Builder by The Crafty Owl - Independent Stampin' Up! Demonstrator.

Spring Tulips Clean and Simple

by Joanne James1. April 2026 10:00

Today I'm sharing a clean and simple card for the current challenge over at The Card Concept that is also perfect for the spring challenge over at CAS on Friday:


Those cute and colourful wellingtons filled with spring tulips inspired me to dig out a couple of retired sets to recreate them for my spring card - take a look:


Here's the low-down on today's card:

I stamped the wellington boots from the 'Under My Umbrella' stamp set and them masked off elements of the 'Love is Kindness' set to fill the boots with tulips. I coloured the completed images with my Stampin' Blends markers in the same colours as the inspiration picture, then added them to a Lovely Arrangements diecut and a (retired) Tahitian Tide cardbase to bring out the blue of the boots:


A simple sunny sentiment completes my card. Do you ever combine sets to create something new in this way? Do leave me a comment below - I'd love to hear about any of your stamp set combinations.

Here is the visual summary of the key products used on today's project for you to pin for easy reference:


You can see all of my 'How To' summaries on my 'How To - Tips and Techniques' Pinterest board in case you've missed any. 

Enjoy your day and I'll be back tomorrow with another project. Until then, happy stampin'!

Lovely Arrangements Squares For PP779

by Joanne James29. March 2026 08:00

Today it's Sunday and time for this week's new challenge over at The Paper Players! It's the turn of the fabulous Ann to host this week and as it's the 5th Sunday of the month she has a fun tictactoe challenge for us to work with:


I  went across the top row and also down the middle column with diecut/twine/sentiment and twine/flowers/patterned paper and cut into more of my Lovely Blossoms papers for today's card - take a look:


Here's the low-down on today's card:

I made this card at the same time as I made this one a couple of weeks ago, but for this one went with the pale pink/peach, blue and white colour scheme. I used a white cardbase and a mat of two white dicut circle panels, then created a montage of papers in two different sized squares, cut with the Stylish Shape Dies. I then added a stamped flower and some leaves, and a simple skinny block sentiment, all from the Lovely Arrangements bundle:

A twine bow and some enamel dots complete my card. This one feels cleaner than the last card I made with this set, but still showcases the pretty colours and patterns of those papers. I'm so glad I bought this suite!

Here is the visual summary of the key products used on today's project for you to pin for easy reference:


You can see all of my Product and 'How To' summaries on my 'How To - Tips and Techniques' Pinterest board in case you've missed any. 

Before you reach for your ink and papers, check out what our amazing team has created to inspire you this week:

The Paper Players Design Team

 
Here's a quick recap of our challenge rules:
 
1.  Create a new paper project
2.  Upload your creation to your blog with a link back to us and provide a direct link to the post featuring your challenge submission.
3.  Please link your card to no more than four challenges, TOTAL.
4.  Have FUN!

Enjoy your day; I'll be back tomorrow with another project. Until then, happy stampin'!


Peekaboo Bunny Easter Shaker Card

by Joanne James26. March 2026 14:00

Today I'm sharing a card that I am squeaking in for the colour challenge over at Color Dare and I'm playing along over at Time Out and Double D for their current Easter challenge:


I love the bright shades in the Color Dare palette and originally was intending to go in a different direction with some stencilling, but when I saw the photo top left over at Double D of that cute bunny amongst the colourful Easter eggs, I was reminded that I had a pot of 'sprinkles' that were the first 4 colours of the Color Dare palette that would be perfect for a shaker card - my favourite method of incorporating a clear element into a project, so I just had to make one for the Time Out team! Take a look at what I came up with:


Here's the low-down on today's card:

My card features the Peekaboo Sheet Die from a company called A Pocketful of Happiness that I just couldn't resist when I saw it - how cute are those bunny ears?! I've used a stencil that I made with this die on cards previously, but this is the first card that I've made featuring the whole coverplate. I think this die is really versatile and of course those egg-shaped apertures are perfect for individual shaker elements! I simply cut my die, added a window sheet to the reverse, created a grid with my foam tape sectioning each opening and added a mix of my sprinkles to each. I could have just added a border of foam tape, but by creating sections each egg always has some sprinkles when viewed from the front of my card:


A simple Easter sentiment from the retired Word Wishes set completes my fun shaker card. You may see another card or two featuring this die in the next week or so as I make a few last minute Easter cards, so keep your eyes open!

The sun is shining here today finally after a couple of days of howling winds, rain and hail, so following a visit to the dentists this morning (just a check-up thankfully) I think I might crack on with some outdoor jobs and clean the cars this afternoon! Enjoy your day and I'll be back tomorrow with another project. Until then, happy stampin'!

2026 May-Aug Catalogue

The Stampin' Up! 2026 May-Aug Catalogue is now live! Click on the image to download your copy.

Product of The Month

Stampin Cut and Emboss

The exclusive Product of the Month can be yours for only £5 when you spend £70 or more in a single order. Make sure you purchase ASAP because once it's sold out, it's gone for good! See this month's exclusive product here.

Shop Online

Access my online shop 24 x 7, 365 days of the year:

Shop Online

New Online Exclusives

There are new products available exclusively in the online store from 5 May - check them out here.

Stampin' Up! Craft Classes

The Paper Mixer class featuring the Paper Medley Mix-In Designer Series Paper will be held on 21 May and is available to purchase from 5 May; get the full details here.

Paper Pumpkin

Paper Pumpkin is now here in the UK! The monthly subscription window is from 11th of the month. Sign up for yours here!

Latest Kits!

Stampin Cut and Emboss

Serene Scenes and Pretty Party are the latest kit additions to the online store - get yours here!

Join My Team

It's always a great time to join Stampin’ Up! New team members can get £130 worth of products for only £99 + free business supplies + free shipping + all the fun being a part of Stampin’ Up! Stampin' Up! has something for everyone: join my growing team and benefit from my support to enjoy Stampin' Up! however you choose. Join during February and you will receive a new Stampin' Positioner too!

When you join 5-31 May, you'll get our new 2026-28 In Color Classic Stampin' Ink Pads FREE! Don't need ink? You can add an extra £35 of product to your starter kit instead.

If you're interested, call me for a chat to understand how I can help you realise your goals. Alternatively, if you have already decided to sign up and you just can't wait, please click here for the link to the online form where you can sign up and order your starter kit right away! 

About Me

Hi I'm Joanne and live in Northampton and when I'm not looking after my husband and two beautiful children, am an avid crafter with a passion for all things Stampin' Up!

I must confess that I have never been a big rubber stamper - until I discovered Stampin' Up! that is. I love the fact that I can get such great results with co-ordinating stamps, inks, papers and punches - the possibilities are endless! Join me on my stamping journey as I share the things I love and be inspired to create amazing things yourself!

Follow Me

Monthly Newsletter

Box Builder

Click the button above to use Box Buster to create your custom box design using the Envelope Punch Board!

I Design For


Stampin' Up Stuff

This is my personal blog and is not endorsed by Stampin’ Up! Stampin' Up! is a registered trademark of Stampin' up! Inc. I hope you find my blog a plentiful source of ideas and personal inspiration but please don't copy my designs for contest submission or use for classes, publication or sale without express permission.