The Sky's The Limit Aeroplane Spinner Card

by Joanne James21. June 2016 09:53

Today I have a fun card made with this week's TGIF Challenge in mind:


The theme is 'travel' and I didn't have to go far as I mused 'trains, planes and automobiles ...' to myself when considering my options for today's card; I knew right away it was time to break out the new products and try something fun - a spinner card! Take a look: 


How much fun is that?! If you'd like to see a little video clip of my fun paper plane in action, click here to see the video I uploaded to my Facebook page. Forgive the wobble, I had the card in one hand and camera in the other!

Here's the low-down on today's card:

Time To Take Flight - The new Sliding Star Framelits Dies are just fantastic for making quick and easy spinner cards. They include two tracks (I've used the circular one here; the set includes a curved one too) that with the aid of a couple of washers or coins and some of the new thick adhesive foam strips, allow construction of a spinner card in no time at all. The framelits also include dies to cut out each of the shapes in the Shooting Star stamp set that make the spinners themselves (except for the globe, which co-ordinates with the 1 1/4" circle punch) so my paper aeroplane was ready to go in no time.

A Sprinkle of Clouds - To add subtle interest to my background, I added a little tone-on-tone stamping in Soft Sky using the cloud stamp from last year's RMHC stamp set 'Sprinkles of Life' that is still in the current catalogue. I stamped the panel before cutting the track so that my clouds align. 

Celebrate Exam Success - In addition to the aeroplane and globe (coloured with my Stampin' Write markers), the 'Shooting Star' stamp set also comes with a handful of punny sentiments that co-ordinate with the shapes for a suitably-themed card. I decided to go with 'The sky's the limit!' as I thought this would be a perfect card to send to someone celebrating exam success and I know lots of people sitting GCSE exams this year so will be needing a few of these. I punched it with my now-retired word window punch, but the new Classic Label Punch would be a great alternative. I finished the ends with a couple of silver mini brads (also retired!).

Here is the visual summary of the key products used on today's project for you to pin for easy reference:


You can see all of my 'How To' summaries on my 'How To - Tips and Techniques' Pinterest board in case you've missed any. 

Lastly, here's a video from those lovely people at the Stampin' Up! Home Office to show you just how easy it is to create spinners using this versatile set:

The sun is shining and for once it looks like it might stay that way, for today at least! My youngest James Junior is spending a 'moving up' day at his new school followed by an appointment for fitting of a whole new uniform ready for September. I have lots of work to do today but am also looking forward to unpacking the rather large boxes that my UPS man delivered as I was typing this, containing my customer orders from my new catalogue open house - so an exciting day all round!

Enjoy your day and I'll be back tomorrow with another project; until then, happy stampin'!


Stampin' Up! Supplies Used:

Table built using Product Table Builder by The Crafty Owl - Independent Stampin' Up! Demonstrator.

Watermelon Wonder Sprinkles of Life Shadow Box Card

by Joanne James31. August 2015 11:00

I'm a day late with my post for this week's new challenge over at The Paper Players! My lack of internet access in Norfolk completely got the better of me yesterday and I didn't get my post loaded, but hey I'm here now!

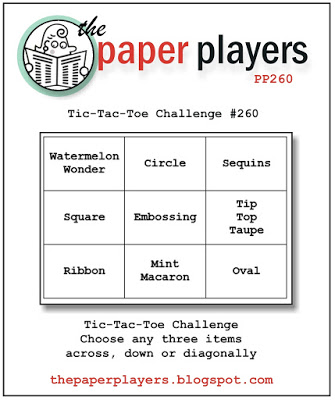
This week it is the turn of the fabulous Nance, so creative and the heroine of The Paper Players team, to host and she has a fun tic-tact-toe challenge to get our creative juices flowing:


I actually have something fun to share with you today and even a slight confession - today's card was designed by me but made by ... my 10 year old daughter! At my last technique card class we were making some fun fold cards featuring the Sprinkles Of Life RMHC set. Since it is school holidays, Rebecca was keen to join in and whilst everyone else's shadow box cards, including mine, were in a blue colourway, Rebecca was determined to make her's stand out from the crowd. Here it is:


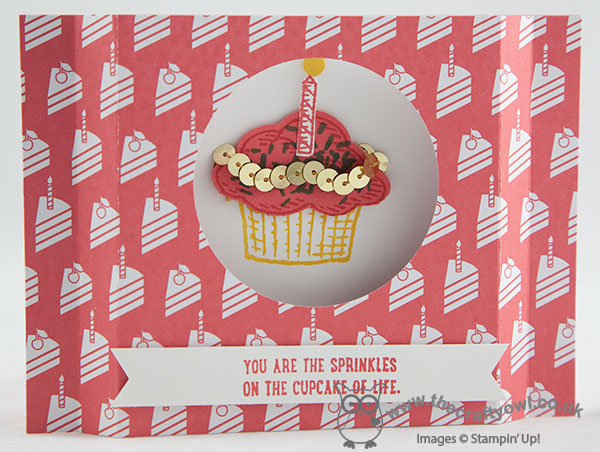
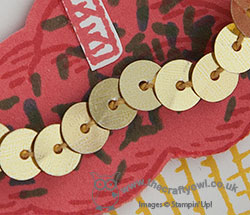
The basic construction of a shadow box card is quite simple: two pieces of cardstock, mine measure 4 1/4" x 5 1/2", scored at 1/2" and 1" from each side to create the box shape. The front of the card is a piece of Watermelon Wonder patterned paper from the Cherry on Top DSP stack, with a 2 1/2" hole punched out of the front. The cupcake case was stamped in Crushed Curry then the cake top stamped and punched out of Watermelon Wonder with the co-ordinating Tree Builder punch. The sprinkles were stamped in Cucumber Crush and the candle stamped, fussy cut and added to the cake, and the sentiment strip flagged with the Triple Banner Punch. When I was busy working on my card for this week, Rebecca reviewed the grid and suddenly said "I have an idea!" Off she ran to get her class card, added a row of gold sequins and said "There - now my card is finished, I knew it needed something!" So true for the child who loves anything that sparkles! Since her card was fulfilling the top line of the tic-tact-toe grid, I couldn't resist the pleading eyes (she is always asking me to put her creations on my blog!) and this time I agreed!

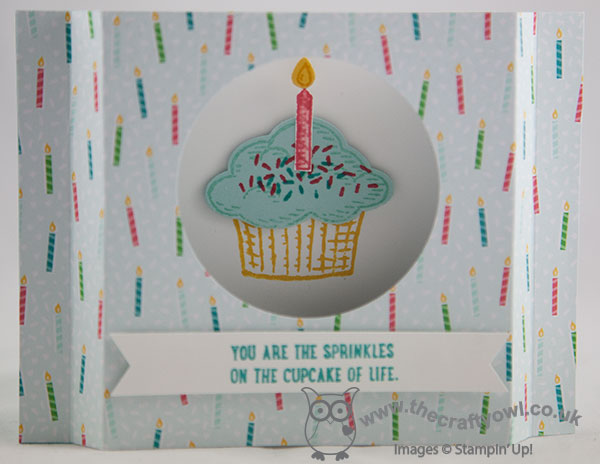
Just in case you were curious as to what my card looked like, here it is (not a patch on Miss Rebecca's though, I'm sure you'll agree!):

Before you reach for your ink and papers, check out what our amazing team has created to inspire you this week:

The Paper Players Design Team
Anne Marie Hile - on leave
 
 
Here's a quick recap of our challenge rules:
 
1.  Create a new paper project
2.  Upload your creation to your blog with a link back to us and provide a direct link to the post featuring your challenge submission.
3.  Please link your card to no more than three challenges, TOTAL.
4.  Have FUN! 


I look forward to seeing what combinations you come up with on your cards in the gallery this week. I am home again and fully wifi'd again, so look forward to visiting your blogs and catch up on some serious creating this week!

Back tomorrow with another project; until then, happy stampin'!


Stampin' Up! Supplies Used:

Table built using Product Table Builder by The Crafty Owl - Independent Stampin' Up! Demonstrator.


Thanks A Bunch Sprinkles Of Life Flap Fold Card

by Joanne James29. August 2015 09:00

Good morning everyone - yay, it's the weekend! Today I'm sharing one of the cards from my last technique class using the Sprinkles of Life stamp set:

This is an example of a Flap Fold Card - Julie Davidson has a great tutorial which you can find on Splitcoast Stampers here. The 'how to' on this card is fairly straightforward to see from the pictures, but if you have any questions then leave me a comment below and I will happily provide more detail. This was our easy 'warm up' card for a class that also featured a couple of other fun folds, along with the great 'Sprinkles Of Life' set - this year's Stampin' Up! stamp set that fundraises for the Ronald McDonald House Charities charity. Here's a photo of the inside so that you can see how the fold works: 

My next technique classes are on the 7th and 8th of September and will feature the new 'Reason For The Season' stamp set and co-ordinating Festive Flower Builder Punch. The class will cost £26 per person and this will include your own stamp set to take home. Alternatively, you can also purchase the co-ordinating punch at the time of class booking and pay £30 - this will mean your class will cost a mere 25 pence. if that's not great value, I don't know what is! All class reservations need to be made by tomorrow Sunday 31st August, so if you haven't already reserved a place and would like to join me, contact me by email at [email protected] to reserve your place. 

I'm off on a boat trip today into the Wash along the north Norfolk coast in the hope we can spot some native seals; wish me luck!

Back tomorrow with another project; until then, happy stampin'!

Tags: , , , , , , ,

Cards | Stamping

Sprinkles of Life Thank You Apple Tree Card

by Joanne James28. June 2015 11:00

It's Sunday and time for our new challenge over at The Paper Players! I really enjoyed our gallery full of summer treats last week; this week should be easier on the waistline though, as the lovely Nance has a great sketch challenge for us:


My card features an altogether more healthy treat this week in the form of apples, on a tree created with the Sprinkles of Life stamp set and co-ordinating tree builder punch:

My card also features three of the five new in-colours: Tip Top Taupe, Cucumber Crush and Watermelon Wonder so I am also linking up with the team over at Fab Friday as their challenge is all about the new in-colours this week. I used Tip Top Taupe for my card base, then adhered a piece of Whisper White to the card front. I embossed another piece of Taupe with my woodgrain textured embossing folder then using my Big Shot and Circles Framelits cut away a partial circle from one side before adhering this on top of the white layer. I stamped the tree trunk in Taupe onto the white panel, then stamped my leaves in Cucumber Crush and my apples in Watermelon Wonder onto Whisper White and punched them out with the co-ordinating tree builder punch. I wanted a full tree so punched three treetops and layered them to create my tree, adding the last one with a dimensional to create some lift. For my banners I used a strip of Watermelon Wonder and a piece of green patterned paper from the Cherry on Top DSP stack, tied with white baker's twine and flagged with the triple banner punch. I stamped my sentiment in white Stazon onto Basic Black and cropped it tightly. I finished with another punched apple, which I covered in Crystal Effects to make it nice and shiny, although it's hard to see in the photo above. The Sprinkles of Life Stamp stamp set is so versatile with so many creative options; not only that, every purchase benefits the Ronald McDonald House Charity too as £2 is donated for every stamp set purchased.

With only three more weeks until the end of the school year, I am needing to make more and more teacher thank you cards, so this one is definitely heading for the teacher pile. Well, an apple for the teacher as the saying goes - or in this case, six!

Before you reach for your ink and papers, check out what our amazing team has created to inspire you this week:

The Paper Players Design Team
 
 
Here's a quick recap of our challenge rules:
 
1.  Create a new paper project
2.  Upload your creation to your blog with a link back to us and provide a direct link to the post featuring your challenge submission.
3.  Please link your card to no more than three challenges, TOTAL.
4.  Have FUN! 

I love a good sketch challenge so I look forward to seeing what you make of this one in the gallery this week. If the weather holds we may manage to squeeze in another weekend BBQ - keep your fingers crossed for me!

Back tomorrow with another project; until then, happy stampin'!


Stampin' Up! Supplies Used:

Table built using Product Table Builder by The Crafty Owl - Independent Stampin' Up! Demonstrator.


Sprinkles of Life Layered Cherry On Top Card

by Joanne James19. June 2015 07:00

It's Friday - the end of the week already! The somewhat strange title of my blog post today is as a result of the card that I'm sharing. it's another Sprinkles of Life birthday card, this time using the sketch over at Retrosketches, which has lots of layers this week:

I decided to go for a real mix and match approach with my Cherry on Top DSP stack - this is what I came up with:


A Pool Party base and borders of Cucumber Crush are the perfect background for the birthday candles paper. For the banner and layers, I chose some of the bold patterns in the pack and kept my cupcake in solid colours with a few sprinkles to tie the cake in with the rest of my card. A paper-pieced candle, some sequin sprinkles and done! I made this card for Ben to give to Rebecca on her birthday earlier this week - she has a real love for bold patterns and colours and is not afraid to mix and match so this card is very her.

That's all from me today; I am treating myself to a rare day of pampering with a couple of friends, with whom I am visiting the spa to enjoy a day of relaxation. Back tomorrow with another project; until then, happy stampin'!


Stampin' Up! Supplies Used:

Table built using Product Table Builder by The Crafty Owl - Independent Stampin' Up! Demonstrator.


Sprinkles of Life With A Cherry On Top!

by Joanne James24. May 2015 10:00

It's Sunday and time for a new challenge over at The Paper Players! There were some beautiful girly thank you cards in our gallery last week - this week it is the turn of the lovely Anne-Marie to host and she has a great sketch challenge for us to play with:

I love a good sketch and couldn't resist using this one to showcase some more 'sneak peek' products using the new in-colours, the RMHC stamp set 'Sprinkles of Life' and the co-ordinating Tree Builder Punch, the Cheery on Top DSP stack and another new product that I'm using for the first time - check out my card:


I used two of the 'Cherry on Top' patterned papers for the background and the strip across the middle, matting each onto Watermelon Wonder and then Bermuda Bay and Crushed Curry respectively and for my focal point, I kept the square shape and used it to feature yet another combination from the 'Sprinkles of Life' stamp set - a cute basket filled with flowers. I stamped the basket in Crushed Curry onto the same colour cardstock and stamped the top in Cucumber Crush on Cucumber Crush cardstock, then using the same tone on tone stamping, stamped and either punched out or fussy cut the flowers and paper pieced them, finishing the centres of the larger flowers with candy dots. I adhered this to a piece of Pool Party cardstock, and I also used this colour for my sentiment flag. The final 'sneak peek' product is the trio of In-Colour Blossom Accents that I used for the circles on the sketch - how gorgeous are they?! They add great dimension to a card and just one would be enough to make a big impact - I can see me getting through lots of these!

Before you reach for your inks and stamps, check out what our amazing team has created to inspire you this week:

The Paper Players Design Team
 
Here's a quick recap of our challenge rules:
 
1.  Create a new paper project
2.  Upload your creation to your blog with a link back to us and provide a direct link to the post featuring your challenge submission.
3.  Please link your card to no more than three challenges, TOTAL.
4.  Have FUN! 

I look forward to seeing how you interpret our sketch this week. I'm off to the tip to dispose of a couple of trailer-loads of garden rubbish and then for Sunday lunch cooked by my mother-in-law - what an exciting life I lead! 

Back tomorrow with another project; until then, happy stampin'!


Stampin' Up! Supplies Used: 

All sneak peek product today - purchase details to be updated when available. 

Double Sneak Peeks Today!

by Joanne James22. May 2015 13:47

Yay it's Friday! I really don't know where this week has gone! I started the week on such good form, yet seem to have achieved steadily less and less as the week has flown by! No matter - we have a Bank Holiday weekend to look forward to here in the UK so I'm hoping it will stay nice enough to enable me to get outside and potter in my garden and fit in a little crafty time too!

As promised, I'm back with more sneak peeks for you today and not one, but two cards. Here's the first one using this week's sketch over at Retrosketches:

I decided to get out one of my pre-order stamp sets, 'Sprinkles of Life', this year's charity stamp set benefiting the Ronald McDonald House Charity, for my card:

This card is an absolute cornucopia of new product: new in-colour inks Watermelon Wonder, Cucumber Crush, Mint Macaron and Tip Top Taupe, new in-colour cardstock in Watermelon Wonder, Cucumber Crush and Mint Macaron, Cherry on Top DSP stack, some Watermelon Wonder dotted lace trim and of course the Sprinkles of Life stamp set and the co-ordinating Tree Builder punch. I interpreted the stacking cups in the sketch as a very over-the-top ice cream cone with 3 scoops and finished it with a cherry punched from my Build A Cupcake punch that I paper-pieced and covered in Crystal Effects to give a lovely shiny finish. I just love these new bright in colours! 

This stamp is oh-so-versatile with so many possibilities - my second card today uses the same stamp set for a totally different look, and is combined with some sponged sunshine using the mask from my 'Simply Created Hooray It's Your Day' card kit:

This time my ice cream is a cloud, complete with heat-embossed silver lining, and the perfect co-ordinating sentiment. How clever is that? This stamp set really is so versatile.

I'm linking this CAS card up with the lovely ladies over at Less Is More where the theme for this week's challenge is 'Hello Sunshine' - I missed linking up my water-themed card last week so am glad I've made it in with the sunshine today. 

Here's looking forward to an equally warm and sunny weekend. Back tomorrow with another project; until then, happy stampin'!


Stampin' Up! Supplies Used:

As detailed above

Mini Catalogue

BROWSE THE CATALOGUE

The mini catalogue is now live! Read and download your copy here.

Shop Online

Access my online shop 24 x 7, 365 days of the year:

Current April hostess code:

VDKNV7BH

Shop Online

Join My Team

It's always a great time to join Stampin’ Up! New team members can get £130 worth of products for only £99 + free business supplies + free shipping + all the fun being a part of Stampin’ Up! Stampin' Up! has something for everyone: join my growing team and benefit from my support to enjoy Stampin' Up! however you choose.

If you're interested, call me for a chat to understand how I can help you realise your goals. Alternatively, if you have already decided to sign up and you just can't wait, please click here for the link to the online form where you can sign up and order your starter kit right away! 

Latest Kit!

Stampin Cut and Emboss

The Rock Legend Kit has all you need to make 8 cards with coordinating envelopes. Along with the new Panda Friends Kit, both are available from January 4th for just £14 each - get yours here!

2023-24 Annual Catalogue

BROWSE THE CATALOGUE

Click on the catalogue for a full list of current SU! supplies - if you would like to order any of the items featured, please drop me a line at [email protected] or give me a call on 07773 421446 - I'd be happy to help.

New Online Exclusives

There are new products available exclusively in the online store from 5 March - check them out here.

About Me

Hi I'm Joanne and live in Northampton and when I'm not looking after my husband and two beautiful children, am an avid crafter with a passion for all things Stampin' Up!

I must confess that I have never been a big rubber stamper - until I discovered Stampin' Up! that is. I love the fact that I can get such great results with co-ordinating stamps, inks, papers and punches - the possibilities are endless! Join me on my stamping journey as I share the things I love and be inspired to create amazing things yourself!

Follow Me

Monthly Newsletter

Box Builder

Click the button above to use Box Buster to create your custom box design using the Envelope Punch Board!

Kits Collection Now Available!

Stampin Cut and Emboss

The new Kits Collection from Stampin' Up! is now available!

Click here to see the current kits available and order yours online today.

I Design For


Stampin' Up Stuff

This is my personal blog and is not endorsed by Stampin’ Up! I hope you find it a plentiful source of ideas and personal inspiration but please don't copy my designs for contest submission or use for classes, publication or sale without express permission.