by Joanne James3. November 2016 08:05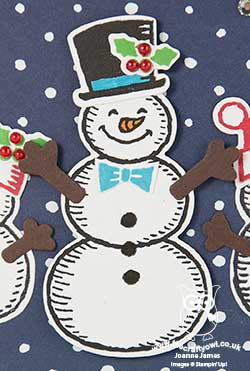
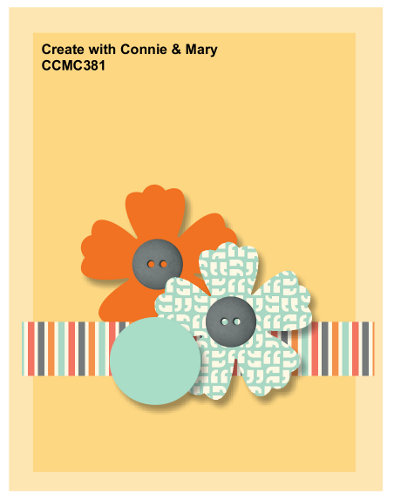
Today it's time for a new challenge over at Create With Connie and Mary and this week we have a sketch for you:
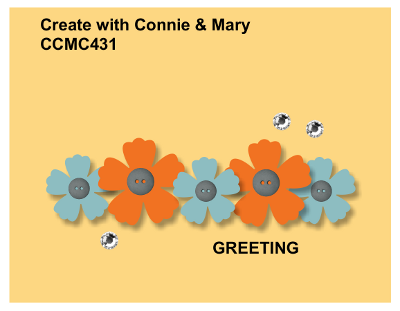
I saw this sketch and immediately saw ... snowmen! Take a look:
Here's the low-down on today's card:
Snow Place Like The Front of a Christmas Card - Apologies for the pun, but these snowmen - and women - definitely deserve to be showcased on the front of a Christmas card. 'Snow Place' is such a fun stamp set with infinite dress up possibilities for the snowmen and penguin in the set. What's more, the co-ordinating Snow Friends Framelits Dies make cutting out the shapes easy-peasy.
Go Large - Bigger is not always better, granted, however to accommodate my snow family of five I needed more cardfront, so I decided to make my card A5 size (21cm x 14.9cm) instead of a more standard A6. This allowed me enough room for my mats and layers, without my family needing to jostle too much for a space on my card.
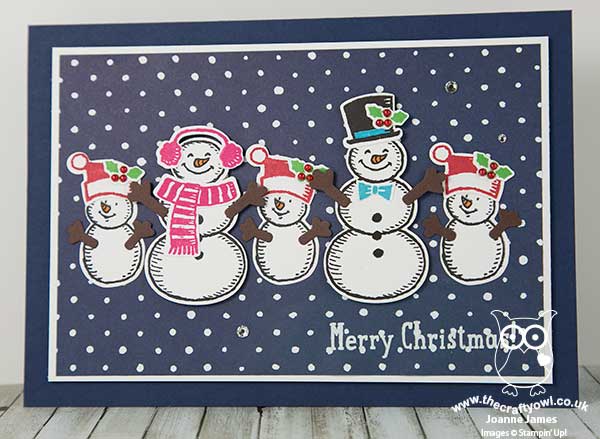
A Pattern Surprise - Do you recognise my patterned paper? Are you wondering where I found my seasonal snowfall? This paper isn't from one of the festive seasonal packs at all; it's actually one of the patterns in the Floral Boutique Designer Series Paper. As with many of our DSP packs, the reverse of the feature papers often has a more repetitive pattern with spots, stripes or solid colours. This gorgeous mix of navy and white papers hides this spotted pattern which makes perfect snow. The moral of the story? Always check both sides of your papers and don't assume that because a pack isn't designed with Christmas in mind, there won't be a hidden gem that is perfect for your card.
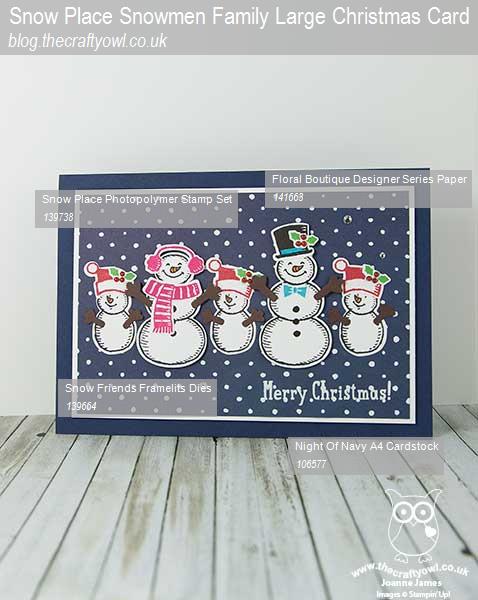
Here is the visual summary of the key products used on today's project for you to pin for easy reference:
You can see all of my 'How To' summaries on my 'How To - Tips and Techniques' Pinterest board in case you've missed any.
Do visit the other Design Team members to see what they did with this week's sketch; there's lots of inspiration over on their blogs too!
Enjoy your day and I'll be back tomorrow with another project; until then, happy stampin'!
Stampin' Up! Supplies Used:
15ebb101-278d-4247-a21d-284b28f8f3cc|0|.0|96d5b379-7e1d-4dac-a6ba-1e50db561b04
Tags: Create With Connie And Mary, Shop online, Shop Stampin' Up online, Stampin' Up, Stampin' Up Card, Stampin' Up Card ideas, Stampin' Up Supplies, Christmas, Snow Place, Snow Friends Framelits, Floral Boutique
Cards | Shop Online | Shop Stampin' Up! Online | Stamping
by Joanne James28. March 2016 12:15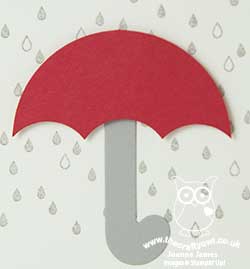
I've been having fun playing along with the CASology challenges for the last couple of weeks, so today I have a couple of clean and simple cards for this week's challenge where the theme is weather:


My first card was a fair weather sunshine card which you can see here. My second card is altogether at the other end of the weather spectrum and was born out my attempts to make a punch art umbrella for this week's challenge over at Just Add Ink where they have the most gorgeous inspiration photo:
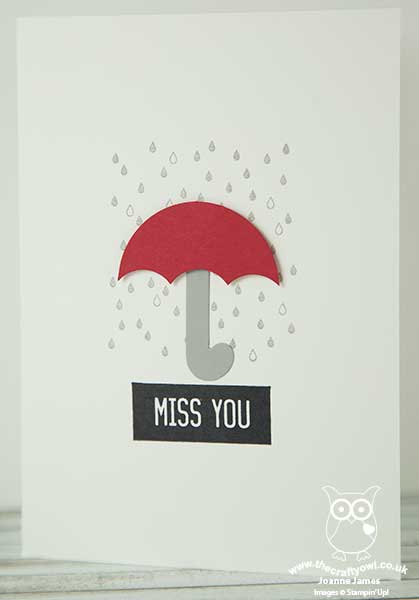
Whilst I abandoned the card I had planned in my head for something infinitely more 'clean and simple', I am really pleased with my little punch art umbrella. Read on to find out how I did it:
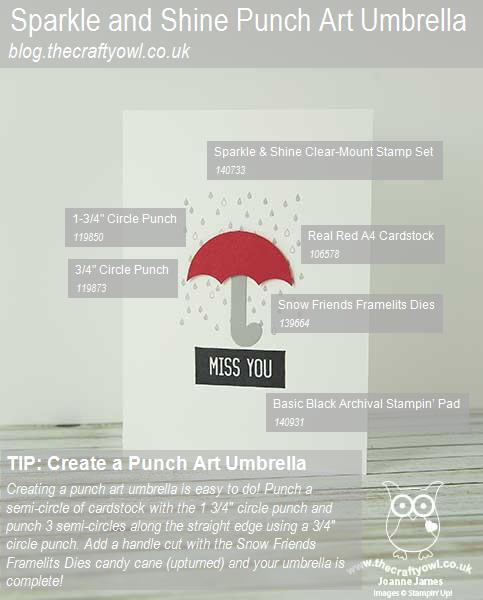
Punch Art Umbrella - I actually used a combination of two circle punches, the 1 3'4" circle punch which I used to create a semi circle, then I took my 3/4" circle punch and punched it three times along the straight edge to create my umbrella shape. As if that wasn't neat enough, I then found the perfect umbrella handle - the candy cane framelit from the Snow Friends Framelits Dies! The dimensions are just right to complete my punch art creation. These framelits are still available as a carry-over item from the Winter seasonal catalogue if you would like to purchase them, along with the co-ordinating 'Snow Place' stamp set.
Pitter-Patter Raindrops - My raindrop background is from the 'Sparkle and Shine' stamp set. This set has some lovely patterns that work for small backgrounds or repeated patterns and the raindrops were just perfect for today's card. My sentiment is also from this set.
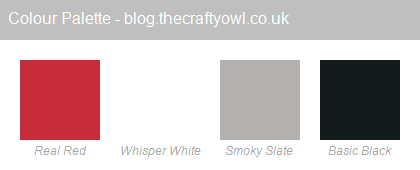
Neutrals That Pop - I deliberately keep my colour palette neutral with just one colour, Real Red, to maintain the CAS feel of my design. I also popped my umbrella canopy up on a couple of dimensionals to help it stand out. You can save my colour palette here:
Here's the visual summary of the key supplies used to make this card and my punch art umbrella tip for you to save for future reference:
This is the weather forecast here in the UK for the rest of this week, but I will be making the most of any fine weather and getting out and about. We also have a stash of craft kits to keep us busy when we aren't so lucky - and all of those chocolate eggs from yesterday to eat too! I have a date with my ironing basket this afternoon and then we are having an extended James family get-together this evening, which is always fun.
I will be back with another card tomorrow for the challenge over at Just Add Ink that this time focuses on the colours of those lovely umbrellas; until then, happy stampin'!
Stampin' Up! Supplies Used:
by Joanne James30. November 2015 12:48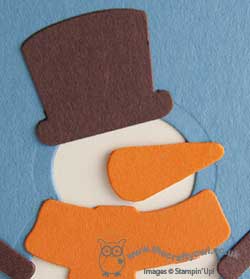
As promised - here is my second card of the day, this time for this week's challenge over at The Color Throwdown:

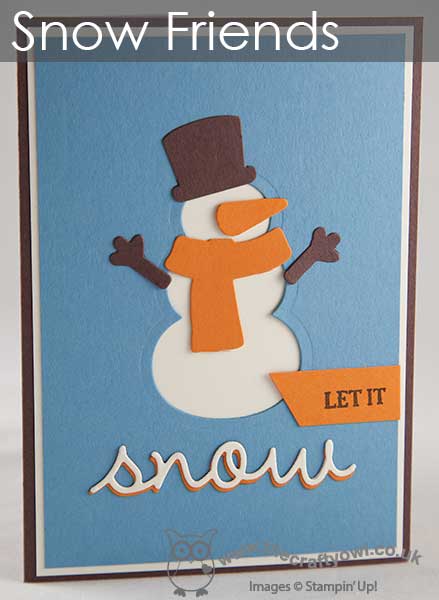
I saw the colours and those adorable snowman treats and knew that I had the perfect idea for a card to play along! The feedback on this card last Thursday where I used my Snow Friends framelits to create a 'negative space' graphic snowman was well received with lots of positive comments, so today I went one step further - and added in a carrot nose! Take a look:
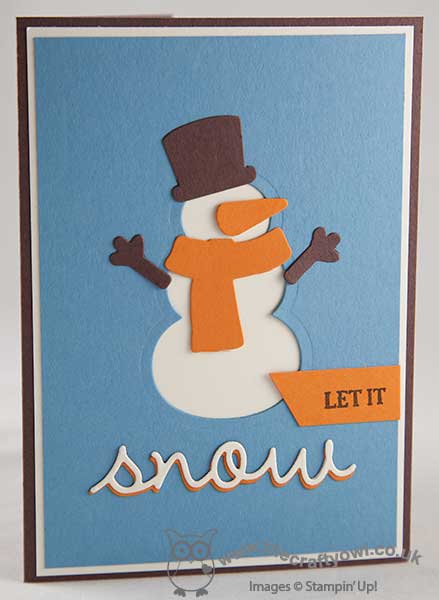
The best thing of all - I used one of my Snow Friends framelits to create it! Are you wondering which one? Yes, it was the ice cream cone - I simply trimmed away the icecream and it left a perfect carrot nose shape. I love it when you can multi-purpose things!! I also added in some twig arms on this card, because the colours worked so well. I think everything else is pretty self-explanatory - check out the layered die cut 'snow' too, cut using the die in the Seasonal Frame Thinlits set and adhered with ease using the fine tip glue pen - perfect for narrow elements like this! Any other questions, leave me a comment below - I read then all and will be sure to post you an answer if you have any queries on this or any of my cards!
Right, off to nurse the poorly one and hopefully fit in an hour or two at my desk before doing the school run. Back tomorrow with another project; until then, happy stampin'!
Stampin' Up! Supplies Used:
d38ac196-d6d7-4da0-8914-f80088104ca2|0|.0|96d5b379-7e1d-4dac-a6ba-1e50db561b04
Tags: Big Shot, Christmas, Shop online, Shop Stampin' Up online, Snow Friends Framelits, Seasonal Frame Thinlits Dies, Sparkly Season, Stampin' Up, Stampin' Up Card, Stampin' Up Card ideas, Stampin' Up Supplies
Cards | Shop Online | Stamping
by Joanne James26. November 2015 08:05
Today it's time for a new challenge over at Create With Connie and Mary and this week we have a great sketch for you:
I had lots of ideas about ways to use this sketch; I eventually settled on this fun card featuring a snowman with a difference:
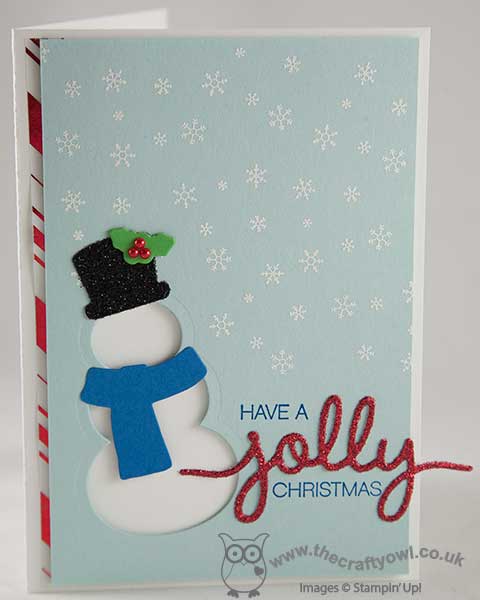
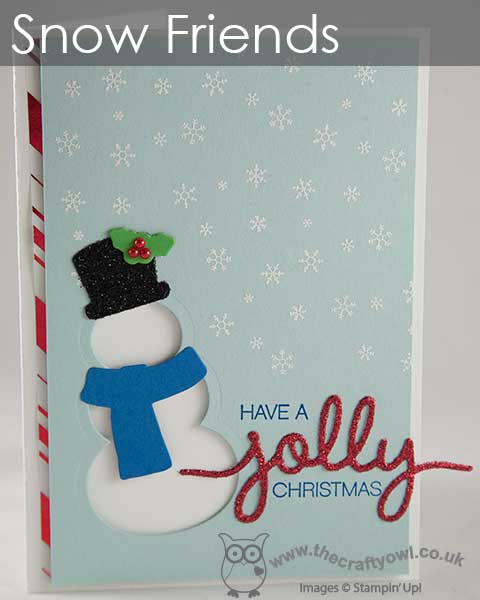
Instead of stamping a snowman on my card, I decided to create a graphic snowman using my Big Shot and the Snow Friends framelits. I used a card base of extra-thick white cardstock and tucked a strip of red striped Holidays Fancy Foil Vellum don the left hand side. I then added a panel of Soft Sky, onto which I stamped the snowflakes from the Wonderland stamp set in Versamark and heat embossed them in white, before cutting out the snowman shape and scarf and hat, which adhered across the negative space for dimension. I then stamped part of the sentiment from Holly Jolly Greetings directly onto the cardbase in Pacific Point, adding a red glimmer 'jolly' cut from the co-ordinating Christmas Greetings Framelits dies to finish. I also used black glimmer paper for the snowman's hat - both add great sparkle to this card. To finish, I added a few pearls coloured with a red Sharpie as the holly berries for the leaves on the hat.
I love the subtle textures and layering on this card - and it's fun to look at framelits and dies to see how else they can be used beyond the straightforward cutting out of shapes.
Do visit the other Design Team members to see how they interpreted this week's sketch; there's lots of inspiration over on their blogs too!
Enjoy your day and I'll be back tomorrow with another project; until then, happy stampin'!
Stampin' Up! Supplies Used:
- Snow Friends Framelits Dies
- Holly Jolly Greetings Clear-Mount Bundle
- Wonderland Wood-Mount Stamp Set
- Embossing Buddy
- Versamark Pad
- Heat Tool (Uk)
- White Stampin' Emboss Powder
- Big Shot
- Whisper White A4 Thick Cardstock
- Holidays Fancy Foil Designer Vellum
- Soft Sky A4 Cardstock
- Pacific Point Classic Stampin' Pad
- Pacific Point A4 Cardstock
- Cucumber Crush A4 Cardstock
- Pearl Basic Jewels
- Red Glimmer Paper
- Black Glimmer Paper
f1729a10-d793-4de2-b586-a56e2bfae032|1|5.0|96d5b379-7e1d-4dac-a6ba-1e50db561b04
Tags: Create With Connie And Mary, Stampin' Up, Stampin' Up Card, Stampin' Up Card ideas, Stampin' Up Supplies, Big Shot, Snow Friends Framelits, Wonderland, Holly Jolly Greetings, Christmas, Christmas Greetings thinlits
Cards | Shop Online | Stamping
by Joanne James12. November 2015 08:05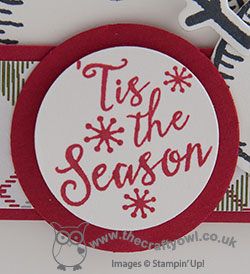
Today it's time for a new challenge over at Create With Connie and Mary and this week we have a great sketch for you:
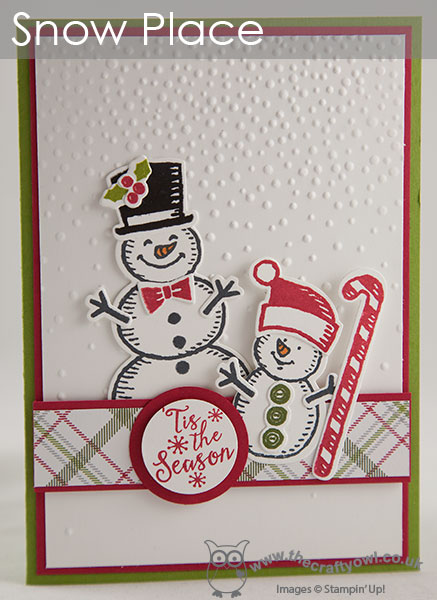
I decided that each of the flowers in teh sketch would become snowmen on my card today and dug out my 'Snow Place' stamp set and Merry Moments DSP stack and set to work:
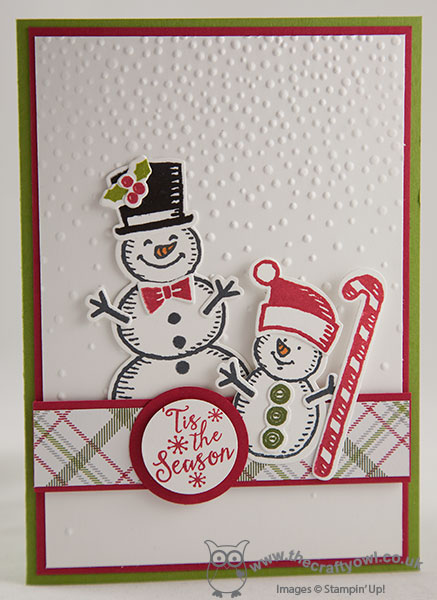
I used the colours of the Merry Moments DSP for the various elements of my card and created a snowy background by embossing my Whisper White layer with the 'Softly Falling' embossing folder. I die cut my little snowmen and their accessories with co-ordinating Snow Friends framelits dies - this makes life so easy, no fussy cutting required! My sentiment is from the 'Peaceful Pines' set - it fitted perfectly in my layered circle.
Do visit the other Design Team members to see how they interpreted this week's sketch; there's lots of inspiration over on their blogs too!
Enjoy your day and I'll be back tomorrow with another project; until then, happy stampin'!
Stampin' Up! Supplies Used:
- Snow Place Photopolymer Bundle
- Merry Moments Designer Series Paper Stack
- Basic Black Archival Stampin’ Pad
- Whisper White A4 Cardstock
- Softly Falling Textured Impressions Embossing Folder
- Peaceful Pines Photopolymer Stamp Set
- Old Olive Classic Stampin' Pad
- Old Olive A4 Cardstock
- Real Red Classic Stampin' Pad
- Real Red A4 Cardstock
- Brights Stampin' Write Markers
by Joanne James27. August 2015 08:05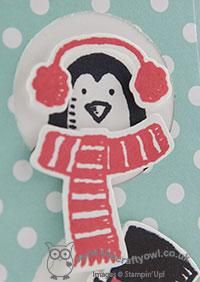
Today it's time for a new challenge over at Create With Connie and Mary and this week we have a great colour challenge for you:
Here's my card:
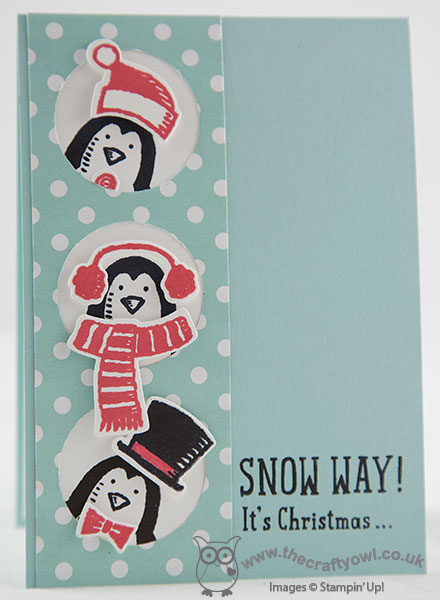
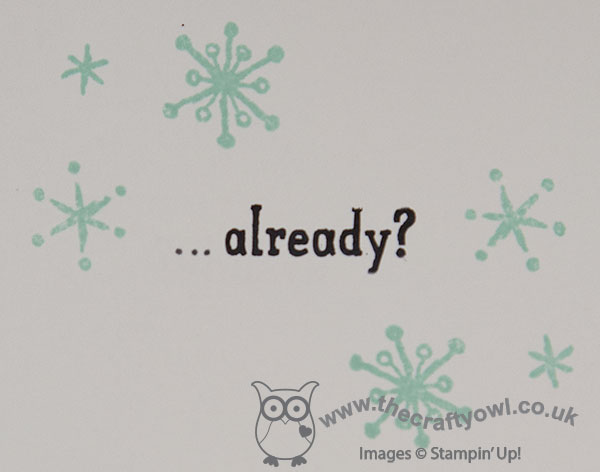
I am loving these cute little penguins (and the snowmen!) in the 'Snowplace' stamp set and the co-ordinating framelits make cutting them and their accessories out a cinch! For today's card, I used a Pool party base with a strip of Whisper White, onto which I stamped my penguins directly using the new Basic Black Archival ink. Each of them is peeking out of a hole punched with my 1 1/2" circle punch into a strip of School House DSP and their accessories stamped in a combination of Basic Black and Watermelon Wonder, which are popped up on dimensionals for a little added lift. I customised the sentiment as it wouldn't fit as per the stamp onto my card front; I continued the remainder inside, where I also added a few festive snowflakes to pretty things up a bit:
Isn't that fun? I have used this set so much already and I just know that I will get lots more use from it - it's already a favourite with my daughter!
Do visit the other Design Team members to see how they used this week's challenge colours; there's lots of inspiration over on their blogs too!
Enjoy your day and I'll be back tomorrow with another project; until then, happy stampin'!
Stampin' Up! Supplies Used:
* Snow Place - available September 1st
* Snow Friends Framelits - available September 1st
- Big Shot
- Magnetic Platform
- 1-1/2" Circle Punch
- Schoolhouse Designer Series Paper
- Pool Party A4 Cardstock
- Pool Party Classic Stampin' Pad
- Watermelon Wonder Classic Stampin' Pad
- Whisper White A4 Cardstock
by Joanne James26. August 2015 19:30 
Good evening lovely blog readers! You may well have to bear with me this week; I am away spending some quality time with the James juniors before returning to school in a couple of weeks time, but our coastal location is virtually devoid of a mobile phone signal and even the local wifi is hit and miss, so even with pre-prepared blog posts communicating with the online world is proving something of a challenge! Likewise I am struggling with sending and receiving emails, so if you have emailed me in the last few days, bear with me - it may take a few days longer than usual for me to respond to you!
I did send out some good old snail mail before I left for our mini-vacation; my seasonal catalogues were shipped to all of my online mail order customers, and I know from the texts and emails that have managed to get through that you are liking what you are seeing! That's all great news - there is lots be excited about! If you are reading this and don't already have yourself a Stampin' Up! demonstrator and you would like a seasonal catalogue, do email me at joanne@thecraftyowl.co.uk and I will pop one in the post to you.
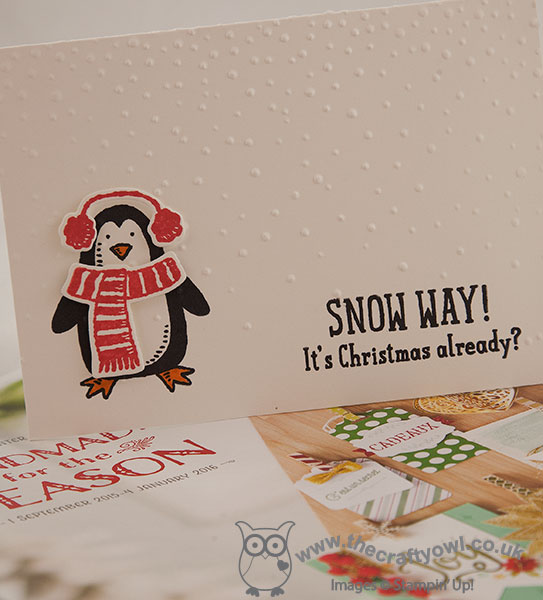
So along with the catalogue, I had to send out a little card showcasing some of my favourite 'sneak peek' Christmas product and I though you might like to see it today - here it is, featuring the adorable penguin from the 'Snow Place' stamp set:
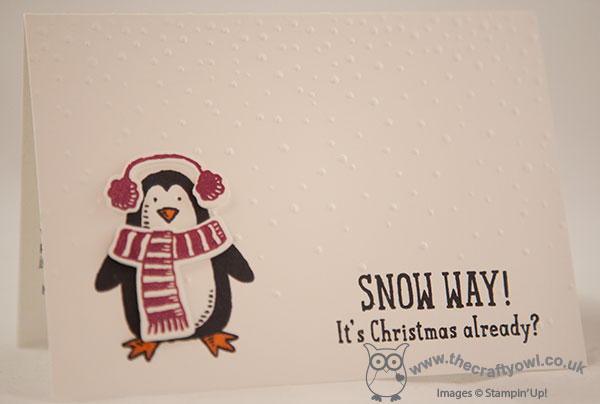
I stamped the penguin and sentiment in the new Basic Black Archival ink onto an extra-thick Whisper White card base, then ran the card front through the new 'Gently Falling' Textured Impressions Embossing Folder - this is the perfect finish for falling snow, so pretty! Lastly, I added some earmuffs and a matching scarf in a variety of colours - the one above is Rich Razzleberry and the one below is Watermelon Wonder (beak and feet coloured with a Pumpkin Pie Stampin' Write marker):
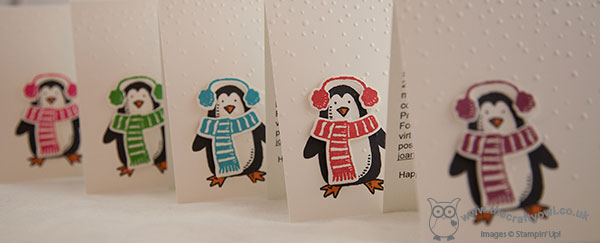
Here's a shot showing the rainbow of colours I used - how lovely are they?! The little earmuffs and scarfs were so easy to cut out using my Big Shot and the co-ordinating Snow Frames framelits - this is also one of the many great product bundle deals on offer in the new seasonal catalogue too, making them great value.
So not Christmas already, but we are definitely well on the way! I can guarantee you'll be seeing lots more of this little fella, along with his snowman friends, throughout the festive season; in fact, he is also making an appearance tomorrow, so come back for another great sneak peek!
Until then, happy stampin'!
by Joanne James24. August 2015 07:20
Well it's Monday and whilst I'm off on my way to the beach today, I couldn't go without squeezing in an entry for this week's Freshly Made Sketches challenge - they are afterall celebrating their 200th sketch challenge, what an achievement! This is their sketch - so many possibilities:

I decided to use the line as the top of a brick wall, with a peeking penguin in the style of Kilroy/Chad graffiti of old (here's the Wikipedia link if you have no idea what I'm talking about!):
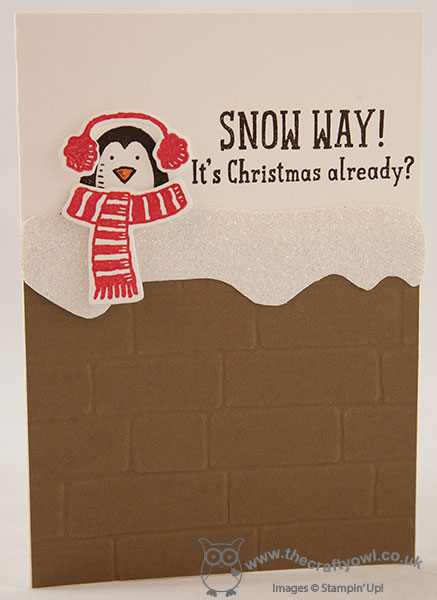
Using a base of thick Whisper White cardstock, I adhered a piece of Soft Suede cardstock embossed with the Brick Wall TIEF and some Dazzling Diamonds which I cut freehand as snow on top of the wall. I stamped my penguin and sentiment from the 'Snow Place' stamp set in the new Archival Black ink directly onto my card base, then stamped the penguin's ear muffs and scarf in Real Red and cut them out with the co-ordinating 'Snow Friends' framelits and pooped them up on dimensionals for a little extra lift.
So what do you think of today's card? I am loving the little penguin in the new 'Snow Place' stamp set - you will be seeing lots more of him this week! You still have time to link up to FMS if you want to have a go at this week's challenge and you should certainly check out this week's gallery, it is absolutely amazing!
I'll be back tomorrow with another festive project. Until then, happy stampin'!
Stampin' Up! Supplies Used:
* Snow Place - available September 1st
*Snow Friends - available September 1st
*Archival Black ink - available September 1st
4ad7f6b9-2d2c-439e-93dd-4421d673bde7|0|.0|96d5b379-7e1d-4dac-a6ba-1e50db561b04
Tags: Snow Place, Snow Friends Framelits, Shop online, Shop Stampin' Up online, Stampin' Up, Stampin' Up Card, Stampin' Up Card ideas, Stampin' Up Supplies, Big Shot, Big ShotCreate With Connie And Mary, Christmas
Cards | Stamping