Stampin’ Up! 2023-2024 Annual Catalogue & January-April 2024 Mini Catalogue Retiring Lists are here – Products Available While Supplies Last!
Last Chance Product Details are as follows:
- All products are available until April 30th while supplies last, and there are no purchase limits.
- The discounted prices will not start on any products until Tuesday, April 9.
- Stamp sets are not guaranteed during this promotion and are while supplies last.
Click here to go right to the the online store to shop your favourite retiring items now - please note the discounted prices are only available from tomorrow, Tuesday April 9th.
Click here to see the retired items list for the 2023-2024 Annual Catalogue in PDF format, including the discounts that will apply beginning on April 9:
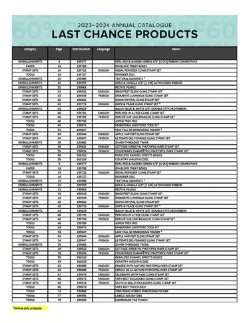
You can click here to download the retiring list for the 2023-2024 Annual Catalogue in Excel format so that you can modify and edit it.
Click here to see the retired items list for the January-April 2024 Mini Catalogue in PDF format, including the discounts that will apply beginning on April 9:
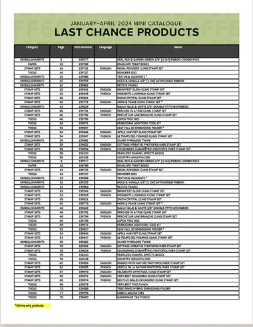
You can click here to download the retiring list for the January-April 2024 Mini Catalogue in Excel format so that you can modify and edit it.
Please remember this is also your last opportunity to stock up on 2022-24 in colour products: we will be saying goodbye for good to Sweet Sorbet, Parakeet Party, Tahitian Tide, Starry Sky and Orchid Oasis at the end of the month.
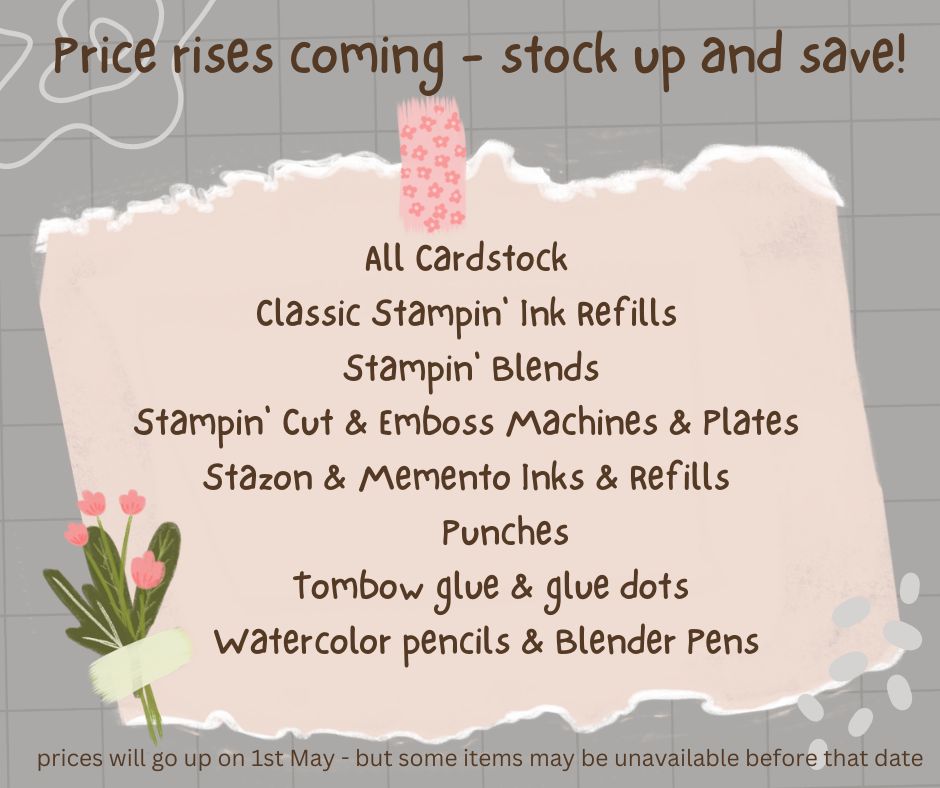
Finally, whilst we all dislike price rises, sometimes they are necessary in order to remain competitive. As such, I want to give you a heads up that the following items will all increase in price when the next Annual Catalogue launches in May, so if you would like to get a jump on those price rises, here's your opportunity to get your order in beforehand:
I'll be placing an order first thing tomorrow, so if you'd like to take advantage of the bargains on the retiring list, then do get in touch with your order by 8pm this evening.
Some products have discounts of up to 60% so there are some great bargains to be had; since these lists are whilst supplies last, there are products that have already gone in some markets prior to discounts beginning, so don't delay in placing your order if there's something you 'must have'. I'll be back to share some of my favourites later in the week but meanwhile, time to review those wishlists!
Let me know if you have any questions. Back tomorrow with another post; until then, happy shopping!