Remarkable You CAS Sympathy Card

by Joanne James21. May 2018 07:30

Good morning and happy Monday everyone! I am up and about and blogging nice and early today as I have a busy day and evening so need to be organised! Today I'm sharing a card using this week's colour challenge over at CAS Colours and Sketches that would also be perfect for our current challenge over at The Paper Players too:


As I had the 'Remarkable You' stamp set out on my desk for the second of my cards yesterday, it struck me that the above colour combo was perfect for those lovely arum lilies so I set about making today's card - take a look:


Here's the low-down on today's card:

Making 'White Space' Blue - One of the principles of clean and simple design is to have plenty of 'white space' visible on your card. White space doesn't have to be white in colour though; in order for my design to work today, I wanted my white lilies to stand out and what better way than to place them against a bright blue Pacific Point coloured background? The blue plays a central role on my card with the other two colours adding just the merest hint of colour, whilst still allowing my card to feel CAS. 

Clean and Simple Paper Piecing - I stamped my lilies directly onto my card base and again onto Whisper White cardstock. I then fussy cut my white lilies, and after colouring the stems in Pear Pizzazz and adding some So Saffron highlights to my blooms with a blender pen, I paper-pieced them in place onto my card base. This is a great way to get all of the detail of the sketch-like outline whilst also ensuring the flowers stood out adequately against the blue background. A simple white embossed sentiment finishes the front of my card.

Words of Sympathy - These lilies make a beautiful sympathy card; one of my go-to sentiment sets for this type of card is 'Flourishing Phrases' -  this set has some wonderful and thoughtful sentiments, and no more so than for those sometimes tricky cards where words are never really enough. Here's the inside of my card - I love how the words fit with the shape of the flowers too:


I always find sympathy cards difficult to make to order so like to have a few on standby for when the need arises. I particularly like to use colour on my sympathy cards too, so this one definitely ticks all the boxes for me and will head to my card box for future use.

Here is the visual summary of the key products used on today's project for you to pin for easy reference:


You can see all of my 'How To' summaries on my 'How To - Tips and Techniques' Pinterest board in case you've missed any. 

Enjoy your day and I'll be back tomorrow with another project. Until then, happy stampin'!


Stampin' Up! Supplies Used:

Table built using Product Table Builder by The Crafty Owl - Independent Stampin' Up! Demonstrator.

Farewell Definitely Dahlia, Hello Pineapple Punch PP394

by Joanne James20. May 2018 09:00

It's Sunday and time for this week's new challenge over at The Paper Players! I'm back following my week off and raring to go. It's the turn of the wonderful Laurie to host this week and she has a clean and simple challenge for you to work with:
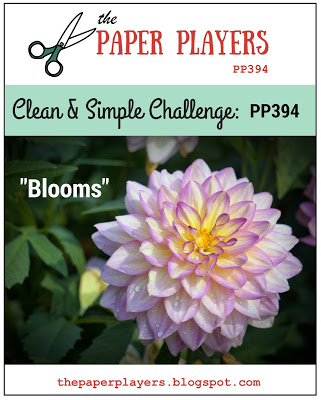
 

Remember in addition to the theme of "blooms", this week is a Clean-and-Simple (CAS) challenge!  What do we mean by CAS?

  • Minimal layers and embellishments
  • Plenty of open space, aka "white" space
  • Simple and uncluttered

I have a couple of cards of cards to share with you today (and another tomorrow!) that fit this week's theme. I decided to use the retiring 'Definitely Dahlia' stamp for my cards today, and was very much inspired by our badge this week created by the oh-so-talented Nance. Here's my single clean and simple bloom:
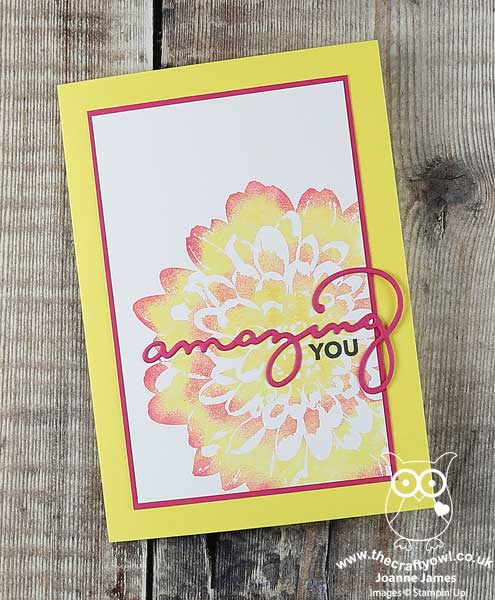
 

Here's the low-down on today's card:

Farewell Definitely Dahlia - I will miss the 'Definitely Dahlia' background stamp, as it is so great for CAS cards. Whether you simply stamp 'as is' (see my uber-CAS card below) or do as I have here, where I inked with two colours to create a two-tone effect, this is a stamp that needs little else for a clean and simple card - the stamp really does much of the work.

Hello Pineapple Punch - I used one of the new in-colours, Pineapple Punch, to create the base layer of colour for my dahlia, stamping off once before adding some Melon Mambo pink with a sponge dauber to the petal edges to create a pretty two-tone effect. This adds a little more depth and interest to the final stamped image. I really like the new in-colours this year - they work so well as a collection and compliment many of the other colours in our palette.

Amazing You - I finished my card with a stamped and diecut sentiment from the 'Celebrate You' thinlits set - can't wait for these to become available in the new catalogue, you know how much I love a diecut thinlit :-) 

Here is the visual summary of the key products used on today's project for you to pin for easy reference:
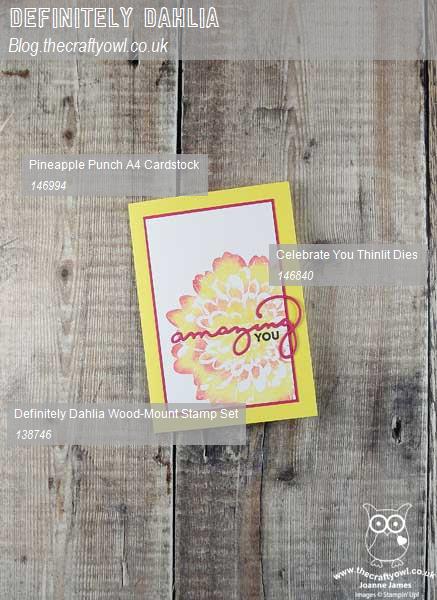
 

You can see all of my Product and 'How To' summaries on my 'How To - Tips and Techniques' Pinterest board in case you've missed any. 

Before I go, here's another version of the same card, this time super clean-and-simple in style, that I made for the current mix it up challenge over at Sugar Pea Designs, using both sketch and photo inspiration:

Whilst I didn't choose a rose for my flower, I did go with the pale pink and a single bloom, and I used the sketch. Here's my card:
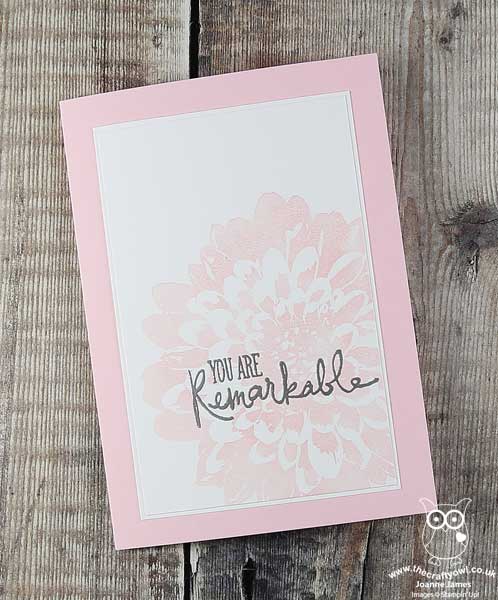
 

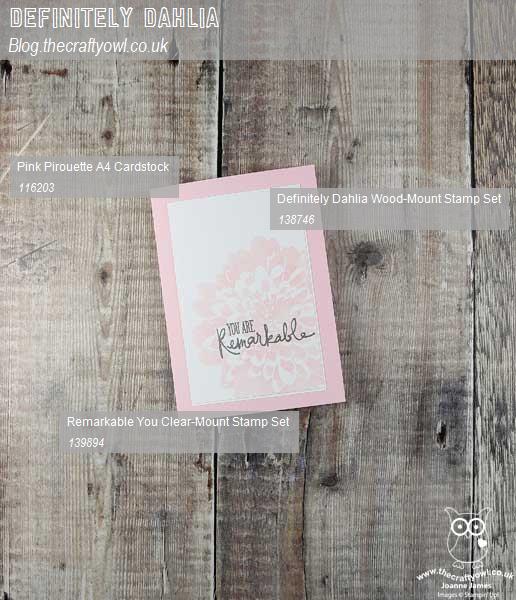
I simply stamped my dahlia in retiring Pink Pirouette ink, stamping off once to get a pale flower, heat embossed my sentiment from another retiring stamp set, Remarkable You, in silver and mounted on a Pink Pirouette card base. 

Here is the visual summary of the key products used on today's project for you to pin for easy reference:
Before you reach for your ink and papers, check out what our amazing team has created to inspire you this week:

Here's a quick recap of our challenge rules:
 
1.  Create a new paper project
2.  Upload your creation to your blog with a link back to us and provide a direct link to the post featuring your challenge submission.
3.  Please link your card to no more than four challenges, TOTAL.
4.  Have FUN!
 
I can't wait to see your clean and simple creations and look forward to visiting your blogs this week! Enjoy the rest of your weekend - it looks like we are going to enjoy another day of sunshine here in the UK so I will be looking forward to spending some time in my garden, amongst other things. I'll be back tomorrow with another project; until then, happy stampin'!


Stampin' Up! Supplies Used: 

Table built using Product Table Builder by The Crafty Owl - Independent Stampin' Up! Demonstrator.

Mini Catalogue

BROWSE THE CATALOGUE

The mini catalogue is now live! Read and download your copy here.

Shop Online

Access my online shop 24 x 7, 365 days of the year:

Current March hostess code:

S9F2XJJW

Shop Online

Join My Team

It's always a great time to join Stampin’ Up! New team members can get £130 worth of products for only £99 + free business supplies + free shipping + all the fun being a part of Stampin’ Up! Stampin' Up! has something for everyone: join my growing team and benefit from my support to enjoy Stampin' Up! however you choose.

If you're interested, call me for a chat to understand how I can help you realise your goals. Alternatively, if you have already decided to sign up and you just can't wait, please click here for the link to the online form where you can sign up and order your starter kit right away! 

Latest Kit!

Stampin Cut and Emboss

The Rock Legend Kit has all you need to make 8 cards with coordinating envelopes. Along with the new Panda Friends Kit, both are available from January 4th for just £14 each - get yours here!

2023-24 Annual Catalogue

BROWSE THE CATALOGUE

Click on the catalogue for a full list of current SU! supplies - if you would like to order any of the items featured, please drop me a line at [email protected] or give me a call on 07773 421446 - I'd be happy to help.

New Online Exclusives

There will be new products available exclusively in the online store from 5 March - check them out here.

About Me

Hi I'm Joanne and live in Northampton and when I'm not looking after my husband and two beautiful children, am an avid crafter with a passion for all things Stampin' Up!

I must confess that I have never been a big rubber stamper - until I discovered Stampin' Up! that is. I love the fact that I can get such great results with co-ordinating stamps, inks, papers and punches - the possibilities are endless! Join me on my stamping journey as I share the things I love and be inspired to create amazing things yourself!

Follow Me

Monthly Newsletter

Box Builder

Click the button above to use Box Buster to create your custom box design using the Envelope Punch Board!

Kits Collection Now Available!

Stampin Cut and Emboss

The new Kits Collection from Stampin' Up! is now available!

Click here to see the current kits available and order yours online today.

I Design For


Stampin' Up Stuff

This is my personal blog and is not endorsed by Stampin’ Up! I hope you find it a plentiful source of ideas and personal inspiration but please don't copy my designs for contest submission or use for classes, publication or sale without express permission.