Seasonal Swirls Pretty Pines Christmas Wreath CCS 445

by Joanne James9. November 2021 12:00

It's Tuesday and time for a new challenge over at CAS Colours & SketchesThis week's challenge is a sketch challenge and I designed the following sketch for us to work with:


I designed the sketch to have a layer beneath a single focal point, with an overlapping sentiment. Whilst the focal point on the sketch is a circle, you can use any shape you like. Also feel free to flip or rotate the sketch when making your card.

I have been trying (and failing!) to find the time to play along with the lovely ladies over at Inspired By for several weeks, but when I saw this week's inspiration photo of that welcoming Christmas wreath, I couldn't resist! The fact that I could combine with my sketch was a bonus! Both of their inspiration photos this week feature wreaths, and having had an aborted attempt using wheatgrasses for the first one, I decided to give that up as a bad job and work with this oh-so-pretty Christmas wreath as my inspiration. I actually went on to create two cards, one being slightly less clean and simple than the other. Here's my first clean and simple one:


Here's the low-down on today's card:

I used the leaf wreath in the Seasonal Swirls Dies set for my wreath base, snipping off the leaves to leaves just the twigs. I used the retired Pretty Pines Thinlits for my sprigs of greenery and berries, adding some sponged white ink to my Soft Succulent greenery and some large retired candy dots for berries. I finished with a gingham DSP bow and added a heat-embossed sentiment from the retired 'Arrange A Wreath' stamp set onto a little stitched rectangle of wood-effect paper which seemed to fit the photo. I backed my wreath with a scrap of white wood effect paper, reminiscent of the shiplap in the photo: 


 And that was that - card complete! I decided to make another one, identical save for one additional detail: I switched out the DSP bow for an actual one, tied with gingham ribbon that I had coloured from its original black and white to black and red with the aid of my Stampin' Blends markers:


 That showy, double-looped bow definitely crosses a CAS boundary, hence not adding it to my original card; I do love it though! Here's a close-up: 


So two cards for the price of one today! Which one gets your vote? Do leave me a comment below - I'd love to hear your thoughts.

Enjoy your day and I'll be back tomorrow with another project. Until then, happy stampin'!


Stampin' Up! Supplies Used:

Table built using Product Table Builder by The Crafty Owl - Independent Stampin' Up! Demonstrator.

Shimmer Floral Heart For World Kindness Day FF096

by Joanne James29. October 2021 09:00

This is my first post of a two-post Friday and I'm here with my card for the new challenge over at Festive Friday. 


The challenge that we are celebrating this week is 'World Kindness Day' which is on November 13th. Remember the fun thing is that at Festive Friday you do not need to actually celebrate the occasion; your goal is to simply use three or more items from the inspiration list on your project. This week I used flowers, pearls, embossing, heart, pastel colours and shimmer and this is what I came up with:


Here's the low-down on today's card:

Floral Heart - I used my Floral Heart Die to cut my centrepiece out of Shimmery White cardstock and embellished it with some basic pearls that I coloured using my Fresh Freesia Blends to co-ordinate with my background.  

Parisian Shimmer - Alongside that fabulous detailed floral heart, there is even more shimmer to be had with a layer of Fresh Freesia shimmer vellum. I embossed it with my Parisian Flourish embossing folder - isn't that embossed detail amazing?! This isn't a folder I use often, but I thought it worked well with the design of today's card. I also added a open weave ribbon bow and some rhinestones and silver twine for added sparkle. 

A Sneak Peek - Finally, the sentiment I used on today's card is a 'sneak peek' from the new 'Eden's Garden' suite, an early release collection that will be available to order from the 2nd November, including some exclusive products that will only be available as part of the early release. I just love the words I used on the front of my card - they seem particularly appropriate to share on a card for World Kindness Day:


I hope you liked today's card - more details on the Eden's Garden Collection pre-release to follow.

Here is the visual summary of the key products used on today's project for you to pin for easy reference:
 

You can see all of my 'How To' summaries on my 'How To - Tips and Techniques' Pinterest board in case you've missed any. 

How does our board inspire you? I can’t wait to see what YOU create! For more inspiration, be sure to visit the rest of the  Festive Friday Challenge Design team.


Ann Schach

Beth McCullough

Sharon Hashimoto Burkert

Melanie Hungerford

Helen Jennings

Stephanie Lanzalotto

Melva Peters

Jaydee

Diane Evans

Joanne James


Enjoy your morning and I'll be back later with my project for the new challenge over at As You See It. Until then, happy stampin'!


Stampin' Up! Supplies Used:

Table built using Product Table Builder by The Crafty Owl - Independent Stampin' Up! Demonstrator.
 
 
I am also linking up today's card over at Inspire.Create Challenges where I used their current sketch as the basis for today's layout.
 

Festival of Trees Christmas Trio IB192

by Joanne James27. October 2021 20:04

Today I have a really quick post to share a card that I made for this week's Inspired By challenge:


They had another two great inspiration photos this week; I decided to use the winter inspiration photo and the sketch (in landscape) and was drawn to both the colours and one of the styles of Christmas trees it featured - it's very similar to one in the retired set 'Festival of Trees' - take a look at my card and you'll see which one I mean:


I stamped the tree in Real Red, Night of Navy and Bumblebee on a trio of white stitched rectangles, I added a silver foil stitched star to each one, cut using one of the Give It A Whirl dies and added a red cardinal from the same stamp set and a silver twine bow to the centre one:


A heat-embossed sentiment and a few extra stars to pretty up the inside completes my card:


No supplies list today - I hope you enjoyed this mix of old and new! I do love an unconventionally-coloured Christmas card and these modern trees are a timeless class for sure so it felt good to give them some love too.

Enjoy your evening and I'll be back tomorrow with another project. Until then, happy stampin'!


Whimsy and Wonder Stitched Snowflakes in Pink PP564

by Joanne James24. October 2021 08:00


Today it's Sunday and time for this week's new challenge over at The Paper Players! It's the turn of the fabulous LeAnne to host this week and she has my favourite, a sketch challenge for you to work with:


So many ways to use this sketch! I decided to go with a larger slimline card and showcase one of my favourite paper designs in the current mini catalogue - take a look:


Here's the low-down on today's card:

Whimsy and Wonder - I love the rather less traditional colours of the Whimsy and Wonder specialty designer series paper and I particularly love the iridescent foiling on some of the sheets, such as the snowflakes on the paper I am featuring on today's card. I cut three rectangular panels of DSP using my stitched rectangle dies and matted each with some brushed silver foil cardstock and a layer of basic white too.

Stitched Snowflakes - For the focal point to anchor my banner, I decided to create a large layered snowflake, using two snowflakes cut using my Stitched Snowflakes Dies and backed this with an additional iridescent snowflake. I added a large rhinestone and silver trim bow - here's a close up so that you can see just how pretty it is:


Finishing Touches - I heat embossed my sentiment from the 'Merry Snowflakes' stamp set in silver onto a banner of Blushing Bride on the front of my card, and stamped another sentiment from the same set onto the inside panel:


I added snippets of snowflakes both to the inside and beneath the panels on the outside of my card to complete the look - you can never have too many snowflakes, right?! I just love this card - so gloriously feminine, yet festive too!

Here is the visual summary of the key products used on today's project for you to pin for easy reference:


You can see all of my Product and 'How To' summaries on my 'How To - Tips and Techniques' Pinterest board in case you've missed any. 

Before you reach for your ink and papers, check out what our amazing team has created to inspire you this week:

Here's a quick recap of our challenge rules:
 
1.  Create a new paper project
2.  Upload your creation to your blog with a link back to us and provide a direct link to the post featuring your challenge submission.
3.  Please link your card to no more than four challenges, TOTAL.
4.  Have FUN!

You can see all of my 'How To' summaries on my 'How To - Tips and Techniques' Pinterest board in case you've missed any. 

Enjoy your day; we are enjoying a restful day at home. If it stays fine we might go for a long walk this afternoon, and since it's the start of half term I may see if I can cajole the rest of the James family into completing a jigsaw with me on our return! I'll be back tomorrow with another project. Until then, happy stampin'!


Stampin' Up! Supplies Used: 

Table built using Product Table Builder by The Crafty Owl - Independent Stampin' Up! Demonstrator.


Counting Sheep Happy Birthday Card For Festive Friday

by Joanne James17. September 2021 09:00


Today will be a two-post day as I have some news: I am joining the Festive Friday Challenge team! This is a fortnightly challenge that is inspired by a particular day of the year that I have played along with on a number of occasions. The fun thing is that at Festive Friday you do not need to actually celebrate the occasion; your goal is to simply use three or more items from the inspiration list on your project.


The challenge that we are celebrating this week is 'Balloons Around The World Day' which is on 1st October. I often only use three or four elements when I play along, but when I saw this week's board I knew exactly what I wanted to create - and ended up using balloons, red, purple, clouds, sun, stripes, twine and paper-piecing!

This is the card I created:


Here's the low-down on today's card:

I grabbed my 'Counting Sheep' and co-ordinating Sheep Dies, both freebies with the current Sale-A-Bration promotion and created a little scene. I used a (retired) stitched square for my scene and layered this onto a striped banner and then a stitched rectangle, to tie in with the stitched detail on the sun. The one thing you may be asking yourself is 'where is the paper-piecing?' It's subtle, but I assure you it's there: I paper-pieced my sheep's wool with the Snowy White Velvet Sheets - it gives the sheep's coat a fun, almost fuzzy felt, feel and you can see it better on the close-up below:


How cute is that?! And all the better for being made with free products too! If you'd like to get your hands on this bundle, you still have a couple of weeks to place your order before the Sale-A-Bration promotion ends. Bear in mind that products are only available whilst stocks last and as we near the end of the promotion, there is a chance that popular items will sell out, so don't leave it too late!

Here is the visual summary of the key products used on today's project for you to pin for easy reference:


You can see all of my 'How To' summaries on my 'How To - Tips and Techniques' Pinterest board in case you've missed any. 

How does our board inspire you? I can’t wait to see what YOU create! For more inspiration, be sure to visit the rest of the  Festive Friday Challenge Design team:

Ann Schach
Beth McCullough
Sharon Hashimoto Burkert
Melanie Hungerford
Helen Jennings
Stephanie Lanzalotto
Melva Peters
Jaydee
Diane Evans
Joanne James

Enjoy your morning and I'll be back later with my project for the new challenge over at As You See It. Until then, happy stampin'!


Stampin' Up! Supplies Used:

Table built using Product Table Builder by The Crafty Owl - Independent Stampin' Up! Demonstrator.

Sweet Symmetry Hey Friend Card PP555

by Joanne James22. August 2021 09:00

Today it's Sunday and time for this week's new challenge over at The Paper Players! It's the turn of our queen of diecuts, the lovely Laurie to host this week and she has my favourite, a sketch challenge, for you to work with:


I loved the layering of Laurie's sketch and decided it was a great layout to showcase some pretty designer series paper - and I've always got plenty of that! In addition to my patterned paper, I added layers (6 in total!) and a gingham ribbon bow for my three items from this week's Festive Friday inspo list to create my bright and cheery card - take a look:


Here's the low-down on today's card:

In Symmetry - A big Calypso Coral flower with a double set of Night of Navy leaves make up the flower from the 'In Symmetry' stamp set that features on my angled panel today. I fussy cut the leaves and flower head and popped them up on dimensionals, adding a Bumblebee enamel dot and some Bumblebee gingham ribbon for a pop of yellow too. 

Envelope Detail - I added another of the flowers from the stamp set inside my card and added some extra stamped detail to the back of the co-ordinating envelope flap; no naked envelopes here! 

Sweet Symmetry Backdrop - The colours of my stamped flower were taken from the Sweet Symmetry designer series paper pattern that featured on the main background panel of my card. This is one of my favourite papers in this pack - I just love these bold, retro papers; they remind me of the patterns synonymous with the Irish fashion designer, Orla Kiely, don't you think?


I just love this card, even with the quirky angled panel which I thought I might struggle with, but it turns out not a bit!

Here is the visual summary of the key products used on today's project for you to pin for easy reference:


You can see all of my Product and 'How To' summaries on my 'How To - Tips and Techniques' Pinterest board in case you've missed any. 

Before you reach for your ink and papers, check out what our amazing team has created to inspire you this week:

Here's a quick recap of our challenge rules:
 
1.  Create a new paper project
2.  Upload your creation to your blog with a link back to us and provide a direct link to the post featuring your challenge submission.
3.  Please link your card to no more than four challenges, TOTAL.
4.  Have FUN!

You can see all of my 'How To' summaries on my 'How To - Tips and Techniques' Pinterest board in case you've missed any. 

Enjoy your day; yesterday the weather was unexpectedly dire here, so if it brightens up today I will be looking forward to spending some time in the garden. I'm hoping to squeeze in a little crafting time too. I'll be back tomorrow with another project. Until then, happy stampin'!


Stampin' Up! Supplies Used: 

Table built using Product Table Builder by The Crafty Owl - Independent Stampin' Up! Demonstrator.

Harvest Meadow Sending Thanks AYSI 257

by Joanne James20. August 2021 12:00

Hello everyone! A few blog-free days as I've been busy enjoying time with the James Juniors, cycling and activities with friends as we continue to enjoy the summer vacation. Today I'm back though and I'm sharing my design team card for our new challenge over at As you See It where it's time for a recipe challenge:


Heather came up with today's recipe and I really like it, although I did struggle with one element of it! Here's my card - can you tell which ingredient had me stumped?


Here's the low-down on today's card:

I dry embossed my background panel with the Tasteful Textile 3D Embossing Folder (tick) and then added a collection of strips of Harvest Meadow designer paper in Crumb Cake (tick) and Misty Moonlight, both of which feature wheat (tick) as does my sentiment from the 'Thinking Thanks and Peace' stamp set. I threaded my diamond weave ribbon with some linen twine (tick) and tied in a bow. Which just leaves gingham! I did struggle a little with this one, as I didn't have any gingham patterns that I could make work with the other recipe elements, so I resorted to some Crumb Cake monochrome plaid as my closest substitute and used it to back my sentiment, so there is just a thin border of it showing - it could pass for gingham, right?!


I really like the colour combo that I ended up using today; this background of strips is also great for using up those leftover scraps and offcuts and would work with lots of other patterned papers too.

Here is the visual summary of the key products used on today's project for you to pin for easy reference:


You can see all of my 'How To' summaries on my 'How To - Tips and Techniques' Pinterest board in case you've missed any. 

Here's a summary of our challenge rules:

  • Create any card, scrapbooking page, 3D project or packaging project that fits the challenge.
  • Please include the challenge graphic and link back to the challenge in your blog post. Turn off word verification so we can leave you lots of lovely comments. Make sure you link the post not the whole blog to the Linky. Use #AYSIXXX when uploading to a public gallery.
  • If you’re unsure about ‘the rules’, check the details under the Challenge Guidelines tab on the As You See It Challenge homepage.
We look forward to seeing your creations in the AYSI gallery.

Enjoy your day and I'll be back tomorrow with another project. Until then, happy stampin'!


Stampin' Up! Supplies Used:

Table built using Product Table Builder by The Crafty Owl - Independent Stampin' Up! Demonstrator.
 
 
Challenges: I used this week's sketch over at The Paper Craft Crew for my layout today.

Happy Birthday Lemon Shaker Card TTT124

by Joanne James29. July 2021 17:00

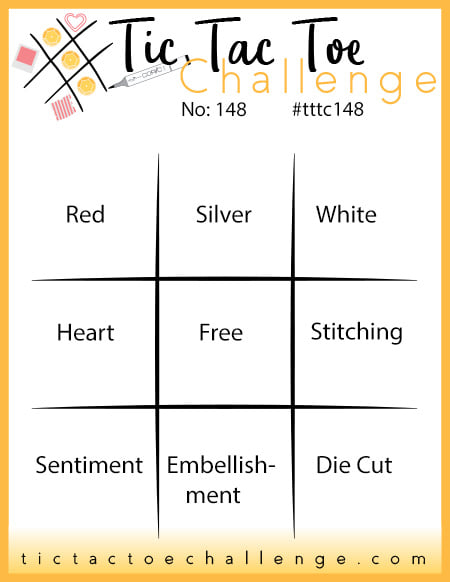
It's Thursday and time for a new challenge over at TicTacToe! It's the turn of Team X to host this week and I am the featured designer this week! This is the fun board that I came up with: 


I chose lots of my favourite things for my board this week and I am thrilled that the Design Team truly rose to the challenge - especially with the fabulous shaker cards in the mix this week! I went on the top left-bottom right diagonal with fruit/designer series paper/shaker for my card today and used both the sketch layout and the lemons in those hydrangea vases over at Fusion as the inspiration for my shaker card today - take a look:


Here's the low-down on today's card:

Yellow is one of my favourite colours to create with, especially bright yellow - there is something so cheery about yellow! I used some retired paper covered in lemons for the background to my shaker, and used a combination of sequins, gems and bits and pieces on my shelf for the contents of my shaker. I added a semi-circle with a sentiment from the 'In Symmetry' stamp set to the front of my shaker and modified the happy birthday sentiment from the 'In Bloom' stamp set for the inside of my card: 


I thought this punny sentiment would raise a smile and added a smiley lemon to finish too. I made this card for one of Rebecca's friends - I know it will appeal to her quirky sense of humour!

Here you can see my shaker elements in more detail - so sparkly!


Here is the visual summary of the key products used on today's project for you to pin for easy reference:


You can see all of my Product and 'How To' summaries on my 'How To - Tips and Techniques' Pinterest board in case you've missed any. 

A tictactoe board offers so many creative possibilities - how does this week's board inspire you? Why not have a go? We would love to see you in the gallery and who knows - you might be selected for Designer's Choice and be eligible to be a guest designer on a future challenge. 

Enjoy your evening; I'll be back tomorrow with another project. Until then, happy stampin'!


Stampin' Up! Supplies Used: 

Table built using Product Table Builder by The Crafty Owl - Independent Stampin' Up! Demonstrator.

Thinking Thanks And Peace CAS Christmas in July Sneak Peek

by Joanne James22. July 2021 20:45

We might be in the middle of a summer heatwave here in the UK, but there's a pre-order in the house and lots of Christmas in July challenges out there currently, so I finally managed a clean and simple card for a couple of them:


Both Less Is More and SUO Challenges have a Christmas In July theme, so I decided to play with a new set from my mini catalogue pre-order called Thinking Thanks and Peace  - take a look:


This set features a selection of large sentiments for a variety of occasions. I heat embossed the Christmas one in gold onto Night of Navy, then cut out a panel with a rectangle stitched die, added a gold border and adhered to a navy card base. I paper-pieced a gold-on-white embossed dove, having first coloured with a white pencil but I couldn't get the bright white effect that I was after and I like this much better:


In fact, I love this card so much, I actually made two! This sentiment set is great for quick, clean and simple cards - I think I'll be using it a lot in the run up to the festive season.


Here is the visual summary of the key products used on today's project for you to pin for easy reference: 


You can see all of my 'How To' summaries on my 'How To - Tips and Techniques' Pinterest board in case you've missed any. 

Enjoy your evening and I'll be back tomorrow with another project. Until then, happy stampin'!


Stampin' Up! Supplies Used:

Table built using Product Table Builder by The Crafty Owl - Independent Stampin' Up! Demonstrator.

Quiet Meadow CAS Bee Trinket Card PP550

by Joanne James18. July 2021 08:00

Today it's Sunday and time for this week's new challenge over at The Paper Players! It's the turn of the fabulous LeAnne to host this week and she has a fun clean and simple challenge for you to work with:


I resisted the urge to go with something punny today and instead used Narelle's sketch over at Freshly Made Sketches as the basis for a cluster of wildflowers to attract my solitary bee - take a look:


Here's the low-down on today's card:

I added a recessed panel featuring a piece embossed with the Bricks and Mortar embossing folder and used this as the backdrop for my trio of wildflower/grass elements courtesy of the Meadow Dies. Two of these I cut out of coloured cardstock and the third I sponged to create a cornflower-inspired bloom to attract my golden bumblebee trinket:

I added a sentiment from the Quiet Meadow stamp set to a banner piece that is included in the Meadow Dies set to complete the outside of my card. I also added a little more stamping to finish the inside:


I hope you like my shiny bee as much as I do! We look forward to seeing your bee creations, but remember this is 'clean and simple' week so ensure your cards have: 

  • minimal layers
  • little to no embellishments
  • lots of clean white space (minimal pattern)

Here is the visual summary of the key products used on today's project for you to pin for easy reference:


You can see all of my Product and 'How To' summaries on my 'How To - Tips and Techniques' Pinterest board in case you've missed any. 

Before you reach for your ink and papers, check out what our amazing team has created to inspire you this week:

Here's a quick recap of our challenge rules:
 
1.  Create a new paper project
2.  Upload your creation to your blog with a link back to us and provide a direct link to the post featuring your challenge submission.
3.  Please link your card to no more than four challenges, TOTAL.
4.  Have FUN!

You can see all of my 'How To' summaries on my 'How To - Tips and Techniques' Pinterest board in case you've missed any. 

Enjoy your day; the weather has been absolutely scorching here in the UK this last few days, so there's unlikely to be much crafting done today as my office becomes a furnace from about 11am onwards! I will definitely be taking it easy and enjoying it whilst it lasts! I'll be back soon with another project. Until then, happy stampin'!


Stampin' Up! Supplies Used: 

Table built using Product Table Builder by The Crafty Owl - Independent Stampin' Up! Demonstrator.

Mini Catalogue

BROWSE THE CATALOGUE

The mini catalogue is now live! Read and download your copy here.

Shop Online

Access my online shop 24 x 7, 365 days of the year:

Current April hostess code:

VDKNV7BH

Shop Online

Join My Team

It's always a great time to join Stampin’ Up! New team members can get £130 worth of products for only £99 + free business supplies + free shipping + all the fun being a part of Stampin’ Up! Stampin' Up! has something for everyone: join my growing team and benefit from my support to enjoy Stampin' Up! however you choose.

If you're interested, call me for a chat to understand how I can help you realise your goals. Alternatively, if you have already decided to sign up and you just can't wait, please click here for the link to the online form where you can sign up and order your starter kit right away! 

Latest Kit!

Stampin Cut and Emboss

The Rock Legend Kit has all you need to make 8 cards with coordinating envelopes. Along with the new Panda Friends Kit, both are available from January 4th for just £14 each - get yours here!

2023-24 Annual Catalogue

BROWSE THE CATALOGUE

Click on the catalogue for a full list of current SU! supplies - if you would like to order any of the items featured, please drop me a line at [email protected] or give me a call on 07773 421446 - I'd be happy to help.

New Online Exclusives

There are new products available exclusively in the online store from 5 March - check them out here.

About Me

Hi I'm Joanne and live in Northampton and when I'm not looking after my husband and two beautiful children, am an avid crafter with a passion for all things Stampin' Up!

I must confess that I have never been a big rubber stamper - until I discovered Stampin' Up! that is. I love the fact that I can get such great results with co-ordinating stamps, inks, papers and punches - the possibilities are endless! Join me on my stamping journey as I share the things I love and be inspired to create amazing things yourself!

Follow Me

Monthly Newsletter

Box Builder

Click the button above to use Box Buster to create your custom box design using the Envelope Punch Board!

Kits Collection Now Available!

Stampin Cut and Emboss

The new Kits Collection from Stampin' Up! is now available!

Click here to see the current kits available and order yours online today.

I Design For


Stampin' Up Stuff

This is my personal blog and is not endorsed by Stampin’ Up! I hope you find it a plentiful source of ideas and personal inspiration but please don't copy my designs for contest submission or use for classes, publication or sale without express permission.