Tropical Climbing Orchids TGIF197

by Joanne James6. February 2019 19:00

I've had a busy week with preparations for classes and my forthcoming weekend craft retreat, so I've had to take a short blogging break. Today I'm sharing a card that was totally inspired by the vibrant colour palette over at TGIF Challenges this week:


This colour palette is so bright I just couldn't resist! I decided that these colours would be perfect for a tropical orchid and set to work - take a look:


Here's the low-down on today's card:

Climbing Orchid - I must confess this is the first time I've used this stamp; I bought it having seen the fabulous creations my wonderful Paper Players friend Nance Leedy created with it and following the stunning birthday card she sent me with it last year (you can see her card here but if you search for 'Climbing Orchid' on Nance's blog you will see lots of fabulous samples using this set). As I was musing what to do with these colours, another of my Paper Players teamies, the lovely LeAnne Pugliese of WeeInklings, posted a photo on her blog of a fabulous real-life orchid that has just bloomed having nurtured it for a whole year (apparently an ice cube a day is the secret!) and as I mused that I have never managed to keep a houseplant going for that long, it dawned on me that an orchid would be perfect for this colour combo. I stamped my orchids in Berry Burst directly onto Pineapple Punch cardstock as I didn't want to see white borders on my flowers, then I also added a little sponged Berry Burst ink to the petals. 

More Stitched Frames - I mounted my orchid on a tone-on-tone stitched rectangle frame and card base and stamped my sentiment on the inner panel. What can I say - these frames are a winner and I love them!

A Post-Friendly Version - I used the co-ordinating Orchid Builder framelits to cut out the layered petals and shaped them with my bone folder for a dimensional effect on the card above, which is headed to someone special who has a birthday coming up who I know will appreciate the effort involved. I am also able to hand-deliver, as this card is not particularly post-friendly. I did however create a second, slightly less involved and more post-friendly version using one of the other sentiments in the set which will be heading overseas that I thought I would also share with you for comparison:


And here's a picture of the two cards together:


I love these cards - why ever did I wait so long to use this set?! I think I'm going to make one of these 3D versions in a pot to keep on my windowsill - I'm sure this is the only houseplant likely to survive in the James household for a year or more! I'm also linking today's card up with the ladies over at SUO Challenges where the theme is 'flowers'.

Here is the visual summary of the key products used on today's project for you to pin for easy reference:


You can see all of my 'How To' summaries on my 'How To - Tips and Techniques' Pinterest board in case you've missed any. 

Enjoy your day and I'll be back tomorrow with another project. Until then, happy stampin'!


Stampin' Up! Supplies Used:

Table built using Product Table Builder by The Crafty Owl - Independent Stampin' Up! Demonstrator.

By The Bay Clean and Simple Inlaid Frame Card

by Joanne James18. January 2019 09:00

Yay - it's Friday, bring on the weekend! Today I'm sharing a card for the current challenge over at Less is More where I haven't played for a while:

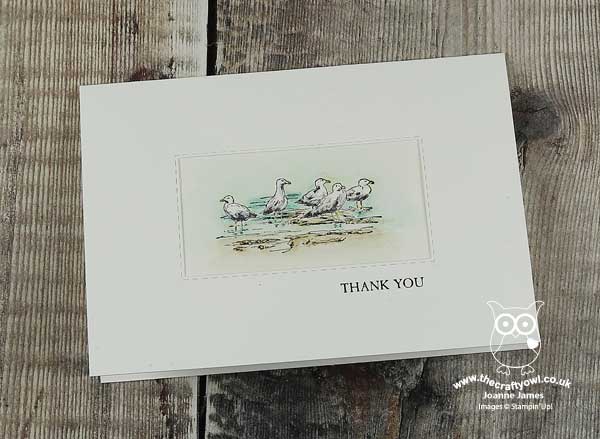
I had a short window for a spot of crafting yesterday and thought I'd whip up another clean and simple card using a couple of new products that fits perfectly with their theme this week - take a look:
 

Here's the low-down on today's card:

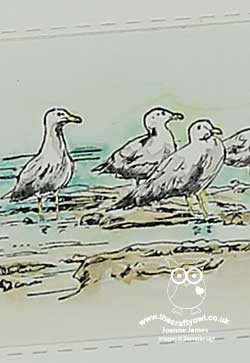
By The Bay - The seagulls paddling on the shoreline that feature on today's card are reminiscent of the ones that featured in the much loved and now retired Wetlands set (anyone else remember that set?) albeit with a little more definition, and they are one of three line-drawn images that feature with three sentiments in 'By The Bay', one of the stamp sets that can be yours free with a purchase of £45 or more during Sale-A-Bration. Perfect for colouring the images are large enough to stand alone but also not so big that they take a long time to colour. I really like this set and you can be sure I will be using it more before the promotion is over. 

Another Way To Frame - To frame my image, I used a new favourite of mine, the Rectangle Stitched Framelits Dies, but this time to cute an aperture frame into my cardfront. I then adhered my watercoloured image behind this. I like the subtle added detail that this gives to a clean and simple card, without adding overt layers. 

Ways With Watercolour - I feel like I've been watercolouring a lot on my cards lately; I don't consider myself to be by any means an expert at watercolouring, but I think that's why I'm enjoying it so much; on watercolour paper, it's easy to build up colour without needing to be too precise in terms of the overall effect. It would take ages if I was to attempt to properly draw and paint the image to achieve omething like this, so I'm grateful that stamps, ink and an aquapainter enable me to produce something this good in a fraction of the time! I used a combination of blues, greys and sandy neutrals to colour my image.

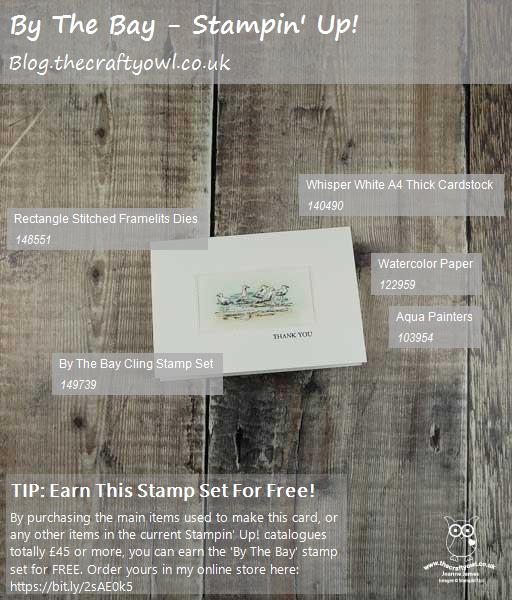
If you like today's clean and simple card, by purchasing the key items used below, you can earn the By The Bay stamp set for free - perfect for creating your own watercoloured masterpieces.

Here is the visual summary of the key products used on today's project for you to pin for easy reference:
You can see all of my 'How To' summaries on my 'How To - Tips and Techniques' Pinterest board in case you've missed any. 

Enjoy your day - I have a monster basket of ironing to wade through but I'm hoping if I focus I might squeeze in a little stamping time before my afternoon school run, so I'm on a mission! I'll be back tomorrow with another project. Until then, happy stampin'!


Stampin' Up! Supplies Used:

Table built using Product Table Builder by The Crafty Owl - Independent Stampin' Up! Demonstrator.

Let It Ride Watercolour CAS Card

by Joanne James8. January 2019 20:00

We are still enjoying the tail end of the Christmas holidays for the youngest of the James Juniors so today we've been making the most of the fine and sunny day with a long walk and catching up with a movie that we've both wanted to see for some time - there will be time for crafting later in the week! Luckily I got a couple made at the weekend and am on a bit of an animal theme this week inspired by this week's challenge that we have over at The Paper Players and today I'm sharing a card using the sketch for this week's challenge over at CAS(E) This Sketch:


I went for a clean and simple card and a little watercolouring, with one of my favourite new stamp sets from the new Spring-Summer catalogue along with a new 'must have' staple  - take a look:


Here's the low-down on today's card:

Let It Ride - The galloping horse on the front of today's card is courtesy of the new 'Let It Ride' set. You might be surprised that I like this set so much, as no-one in our family rides or owns horses (although Rebecca did have lessons for a while and made many requests for her own pony until she discovered hockey - phew!) I do have lots of friends that ride though and know I will get lots of use out of this set. I especially like the inspirational phrases that accompany these sketched images - I mean, 'Live life as if someone left the gate open' - what a great quote to live by!

Easy Watercolouring - I stamped my image onto watercolour paper and used my aquapainter to colour my horse, adding a little green to ground him. The sketchy nature of the images in this set really lend themselves to a watercoloured finish, without the need to be too precise. I layered the colour gradually until I was happy with the intensity, allowing each layer to dry briefly before adding more colour.

A New Craft Cupboard Staple - I cropped my main image with that perennial staple of my tool cupboard, my Stitched Circle Framelits.  My regular readers know how much I love these stitched shapes - they are great for adding an extra detail to a simple shape. Stitching generally is very on-trend in the craft world right now, and the new Spring-Summer catalogue debuts a new kid on the block though that is going to come a close second on my 'top 10 framelits' list I think: the new Rectangle Stitched Framelits Dies set includes 13 dies, each of which feature stitching both inside and outside the frame and offer lots more ways to expand your creative options. I used them here to crop my sentiment panel, before heat-embossing my sentiment onto it. 

Here is the visual summary of the key products used on today's project for you to pin for easy reference:


You can see all of my 'How To' summaries on my 'How To - Tips and Techniques' Pinterest board in case you've missed any. 

Enjoy your evening; tomorrow is the last day of the school holidays (finally!) and following my open house in the morning we will be spending the afternoon with friends. I'll be back soon with another project. Until then, happy stampin'!


Stampin' Up! Supplies Used:

Table built using Product Table Builder by The Crafty Owl - Independent Stampin' Up! Demonstrator.

2025-26 Annual Catalogue

BROWSE THE CATALOGUE

Click on the image to download your copy of the 2025-26 annual catalogue. For a full list of current SU! supplies, go to my online store. If you would like any help or advice, please drop me a line at joanne@thecraftyowl.co.uk or give me a call on 07773 421446 - I'd be happy to help.

Shop Online

Access my online shop 24 x 7, 365 days of the year:

Shop Online

Join My Team

It's always a great time to join Stampin’ Up! Between 6-31 May, new team members can get £170 worth of products for only £99 + free business supplies + free shipping + all the fun being a part of Stampin’ Up! That's an extra £40 of product - FREE! Stampin' Up! has something for everyone: join my growing team and benefit from my support to enjoy Stampin' Up! however you choose.

If you're interested, call me for a chat to understand how I can help you realise your goals. Alternatively, if you have already decided to sign up and you just can't wait, please click here for the link to the online form where you can sign up and order your starter kit right away! 

Latest Kits!

Stampin Cut and Emboss

The Sending A Smile Kit and The Beautiful Blues Kit are the latest kit additions to the online store - get yours here!

New Online Exclusives

There are new products available exclusively in the online store from 6 May - check them out here.

About Me

Hi I'm Joanne and live in Northampton and when I'm not looking after my husband and two beautiful children, am an avid crafter with a passion for all things Stampin' Up!

I must confess that I have never been a big rubber stamper - until I discovered Stampin' Up! that is. I love the fact that I can get such great results with co-ordinating stamps, inks, papers and punches - the possibilities are endless! Join me on my stamping journey as I share the things I love and be inspired to create amazing things yourself!

Follow Me

Monthly Newsletter

Box Builder

Click the button above to use Box Buster to create your custom box design using the Envelope Punch Board!

Kits Collection Now Available!

Stampin Cut and Emboss

The new Kits Collection from Stampin' Up! is now available!

Click here to see the current kits available and order yours online today.

I Design For


Stampin' Up Stuff

This is my personal blog and is not endorsed by Stampin’ Up! Stampin' Up! is a registered trademark of Stampin' up! Inc. I hope you find my blog a plentiful source of ideas and personal inspiration but please don't copy my designs for contest submission or use for classes, publication or sale without express permission.