Summer Sunshine and Autumn Leaves

by Joanne James27. September 2023 11:45

Today I'm sharing a couple of cards - the first one is a quick clean and simple card for the current challenges over at CAS on Friday where the theme is 'SUNSHINE' and Inkspirational where they are all about clean and simple:

 The weather is decidedly autumnal here in the UK now, but I couldn't resist the opportunity to flirt with the last of the summer sun - take a look:


 I grabbed a retired What A Year Memories & More card for my base, then added a stamped and diecut sun and a couple of pink sequins to highlight my sentiment. Isn't this card just so, well, sunny?!


A couple of well-chosen embellishments are enough to elevate this CAS card without spoiling the clean feel. This card will be winging its way to my very own ray of sunshine, by daughter, who is very much enjoying her new university life. My second card, much more in keeping with the weather outside my window, was inspired by the nature photo over at Time Out:

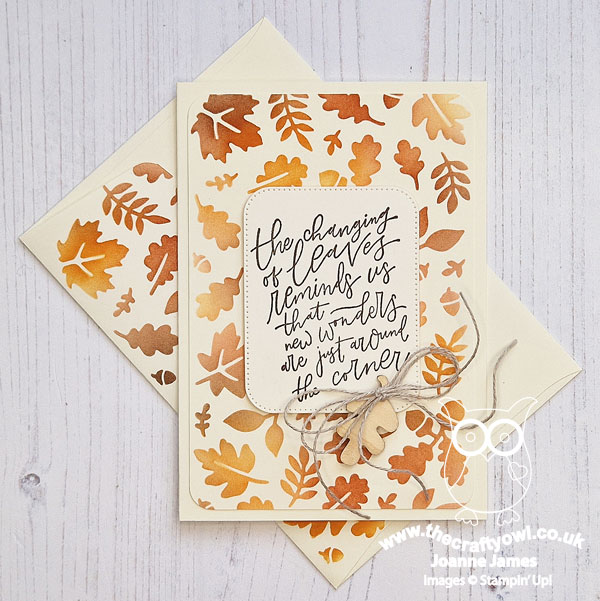
So many interesting things in this photo; I took my inspiration from the tall trees with their autumn leaves reflecting the low autumn sun and decided to feature one of the beautiful photographic papers from the All About Autumn designer series paper pack:


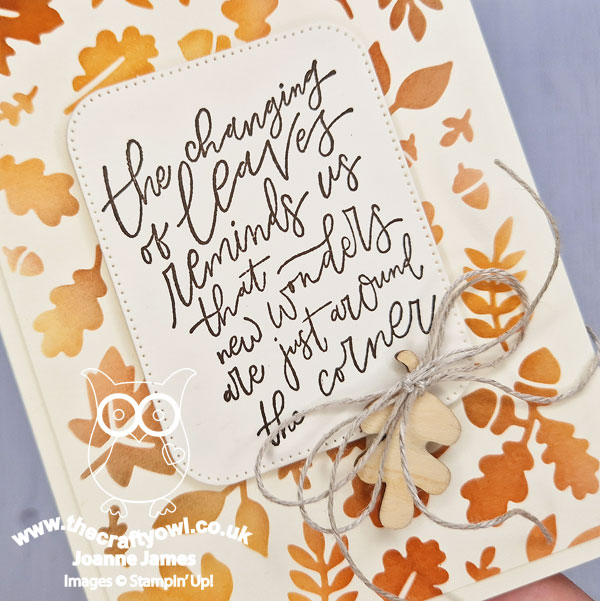
I really wanted the trees to take centre stage, so added little more than a simple border (this is actually the reverse of the photographic image) and a little copper foil, along with one of my favourite sentiments for this kind of card, which is from the retired stamp set 'Lighthearted Leaves'. The sentiment is square but I stamped it on a diecut rectangle from the Nested Essentials Dies so that I could recreate the border detail from my main panel:


I think this adds to the cohesiveness of the design. And that's all there is to it!

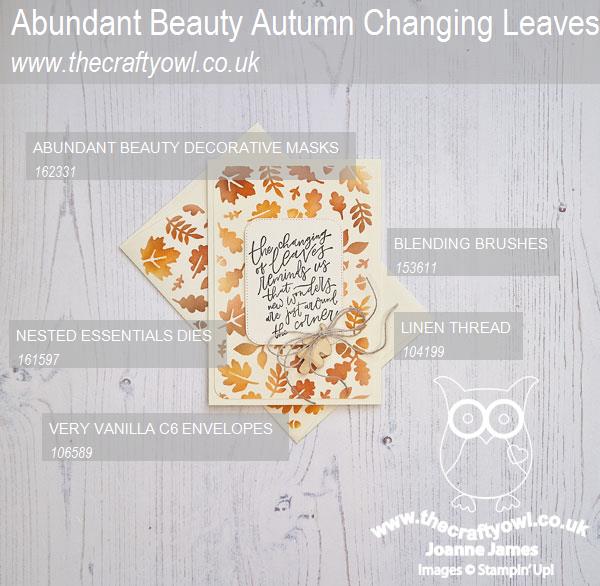
Here is the visual summary of the key products used on my second card for you to pin for easy reference:


You can see all of my 'How To' summaries on my 'How To - Tips and Techniques' Pinterest board in case you've missed any. 

Enjoy your day and I'll be back tomorrow with another project, featuring another of the designs in the All About Autumn pack, so stay tuned! Until then, happy stampin'!


Stampin' Up! Supplies Used:

Table built using Product Table Builder by The Crafty Owl - Independent Stampin' Up! Demonstrator.


Gorgeously Made Textured Thank You Card FF0138

by Joanne James7. July 2023 09:00

Today I have my card for the new challenge over at Festive Friday Card Making and Paper Crafting Challenge


The challenge that we are celebrating this week is 'World Conservation Day' which is on July 28th. Remember the fun thing is that at Festive Friday you do not need to actually celebrate the occasion; your goal is to simply use three or more items from the inspiration list on your project. This week I used kraft card, copper, a wooden embellishment, foliage and a thank you sentiment and this is what I came up with:


Here's the low-down on today's card:

The starting point for today's card was actually the wooden embellishment that I found in my stash; I thought it had a similar shape to the large foliage die in the Gorgeously Made Dies set so I grabbed that stamp set and dies and set to work! I heat-embossed one of the grassy stamps in white onto my kraft mat layer, and did some tone-on-tone stamping with the script stamp on this layer too, along with some added ink blended around the edge of my panel. I then added two pieces of diecut foliage, one cut from the Copper Clay washed pattern in the Fresh As A Daisy DSP pack and one from copper foil, then added my wooden embellishment and some Copper Clay enamel dots and ribbon behind my sentiment, that I cut out with one of the labels in the Gorgeously Made die set:

In addition to my layered foliage, I added in a shape cut from corrugated kraft card that I found in my stash and some distressed Copper Clay cardstock. This card is so chock-full of texture and the warm, copper tones give it a warm, naturalistic feel - I like it!

Here is the visual summary of the key products used on today's project for you to pin for easy reference:
 

You can see all of my 'How To' summaries on my 'How To - Tips and Techniques' Pinterest board in case you've missed any. 

How does our board inspire you? I can’t wait to see what YOU create! For more inspiration, be sure to visit the rest of the Festive Friday Card Making and Paper Crafting Challenge Design team:


Enjoy your day and I'll be back tomorrow with another project. Until then, happy stampin'!


Stampin' Up! Supplies Used:
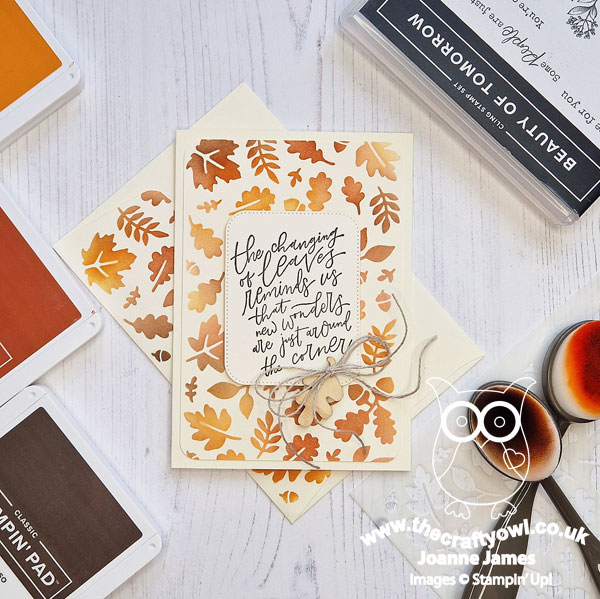
Table built using Product Table Builder by The Crafty Owl - Independent Stampin' Up! Demonstrator.

Pinkfresh Studio Slimline Birthday Card

by Joanne James5. July 2023 16:00

Today I'm sharing a card I made using the current sketch over at Sunday Stamps which is a slimline and using a pastel colour palette for the challenge over at Just Us Girls this week:


I'm not usually big on pastels, but I do LOVE the new  Lemon Lolly and Bubble Bath colours, and when I received a crafty gift in the post from a crafty friend I was inspired to create something pretty in pink take a look:


Here's the low-down on today's card:

One of my dear friends, Elizabeth Stewart of Paper Sweetness fame, sent me a whole collection of fabulous washi diecuts after I was wowed by a card she made using some, so I couldn't wait to create something with them! Since she is the hostess over at Just Us Girls this week it seemed only fair I showed that I was putting her sweet gift to good use! I paired them with existing bits and pieces from my stash, including a decorative panel cut from the (retired) Slim Card Dies in white layered over a base of Bubble Bath and my favourite shape of the Nested Essential Dies, to which I added a diecut 'celebrate' in gold foil from the Wanted To Say DIes and a gold heat-embossed 'you' from an old set:


An extra sprinkle of gold festive pearls completed my card. I love the pretty pastels in the washi tape and the way the elements 'frame' my label and extend along the slimline. Pretty in pink, for sure!

Here is the visual summary of the key products used on today's project for you to pin for easy reference:


You can see all of my 'How To' summaries on my 'How To - Tips and Techniques' Pinterest board in case you've missed any. 

Enjoy your evening and I'll be back tomorrow with another project. Until then, happy stampin'!


Stampin' Up! Supplies Used:

Table built using Product Table Builder by The Crafty Owl - Independent Stampin' Up! Demonstrator.

Beside Me Trio For Father's Day FF0135

by Joanne James26. May 2023 08:00

Today I have my card for the new challenge over at Festive Friday Card Making and Paper Crafting Challenge

    May be an illustration of text

The challenge that we are celebrating this week is 'Father's Day' which is on 18th June. This time around we are also teaming up with Double Trouble: entering both challenges gives you double the chance of winning. Their Thing 1 challenge is to create a masculine card. Their Thing 2 challenge is to enter our Festive Friday Challenge. Their Thing 3 challenge is to include a plaid/check. Here's the link to enter their challenge: Double Trouble ChallengeRemember the fun thing is that at Festive Friday you do not need to actually celebrate the occasion; your goal is to simply use three or more items from the inspiration list on your project. This week I used blue, monochromatic, masculine, plaid/checks and diecuts and decided to create a Father's Day card - this is what I came up with:


Here's the low-down on today's card:

Inked Botanicals - The plaid paper that I used for my background inspired the subtle colour scheme for today's card. You may be surprised to know that this soft plaid is one of the designs in the new Inked Botanicals designer paper pack. I though the soft Pool Party and Lost Lagoon tones would provide the perfect background for my coastal themed card which I'm also linking up with the lovely ladies over at SUO Challenges who are all about the blues and sea-inspired cards.

Nested Essentials - I framed my stamped scene using one of the new Nested Essentials Dies. These are one of those 'easily overlooked' products as they are a die-only set. Comprising 12 dies including 4 banners, 4 rounded corner rectangles and 4 nested diamonds with straight edges all of which have a neat stitched border detail, these are great for framing and layering and I know that they will become a new craft room staple. 

Beside Me - But Not As You Know It - The image on the front of my card is from the 'Beside Me' set - but the eagle-eyed amongst you will have noticed that there is something missing! I love this image as it looks exactly like the James Juniors with their Dad, but I don't think they have ever been fishing together - so the fishing rods had to go! This was so easy to achieve: I simply inked the stamp in Lost Lagoon and masked off the fishing rods before inking, so that they weren't present when stamped - voila! I wanted to stick with my simple colour scheme, so chose not to colour the image itself, instead masking it before inking in a sky and sea using a blending brush. You can see the results of my handiwork more closely below:

This wasn't the only stamp I tweaked on today's card. I stamped a combination of sentiments from the set inside my card, but since the image on the front of the card had two children, I wanted the sentiment to read 'You've always been there for us' as opposed to 'me'. Again, this was simple enough to achieve: I stamped the sentiment having masked out the 'me', then added in a 'u' and 's' using my Stamp-a-ma-jig to line them up, having selectively inked them up on one of the other stamps in the set:


I think it works - don't you? I love that I can tailor my stamps to create something that is bespoke to my needs. Do you ever do that with your stamps? Do leave me a comment below - I would love to know about your 'stamp hacks' too.

Here is the visual summary of the key products used on today's project for you to pin for easy reference:


You can see all of my 'How To' summaries on my 'How To - Tips and Techniques' Pinterest board in case you've missed any. 

How does our board inspire you? I can’t wait to see what YOU create! For more inspiration, be sure to visit the rest of the Festive Friday Card Making and Paper Crafting Challenge

 Design team:


Enjoy your day and I'll be back tomorrow with another project. Until then, happy stampin'!


Stampin' Up! Supplies Used:

Table built using Product Table Builder by The Crafty Owl - Independent Stampin' Up! Demonstrator.

Current Promotions

Stampin Cut and Emboss

Save up to 30% off on all your favourite kits from 1 to 31 October! 

Click here to see the current kits available and order yours online today.

Join My Team

It's always a great time to join Stampin’ Up! During October you can get even more in your starter kit! New team members can get £160 worth of products for only £99 + free business supplies + free shipping + all the fun being a part of Stampin’ Up! Stampin' Up! has something for everyone: join my growing team and benefit from my support to enjoy Stampin' Up! however you choose.

If you're interested, call me for a chat to understand how I can help you realise your goals. Alternatively, if you have already decided to sign up and you just can't wait, please click here for the link to the online form where you can sign up and order your starter kit right away! 

Shop Online

Access my online shop 24 x 7, 365 days of the year:

Current October hostess code:

4XPEYCB9

Shop Online

Scrapbooking

Stampin' Up! has introduced a new range of 12x12" scrapbooking product and kit - the full range is now available to purchase online. To download a copy of the new digital Scrapbooking Catalogue click here.

Mini Catalogue

BROWSE THE CATALOGUE

'Tis The Season - the new Stampin' Up! Mini Catalogue is here! For more details and to download your copy click here

2024-25 Annual Catalogue

BROWSE THE CATALOGUE

Click on the image to download your copy of the 2024-25 annual catalogue. For a full list of current SU! supplies, go to my online store. If you would like any help or advice, please drop me a line at joanne@thecraftyowl.co.uk or give me a call on 07773 421446 - I'd be happy to help.

Latest Kits!

Stampin Cut and Emboss

The Christmas Ornaments Kit and Card Keeper Kit are the latest kits in the online store - get yours here!

New Online Exclusives

There are new products available exclusively in the online store from 5 November - check them out here.

About Me

Hi I'm Joanne and live in Northampton and when I'm not looking after my husband and two beautiful children, am an avid crafter with a passion for all things Stampin' Up!

I must confess that I have never been a big rubber stamper - until I discovered Stampin' Up! that is. I love the fact that I can get such great results with co-ordinating stamps, inks, papers and punches - the possibilities are endless! Join me on my stamping journey as I share the things I love and be inspired to create amazing things yourself!

Follow Me

Monthly Newsletter

Box Builder

Click the button above to use Box Buster to create your custom box design using the Envelope Punch Board!

Kits Collection Now Available!

Stampin Cut and Emboss

The new Kits Collection from Stampin' Up! is now available!

Click here to see the current kits available and order yours online today.

I Design For


Stampin' Up Stuff

This is my personal blog and is not endorsed by Stampin’ Up! I hope you find it a plentiful source of ideas and personal inspiration but please don't copy my designs for contest submission or use for classes, publication or sale without express permission.